- Products

- Developers
- User stories
- Blog
- Pricing

Re-engage offline users with notification fallbacks Part 1: Build authentication with GitHub SSO
- Introduction
- Channels and Beams
- Channels publish with info
- Building a notification fallback
- What you will build
- Pusher concepts you will learn
- Channels concepts
- Beams concepts
- Getting Started
- Pusher Account
- Creating a Channels app
- Configuring subscription counting for Channels
- Creating a Beams instance
- Set up a Node.js environment
- GitHub account with OAuth app
- Cloning the project
- Walkthrough
- Local quickstart
- Heroku quickstart
- Configuring environment variables
- Installing dependencies
- Authenticating users
- Establishing user identity
- GitHub authentication
Introduction
Channels and Beams
You can use Channels and Beams to streamline your realtime development and build highly engaging applications, whether your users are online and connected via low latency WebSockets, or offline and need to be re-engaged with a transactional push notification.
In this tutorial series we will be exploring how our new Channels publish with info API extension makes it extremely easy to determine when a user is offline, and then fallback to notifications via Beams so that they are kept up to date and you can bring them back to your app.
The series will cover the following topics:
Part 1. Setting up your environment and building authentication with GitHub SSO
Channels publish with info
At the time of writing this tutorial, we've experimental extension to our Channels publish API that can return a hash map of channel names to a hash of attributes for that channel. This can include the user count (for presence channels) and the subscription count (if subscription counting is enabled for your app).
If the channel you publish to has no subscribers then the subscription/user count will be returned as 0. If you subscribe individual users to unique channel names you can use this construct to determine if a user is online/offline at the time of publishing your message to the Channels API.
If the user channel has 0 subscribers (user is offline) then you can fallback to notifying the user via a fallback mechanism such as email, sms or as per this example push notifications using Beams.
Building a notification fallback
What you will build
In this tutorial series you will build the following
- Authentication with GitHub SSO
- A table that will be updated with new messages in realtime using Channels
- Capability to enable/disable web push notifications
- Integration with Beams to receive web push notifications
- A simple form to trigger notifications
- A button to toggle Channels connection state
Pusher concepts you will learn
In this tutorial you will get familiar with the following Pusher concepts. Check back at the end of the tutorial to test your knowledge!
Channels concepts
- How to implement a Channels authentication endpoint
- How to build private channels
- How to count subscriptions
- How to publish with info
- How to trigger a Channels notification
- Channels connection state lifecycle
Beams concepts
- Web push notifications enablement lifecycle
- How to implement a Beams authentication endpoint
- How to associate user identities with device tokens
- How to publish web push notifications to users
Getting Started
Before we dive into the tutorial there are a few steps you need to take to get set up.
Pusher Account
Create a free sandbox Pusher account or sign in. The Channels and Beams sandbox plans are both completely free and will be more than ample to complete this sample project.
Creating a Channels app
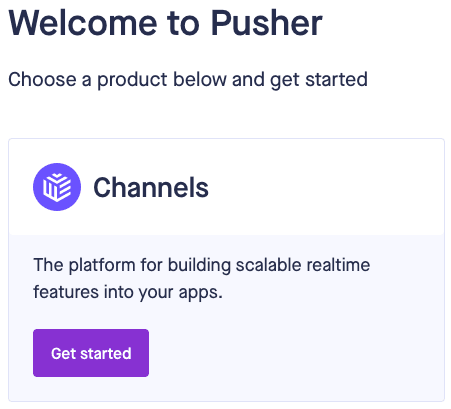
Once you have signed up for a Pusher account you need to create a Channels app by clicking Get Started under Channels:
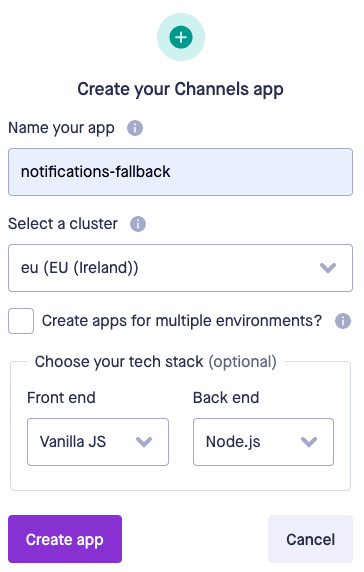
Follow the steps in the dialog box to name your app and also choose a preferred cluster location from the list.
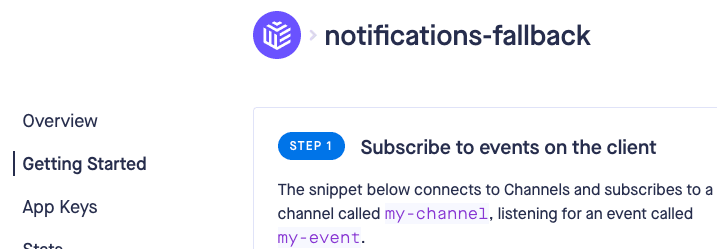
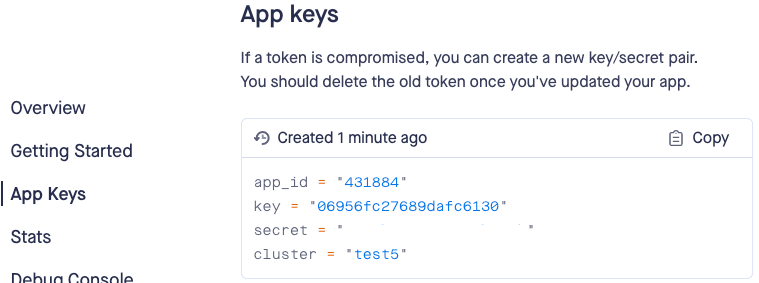
Next you'll see the following page. Here, the details you need for connections can be found under App Keys.
From the App Keys page note down the app_id, key, secret and cluster as you will need these to connect to your Channels app.
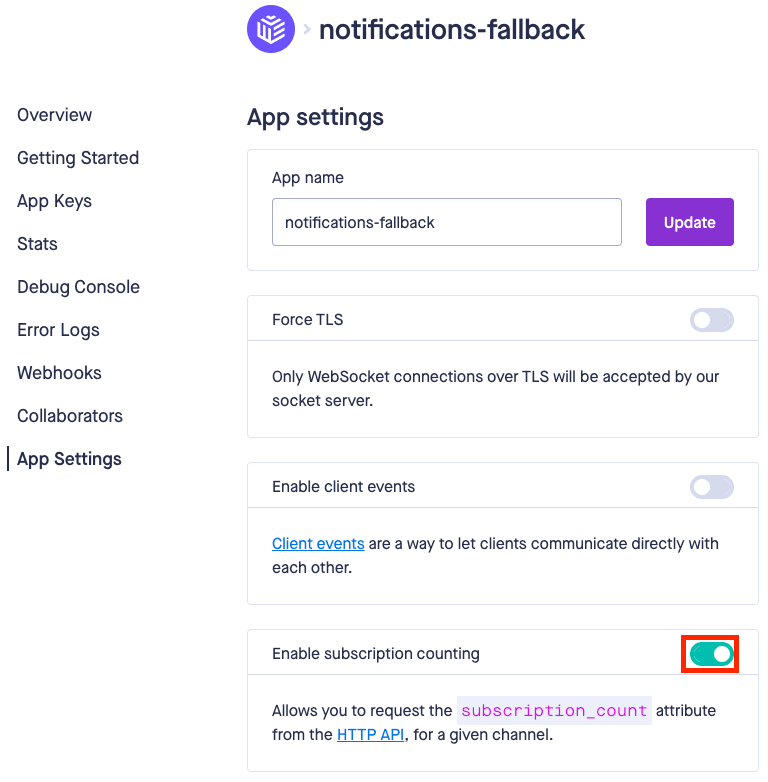
Configuring subscription counting for Channels
Once you are up and running with Channels the next step is to ensure that subscription counting is turned on for your Channels app. You can do this by going to to the settings page of your Channels App and setting Enable subscription counting to True. This is needed to provide the number of subscribers in a channel when using the publish with info endpoint.
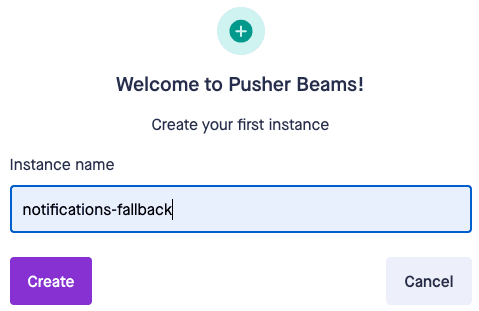
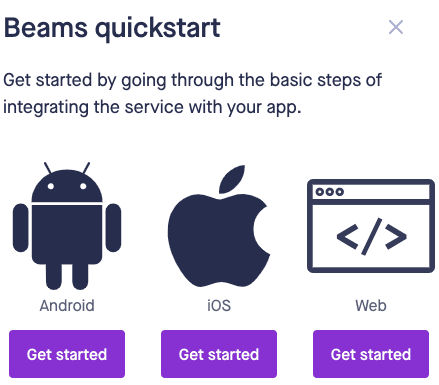
Creating a Beams instance
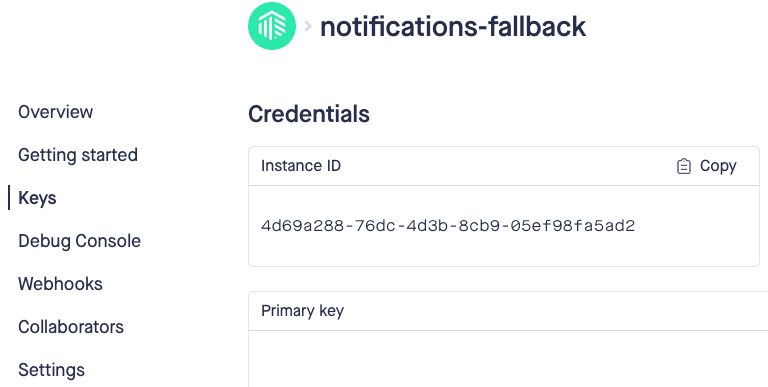
After creating your Channels app you should return to the homepage and then create a Beams instance by clicking the Get Started button under Beams. You just need to give your new Beams instance a name. Here we'll call it "notifications-fallback":
When the quick start appears you can dismiss this by clicking the X in the dialog box as we will walk through installing the service worker for web notifications as part of this tutorial.
Once again, navigate to the Keys page and make a note of your Instance ID and Primary Key.
Set up a Node.js environment
You also need to make sure you have Node.js and NPM installed. Find the instructions to do this here.
GitHub account with OAuth app
As part of the tutorial we will be using Github OAuth for authentication. Sign up for a Github account if you don’t already have one.
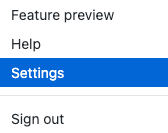
Once you have signed in, click on your profile and navigate to the Settings page.
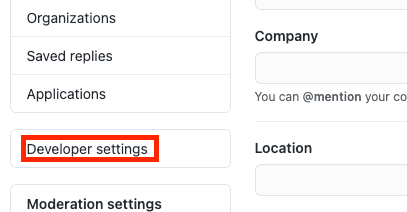
From the settings page you need to go Developer settings > OAuth Apps and click New OAuth App.
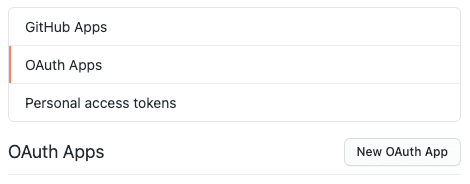
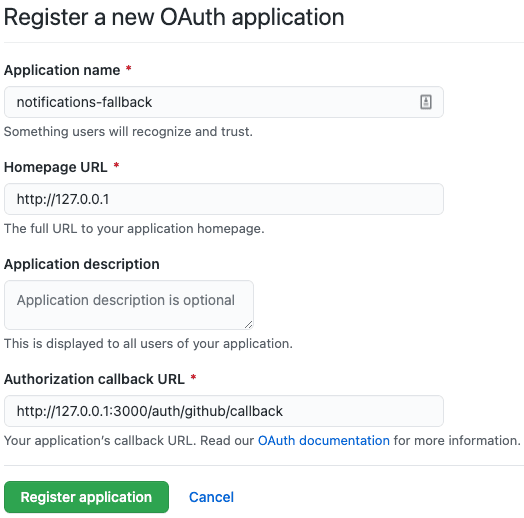
You should then register a new OAuth app as follows (we will set this to localhost for now for testing):
Application name: notifications-fallback
Homepage URL: http://127.0.0.1
Authorization callback URL: http://127.0.0.1:3000/auth/github/callback
Finally click Generate a new client secret and note down your Client ID and Secret for later use.
Cloning the project
Now that we have got the set up out of the way there are three options to follow along with this tutorial:
Walkthrough
The walkthrough provides you with a skeleton project and will then guide you step by step to build out the final project. This will help you really get to grips with each of the core concepts as you go. To follow the walkthrough do the following:
- Open up a terminal window and clone the skeleton branch from
git clone -b tutorial-start https://github.com/pusher/pusher_tutorial_channels_beams_notif.git - Move onto the next section of the tutorial: Configuring Environment Variables
Local quickstart
The local quickstart approach allows you to get a fully working solution on your local machine and then you can just read through the content below to understand exactly how the project works. To follow the local quickstart do the following:
- Open up a terminal window and clone the main branch from
git clone https://github.com/pusher/pusher_tutorial_channels_beams_notif.git - Set up your environment variables
- Install dependencies and start the app
- Use the app
- Read through the tutorial content.
Heroku quickstart
The Heroku quickstart will guide you through deploying the project to Heroku and you can then read through the tutorial content to understand exactly how the project works. To follow the Heroku quickstart do the following:
- Follow the deploy to Heroku section
- Use the app
- Read through the tutorial content.
Configuring environment variables
Once you have cloned the repository from GitHub from your terminal window navigate into the terminal window and copy .env.example to .env
Open up the .env file and complete the variables as follows:
1GITHUB_CLIENT_ID=client id from github oauth app 2GITHUB_CLIENT_SECRET=client secret from github oauth app 3GITHUB_CALLBACK_URL=/auth/github/callback 4APP_ID=channels app id 5APP_KEY=channels app key 6CHANNELS_SECRET_KEY=channels secret key 7CLUSTER=channels cluster 8INSTANCE_ID=beams instance id 9BEAMS_SECRET_KEY=beams primary key 10SESSION_SECRET=secretstring 11ENVIRONMENT=development
You should have noted down the values for each variable earlier other than the SESSION_SECRET and ENVIRONMENT. Session secret should be a randomly generated secret that will be used to generate the session tokens as part of user authentication. Environment should be set to development for local deployments.
Installing dependencies
Install the project dependencies by navigating into the project directory and running npm install.
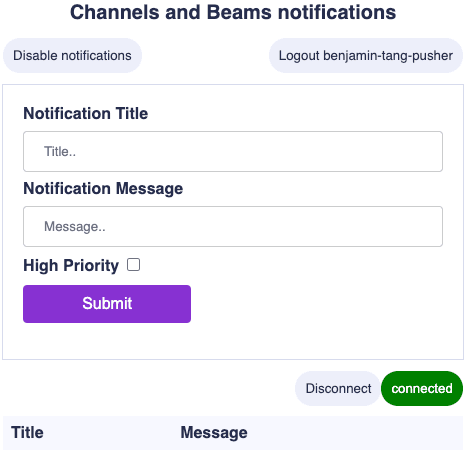
You can then start the app by running npm start. At this stage you can navigate to http://127.0.0.1:3000 in a web browser and you should see the title “Channels and Beams Notifications” displayed. If you open the server.js file you will see that currently we are just running a simple webserver using expressjs and rendering a file called index (views/index.hbs) using the Handlebars templating engine. There is also some preconfigured css styling (public/css/app.css).
Authenticating users
Establishing user identity
Assuming that you want to send personalised notifications to specific users; such as for a new message, a new task assignment or an account alert you need to associate a user identity with a private channel and a push notifications token. This is easy to do using Channels and Beams.
For the purpose of this tutorial we will use authenticate a user with GitHub and then use the GitHub User ID as part of the Channel subscription and Beams registration.
When a user lands on a page with realtime functionality you will associate their user identity with Channels and Beams by verifying the session token the client will provide when subscribing.
GitHub authentication
To set up GitHub authentication we will use the passport.js middleware with the GitHub authentication module.
Once we have established that a user has a GitHub account we will then create an in-memory session using express-session. In future you may choose to persist these sessions.
To set this up do the following:
In server.js under //Imports add the following lines to add the required dependencies
1//Imports 2var passport = require('passport'); 3var session = require('express-session'); 4var GitHubStrategy = require('passport-github2').Strategy;
You then need to import the auth config from your .env file by adding the following under //Auth config:
1//Auth config 2const GITHUB_CLIENT_ID = process.env.GITHUB_CLIENT_ID 3const GITHUB_CLIENT_SECRET = process.env.GITHUB_CLIENT_SECRET 4const GITHUB_CALLBACK_URL = process.env.GITHUB_CALLBACK_URL 5const SESSION_SECRET = process.env.SESSION_SECRET
Next you need to set up the passport middleware and add a function that will be used to check if a user has a valid session. If they don’t they will be redirected to the login page.
Under //Auth middleware add
1//Auth middleware 2passport.serializeUser(function(user, done) { 3 done(null, user) 4}) 5 6passport.deserializeUser(function(obj, done) { 7 done(null, obj) 8}) 9 10passport.use(new GitHubStrategy({ 11 clientID: GITHUB_CLIENT_ID, 12 clientSecret: GITHUB_CLIENT_SECRET, 13 callbackURL: GITHUB_CALLBACK_URL 14 }, 15 function(accessToken, refreshToken, profile, done) { 16 // asynchronous verification, for effect... 17 process.nextTick(function () { 18 19 // To keep the example simple, the user's GitHub profile is returned to 20 // represent the logged-in user. In a typical application, you would want 21 // to associate the GitHub account with a user record in your database, 22 // and return that user instead. 23 return done(null, profile); 24 }); 25 } 26)); 27 28var sess = { secret: SESSION_SECRET, resave: false, saveUninitialized: false, cookie: {} }; 29if (environment === 'production') { 30 app.set('trust proxy', 1) // trust first proxy 31 sess.cookie.secure = true // serve secure cookies 32} 33app.use(session(sess)); 34app.use(passport.initialize()); 35app.use(passport.session());
Next under //Auth function at the end of the server.js file add:
1//Auth function 2function ensureAuthenticated(req, res, next) { 3 if (req.isAuthenticated()) { 4 return next() 5 } 6 res.redirect('/login') 7}
In short what happens here is that the passport.session handler intercepts the request, deserializes the user session and checks this is valid.
We will also add a login route and auth callback for setting up new sessions. Add the following under //Auth routes
1//Auth routes 2app.get('/login', (req, res) => { 3 res.send("<a href='/auth/github'>Sign in With GitHub</a>") 4}) 5 6app.get('/logout', function(req, res){ 7 req.session.destroy(function (err) { 8 res.redirect('/login'); 9 }) 10}); 11 12app.get('/auth/github', 13 passport.authenticate('github', { scope: [ 'user:email' ] }), 14 function(req, res){ 15 }); 16 17app.get('/auth/github/callback', 18 passport.authenticate('github', { failureRedirect: '/login' }), 19 function(req, res) { 20 res.redirect('/'); 21 });
Now we need to check that a user is actually authenticated before allowing access to our index page. Currently we have one route defined under app.get(``'``/``'``, … and when this endpoint is called we render the index page with handlebars.
Go ahead and update this function as follows:
1//Render 2app.get('/', ensureAuthenticated, function(req, res){ 3 res.render('index', { 4 user: req.user.username 5 }) 6});
When this route is called, we will call the ensureAuthenticated function first and if there is no valid session then we will redirect the request to the login page. Once a user has then logged in via Github and is authenticated we will return the index page. Additionally the line user: req.user.username will provide the username to the index template.
We can make use of this value in our template. To see this in action open views/index.hbs and add the following under <!-- divButton -->
1<!-- divButton --> 2<div class="divButton"> 3 <!--button id="beams-notification-button" disabled>Loading...</button--> 4 <button id="logout-button">Logout {{ user }}</button> 5</div>
This will render a logout button and decorate this with the userid of the logged in user. The final part is to call the logout route we set up above, so the logout button will actually do something.
In the script section of index.hbs add the following:
1//Logout button listener 2const logoutButton = document.getElementById('logout-button'); 3logoutButton.addEventListener('click', logout);
1//Logout function 2 async function logout(){ 3 //await beamsClient.stop(); 4 await fetch('/logout', { 5 method: 'GET', 6 mode: 'same-origin', 7 cache: 'no-cache', 8 credentials: 'same-origin', 9 redirect: 'follow', 10 referrerPolicy: 'no-referrer' 11 }); 12 window.location = '/login'; 13 };
To see all of this in action stop your server and start it again by running npm start from the command line. Navigate to http://127.0.0.1:3000 and you should now be required to authenticate using GitHub:

All being well you should see the page above with a logout button rendered with your GitHub username. If you click the logout button you will be returned to the login page. You are now up and running with GitHub authentication!
Continue to Part 2 of this tutorial series to learn how to set up an authentication endpoint to run on your server that will allow your app to subscribe to a private-channel.


© 2026 Pusher Ltd. All rights reserved.
Pusher Limited is a company registered in England and Wales (No. 07489873) whose registered office is at MessageBird UK Limited, 3 More London Riverside, 4th Floor, London, United Kingdom, SE1 2AQ.