- Products

- Developers
- User stories
- Blog
- Pricing

Build a realtime Instagram clone — Part 4: Going offline with service workers
Introduction
This is part 4 of a 4 part tutorial. You can find part 1 here, part 2 here and part 3 here.
In the last part of the series, we looked at how to add realtime functionality to our React application using Pusher to enable notifications. Sometimes, when surfing the web, you loose internet connection. In the past, all you got was the default error page decided by the browser. Now, you sometimes get custom pages even when you don’t have internet connection at all.
In this article, we are going to look at how to add this kind of functionality to our application to allow the users still engage with our application even when they are constrained by internet connections. To do accomplish this, we are going to make use of the browser’s local storage and service workers.
Prerequisites
To follow this article you need the following:
- Should have read previous parts of the series
- Basic knowledge of JavaScript
- Node installed on your machine
- NPM installed on your machine
Set up an app shell to show when offline
The app “shell” is the minimal HTML, CSS and JavaScript required to power the user interface. This allow us to immediately render the page while the rest of the page is being fetched.
Service workers
Service workers are scripts that the browser runs in the background to give the online effect to users by caching assets and other files. Their core features are how they’re able to intercept and handle network requests. There are three stages in the lifecycle of a service worker: registration, installation and activation.
React includes starter code that registers a service worker. In the src/index.js you have:
1// src/index.js 2 [...] 3 import registerServiceWorker from './registerServiceWorker'; 4 [...] 5 registerServiceWorker();
This registers a service worker for your application when your application is in production mode.
Next thing to do is update your public/manifest.json file
1{ 2 "short_name": "InstaClone", 3 "name": "Simple Instagram Clone App", 4 "icons": [ 5 { 6 "src": "favicon.ico", 7 "sizes": "64x64 32x32 24x24 16x16", 8 "type": "image/x-icon" 9 } 10 ], 11 "start_url": "./index.html", 12 "display": "standalone", 13 "theme_color": "#000000", 14 "background_color": "#ffffff" 15 }
Now, build your application using:
npm run build # or yarn build
An optimized version of your application will be built in the build/ folder of your application. Now you will want to deploy the built application. To do this, http-server - a node module for serving static files:
1npm install http-server 2 http-server build
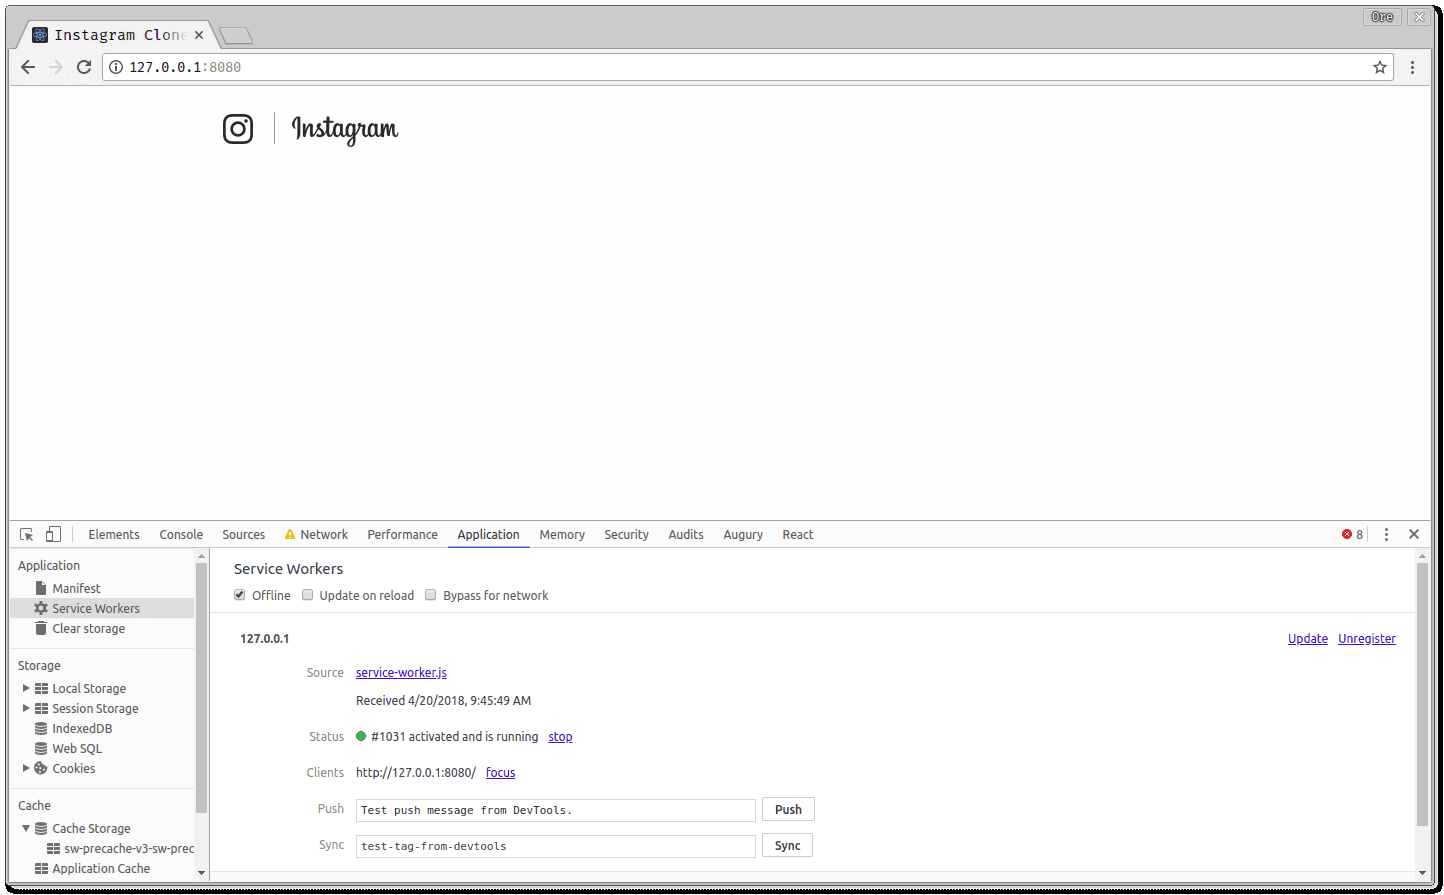
When you visit the application at 127.0.0.1:8080, you get your regular application. Now, head over to the Appication tab of your Chrome debug console. You can see the existing service worker for your application displayed there. Click the Offline option to simulate no network connection. When you reload your application, you get this:
Serving stale data when offline
The current display when a user is offline is a little better than the default page shown when there’s no connection. For an application like our Instagram clone application, it’ll be nice for the users to still be able to view old posts when offline. When we fetch posts in the Posts component, we are going to save them in the browsers localStorage for future use. To do this, update the componentDidMount of your src/components/Posts/index.js as follows:
1// src/components/Posts/index.js 2 [...] 3 componentDidMount(){ 4 [...] 5 if( !navigator.onLine){ 6 this.setState({ posts: JSON.parse(localStorage.getItem("posts")) }); 7 }else{ 8 this.props.apollo_client 9 .query( 10 // grapgl ql query 11 [...] 12 ) 13 .then(response => { 14 this.setState({ posts: response.data.posts}); 15 localStorage.setItem('posts', JSON.stringify(response.data.posts)); 16 }); 17 } 18 [...] 19 }
We first check if the user is online. If they are, the apollo_client ****makes the request to get new posts. After the posts are obtained they’re saved using the localStorage.setItem() function. When the user is offline, !navigator.onLine will return true and then the stored posts are fetched from the localStorage using localStorage.getItem().
Tip: localStorage only stores strings so to work around this, you use
JSON.stringify()andJSON.parse()for storage and retrieval respectfully
You can also decide to display a banner to the user letting then know that they are viewing stale data. To do this, let’s create a simple Notifier component in the src/components directory like this:
1cd src/components 2 mkdir Notifier 3 cd Notifier && touch index.js Notifier.css
1// src/components/Notifier/index.js 2 3 import React, { Component } from "react"; 4 import "./Notifier.css"; 5 class Notifier extends Component { 6 render() { 7 return ( 8 <div className="notify"> 9 <p> 10 <em>{this.props.data}</em> 11 </p> 12 </div> 13 ); 14 } 15 } 16 export default Notifier;
The component has the following styling:
1// src/components/Notifier/Notifier.css 2 3 .notify{ 4 background-color: red; 5 width: 100%; 6 padding-top: 20px; 7 padding-bottom: 20px; 8 text-align: center; 9 color: white; 10 margin-bottom: 20px; 11 }
Now that the component is created, to use it in the Posts component, update the src/components/Posts/index.js:
1// src/components/Posts/index.js 2 3 import React, {Component} from "react"; 4 import "./Posts.css"; 5 import gql from "graphql-tag"; 6 import Post from "../Post"; 7 import Notifier from "../Notifier"; 8 class Posts extends Component { 9 constructor() { 10 super(); 11 this.state = { 12 posts: [] 13 }; 14 this.offline = !navigator.onLine; 15 } 16 componentDidMount() { 17 [...] 18 } 19 render() { 20 const notify = this.offline ? <Notifier data="Instagram Clone: Offline Mode" /> : <span />; 21 return ( 22 <div> 23 {notify} 24 // display posts 25 [...] 26 </div> 27 ); 28 } 29 } 30 31 export default Posts;
Now, build the application again using:
npm run build # or yarn build
Start your backend server:
node server
If you are confused about the backend server, refer to previous parts of this series
And then serve the production build with:
http-server build
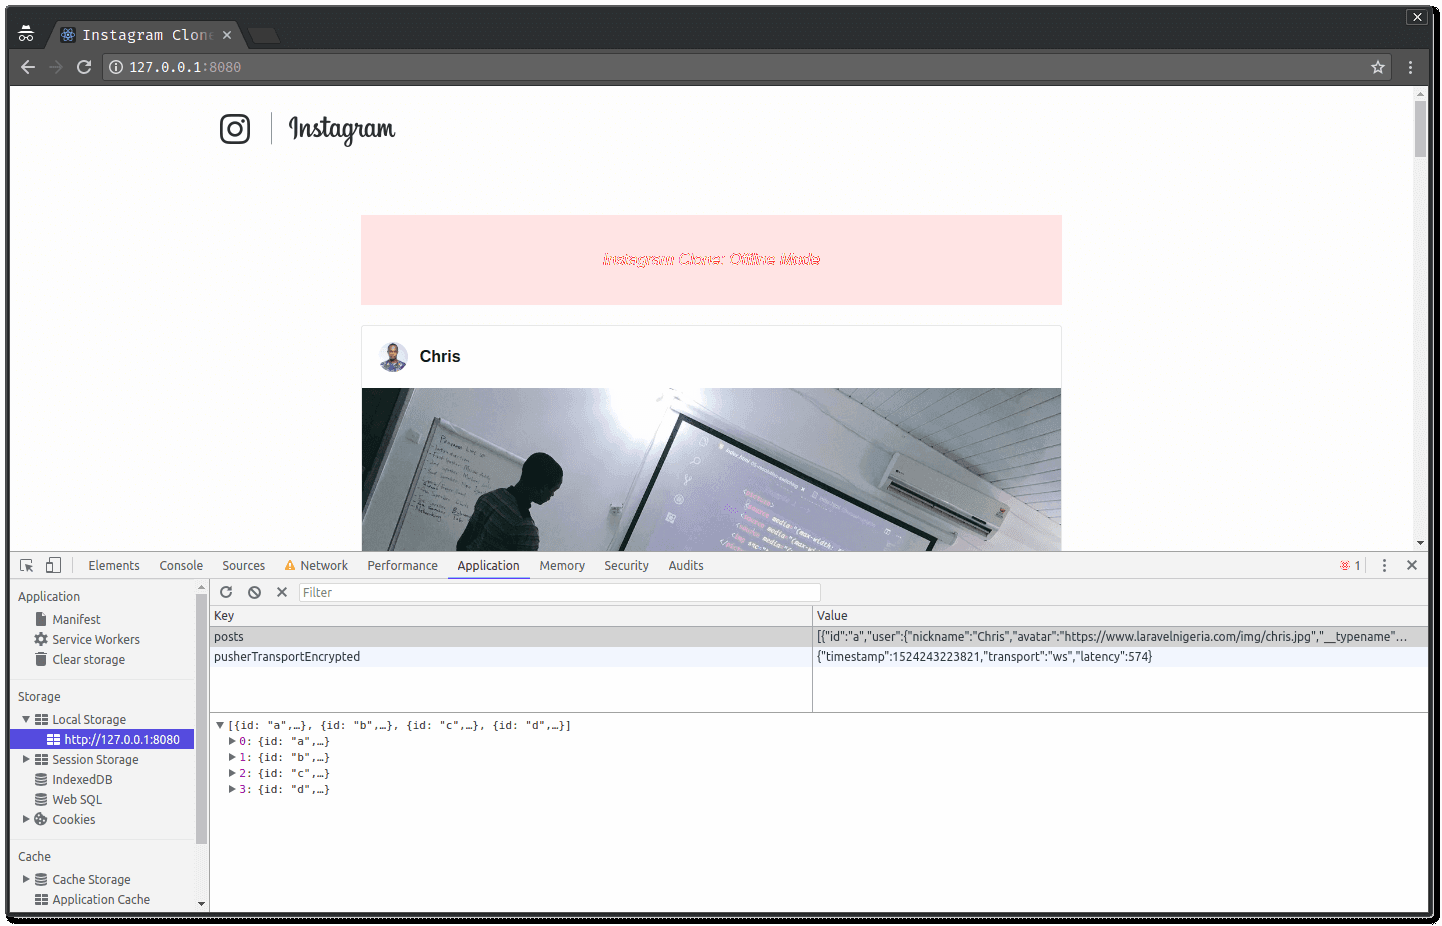
When you go to the browser you get:
It’s advised to test service workers in incognito/private mode so that your application behavior is not affected by previously installed service workers / caches
Conclusion
In this series, we have seen how to build a simple Instagram clone using react by using react, fetching dynamic data using GraphQL, adding realtime functionality using Pusher and making the application work offline with service workers. Feel free to leverage any of the concepts shared here in your web applications. Here’s a link to the Github repository if interested


© 2026 Pusher Ltd. All rights reserved.
Pusher Limited is a company registered in England and Wales (No. 07489873) whose registered office is at MessageBird UK Limited, 3 More London Riverside, 4th Floor, London, United Kingdom, SE1 2AQ.