- Products

- Developers
- User stories
- Blog
- Pricing

Getting started with Auto Layout in Swift - Part 4: Diving deeper into constraints and intrinsic content size
Introduction
In this tutorial, we will dive a little more into constraints and consider some other concepts that might be useful to know when working with constraints in Auto Layout.
In the previous part of the series, we started looking into constraints in Auto Layout. We looked at the anatomy of a constraint and the several parts that make up a constraint. Finally, we looked into constraint priorities and how we can use them when creating responsive layouts using Auto Layout.
Prerequisites
To get started, you need the following:
- To have completed part three of the series.
- Xcode installed on your machine. Download here.
- Knowledge of the Xcode interface builder.
Let’s get started.
Creating a sample Xcode project
For the purposes of this chapter, we will be creating a sample Xcode application. We will be playing around with this sample app throughout this chapter.
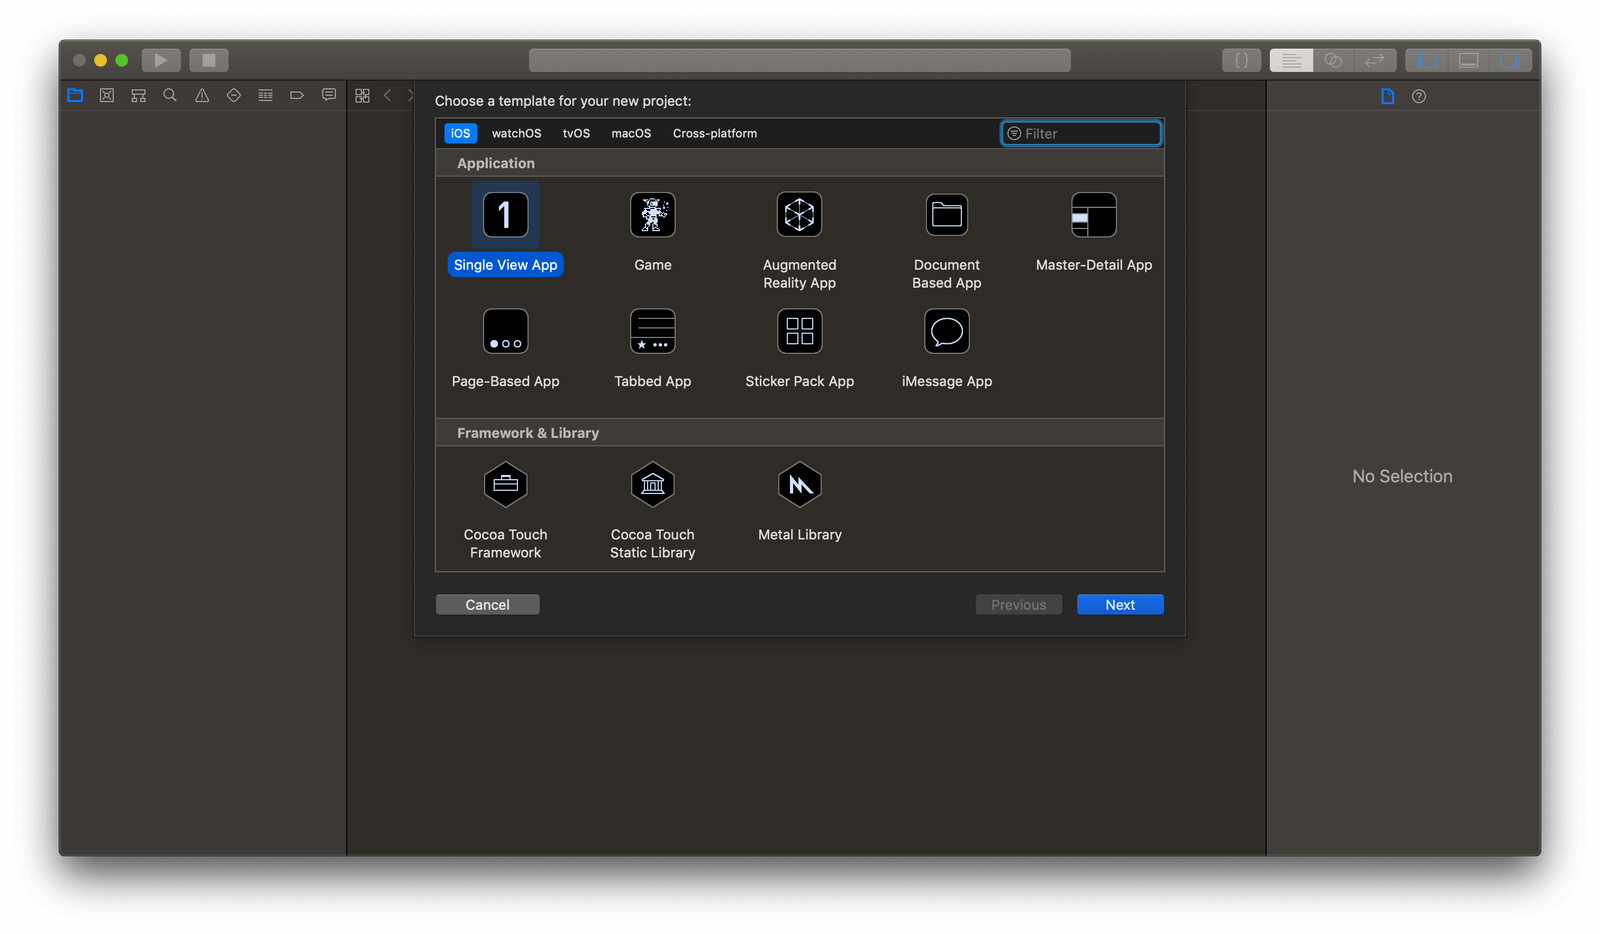
Launch Xcode and click Create a new Xcode project. Next, select Single View App in Xcode.
In the project, open the Main.storyboard file. We will be using the storyboard to play around with views and layouts.
Now that we have the sample project, let’s continue.
Implicit and explicit constraints
Before we go into the what implicit and explicit constraints are, let's look at the meaning of both words.
- Implicit: suggested though not directly expressed.
- Explicit: stated clearly and in detail, leaving no room for confusion or doubt.
Implicit constraints
Implicit constraints are constraints that are automatically added to views when we add them to the view hierarchy. Whenever we add a new view to the view hierarchy, Xcode implicitly adds constraints for us. These constraints are not visible to us in the Xcode interface but they are there nonetheless.
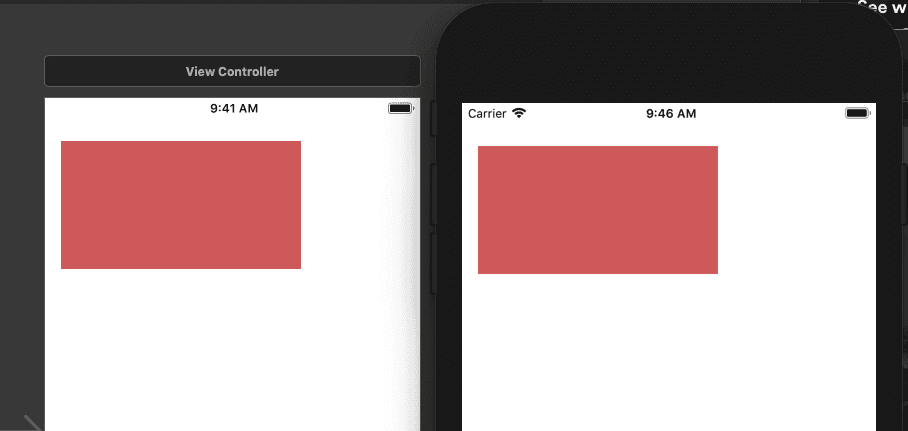
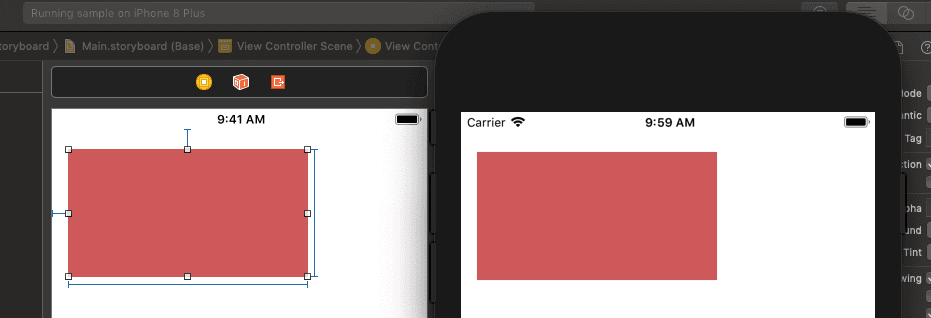
Open the main storyboard file in the sample project we created earlier and in the view controller, drag a new view into it. Place the view in the top left corner of the view. Now run the application in a simulator. You’d notice the view is placed where we expected in the simulator, even without any constraints. This is because there are implicit constraints added to the view.
Explicit constraints
Unlike implicit constraints, explicit constraints are added by you. Once you add a constraint to the view, the implicit constraints are automatically removed. With explicit constraints, there is a general rule that applies: each dimension, horizontal or vertical, needs at least two constraints to work.
This means if you add one constraint to the horizontal dimension, you will get an error until you add a second that satisfies the constraint. Let’s see what we mean. In the storyboard, add a 16 point leading constraint to the view. Immediately we add this constraint, we can see Xcode pop up with errors saying we need more constraints to satisfy the layout.
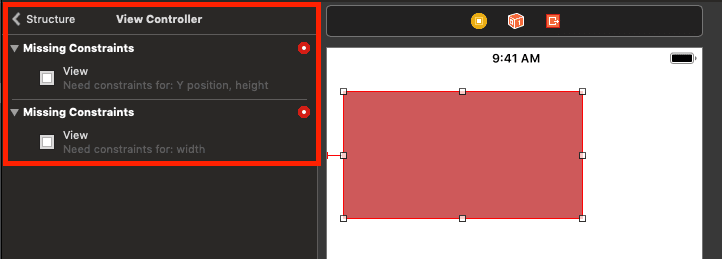
The first error says, “Need constraints for: Y position, height”. This error happens because the implicit constraints have been removed by Xcode and thus, Xcode needs you to explicitly add constraints for the Y position and the height of the view. To resolve this error, add a height constraint and a top constraint.
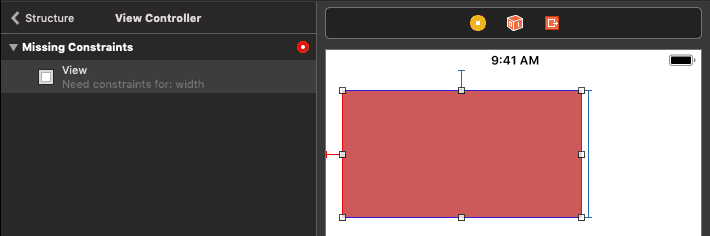
The second error says: “Need constraints for: width”. As stated earlier, each dimension needs at least two constraints for it to be satisfiable and so far, we have specified one constraint for the vertical dimension, which is the X position. To resolve this error, we can add either a specific width to the view or a trailing constraint.
After adding a width constraint, the errors should be gone. Run the application and you should see the same preview as before, only now, we have explicitly defined the constraints.
Intrinsic content size
Earlier in the series, we created several views and we had to specify the size of the view so Auto Layout shows how to resolve the view. However, some views like UILabel have automatically defined sizes that fit the size of the content inside them.
For instance, let’s add a label to our storyboard. Add a label below the view we created earlier, and add a horizontal constraint and a top spacing constraint as seen below:
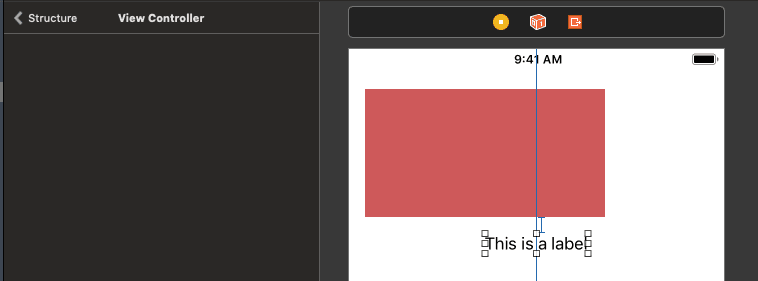
As you can see there are no errors in Xcode asking us to specify a width or height to the label. This is because the label has an intrinsic content size that is calculated at runtime.
The intrinsic content size makes the label contract or expand when there are changes in the layout. For instance, if the user changes the font size in the iOS accessibility settings, the label will adjust its size automatically because of it’s intrinsic content size.
Intrinsic content size is very useful, however, there are cases we need to be aware of. In the storyboard, let’s remove the horizontal constraint and add a 16pt trailing constraint to the label. Now, update the text to something longer, like 30 words or more. You will notice immediately, that the label now extends past the device screen.
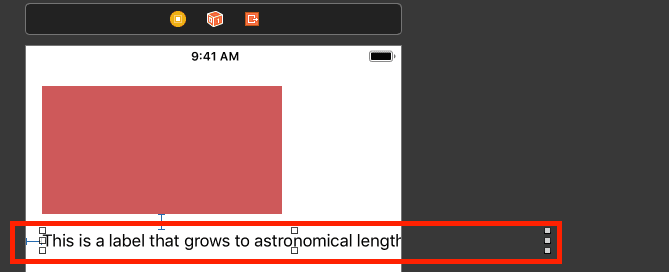
The problem is compounded when there is a view just beside this label to the right. Let’s add a button to the right of the label and specify the top constraint and trailing constraint of the label. Make sure the button is right beside the label as seen below:
Right now, the label is not only longer, but it also overlaps with the button. This can be a problem, especially with dynamic layouts. However, what if we shrink the label manually and define a trailing constraint on the label to make sure it doesn’t overlap with the button?

Well, now we have a new set of errors on “Content Priority”. The Auto Layout engine is saying we need to set a “horizontal compression resistance priority” for the view. Let’s see what this means.
When dealing with intrinsic content size, there are two constraints that are created automatically for the view. They are:
- Content compression resistance.
- Content hugging.
Let’s see how they work.
Content compression resistance
The content compression resistance constraint priority deals with how much the content does not want to shrink smaller than the size of its content. The higher the priority the higher the resistance of the view to getting shrunk.
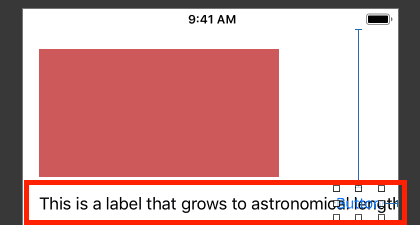
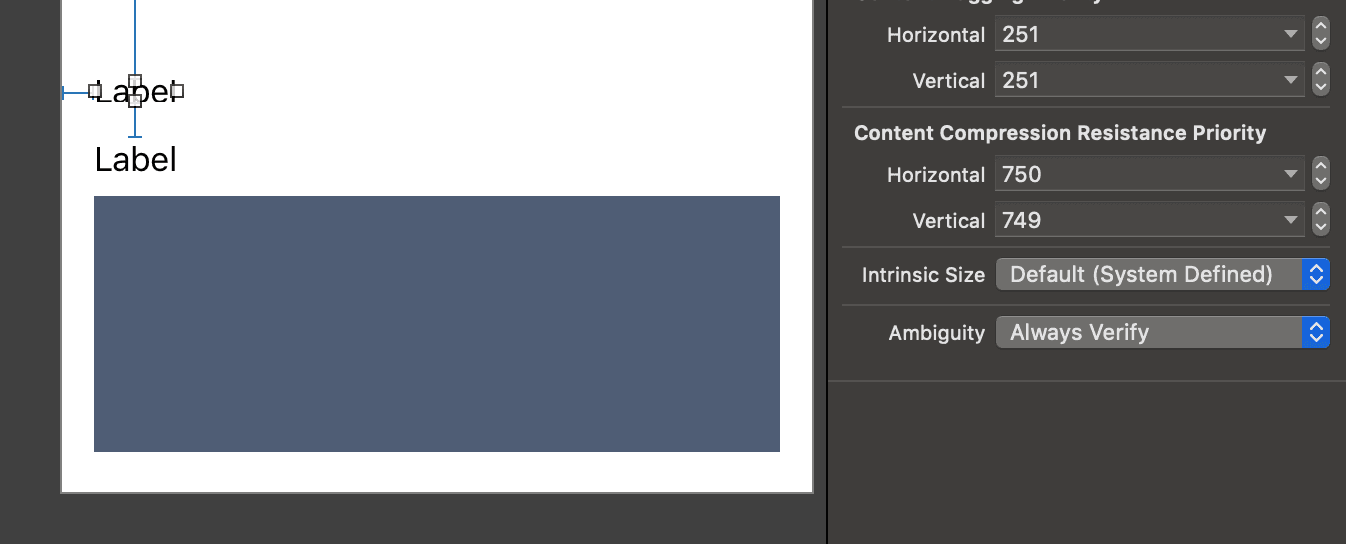
To see this in action, let’s look at the example from above. First, select the label and in the size inspector, look at the Content Compression Resistance Priority, you’ll see that the priority of the horizontal value is 750. If you check the button, it’s also the same.

This means both views have the same priority and no one is willing to shrink to satisfy the view, hence the error. Change the horizontal priority of the label to 749 and you should see the errors disappear.
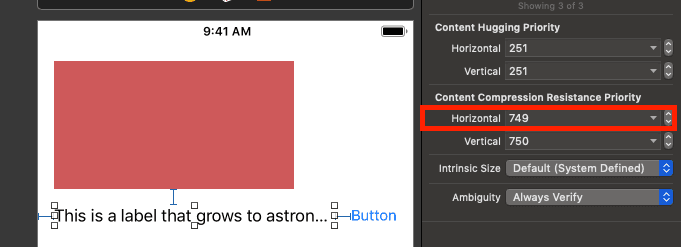
After the change, the error disappeared because we have instructed Auto Layout that if the intrinsic content size of the label is larger than it’s calculation compress the label to fit so the layout can be resolved.
Content hugging
Content hugging is the opposite of content compression resistance. The content hugging resistance constraint priority deals with how much the content does not want to grow larger than the size of its content.
You can read more on content compression resistance and content hugging here.
One thing to remember is that both the content compression resistance and content hugging priorities have horizontal and vertical values. The horizontal deals with conflicts on the horizontal axis while the vertical deals with conflicts on the vertical axis.
Let’s see when the vertical priorities come into play. In the layout, create a view and add the following constraints to the view:
Next, create two labels one over the other above the newly created view. The resulting view will look something similar to this:
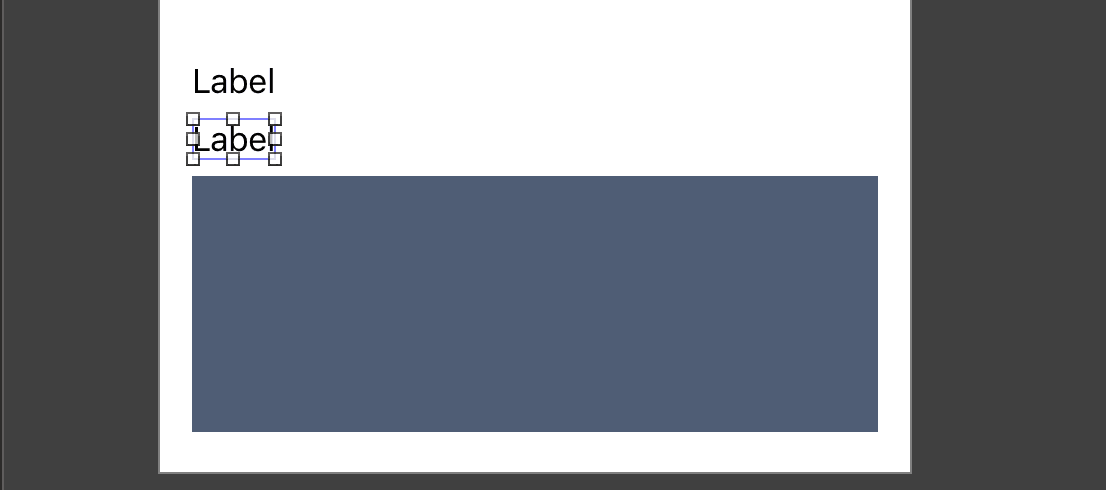
For the bottom label, add a 16pt leading space constraint and 8pt bottom spacing constraint. For the top label, add a 16pt leading constraint, and then add the top space constraint, use the value automatically calculated by the interface builder, in my case it was 256pt.
Next, add an 18pt bottom constraint to the top label. The idea is to make both constraints conflict on the vertical axis as seen below:
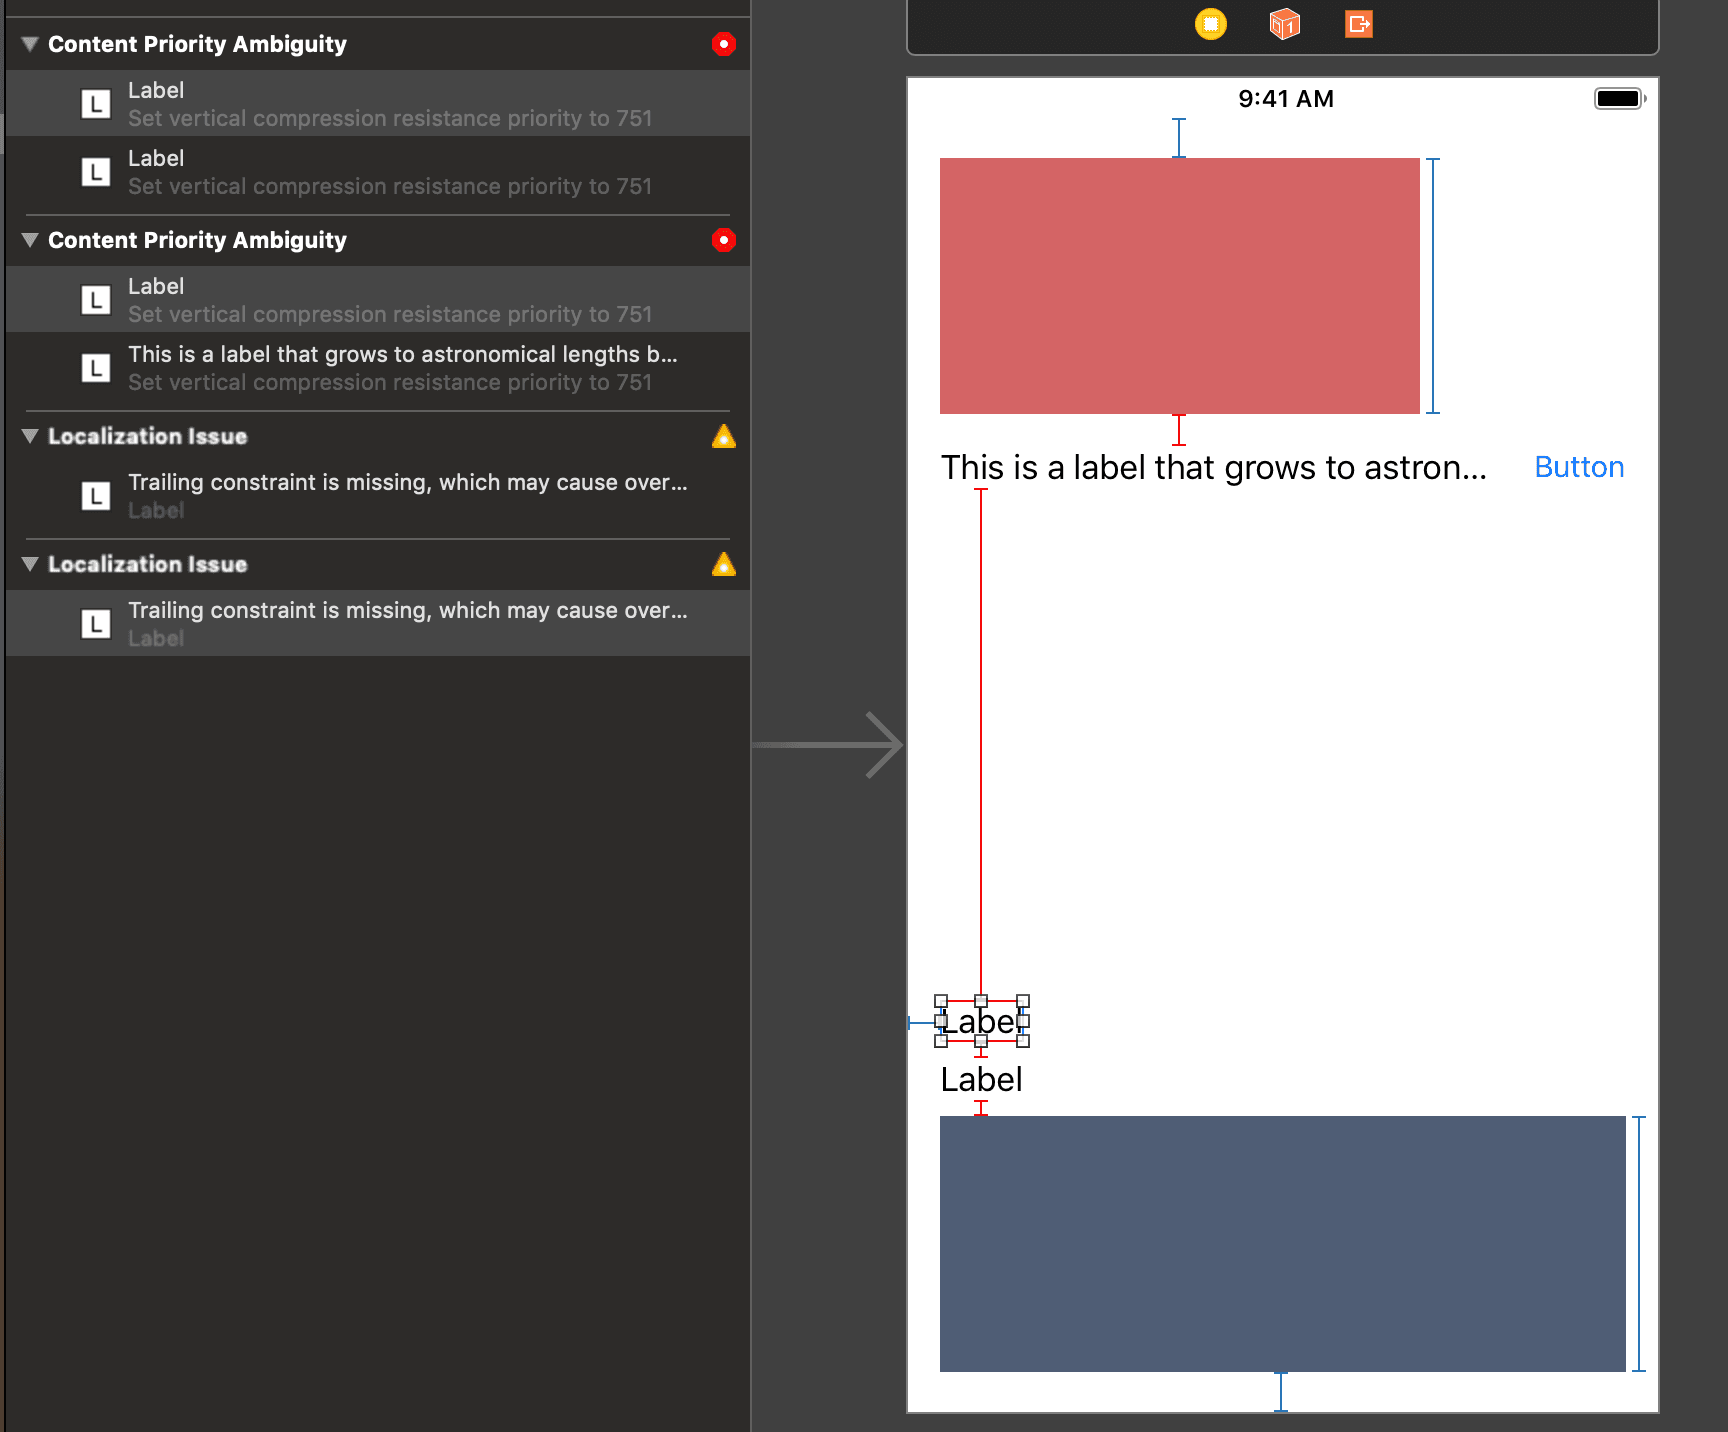
As seen above, we now have a Content Priority Ambiguity error on the left panel. As we did before, we can resolve this by reducing the vertical value of the content compression resistance priority for the top or bottom label.
Conclusion
In this part of the series, we have learned about implicit and explicit constraints and how they are used by the Auto Layout engine to resolve layouts. We have also learned about intrinsic content sizes, content compression resistance, and content hugging.
In the next part, we will look into stack views and how they work. The source code to the application built in this series is available on GitHub.


© 2026 Pusher Ltd. All rights reserved.
Pusher Limited is a company registered in England and Wales (No. 07489873) whose registered office is at MessageBird UK Limited, 3 More London Riverside, 4th Floor, London, United Kingdom, SE1 2AQ.