- Products

- Developers
- User stories
- Blog
- Pricing

Build a login approval system with Laravel and iOS - Part 1: Building the base application
Introduction
When building applications that require authentication, it is not uncommon to see applications add 2FA (Two-factor authentication) to make things secure. With 2FA, when you log in in one device, you need to enter a code that would be sent to another trusted device via SMS or a code generator. Another form of 2FA is simply approving the login from another device.
In this article, we are going to consider how to build a simple login approval system that mimics this behavior using Laravel, Swift, and Pusher technologies.
How will it work?
We will build a sample dashboard with actual login but fake data. We will also build an accompanying mobile application that will serve as the authorized device where all the login approvals can be made.
When an administrator attempts to log in to the web dashboard, a push notification will be sent to the iOS application prompting the user to approve the login. The user can then approve or deny the login using the Approve or Deny option on the push notification, or clicking on Approve if the application is already opened.
Requirements
To build this system, we need the following requirements:
- Xcode 10.x installed on your local machine.
- Knowledge of the Xcode IDE.
- Laravel v5.x installed on your local machine.
- Knowledge of the Laravel PHP framework.
- Knowledge of the Swift programming language.
- A Pusher Beams application. Create one here.
- A Pusher Channels application. Create one here.
If you have these requirements, let’s get started.
Setting up the web dashboard
To get started, we will be creating a web dashboard. Launch your terminal application and cd to the directory you want to install your web project to and run the following commands:
1$ laravel new dashboard 2 $ cd dashboard
This will create a new Laravel project called dashboard. When the application is created, open the project in your preferred text editor.
Next, in your terminal, run the following command in the root of your application directory:
$ php artisan make:auth
This command will generate an authentication scaffold. This means we will automatically have access to all of Laravel’s authentication system including the login and logout parts that we need.
Next, let’s connect the application to a database. You can use MySQL or any other supported database you want, but for simplicity, we will be using an SQLite database. Create a new database.sqlite file in the databases directory and leave it empty.
Next, for SQLite, open the .env file and remove all the DB_* keys except DB_CONNECTION and DB_DATABASE. You can set the values as seen below:
1DB_CONNECTION=sqlite 2 DB_DATABASE=/path/to/database/database.sqlite
Since Laravel comes with a default database migration for the users table, we do not need to worry about that. However, let’s create a seeder to add sample data to the database and make it easy to set up a user without registering manually.
In your terminal, run the following command:
$ php artisan make:seed UsersTableSeeder
In the generated seed class, replace the contents with the following:
1<?php 2 // File: ./database/seeds/UsersTableSeeder.php 3 4 use App\User; 5 use Illuminate\Database\Seeder; 6 use Illuminate\Support\Facades\Hash; 7 8 class UsersTableSeeder extends Seeder 9 { 10 /** 11 * Run the database seeds. 12 * 13 * @return void 14 */ 15 public function run() 16 { 17 User::create([ 18 'name' => 'Jane Doe', 19 'email' => 'janedoe@pusher.com', 20 'password' => Hash::make('secret'), 21 ]); 22 } 23 }
Next, open the database/seeds/DatabaseSeeder.php file and uncomment the call to the UsersTableSeeder in that file. Next, let’s migrate and seed our database. Run the following command to do so:
$ php artisan migrate --seed
This command will run the migrations in the database/migrations directory and also seed the UsersTableSeeder. To verify that the user was indeed created, run the following command:
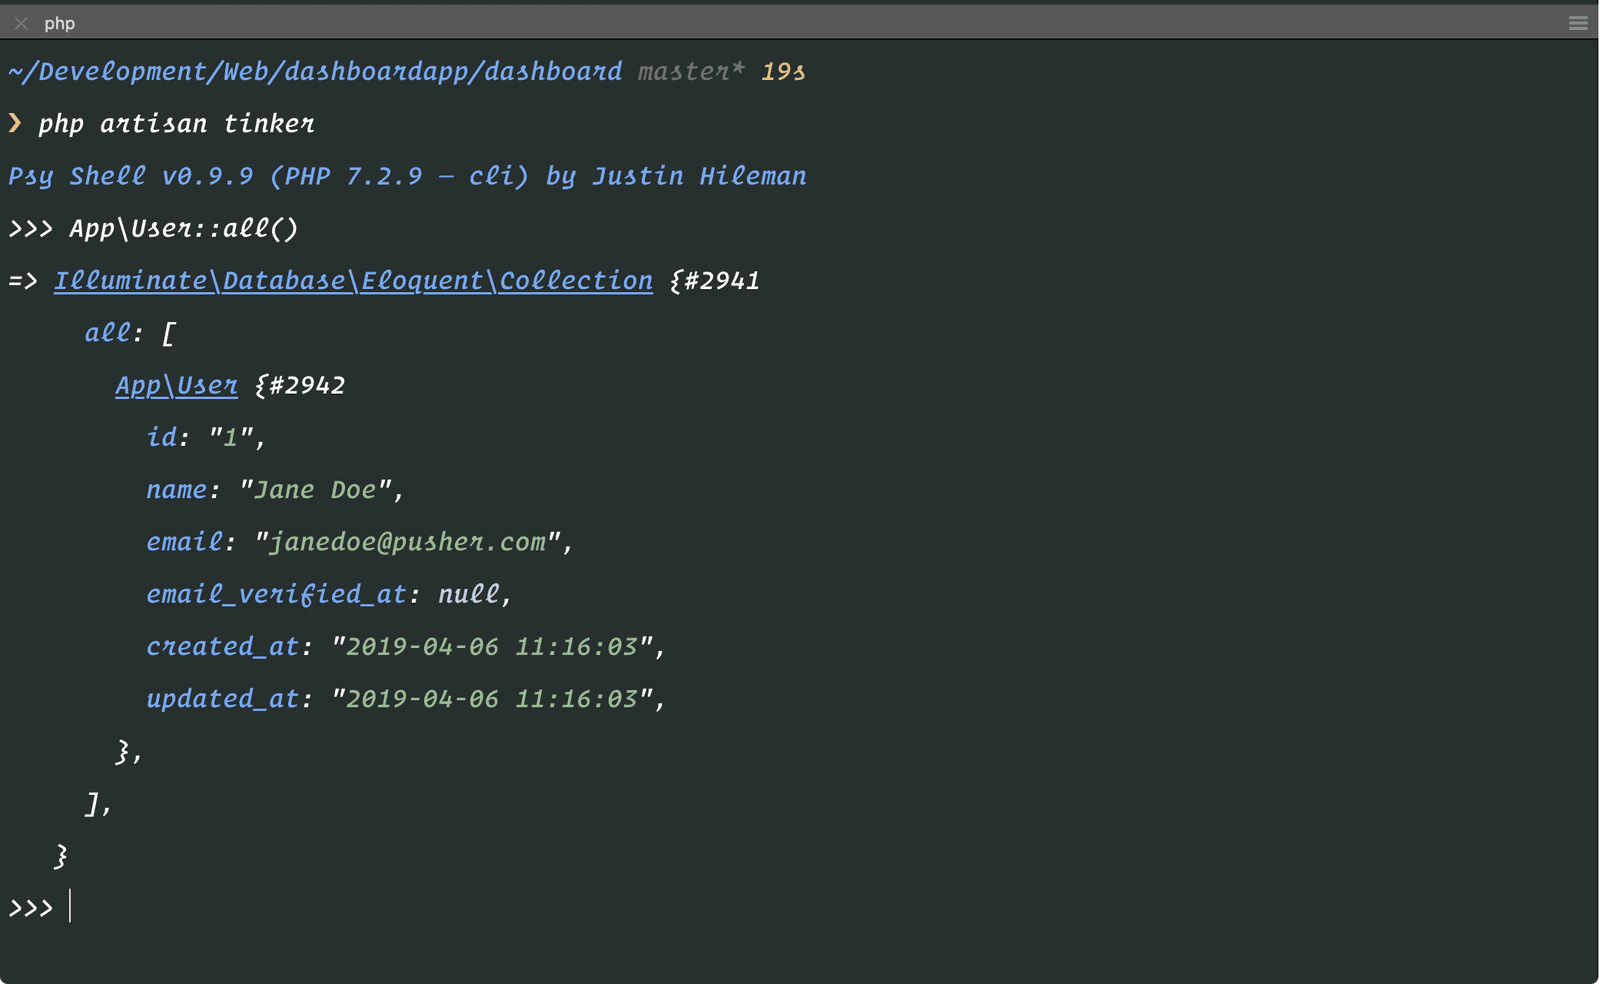
$ php artisan tinker
This will launch a REPL session where we can run everything available in the Laravel application directly. In this REPL session, run the following:
>>> App\User::all()
This should print a list of all the available users and your seeded user should be on this list.
Now that we have some data, we are done with the initial set up. Let’s move on to adding a good design and also making the login actually function as intended.
Creating the layout and routes
Before we start creating the frontend, we need to make sure the application’s routes are set up correctly. Open the routes/web.php file and replace the entire contents with the following:
1<?php 2 3 Route::redirect('/', '/home'); 4 5 Auth::routes(); 6 7 Route::get('/home', 'HomeController@index')->name('home'); 8 Route::post('/login/confirm', 'Auth\LoginController@confirmLogin'); 9 Route::post('/login/authorize', 'Auth\LoginController@authorizeLogin'); 10 Route::post('/login/client-authorized', 'Auth\LoginController@clientAuthorized');
Above we have defined routes to our application and we will need to start creating some of the methods these routes point to. For now, let’s focus on the ones that have to do with seeing our login screen.
We will be using the SB Admin 2 free template for the frontend of the dashboard. Before we start building, download the template from the link above as we will need some asset files from the template.
Adding the HTML template to the application
If you have downloaded the template we can move on to the next step. Open the app.blade.php file in the resources/views/layouts directory and replace the contents of the file with the following code:
1<!-- File: ./resources/views/layouts/app.blade.php --> 2 <!DOCTYPE html> 3 <html lang="{{ str_replace('_', '-', app()->getLocale()) }}"> 4 <head> 5 <meta charset="utf-8"> 6 <meta name="viewport" content="width=device-width, initial-scale=1"> 7 <meta name="csrf-token" content="{{ csrf_token() }}"> 8 <title>Dashboard | {{ config('app.name') }}</title> 9 <link href="{{ asset('vendor/fontawesome-free/css/all.min.css') }}" rel="stylesheet"> 10 <link rel="dns-prefetch" href="//fonts.gstatic.com"> 11 <link href="https://fonts.googleapis.com/css?family=Nunito:200,200i,300,300i,400,400i,600,600i,700,700i,800,800i,900,900i" rel="stylesheet"> 12 <link href="{{ asset('css/sb-admin-2.min.css') }}" rel="stylesheet"> 13 </head> 14 <body id="page-top"> 15 <div id="wrapper"> 16 @include('partials.sidebar') 17 <div id="content"> 18 @include('partials.topbar') 19 @yield('content') 20 <footer class="sticky-footer bg-white"> 21 <div class="container my-auto"> 22 <div class="copyright text-center my-auto"> 23 <span>Copyright © {{ config('app.name') }} {{ date('Y') }}</span> 24 </div> 25 </div> 26 </footer> 27 </div> 28 </div> 29 <a class="scroll-to-top rounded" href="#page-top"> 30 <i class="fas fa-angle-up"></i> 31 </a> 32 @include('modals.logout') 33 <script src="{{ asset('vendor/jquery/jquery.min.js') }}"></script> 34 <script src="{{ asset('vendor/bootstrap/js/bootstrap.bundle.min.') }}js"></script> 35 <script src="{{ asset('vendor/jquery-easing/jquery.easing.min.') }}js"></script> 36 <script src="{{ asset('js/sb-admin-2.min.js') }}"></script> 37 <script src="{{ asset('vendor/chart.js/Chart.min.js') }}"></script> 38 <script src="{{ asset('js/demo/chart-area-demo.js') }}"></script> 39 <script src="{{ asset('js/demo/chart-pie-demo.js') }}"></script> 40 </body> 41 </html>
This will be the layout of the entire dashboard. In case you noticed, we included some nonexistent files in the blade template above so let’s create them.
Create a new directory in resources/views called partials and inside this new directory create some new files as seen below.
The first file will be the sidebar.blade.php:
1<!-- File: ./resources/views/sidebar.blade.php --> 2 <ul class="navbar-nav bg-gradient-primary sidebar sidebar-dark accordion" id="accordionSidebar"> 3 <a class="sidebar-brand d-flex align-items-center justify-content-center" href="index.html"> 4 <div class="sidebar-brand-icon rotate-n-15"> 5 <i class="fas fa-laugh-wink"></i> 6 </div> 7 <div class="sidebar-brand-text mx-3">SB Admin <sup>2</sup></div> 8 </a> 9 <hr class="sidebar-divider my-0"> 10 <li class="nav-item active"> 11 <a class="nav-link" href="index.html"> 12 <i class="fas fa-fw fa-tachometer-alt"></i> 13 <span>Dashboard</span> 14 </a> 15 </li> 16 <hr class="sidebar-divider"> 17 <div class="sidebar-heading"> 18 Interface 19 </div> 20 <li class="nav-item"> 21 <a class="nav-link collapsed" href="#" data-toggle="collapse" data-target="#collapseTwo" aria-expanded="true" aria-controls="collapseTwo"> 22 <i class="fas fa-fw fa-cog"></i> 23 <span>Components</span> 24 </a> 25 <div id="collapseTwo" class="collapse" aria-labelledby="headingTwo" data-parent="#accordionSidebar"> 26 <div class="bg-white py-2 collapse-inner rounded"> 27 <h6 class="collapse-header">Custom Components:</h6> 28 <a class="collapse-item" href="buttons.html">Buttons</a> 29 <a class="collapse-item" href="cards.html">Cards</a> 30 </div> 31 </div> 32 </li> 33 <li class="nav-item"> 34 <a class="nav-link collapsed" href="#" data-toggle="collapse" data-target="#collapseUtilities" aria-expanded="true" aria-controls="collapseUtilities"> 35 <i class="fas fa-fw fa-wrench"></i> 36 <span>Utilities</span> 37 </a> 38 <div id="collapseUtilities" class="collapse" aria-labelledby="headingUtilities" data-parent="#accordionSidebar"> 39 <div class="bg-white py-2 collapse-inner rounded"> 40 <h6 class="collapse-header">Custom Utilities:</h6> 41 <a class="collapse-item" href="utilities-color.html">Colors</a> 42 <a class="collapse-item" href="utilities-border.html">Borders</a> 43 <a class="collapse-item" href="utilities-animation.html">Animations</a> 44 <a class="collapse-item" href="utilities-other.html">Other</a> 45 </div> 46 </div> 47 </li> 48 <hr class="sidebar-divider"> 49 <div class="sidebar-heading"> 50 Addons 51 </div> 52 <li class="nav-item"> 53 <a class="nav-link collapsed" href="#" data-toggle="collapse" data-target="#collapsePages" aria-expanded="true" aria-controls="collapsePages"> 54 <i class="fas fa-fw fa-folder"></i> 55 <span>Pages</span> 56 </a> 57 <div id="collapsePages" class="collapse" aria-labelledby="headingPages" data-parent="#accordionSidebar"> 58 <div class="bg-white py-2 collapse-inner rounded"> 59 <h6 class="collapse-header">Login Screens:</h6> 60 <a class="collapse-item" href="login.html">Login</a> 61 <a class="collapse-item" href="register.html">Register</a> 62 <a class="collapse-item" href="forgot-password.html">Forgot Password</a> 63 <div class="collapse-divider"></div> 64 <h6 class="collapse-header">Other Pages:</h6> 65 <a class="collapse-item" href="404.html">404 Page</a> 66 <a class="collapse-item" href="blank.html">Blank Page</a> 67 </div> 68 </div> 69 </li> 70 <li class="nav-item"> 71 <a class="nav-link" href="charts.html"> 72 <i class="fas fa-fw fa-chart-area"></i> 73 <span>Charts</span></a> 74 </li> 75 <li class="nav-item"> 76 <a class="nav-link" href="tables.html"> 77 <i class="fas fa-fw fa-table"></i> 78 <span>Tables</span></a> 79 </li> 80 <hr class="sidebar-divider d-none d-md-block"> 81 <div class="text-center d-none d-md-inline"> 82 <button class="rounded-circle border-0" id="sidebarToggle"></button> 83 </div> 84 </ul>
The above is just the extracted sidebar from the theme we downloaded earlier. Next create the second file topbar.blade.php inside the same partials directory:
1<!-- File: ./resources/views/topbar.blade.php --> 2 <nav class="navbar navbar-expand navbar-light bg-white topbar mb-4 static-top shadow"> 3 <button id="sidebarToggleTop" class="btn btn-link d-md-none rounded-circle mr-3"> 4 <i class="fa fa-bars"></i> 5 </button> 6 <form class="d-none d-sm-inline-block form-inline mr-auto ml-md-3 my-2 my-md-0 mw-100 navbar-search"> 7 <div class="input-group"> 8 <input type="text" class="form-control bg-light border-0 small" placeholder="Search for..." aria-label="Search" aria-describedby="basic-addon2"> 9 <div class="input-group-append"> 10 <button class="btn btn-primary" type="button"> 11 <i class="fas fa-search fa-sm"></i> 12 </button> 13 </div> 14 </div> 15 </form> 16 <ul class="navbar-nav ml-auto"> 17 <li class="nav-item dropdown no-arrow d-sm-none"> 18 <a class="nav-link dropdown-toggle" href="#" id="searchDropdown" role="button" data-toggle="dropdown" aria-haspopup="true" aria-expanded="false"> 19 <i class="fas fa-search fa-fw"></i> 20 </a> 21 <div class="dropdown-menu dropdown-menu-right p-3 shadow animated--grow-in" aria-labelledby="searchDropdown"> 22 <form class="form-inline mr-auto w-100 navbar-search"> 23 <div class="input-group"> 24 <input type="text" class="form-control bg-light border-0 small" placeholder="Search for..." aria-label="Search" aria-describedby="basic-addon2"> 25 <div class="input-group-append"> 26 <button class="btn btn-primary" type="button"> 27 <i class="fas fa-search fa-sm"></i> 28 </button> 29 </div> 30 </div> 31 </form> 32 </div> 33 </li> 34 <div class="topbar-divider d-none d-sm-block"></div> 35 <li class="nav-item dropdown no-arrow"> 36 <a class="nav-link dropdown-toggle" href="#" id="userDropdown" role="button" data-toggle="dropdown" aria-haspopup="true" aria-expanded="false"> 37 <span class="mr-2 d-none d-lg-inline text-gray-600 small">{{ auth()->user()->name }}</span> 38 <img class="img-profile rounded-circle" src="https://source.unsplash.com/QAB-WJcbgJk/60x60"> 39 </a> 40 <div class="dropdown-menu dropdown-menu-right shadow animated--grow-in" aria-labelledby="userDropdown"> 41 <a class="dropdown-item" href="#"> 42 <i class="fas fa-user fa-sm fa-fw mr-2 text-gray-400"></i> Profile 43 </a> 44 <a class="dropdown-item" href="#"> 45 <i class="fas fa-cogs fa-sm fa-fw mr-2 text-gray-400"></i> Settings 46 </a> 47 <a class="dropdown-item" href="#"> 48 <i class="fas fa-list fa-sm fa-fw mr-2 text-gray-400"></i> Activity Log 49 </a> 50 <div class="dropdown-divider"></div> 51 <a class="dropdown-item" href="#" data-toggle="modal" data-target="#logoutModal"> 52 <i class="fas fa-sign-out-alt fa-sm fa-fw mr-2 text-gray-400"></i> Logout 53 </a> 54 </div> 55 </li> 56 </ul> 57 </nav>
Now that we have both files, create a new directory modals inside the resources/views directory and inside this directory add this new file logout.blade.php:
1<!-- File: ./resources/views/modals/logout.blade.php --> 2 <div class="modal fade" id="logoutModal" tabindex="-1" role="dialog" aria-labelledby="exampleModalLabel" aria-hidden="true"> 3 <div class="modal-dialog" role="document"> 4 <div class="modal-content"> 5 <div class="modal-header"> 6 <h5 class="modal-title" id="exampleModalLabel">Ready to Leave?</h5> 7 <button class="close" type="button" data-dismiss="modal" aria-label="Close"> 8 <span aria-hidden="true">×</span> 9 </button> 10 </div> 11 <div class="modal-body">Select "Logout" below if you are ready to end your current session.</div> 12 <div class="modal-footer"> 13 <button class="btn btn-secondary" type="button" data-dismiss="modal">Cancel</button> 14 <a class="btn btn-primary" href="{{ route('logout') }}" 15 onclick="event.preventDefault(); 16 document.getElementById('logout-form').submit();"> 17 {{ __('Logout') }} 18 </a> 19 <form id="logout-form" action="{{ route('logout') }}" method="POST" style="display: none;"> 20 @csrf 21 </form> 22 </div> 23 </div> 24 </div> 25 </div>
Next, open the resources/views/auth/login.blade.php file and replace the file with the following:
1<!-- File: ./resources/views/auth/login.blade.php --> 2 <!DOCTYPE html> 3 <html lang="{{ str_replace('_', '-', app()->getLocale()) }}"> 4 <head> 5 <meta charset="utf-8"> 6 <meta name="viewport" content="width=device-width, initial-scale=1"> 7 <meta name="csrf-token" content="{{ csrf_token() }}"> 8 <title>Dashboard Login | {{ config('app.name') }}</title> 9 <script src="{{ asset('js/app.js') }}" defer></script> 10 <link rel="dns-prefetch" href="//fonts.gstatic.com"> 11 <link href="{{ asset('vendor/fontawesome-free/css/all.min.css') }}" rel="stylesheet"> 12 <link href="https://fonts.googleapis.com/css?family=Nunito:200,200i,300,300i,400,400i,600,600i,700,700i,800,800i,900,900i" rel="stylesheet"> 13 <link href="{{ asset('css/sb-admin-2.min.css') }}" rel="stylesheet"> 14 </head> 15 <body class="bg-gradient-primary"> 16 <div class="container"> 17 <div class="row justify-content-center"> 18 <div class="col-xl-10 col-lg-12 col-md-9"> 19 <div class="card o-hidden border-0 shadow-lg my-5"> 20 <div class="card-body p-0"> 21 <div class="row"> 22 <div class="col-lg-6 d-none d-lg-block"> 23 <img src="https://source.unsplash.com/K4mSJ7kc0As/464x577"> 24 </div> 25 <div class="col-lg-6"> 26 <div class="p-5 d-none" id="loginApprovalQueue"> 27 <div class="w-50 my-5 mx-auto mobilePhone"> 28 <img src="{{ asset('img/approval-mobile.svg') }}" class="w-100"> 29 </div> 30 <h5 class="text-center text-primary">We sent an approval request to your registered devices</h5> 31 <small class="d-block text-secondary text-center"> 32 To log in, open the dashboard app on one of your registered devices and approve the login request. 33 </small> 34 <div class="text-center mt-3"> 35 <img src="{{ asset('/img/spinner.svg') }}" alt=""> 36 </div> 37 </div> 38 <div class="p-5" id="loginFormWrapper"> 39 <div class="text-center"> 40 <h1 class="h4 text-gray-900 mb-4">Log in</h1> 41 </div> 42 <form method="POST" action="{{ route('login') }}" class="user" id="authenticationForm"> 43 @csrf 44 <div class="form-group"> 45 <input type="email" class="form-control form-control-user" id="email" aria-describedby="emailHelp" placeholder="Email Address" name="email" value="{{ old('email') }}" required autofocus> 46 </div> 47 <div class="form-group"> 48 <input type="password" class="form-control form-control-user" id="password" placeholder="Password" name="password" required> 49 </div> 50 <div class="form-group"> 51 <div class="custom-control custom-checkbox small"> 52 <input type="checkbox" class="custom-control-input" id="remember" name="remember" {{ old('remember') ? 'checked' : '' }}> 53 <label class="custom-control-label" for="remember">Remember Me</label> 54 </div> 55 </div> 56 <button type="submit" class="btn btn-primary btn-user btn-block"> 57 Login 58 </button> 59 <hr> 60 <a href="index.html" class="btn btn-google btn-user btn-block"> 61 <i class="fab fa-google fa-fw"></i> Login with Google 62 </a> 63 <a href="index.html" class="btn btn-facebook btn-user btn-block"> 64 <i class="fab fa-facebook-f fa-fw"></i> Login with Facebook 65 </a> 66 </form> 67 <hr> 68 @if (Route::has('password.request')) 69 <div class="text-center"> 70 <a class="small" href="{{ route('password.request') }}">Forgot Password?</a> 71 </div> 72 @endif 73 <div class="text-center"> 74 <a class="small" href="{{ route('register') }}">Create an Account!</a> 75 </div> 76 </div> 77 </div> 78 </div> 79 </div> 80 </div> 81 </div> 82 </div> 83 </div> 84 <script src="{{ asset('vendor/jquery/jquery.min.js') }}"></script> 85 <script src="{{ asset('vendor/bootstrap/js/bootstrap.bundle.min.js') }}"></script> 86 <script src="{{ asset('vendor/jquery-easing/jquery.easing.min.js') }}"></script> 87 <script src="{{ asset('js/sb-admin-2.min.js') }}"></script> 88 89 <script type="text/javascript"> 90 const showApprovalAndListenForApproval = callback => { 91 $('#loginFormWrapper').addClass('d-none'); 92 $('#loginApprovalQueue').removeClass('d-none'); 93 94 Echo.channel('auth-request') 95 .listen('.approval-granted', e => callback(e.hash)); 96 }; 97 98 const getLoginCredentials = () => { 99 return { 100 email: $('#email').val(), 101 password: $('#password').val(), 102 remember: $('#remember').val() 103 } 104 }; 105 106 $(document).ready(() => { 107 $('#authenticationForm').on('submit', e => { 108 e.preventDefault(); 109 110 const { email, password, remember } = getLoginCredentials(); 111 112 axios.post('/login/confirm', {email, password, remember }) 113 .then(() => { 114 showApprovalAndListenForApproval(hash => { 115 axios.post('/login/authorize', { email, password, remember, hash }) 116 .then(() => (window.location = '/home')) 117 .catch(() => alert('Invalid authorization. Please try again.')); 118 }); 119 }) 120 .catch(() => alert('Invalid login credentials!')); 121 }) 122 }) 123 </script> 124 </body> 125 </html>
Above we have defined the login page, based on the template we downloaded earlier. We have also added Laravel specific login logic to the code. More importantly, note that we have some custom JavaScript at the bottom of the page.
In this script, we capture the login event and then use Axios to send the login request to the backend. When we receive a valid response, we display the login confirmation page so the user knows they have to approve the login from their device.
Also above, we use Laravel Echo to start listening for realtime messages from the Pusher API, we will get to this later. For us to have Echo, we need to install it and build the JavaScript file.
Adding assets and building our JavaScript file
First, open the app.js file in the resources/js directory and replace the contents with the following:
1// File: ./resources/js/app.js 2 window.axios = require('axios'); 3 window.axios.defaults.headers.common['X-Requested-With'] = 'XMLHttpRequest'; 4 5 let token = document.head.querySelector('meta[name="csrf-token"]'); 6 7 if (token) { 8 window.axios.defaults.headers.common['X-CSRF-TOKEN'] = token.content; 9 } else { 10 console.error('CSRF token not found: https://laravel.com/docs/csrf#csrf-x-csrf-token'); 11 } 12 13 import Echo from 'laravel-echo'; 14 15 window.Pusher = require('pusher-js'); 16 window.Echo = new Echo({ 17 broadcaster: 'pusher', 18 key: process.env.MIX_PUSHER_APP_KEY, 19 cluster: process.env.MIX_PUSHER_APP_CLUSTER, 20 encrypted: true 21 });
Next, in your terminal run the following commands to install dependencies and build our JS file.
1$ npm install laravel-echo pusher-js 2 $ npm install 3 $ npm run dev
Next, unzip the downloaded template. Copy the following directories as seen below into the public directory:
- Copy the
.cssfiles fromcssto thepublic/cssdirectory - Copy the
.jsfiles (including thedemodirectory) fromjsto thepublic/jsdirectory - Copy the
.svgfile inimgto thepublic/imgdirectory - Copy the
vendordirectory to thepublicdirectory. - Copy the
approval-mobile.svgandspinner.svgfrom here.
That is all the assets we will be needing from the theme.
Running our application
When the build is complete, we can now run our application. In your terminal, run the following command to start a new PHP server for our application:
$ php artisan serve
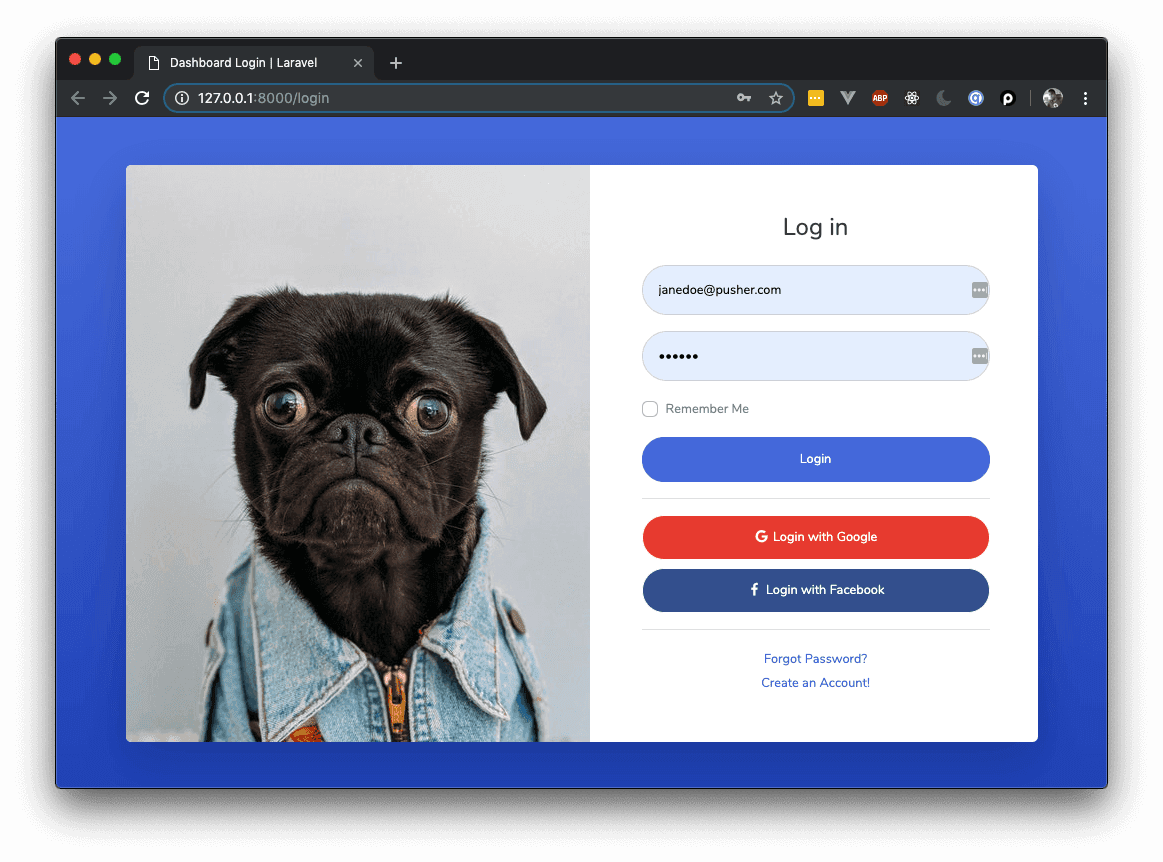
Now when you visit http://127.0.0.1:8000 you should see the login page for the application. It won’t work yet. We will make it work in the next part of the article.
Conclusion
In this part of the tutorial, we set up the application and added the login page.
In the next part, we will be making the login functionality work and also adding a dashboard page.
The source code to the application is available on GitHub.


© 2025 Pusher Ltd. All rights reserved.
Pusher Limited is a company registered in England and Wales (No. 07489873) whose registered office is at MessageBird UK Limited, 3 More London Riverside, 4th Floor, London, United Kingdom, SE1 2AQ.