- Products

- Developers
- User stories
- Blog
- Pricing

Build an Instagram clone with Ionic: Part 4 - Testing your Ionic application on mobile devices
Introduction
Through the series, our GraphQL and event server have been accessible via localhost. Since we have been viewing the application on our local browser, the browser can access the localhost without any issues. These servers need to be accessible on a public URL so that the mobile device can connect to them.
Prerequisites
- You should have followed through the earlier parts of the series.
- Basic knowledge of JavaScript.
- Node installed on your machine (v10.13.0)
- Node Package Manager installed on your machine (v 6.4.1)
- Cordova installed on your machine (v 8.1.2)
- Docker installed on your machine. (version 18.09.2) Download here.
Using localhost.run to share your localhost
To share your localhost on a public URL, let’s use localhost.run. There are no downloads required to use this service. Just open your terminal and paste a code:
ssh -R 80:localhost:<PORT_YOU_WANT_TO_SHARE> ssh.localhost.run
Remember to replace
PORT_YOU_WANT_TO_SHAREwith the actual port on the local server your application is running on.
Making the GraphQL server publicly accessible
Now, your GraphQL server was accessible on port 4466 of your local machine, go ahead and then run this in the terminal:
ssh -R 80:localhost:4466 ssh.localhost.run
Ensure that the GraphQL server is running by checking docker on your machine
This command returns a URL as a response. Go ahead and then paste the URL in your app.module.ts as the link to your GraphQL server:
1// src/app/app.module.ts 2 3 // [...] 4 5 export class AppModule { 6 constructor(apollo: Apollo, httpLink: HttpLink) { 7 apollo.create({ 8 link: httpLink.create({ uri: 'LINK_TO_PUBLICLY_ACCESIBLE_URL' }), // uri specifies the endpoint for our graphql server 9 cache: new InMemoryCache() 10 }) 11 } 12 }
Making the event server publicly accessible
Earlier in the series, we created the event server and served it on port 3128 of the localhost. To make it public accessible too, run this command:
ssh -R 80:localhost:3128 ssh.localhost.run
Ensure that the event server is still running. If it isn’t running, navigate to the
server/of the project and runnode server.js
You will be provided with a publicly accessible URL for the event server. Now, let’s update the places where requests were made to the event server in the code.
First, update the uploadPost method in the CreatePost page:
1// src/pages/create-post/create-post.ts 2 3 // [...] 4 5 export class CreatePostPage { 6 // [...] 7 8 public uploadPost() { 9 this.apollo.mutate({ 10 mutation: createUserPost, 11 variables: { 12 image_url: this.image_url, 13 description: this.description, 14 likes: 10, 15 postedAt: this.posted_at, 16 user: { "connect": { "id": this.user_id } } 17 } 18 }).subscribe((data) => { 19 console.log('uploaded successfuly'); 20 // after sucessful upload, trigger pusher event 21 let post_response: any = data; 22 this.http.post('LINK_TO_PUBLICLY_ACCESSIBLE_URL/trigger-post-event', post_response.data.createPost) 23 .subscribe(() => { 24 this.showAlert('Post Shared', 'Your post has been shared with other users'); 25 this.navCtrl.push(HomePage); 26 }); 27 }, (error) => { 28 this.showAlert('Error', 'There was an error sharing your post, please retry'); 29 console.log('there was an error sending :the query', error); 30 }) 31 } 32 33 // [...] 34 }
Also, go ahead to update the postComment method in the CommentPage:
1// src/pages/comment/comment.ts 2 3 // [...] 4 5 export class CommentPage { 6 // [...] 7 8 public postComment() { 9 this.apollo.mutate({ 10 mutation: makeComment, 11 variables: { 12 message: this.user_comment, 13 postedAt: (new Date()).toISOString(), 14 user: { connect: { id: "YOUR_USER_ID_FROM_GRAPHQL_SERVER" } }, 15 post: { connect: { id: this.post_id } } 16 } 17 }).subscribe((data) => { 18 let post_response: any = data; 19 // after successful upload, trigger new comment event 20 this.http.post('LINK_TO_PUBLICLY_ACCESSIBLE_URL/trigger-comment-event', post_response.data.createComment) 21 .subscribe(() => { 22 this.showAlert('Success', 'Comment posted successfully'); 23 }); 24 }, (error) => { 25 this.showAlert('Error', 'Error posting comment'); 26 }); 27 } 28 29 // [...] 30 }
Now that this is all done, we can access both the GraphQL server and event server anywhere the code is run.
Now, navigate to the root directory of your project and run your application:
ionic serve -c
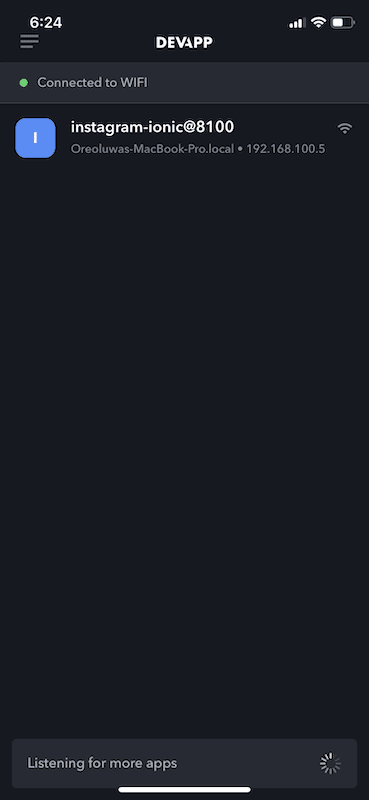
Using the IonicDevApp
To test the application on your mobile device, download the IonicDevApp on your mobile device. Ensure that your device and computer are on the same network and you should see this demo application listed there:
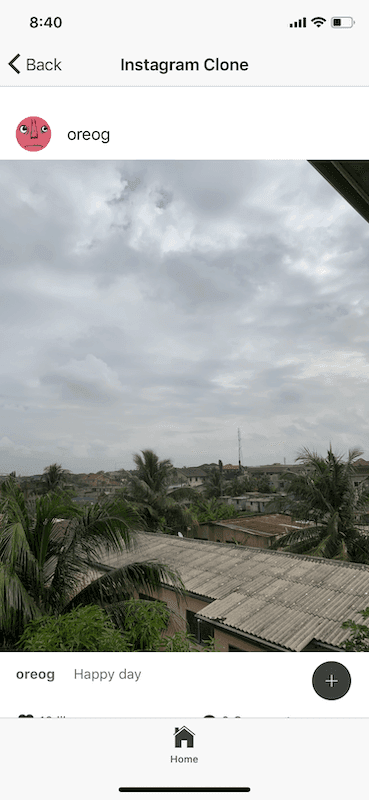
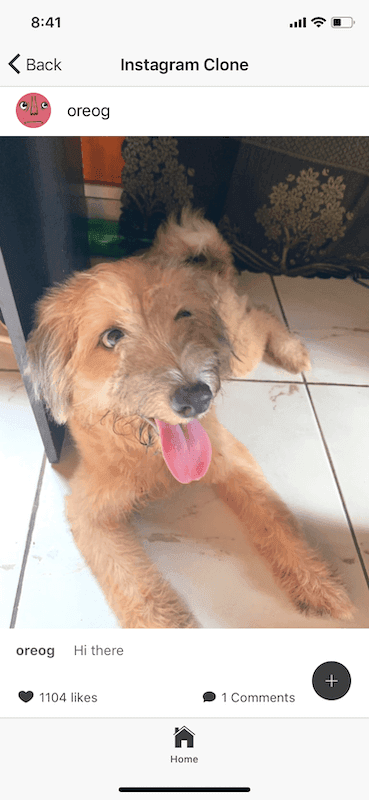
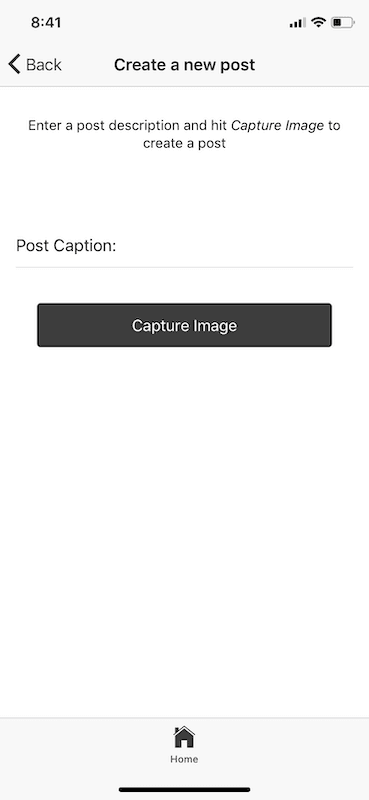
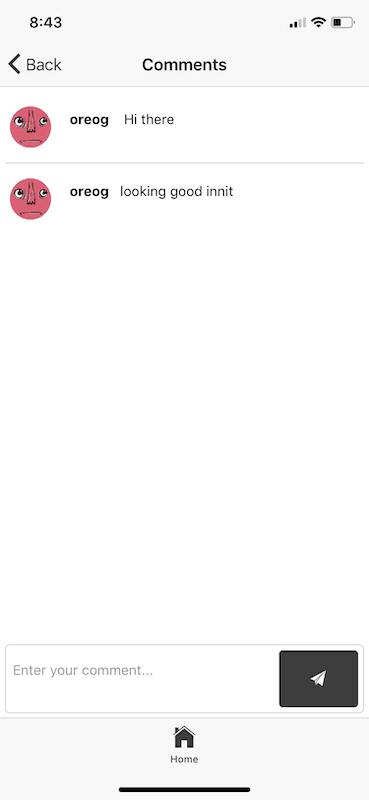
Now, testing with the device, we get the following:

Head over here for more information on how to deploy to target devices.
Conclusion
In this four-part series, we walked through building a simple Instagram clone with Ionic. In the first part of the series, we looked at how to build the interface of the application. In the second part, we went through an introduction to GraphQL and how to fetch data dynamically in the application. The third part of the series walked through uploading posts and comments from the application using Cloudinary and Pusher to enable realtime functionality. Finally, in this part of the series, we looked at steps to making your servers publicly accessible so we could test the application on mobile devices.
Feel free to use the concepts learned in this series when you’re building your own applications. Here’s a link to the full GitHub repository.


© 2025 Pusher Ltd. All rights reserved.
Pusher Limited is a company registered in England and Wales (No. 07489873) whose registered office is at MessageBird UK Limited, 3 More London Riverside, 4th Floor, London, United Kingdom, SE1 2AQ.