- Products

- Developers
- User stories
- Blog
- Pricing

How to add realtime communication to your Flutter app with Pusher Channels
Introduction
In this tutorial, we’ll create a Flutter project from scratch using Pusher Channels to send and receive events in real time from our application.
Flutter is an open source framework by Google for building beautiful, natively compiled, multi-platform applications from a single codebase.
You can use Channels to bring scalable realtime features to your apps via our pub/sub WebSocket-based service, providing seamless bi-directional data transactions for highly engaging user experiences.
Set up
To complete this tutorial you'll need the following:
- A Pusher account and a Channels project set up in the dashboard. If you don't already have one you can sign up for the sandbox plan which is completely free and will be more than ample to complete this sample project so you can start experimenting with realtime for Flutter.
- The latest version of Flutter installed on your system. If you’re just starting with Flutter, you can follow the tutorial here to install.
- An IDE of your choice.
Platform support
- Android support for API level greater than 19
- iOS > 10.0
- Web browsers: Chrome, Firefox & Safari
All events/connections can be viewed on the debug console on the Pusher dashboard.
Creating your first Flutter/Pusher app
Set up your project
If you already have a Flutter project you can jump to installing the Pusher SDK.
Creating your first app with Flutter is as easy as
$ flutter create pusher_example
This will create a directory called pusher_example. We can now run the sample app to see if everything is working properly.
1$ cd pusher_example 2$ flutter run
If you do not have Android or iOS Flutter set up on your system by default it should run in web mode and open a browser with the app. This is a simple button counter app.
Install the Pusher SDK
You can install the Pusher Channels Flutter SDK from
$ flutter pub add pusher_channels_flutter
Create app class
Now, let’s create a state class that will contain our app.
Open lib/main.dart in the IDE of your choice.
Class _MyAppState will be our main factory to implement all features. It will contain all the variables and functions for event listening on Channels.
1class _MyAppState extends State<MyApp> { 2 PusherChannelsFlutter pusher = PusherChannelsFlutter.getInstance(); 3 String _log = 'output:\n'; 4 final _apiKey = TextEditingController(); 5 final _cluster = TextEditingController(); 6 final _channelName = TextEditingController(); 7 final _eventName = TextEditingController(); 8 final _channelFormKey = GlobalKey<FormState>(); 9 final _eventFormKey = GlobalKey<FormState>(); 10 final _listViewController = ScrollController(); 11 final _data = TextEditingController(); 12 13 void log(String text) { 14 print("LOG: $text"); 15 setState(() { 16 _log += text + "\n"; 17 Timer( 18 const Duration(milliseconds: 100), 19 () => _listViewController 20 .jumpTo(_listViewController.position.maxScrollExtent)); 21 }); 22 }
With our class initiated with the required variables in place, we can get to work on controllers.
The method onConnectPressed() establishes a connection to Pusher and declares all the different event listeners.
1void onConnectPressed() async { 2 if (!_channelFormKey.currentState!.validate()) { 3 return; 4 } 5 // Remove keyboard 6 FocusScope.of(context).requestFocus(FocusNode()); 7 SharedPreferences prefs = await SharedPreferences.getInstance(); 8 prefs.setString("apiKey", _apiKey.text); 9 prefs.setString("cluster", _cluster.text); 10 prefs.setString("channelName", _channelName.text); 11 12 try { 13 await pusher.init( 14 apiKey: _apiKey.text, 15 cluster: _cluster.text, 16 onConnectionStateChange: onConnectionStateChange, 17 onError: onError, 18 onSubscriptionSucceeded: onSubscriptionSucceeded, 19 onEvent: onEvent, 20 onSubscriptionError: onSubscriptionError, 21 onDecryptionFailure: onDecryptionFailure, 22 onMemberAdded: onMemberAdded, 23 onMemberRemoved: onMemberRemoved, 24 // authEndpoint: "<Your Authendpoint Url>", 25 // onAuthorizer: onAuthorizer 26 ); 27 await pusher.subscribe(channelName: _channelName.text); 28 await pusher.connect(); 29 } catch (e) { 30 log("ERROR: $e"); 31 } 32 }
The method onTriggerEventPressed() implements the client to client communication. This will send the text from the front end with the desired event name.
1void onTriggerEventPressed() async { 2 var eventFormValidated = _eventFormKey.currentState!.validate(); 3 4 if (!eventFormValidated) { 5 return; 6 } 7 SharedPreferences prefs = await SharedPreferences.getInstance(); 8 prefs.setString("eventName", _eventName.text); 9 prefs.setString("data", _data.text); 10 pusher.trigger(PusherEvent( 11 channelName: _channelName.text, 12 eventName: _eventName.text, 13 data: _data.text)); 14 }
Now let’s add more controllers for some other events. These are attached to the init function in onConnectPressed().
1void onConnectionStateChange(dynamic currentState, dynamic previousState) { 2 log("Connection: $currentState"); 3 } 4 void onError(String message, int? code, dynamic e) { 5 log("onError: $message code: $code exception: $e"); 6 } 7 void onEvent(PusherEvent event) { 8 log("onEvent: $event"); 9 } 10 void onSubscriptionSucceeded(String channelName, dynamic data) { 11 log("onSubscriptionSucceeded: $channelName data: $data"); 12 final me = pusher.getChannel(channelName)?.me; 13 log("Me: $me"); 14 } 15 void onSubscriptionError(String message, dynamic e) { 16 log("onSubscriptionError: $message Exception: $e"); 17 } 18 void onDecryptionFailure(String event, String reason) { 19 log("onDecryptionFailure: $event reason: $reason"); 20 } 21 void onMemberAdded(String channelName, PusherMember member) { 22 log("onMemberAdded: $channelName user: $member"); 23 } 24 void onMemberRemoved(String channelName, PusherMember member) { 25 log("onMemberRemoved: $channelName user: $member"); 26 }
Initiate the parameters by initPlatformState().
1// Platform messages are asynchronous, so we initialize in an async method. 2 Future<void> initPlatformState() async { 3 // If the widget was removed from the tree while the asynchronous platform 4 // message was in flight, we want to discard the reply rather than calling 5 // setState to update our non-existent appearance. 6 if (!mounted) return; 7 SharedPreferences prefs = await SharedPreferences.getInstance(); 8 setState(() { 9 _apiKey.text = prefs.getString("apiKey") ?? ''; 10 _cluster.text = prefs.getString("cluster") ?? 'eu'; 11 _channelName.text = prefs.getString("channelName") ?? 'presence-channel'; 12 _eventName.text = prefs.getString("eventName") ?? 'client-event'; 13 _data.text = prefs.getString("data") ?? 'test'; 14 }); 15 } 16 17@override 18 void initState() { 19 super.initState(); 20 initPlatformState(); 21 }
That’s the most complicated part done with!
It's time to put everything together with a UI.
1@override 2 Widget build(BuildContext context) { 3 return MaterialApp( 4 home: Scaffold( 5 appBar: AppBar( 6 title: Text(pusher.connectionState == 'DISCONNECTED' 7 ? 'Pusher Channels Example' 8 : _channelName.text), 9 ), 10 body: Padding( 11 padding: const EdgeInsets.all(8.0), 12 child: ListView( 13 controller: _listViewController, 14 scrollDirection: Axis.vertical, 15 shrinkWrap: true, 16 children: <Widget>[ 17 if (pusher.connectionState != 'CONNECTED') 18 Form( 19 key: _channelFormKey, 20 child: Column(children: <Widget>[ 21 TextFormField( 22 controller: _apiKey, 23 validator: (String? value) { 24 return (value != null && value.isEmpty) 25 ? 'Please enter your API key.' 26 : null; 27 }, 28 decoration: 29 const InputDecoration(labelText: 'API Key'), 30 ), 31 TextFormField( 32 controller: _cluster, 33 validator: (String? value) { 34 return (value != null && value.isEmpty) 35 ? 'Please enter your cluster.' 36 : null; 37 }, 38 decoration: const InputDecoration( 39 labelText: 'Cluster', 40 ), 41 ), 42 TextFormField( 43 controller: _channelName, 44 validator: (String? value) { 45 return (value != null && value.isEmpty) 46 ? 'Please enter your channel name.' 47 : null; 48 }, 49 decoration: const InputDecoration( 50 labelText: 'Channel', 51 ), 52 ), 53 ElevatedButton( 54 onPressed: onConnectPressed, 55 child: const Text('Connect'), 56 ) 57 ])) 58 else 59 Form( 60 key: _eventFormKey, 61 child: Column(children: <Widget>[ 62 ListView.builder( 63 scrollDirection: Axis.vertical, 64 shrinkWrap: true, 65 itemCount: pusher 66 .channels[_channelName.text]?.members.length, 67 itemBuilder: (context, index) { 68 final member = pusher 69 .channels[_channelName.text]!.members 70 .elementAt(index); 71 return ListTile( 72 title: Text(member.userInfo.toString()), 73 subtitle: Text(member.userId)); 74 }), 75 TextFormField( 76 controller: _eventName, 77 validator: (String? value) { 78 return (value != null && value.isEmpty) 79 ? 'Please enter your event name.' 80 : null; 81 }, 82 decoration: const InputDecoration( 83 labelText: 'Event', 84 ), 85 ), 86 TextFormField( 87 controller: _data, 88 decoration: const InputDecoration( 89 labelText: 'Data', 90 ), 91 ), 92 ElevatedButton( 93 onPressed: onTriggerEventPressed, 94 child: const Text('Trigger Event'), 95 ), 96 ]), 97 ), 98 SingleChildScrollView( 99 scrollDirection: Axis.vertical, child: Text(_log)), 100 ]), 101 ), 102 ), 103 ); 104 }
Running a web-specific configuration
To run the web version of this application the following needs to be added to web/index.html.
1<head> 2 <script charset="utf-8" src="https://js.pusher.com/7.0/pusher.min.js"></script> 3 ... 4</head>
iOS-specific integration
The Pusher Channels Flutter plugin adds the pusher-websocket-swift cocoapod to your project. In this case you will likely need to run a
$ pod install
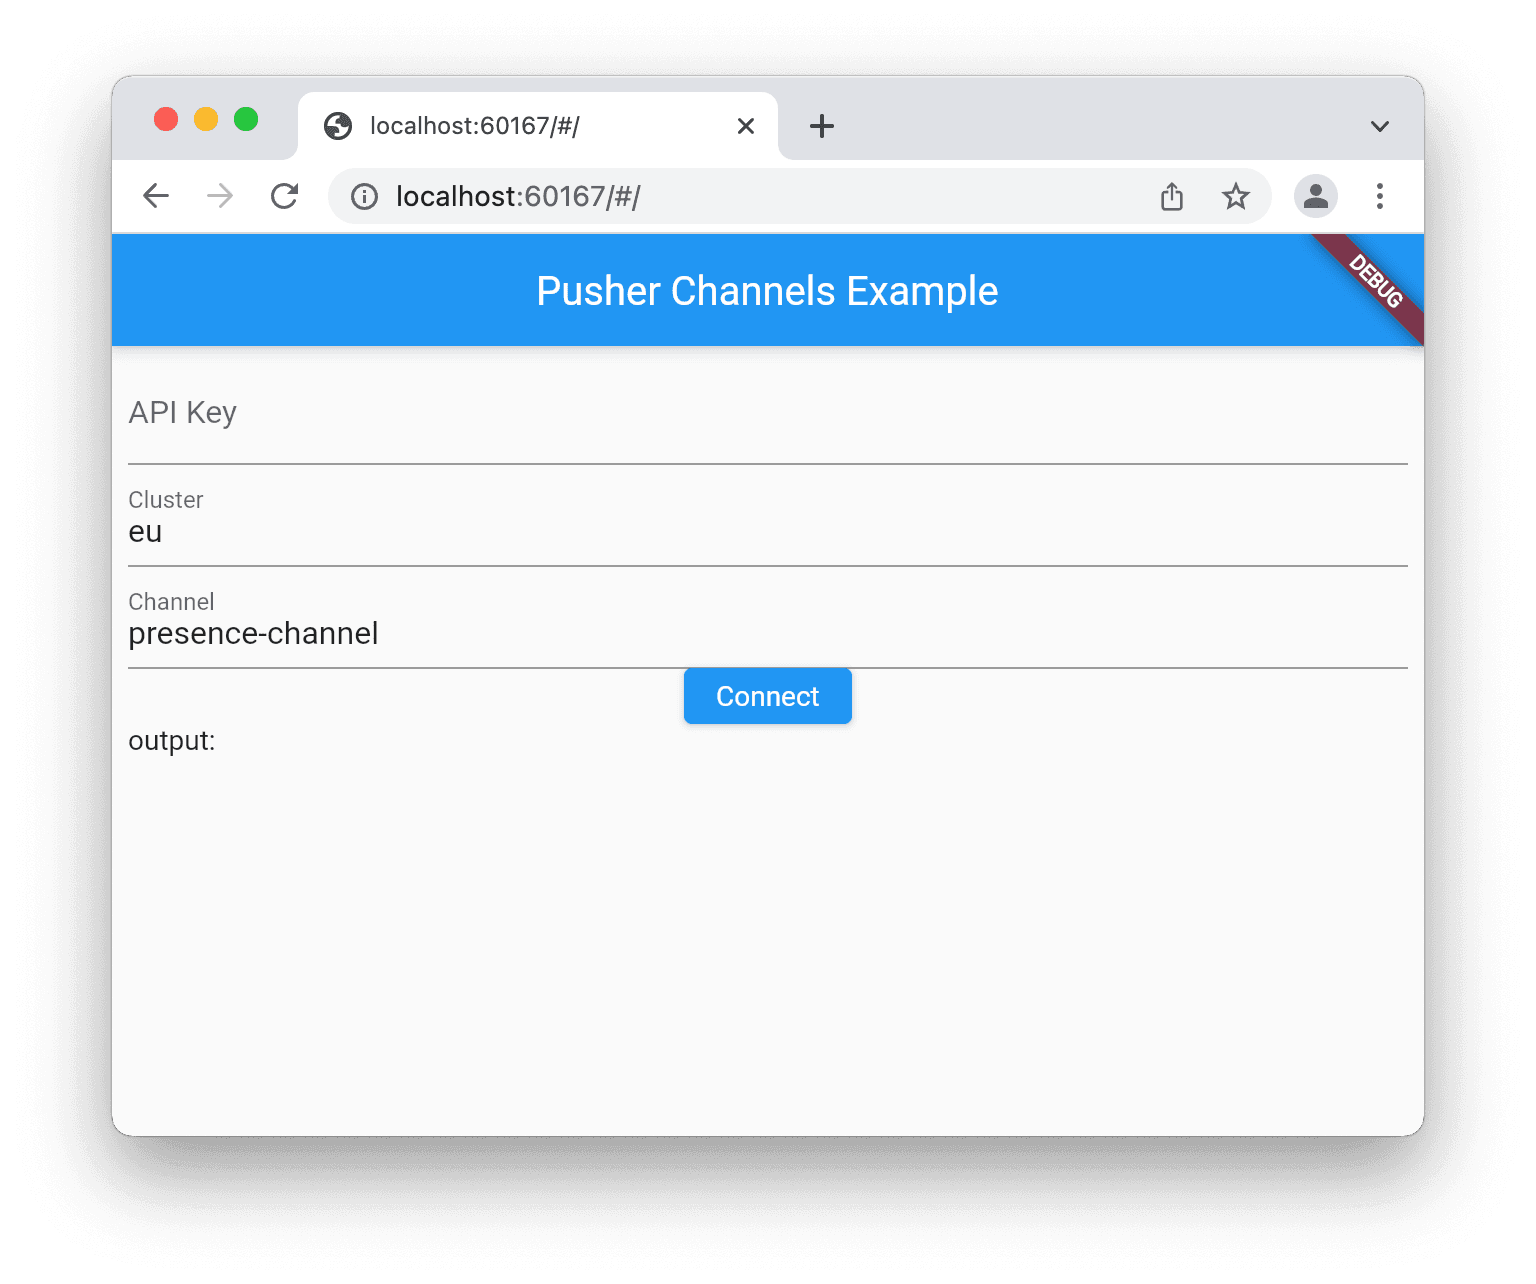
Running the application
That’s it! Now we are ready to run our application. If everything has gone smoothly, you can issue the following command
$ flutter run
And should be able to see a screen like below in your browser:
TLDR; Integrating authentication
To use private and presence channels the pusher.init() function provides two parameters authEndpoint and onAuthorizer.
You can run an auth server using pusher-channels-auth-example. And define the onAuthorizer in _MyAppState.
1dynamic onAuthorizer(String channelName, String socketId, dynamic options) { 2 return { 3 "auth": "foo:bar", 4 "channel_data": '{"user_id": 1}', 5 "shared_secret": "foobar" 6 }; 7 }
To read more on auth go here.
Check out our use cases to read more about what you can build on your Flutter apps using Pusher.


© 2026 Pusher Ltd. All rights reserved.
Pusher Limited is a company registered in England and Wales (No. 07489873) whose registered office is at MessageBird UK Limited, 3 More London Riverside, 4th Floor, London, United Kingdom, SE1 2AQ.