- Products

- Developers
- User stories
- Blog
- Pricing

Create a food ordering app in React Native - Part 3: Adding push notifications
- Introduction
- Prerequisites
- Feature overview
- Setting up a Firebase project
- Setting up Beams
- Setting up Chatkit webhooks
- Setting up the ordering and driver app
- Setting up the server
- Updating the ordering app
- GlobalContext
- OrderSummary
- TrackOrder screen
- Updating the driver app
- OrderMap screen
- Updating the server
- Running the app
- Conclusion and next steps
Introduction
This is the final part of a three-part series on creating a food ordering app in React Native. In the first part we created a very simple food ordering app, and in the second part we created a driver app with chat functionality. In this part, we’re going to add push notifications to inform both the customer and the driver of various events throughout the ordering process.
IMPORTANT: ChatKit has been retired from the Pusher product stack as of April, 2020. This tutorial will no longer be functional in its current version. Explore our other Pusher tutorials to find out how Channels and Beams can help you build.
Prerequisites
This part has the same prerequisites as the first and second part.
You’ll need a Firebase account, Pusher account, and Pusher Beams app for implementing push notifications. To get started with Pusher, create a free account or sign in.
Feature overview
We will be adding push notifications for the following events:
- Driver accepted the order.
- Driver picked the order from the restaurant.
- Driver delivered the order to the customer.
- Driver sent a message to the customer.
- Customer confirmed to let the driver handle the order.
- Customer sent a message to the driver.
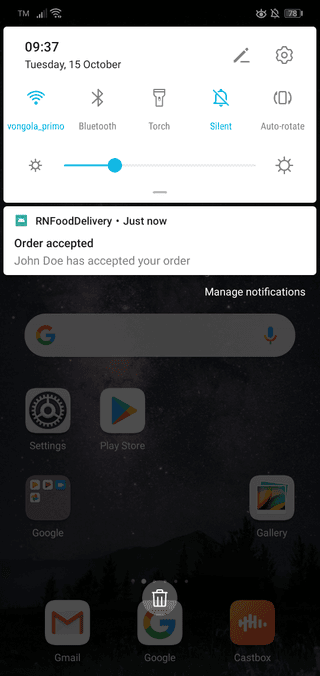
Here are a couple of screenshots. The first one is when the driver has accepted an order, and the second one is when the customer confirmed:

You can find the code on this GitHub repo. The completed code for this part is on the push-notifications branch.
Setting up a Firebase project
Beams depends on Firebase Cloud Messaging (FCM) to send push notifications in Android so we need to set up a Firebase project.
The official documentation on how to create a Firebase project is available here. You can also follow the visual walkthrough in the Beams docs.
Create a separate Firebase project for each of the apps that we created because each one uses a different package name.
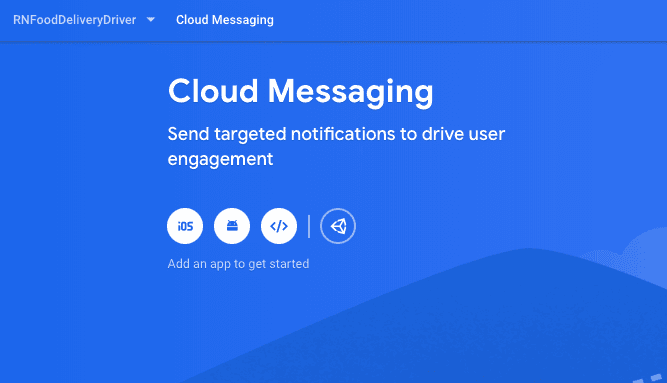
Once the project is created, click on the Cloud Messaging menu on the sidebar and you’ll see this screen. Click on the Android icon to view the form wizard for setting up Firebase on an Android app:
On the screen that follows, enter the package name. Note that you have to do this twice (one for each Firebase project). The first one is the driver app (com.rnfooddeliverydriver), and the second one is for the ordering app (com.rnfooddelivery):
Once you clicked on the Register app, it will ask you to download the config file. Download it and copy it over to the android/app directory for the corresponding app.
Remember to repeat the same process for the ordering app.
Setting up Beams
On your Beams account, you also need to create two app instances. Each corresponds to the Firebase projects you just created.
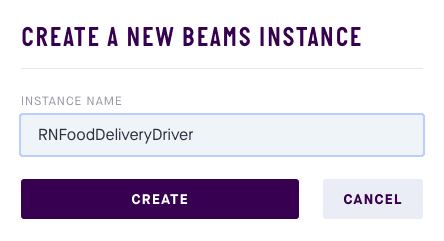
On your Beams dashboard, click on the + CREATE button and enter the name of the app:
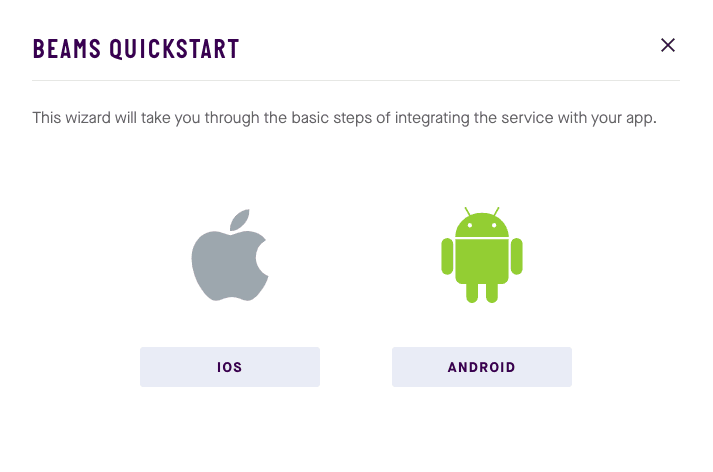
Once the instance created, it walks you through the quickstart. Select ANDROID:
Next, it will ask you to enter the FCM server key. Documentation on how to get it is available here:
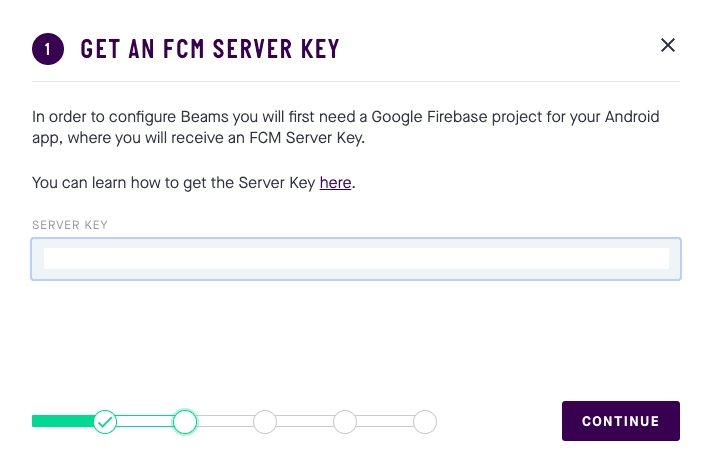
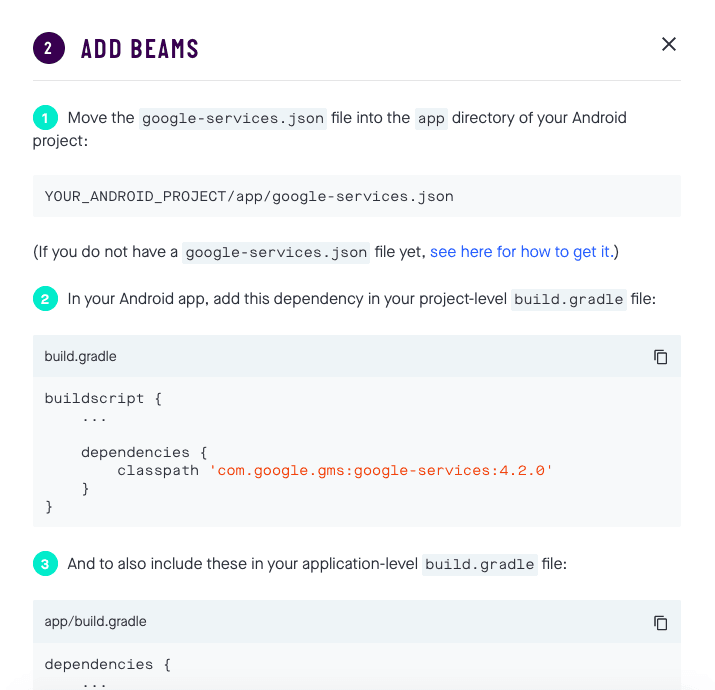
Once that’s done, it will give you instructions on how to add Beams on your app. Some of these apply to React Native, but I’ll just walk you through how to set it up in the Setting up the ordering and driver app section so just skip this one:
Remember to repeat the same process for the ordering app and add the FCM server key from the corresponding Firebase project.
Setting up Chatkit webhooks
IMPORTANT: ChatKit has been retired from the Pusher product stack as of April, 2020. This tutorial will no longer be functional in its current version. Explore our other Pusher tutorials to find out how Channels and Beams can help you build.
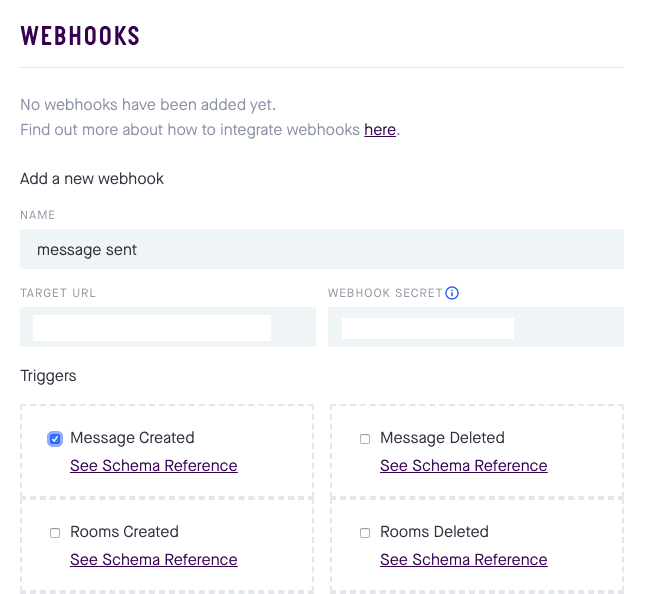
Configure Chatkit webhooks. This allows us to get notified when new messages are sent by any of the users of the app. That’s where we’ll add push notification code to notify the receiving user that somebody has sent them a message. This is especially useful in cases where the receiver is not yet in the chat screen when the message is sent.
You can choose to do this now or later when you run the app. Just know that you can actually execute ngrok at this point and add the target URL using this format: https://YOUR_NGROK_URL/notify. Add a webhook secret as well. Just take note of it because we’re going to add it to the server/.env file:
Setting up the ordering and driver app
The next step is to install and configure the React Native package for implementing push notifications. There’s no official React Native package for Beams yet so we’re using the React Native Push Notifications package. But because this package is already outdated, we’re using a fork instead.
The following instructions should be applied to both the ordering and driver app.
Update your package.json file to add the push notifications package:
1"dependencies": { 2 // ... 3 "react-native-pusher-push-notifications": "git+http://git@github.com/ZeptInc/react-native-pusher-push-notifications#v.2.4.0-zept-master", 4 }
After that, install the package:
yarn install
Next, update the android/settings.gradle file, android/build.gradle, and android/app/build.gradle files to include the necessary configuration:
1// android/settings.gradle 2 rootProject.name = 'RNFoodDelivery' 3 4 include ':app' 5 6 // add these: 7 include ':react-native-pusher-push-notifications' 8 project(':react-native-pusher-push-notifications').projectDir = new File(rootProject.projectDir, '../node_modules/react-native-pusher-push-notifications/android') 9 10 // android/build.gradle 11 buildscript { 12 ext { 13 // ... 14 } 15 repositories { 16 // ... 17 } 18 dependencies { 19 classpath("com.android.tools.build:gradle:3.4.2") 20 classpath 'com.google.gms:google-services:4.2.0' // add this 21 } 22 } 23 24 allprojects { 25 repositories { 26 mavenLocal() 27 maven { 28 // .. 29 } 30 maven { 31 // .. 32 } 33 34 google() 35 jcenter() 36 } 37 } 38 39 // android/app/build.gradle 40 dependencies { 41 implementation fileTree(dir: "libs", include: ["*.jar"]) 42 implementation "com.facebook.react:react-native:+" 43 44 // add these: 45 compile project(':react-native-pusher-push-notifications') 46 implementation 'com.github.ZeptInc:push-notifications-android:1.5.0-alpha' 47 } 48 49 // ... 50 51 apply from: file("../../node_modules/@react-native-community/cli-platform-android/native_modules.gradle"); applyNativeModulesAppBuildGradle(project) 52 53 apply plugin: 'com.google.gms.google-services' // add this
Lastly, update your .env file for the ordering app to include the Beams instance ID for the ordering app:
BEAMS_INSTANCE_ID="YOUR BEAMS INSTANCE ID FOR THE ORDERING APP"
Do the same for the driver app:
BEAMS_INSTANCE_ID="YOUR BEAMS INSTANCE ID FOR THE DRIVER APP"
Setting up the server
Since the push notifications will be triggered from the server, we need to install the Beams Server SDK for Node.js. Add the following to your server’s package.json file:
1"dependencies": { 2 // ... 3 "@pusher/push-notifications-server": "^1.2.0", 4 }
After that, execute the following:
yarn install
Lastly, update your server/.env file with your Chatkit webhook secret and the instance and secret key for both Beams app instances:
1CHATKIT_WEBHOOK_SECRET="YOUR CHATKIT WEBHOOK SECRET" 2 3 BEAMS_INSTANCE_ID_DRIVER="YOUR BEAMS INSTANCE ID FOR THE DRIVER APP" 4 BEAMS_SECRET_KEY_DRIVER="YOUR BEAMS SECRET KEY FOR THE DRIVER APP" 5 6 BEAMS_INSTANCE_ID_CUSTOMER="YOUR BEAMS INSTANCE ID FOR THE ORDERING APP" 7 BEAMS_SECRET_KEY_CUSTOMER="YOUR BEAMS SECRET KEY FOR THE ORDERING APP"
Updating the ordering app
At this point, we’re now ready to start updating the apps. First we’ll start with the ordering app.
GlobalContext
Open the GlobalContext.js file and add a user_type. This allows us to specify which type of user triggered the push notification. Which in turn allows us to determine which Beams app instance to use for sending the push notification. If it’s the customer who triggered it then it means the receiver is the driver so we use the Beams app instance for the driver app. Otherwise, we use the Beams app instance for the ordering app. You’ll see this in action in the server code later on:
1export class AppContextProvider extends React.Component { 2 state = { 3 cart_items: [], 4 user_id: 'wernancheta', 5 user_name: 'Wern Ancheta', 6 user_type: 'customer', // add this 7 room_id: '', 8 room_name: '', 9 }; 10 // ... 11 }
OrderSummary
Next we update the Chatkit login code so it uses the user_type that we just added:
1// src/screens/OrderSummary.js 2 placeOrder = async () => { 3 // ... 4 5 const { 6 address: restaurant_address, 7 location: restaurant_location, 8 } = this.context.cart_items[0].restaurant; 9 10 try { 11 await axios.post(`${BASE_URL}/login`, { 12 user_id: this.context.user_id, 13 user_name: this.context.user_name, 14 user_type: this.context.user_type, // add this 15 }); 16 } catch (err) { 17 // ... 18 } 19 20 // ... 21 }
TrackOrder screen
The TrackOrder screen is where we put the code for implementing push notifications. Start by importing the react-native-pusher-push-notifications package:
1// src/screens/TrackOrder.js 2 import RNPusherPushNotifications from 'react-native-pusher-push-notifications';
Next, set the Beams app instance and create the function for subscribing to a specific device interest. In this case, we’re using the name subscribeToRoom() because we’re using the room ID as the device interest name:
1RNPusherPushNotifications.setInstanceId(Config.BEAMS_INSTANCE_ID); 2 3 const subscribeToRoom = room_id => { 4 RNPusherPushNotifications.subscribe( 5 room_id, 6 (statusCode, response) => { 7 console.error(statusCode, response); 8 }, 9 () => { 10 console.log('Success'); 11 }, 12 ); 13 };
We’re using the concept of device interests in order to subscribe users to a specific push notification channel. Later on in the server, we publish to the same device interest so that the devices which are subscribed to it can receive the notification.
Next, in your componentDidMount(), add the code for triggering a push notification to be sent to the driver. This is sent when the customer confirms that the driver can proceed with processing the order after the driver has accepted their request. The way this works is that we add a specific route to the server later on to handle the triggering of push notifications. All we have to do from the frontend is supply the room_id, push_type, and data and it will deliver the push notification to the recipient:
1componentDidMount() { 2 // ... 3 this.user_ride_channel.bind('client-driver-response', data => { 4 const {hasDriver} = this.state; 5 this.user_ride_channel.trigger('client-driver-response', { 6 response: hasDriver ? 'no' : 'yes', 7 room_id: hasDriver ? '0' : this.context.room_id, 8 room_name: hasDriver ? '' : this.context.room_name, 9 }); 10 11 // add this 12 if (!hasDriver) { 13 setTimeout(async () => { 14 const res = await axios.post( 15 `${BASE_URL}/push/${this.context.room_id}`, 16 { 17 push_type: 'customer_confirmed', 18 data: this.context.user_name, 19 }, 20 ); 21 }, 5000); 22 } 23 24 }); 25 }
Still inside componentDidMount(), right before the function’s closing curly brace, add the code to subscribe to the room and listen for notifications. In this case, we simply alert the user. This is only triggered when the app is in the foreground. If the app is in the background then the default behavior is to add a new item in the notification panel:
1this.user_ride_channel.bind('client-order-update', data => { 2 this.setState({ 3 orderStatusText: orderSteps[data.step], 4 }); 5 }); 6 7 // add these: 8 subscribeToRoom(this.context.room_id); // subscribe to device interest 9 10 RNPusherPushNotifications.on('notification', noty => { // listen for notifications 11 Alert.alert(noty.title, noty.body); 12 });
Updating the driver app
We now proceed to the driver app. What we need to do is pretty much the same thing we did in the ordering app. Only this time, we’re triggering a lot more notifications.
OrderMap screen
First, update the OrderMap screen:
1// src/screens/OrderMap.js 2 import axios from 'axios'; 3 import RNPusherPushNotifications from 'react-native-pusher-push-notifications'; // add this 4 5 // .. 6 const GOOGLE_API_KEY = Config.GOOGLE_API_KEY; 7 8 // add these 9 RNPusherPushNotifications.setInstanceId(Config.BEAMS_INSTANCE_ID); 10 11 const subscribeToRoom = room_id => { 12 RNPusherPushNotifications.subscribe( 13 room_id, 14 (statusCode, response) => { 15 console.error(statusCode, response); 16 }, 17 () => { 18 console.log('Success'); 19 }, 20 ); 21 }; 22 // next: add triggerNotification()
Because we now have to trigger multiple notifications, we also need to add a function to encapsulate the functionality so we don’t repeat ourselves. You’ll see how the arguments we’re passing here will be utilized in the server later on. For now, know that the push_type is the key that decides which user type the notification will be sent to as well as the title and body of the notification:
1triggerNotification = async (room_id, push_type, data) => { 2 try { 3 await axios.post(`${BASE_URL}/push/${room_id}`, { 4 push_type, 5 data, 6 }); 7 } catch (err) { 8 console.log('error triggering notification: ', err); 9 } 10 }
Next, in the constructor(), add the user_type:
1constructor(props) { 2 super(props); 3 4 this.user_id = 'johndoe'; 5 this.user_name = 'John Doe'; 6 this.user_type = 'driver'; // add this 7 8 // ... 9 }
Update componentDidMount() to add the code for listening to notifications. Also, update the Chatkit login code to include the user_type:
1componentDidMount() { 2 3 // ... 4 this.setState({ 5 locationPermission: location_permission, 6 }); 7 8 RNPusherPushNotifications.on('notification', noty => { 9 Alert.alert(noty.title, noty.body); 10 }); 11 12 try { 13 await axios.post(`${BASE_URL}/login`, { 14 user_id: this.user_id, 15 user_name: this.user_name, 16 user_type: this.user_type, // add this 17 }); 18 } catch (err) { 19 console.log('error creating user: ', err); 20 } 21 }
When the driver accepts an order, we want to notify the customer that somebody has accepted their order. Before triggering the notification though, we subscribe to the room first so that the driver will also receive notifications that are triggered by the customer:
1_acceptOrder = () => { 2 // ... 3 this.ride_channel.bind('pusher:subscription_succeeded', () => { 4 // .. 5 6 this.ride_channel.bind( 7 'client-driver-response', 8 async customer_response => { 9 if (customer_response.response == 'yes') { 10 // .. 11 12 this.room_id = room_id; 13 this.room_name = room_name; 14 15 // add these 16 subscribeToRoom(room_id); 17 await triggerNotification( 18 room_id, 19 'driver_accepted_order', 20 this.username, 21 ); 22 23 // .. 24 } 25 } 26 ); 27 28 }); 29 }
When an order is picked, trigger a notification:
1_pickedOrder = async () => { 2 // ... 3 await triggerNotification( 4 this.room_id, 5 'driver_picked_order', 6 this.username, 7 ); 8 }
And lastly, when an order is delivered:
1_deliveredOrder = async () => { 2 // ... 3 4 await triggerNotification( 5 this.room_id, 6 'driver_delivered_order', 7 this.user_name, 8 ); 9 }
Updating the server
The final step is to update the server code to send out those push notifications.
First, include the additional packages that we need:
1// server/index.js 2 const PushNotifications = require('@pusher/push-notifications-server'); 3 const crypto = require('crypto');
cryptois a built-in module in Node.js so all we have to do is import it. We’re using it to calculate the signature to verify if the requests are indeed coming from Chatkit’s servers.
Next, add the Chatkit webhook secret and initialize the Beams client for each app:
1const CHATKIT_WEBHOOK_SECRET = process.env.CHATKIT_WEBHOOK_SECRET; 2 3 // for sending notifications for the driver app 4 const beamsClientDriver = new PushNotifications({ 5 instanceId: process.env.BEAMS_INSTANCE_ID_DRIVER, 6 secretKey: process.env.BEAMS_SECRET_KEY_DRIVER, 7 }); 8 9 // for sending notifications for the ordering app 10 const beamsClientCustomer = new PushNotifications({ 11 instanceId: process.env.BEAMS_INSTANCE_ID_CUSTOMER, 12 secretKey: process.env.BEAMS_SECRET_KEY_CUSTOMER, 13 });
After that, add the push_types. These are the notification types that the server will handle. As you can see, it’s just a map of the title and body to be used for each notification type. The [data] is replaced with the data supplied for each notification request:
1const push_types = { 2 driver_accepted_order: { 3 title: 'Order accepted', 4 body: '[data] has accepted your order', 5 }, 6 driver_picked_order: { 7 title: 'Picked up order', 8 body: '[data] has picked up your order from the restaurant', 9 }, 10 driver_delivered_order: { 11 title: 'Order delivered', 12 body: '[data] has delivered your order', 13 }, 14 driver_sent_message: { 15 title: 'New message', 16 body: '[data]', 17 }, 18 19 customer_confirmed: { 20 title: 'Customer confirmed', 21 body: '[data] has confirmed', 22 }, 23 customer_sent_message: { 24 title: 'New message', 25 body: '[data]', 26 }, 27 };
Next, determine which body parser to use depending on the content type. Chatkit webhooks needs to be processed as plain text so we use bodyParser.text() if the content-type is application/json. This is the content type used by Chatkit’s servers. For the rest of the requests, we’re not really specifying the content type so it’s basically application/text. In those cases, we use the bodyParser.json():
1// app.use(bodyParser.json()); // remove 2 app.use( 3 bodyParser.text({ 4 type: req => { 5 const contype = req.headers['content-type']; 6 if (contype === 'application/json') { 7 return true; 8 } 9 return false; 10 }, 11 }), 12 ); 13 14 app.use( 15 bodyParser.json({ 16 type: req => { 17 const contype = req.headers['content-type']; 18 if (contype !== 'application/json') { 19 return true; 20 } 21 return false; 22 }, 23 }), 24 );
Next, add the function for verifying if the requests came from Chatkit:
1const verifyRequest = req => { 2 const signature = crypto 3 .createHmac('sha1', CHATKIT_WEBHOOK_SECRET) 4 .update(req.body) 5 .digest('hex'); 6 7 return signature === req.get('webhook-signature'); 8 };
If you want to learn more about implementing Chatkit webhooks in a React Native app, check out this tutorial: Integrate Chatkit Webhooks in a React Native Chat App.
Next, add a function for getting a Chatkit user. We’re already using the same functionality in the /login route. But since we’re also going to need it to get the data of the user who sent a message, we’re adding it as well so we can use it for both instances:
1const getUser = async user_id => { 2 try { 3 const user = await chatkit.getUser({ 4 id: user_id, 5 }); 6 return user; 7 } catch (err) { 8 console.log('error getting user: ', err); 9 return false; 10 } 11 };
Next, add the function for sending push notifications. This determines which Beams app instance to use depending on the user_type. If the driver is the one who sent it then the recipient is the customer, thus we use the beamsClientCustomer. Otherwise, we use the beamsClientDriver:
1const publishNotification = async (user_type, order_id, title, body) => { 2 const beamsClient = 3 user_type == 'driver' ? beamsClientCustomer : beamsClientDriver; 4 5 try { 6 await beamsClient.publishToInterests([order_id], { 7 fcm: { 8 notification: { 9 title, 10 body, 11 }, 12 }, 13 }); 14 } catch (err) { 15 console.log('error publishing push notification: ', err); 16 } 17 };
Next, add the function for handling Chatkit webhooks. This handles the “message created” event. This is where we use the custom user data user_type to determine which push notification to send. The room_id is the same as the device interest so we can simply use it as the value for the order_id required by the publishNotification() function:
1const notifyUser = async ({payload}) => { 2 try { 3 const msg = payload.messages[0]; 4 const sender_id = msg.user_id; 5 const sender = await getUser(sender_id); 6 7 const message = msg.parts[0].content.substr(0, 37) + '...'; 8 const order_id = msg.room_id; 9 10 const user_type = sender.custom_data.user_type; 11 12 const push_data = push_types[`${user_type}_sent_message`]; 13 const title = push_data.title; 14 const body = push_data.body.replace('[data]', message); 15 16 await publishNotification(user_type, order_id, title, body); 17 } catch (err) { 18 console.log('notify user err: ', err); 19 } 20 };
Before we proceed to the routes which triggers the notifications, let’s first update the /login route to include the user_type:
1app.post('/login', async (req, res) => { 2 const {user_id, user_name, user_type} = req.body; // add user_type 3 const user = await getUser(user_id); 4 5 if (!user) { 6 await chatkit.createUser({ 7 id: user_id, 8 name: user_name, 9 // add this 10 customData: { 11 user_type, 12 }, 13 }); 14 } 15 16 return res.send('ok'); 17 });
Next, add the route that allows us to trigger push notifications from the app:
1app.post('/room', async (req, res) => { 2 // ... 3 }); 4 5 app.post('/push/:order_id', async (req, res) => { 6 const {data, push_type} = req.body; 7 const {order_id} = req.params; 8 9 const user_type = push_type.split('_')[0]; 10 11 const push_data = push_types[push_type]; 12 const title = push_data.title; 13 const body = push_data.body.replace('[data]', data); 14 15 await publishNotification(user_type, order_id, title, body); 16 17 return res.send('ok); 18 });
Lastly, add the route which handles the Chatkit webhook for new messages:
1app.post('/notify', (req, res) => { 2 if (verifyRequest(req)) { 3 const data = JSON.parse(req.body); 4 const type = data.metadata.event_type; 5 if (type == 'v1.messages_created') { 6 notifyUser(data); 7 } 8 return res.sendStatus(200); 9 } else { 10 console.log('Unverified request'); 11 return res.sendStatus(401); // unauthorized 12 } 13 });
Running the app
At this point, you’re now ready to run the app.
Replace the NGROK_HTTPS_URL on the .env file on both apps then run the app. You can use the same technique we used on part two to run two apps from the same machine.
Don’t forget to update your Chatkit webhook with the ngrok HTTPS URL and the same webhook secret that you added on your server/.env file. Also, clear out all existing Chatkit users because they don’t have the user_type custom data yet.
Conclusion and next steps
That’s it! In this series, we created a food ordering app with React Native, Channels, Chatkit, and Beams. Along the way, you learned how to use various React Native packages for implementing maps, realtime location tracking, chat, and push notifications.
As for the next steps, here are a few ideas for improving the app further:
- Add authentication - currently, the usernames are just hard coded. It would be good to have an authentication in place. You can check out this tutorial as a guide: Using Auth0 for authenticating users in a React Native chat app.
- Add a restaurant app - you might have noticed that there’s really no way for the restaurant to know that someone has ordered a meal from them. You can either create a separate React Native app or simply create a web interface which gets notified everytime an order is received from the app.
- Hande order declines - we’ve only handled the “happy path” in this tutorial. It would be good to handle instances wherein the driver declines an order.
- Notify only nearby drivers - it would be good for the drivers to have a location database which constantly gets updated so that when an order is made, the app will query from this database only the drivers within a certain radius from the customer.
- Improve security - currently, anyone can just have access to the Channels and push notifications route. It would be good to put those behind an authentication.
You can find the full source code on this GitHub repo.
IMPORTANT: ChatKit has been retired from the Pusher product stack as of April, 2020. This tutorial will no longer be functional in its current version. Explore our other Pusher tutorials to find out how Channels and Beams can help you build.


© 2026 Pusher Ltd. All rights reserved.
Pusher Limited is a company registered in England and Wales (No. 07489873) whose registered office is at MessageBird UK Limited, 3 More London Riverside, 4th Floor, London, United Kingdom, SE1 2AQ.