- Products

- Developers
- User stories
- Blog
- Pricing

Build a cryptocurrency alert app using Kotlin and Go: Part 2 - The backend
Introduction
Building a cryptocurrency alert app using Kotlin, Go, and Pusher Beams: Part 2
In the first part of this article, we started building our service by creating our Android application. The application, however, requires a backend to work properly. So in this part, we will be creating the backend of the application.
We will be using Go to build the backend of the application. The framework in Go we will be using is Echo.
As a recap, here is a screen recording of what we will have built when we are done:

Prerequisites
To follow along, you need:
- To have completed part one of the article.
- Android Studio installed on your machine (v3.x or later). Download here.
- Go version 1.10.2 or later installed.
- SQLite installed on your machine.
- Basic knowledge on using the Android Studio IDE.
- Basic knowledge of Kotlin programming language. See the official docs.
- Basic knowledge of Go and the Echo framework.
Building our Go API
Setting up our project
To get started, create a new project directory for your application. We will create one called backend. It is recommended that you create this in your $GOPATH however, it is not a requirement.
In the project directory, create three new directories:
- database
- notification
- routes
In the database directory, create a new directory called model. In this database directory, we will store all things related to the database including the SQLite database file, the model, and database package.
In the notification directory, we will have a package that will contain everything needed to send push notifications to the devices.
Finally, in the routes directory, we will have the routes package where we have the logic for each HTTP request.
Now let’s start building the application.
Building our core application
Create a new main.go file in the root of the project. In this file, we will be adding the core of the project. We will be setting up the routing, middleware, and database.
In the main.go file, paste the following code:
1// File: ./main.go 2 package main 3 4 import ( 5 "./database" 6 "./routes" 7 8 "github.com/labstack/echo" 9 "github.com/labstack/echo/middleware" 10 ) 11 12 func main() { 13 db := database.Initialize("./database/db.sqlite") 14 database.Migrate(db) 15 16 e := echo.New() 17 18 e.Use(middleware.Logger()) 19 e.Use(middleware.Recover()) 20 21 e.GET("/fetch-values", routes.GetPrices()) 22 e.POST("/btc-pref", routes.SaveDeviceSettings(db)) 23 e.POST("/eth-pref", routes.SaveDeviceSettings(db)) 24 e.GET("/simulate", routes.SimulatePriceChanges(db)) 25 26 e.Start(":9000") 27 }
In the code above, we first imported some packages that the Go script will need to work. Then we instantiate the database using the database subpackage that we imported. Next, we run the migration on the db instance. This will create the database table the application needs to run if it does not already exist.
Next, we create a new Echo instance e. We then use the instance to register the Logger middleware and the Recover middleware.
Logger middleware logs the information about each HTTP request.
Recover middleware recovers from panics anywhere in the chain, prints stack trace and handles the control to the centralized HTTPErrorHandler.
We then register our routes and map a handler to them using the routes package we imported. The routes are:
GET /fetch-values- fetches the current prices of all the supported currencies and returns a JSON response.POST /btc-pref- stores the minimum and maximum price BTC has to exceed for a device before receiving a notification and returns a JSON response.POST /eth-pref- stores the minimum and maximum price ETH has to exceed for a device before receiving a notification and returns a JSON response.GET /simulate- simulates prices changes in the supported currencies.
After the routes, we start the server on port 9000.
You can choose a different port if 9000 is in use, just remember to also change it in your
MainActivity.ktfile.
Now that we have the main.go file, let’s pull in all the imports the script needs. Open your terminal and run the following commands:
1$ go get github.com/labstack/echo 2 $ go get github.com/labstack/echo/middleware
This will pull in Echo package and the Echo Middleware package. For the other two packages, database and routes, we will create those manually. Let’s do that now.
Creating our internal Go packages
As mentioned earlier, we are going to create some internal packages to make the application a lot more modular so let’s start with the database package.
In the database directory, create a new init.go file and paste the following code:
1// File: ./database/init.go 2 package database 3 4 import ( 5 "database/sql" 6 7 _ "github.com/mattn/go-sqlite3" 8 ) 9 10 // Initialize initialises the database 11 func Initialize(filepath string) *sql.DB { 12 db, err := sql.Open("sqlite3", filepath) 13 if err != nil || db == nil { 14 panic("Error connecting to database") 15 } 16 17 return db 18 } 19 20 // Migrate migrates the database 21 func Migrate(db *sql.DB) { 22 sql := ` 23 CREATE TABLE IF NOT EXISTS devices( 24 id INTEGER NOT NULL PRIMARY KEY AUTOINCREMENT, 25 uuid VARCHAR NOT NULL, 26 btc_min INTEGER, 27 btc_max INTEGER, 28 eth_min INTEGER, 29 eth_max INTEGER 30 ); 31 ` 32 33 _, err := db.Exec(sql) 34 if err != nil { 35 panic(err) 36 } 37 }
In the file above, we first import two packages, the database/sql, which is inbuilt, and the mattn/go-sqlite3 package, which is an sqlite3 driver for Go using database/sql. To pull that in open the terminal and run the command below:
$ go get github.com/mattn/go-sqlite3
Next, we created a function called Initialize and in this function, we initialize our SQLite database. This will create a new database file if it does not exist, or use an existing one.
We also have a Migrate function where we specify the SQL query to be run when the application is initialized. As seen from the query, we create the table devices only if it does not already exist.
That’s all for the init.go file.
Create a new routes.go file in the routes directory and paste the following code:
1// File: ./routes/routes.go 2 package routes 3 4 import ( 5 "database/sql" 6 "errors" 7 "net/http" 8 "strconv" 9 10 "../database/model" 11 12 "github.com/labstack/echo" 13 )
Now let’s start defining the route handlers as used in the main.go file.
First, we will add the GetPrices function. In the same file paste the following code at the bottom:
1// GetPrices returns the coin prices 2 func GetPrices() echo.HandlerFunc { 3 return func(c echo.Context) error { 4 prices, err := model.GetCoinPrices(true) 5 if err != nil { 6 return c.JSON(http.StatusBadGateway, err) 7 } 8 9 return c.JSON(http.StatusOK, prices) 10 } 11 }
The function above is straightforward. We just get the prices from the model.GetCoinPrices function and return them as a JSON response.
Note that we passed a boolean to the GetCoinPrices function. This boolean is to mark whether to simulate the prices or fetch from the API directly. Since we are testing, we want to simulate the prices so it changes often.
The next function to add to the routes.go file is the SaveDeviceSettings function. In the same file, paste the following code to the bottom of the file:
1var postedSettings map[string]string 2 3 func formValue(c echo.Context, key string) (string, error) { 4 if postedSettings == nil { 5 if err := c.Bind(&postedSettings); err != nil { 6 return "", err 7 } 8 } 9 10 return postedSettings[key], nil 11 } 12 13 func getCoinValueFromRequest(key string, c echo.Context) (int64, error) { 14 value, _ := formValue(c, key) 15 if value != "" { 16 setting, err := strconv.ParseInt(value, 10, 64) 17 if err == nil { 18 return setting, nil 19 } 20 } 21 22 return 0, errors.New("Invalid or empty key for: " + key) 23 } 24 25 // SaveDeviceSettings saves the device settings 26 func SaveDeviceSettings(db *sql.DB) echo.HandlerFunc { 27 return func(c echo.Context) error { 28 uuid, _ := formValue(c, "uuid") 29 field := make(map[string]int64) 30 31 if btcmin, err := getCoinValueFromRequest("minBTC", c); err == nil { 32 field["btc_min"] = btcmin 33 } 34 35 if btcmax, err := getCoinValueFromRequest("maxBTC", c); err == nil { 36 field["btc_max"] = btcmax 37 } 38 39 if ethmin, err := getCoinValueFromRequest("minETH", c); err == nil { 40 field["eth_min"] = ethmin 41 } 42 43 if ethmax, err := getCoinValueFromRequest("maxETH", c); err == nil { 44 field["eth_max"] = ethmax 45 } 46 47 defer func() { postedSettings = nil }() 48 49 device, err := model.SaveSettings(db, uuid, field) 50 if err != nil { 51 return c.JSON(http.StatusBadRequest, err) 52 } 53 54 return c.JSON(http.StatusOK, device) 55 } 56 }
In the code above, we have three functions. The first two are helper functions. We need them to get the posted form values from the request.
In the SaveDeviceSettings function, we get the uuid for the device, and conditionally get the minimum and maximum values for the coin. We save the values to the database using the model.SaveSettings function and return a JSON response.
The final function to add will be the Simulate function. Add the following code to the bottom of the file:
1// SimulatePriceChanges simulates the prices changes 2 func SimulatePriceChanges(db *sql.DB) echo.HandlerFunc { 3 return func(c echo.Context) error { 4 prices, err := model.GetCoinPrices(true) 5 if err != nil { 6 panic(err) 7 } 8 9 devices, err := model.NotifyDevicesOfPriceChange(db, prices) 10 if err != nil { 11 panic(err) 12 } 13 14 resp := map[string]interface{}{ 15 "prices": prices, 16 "devices": devices, 17 "status": "success", 18 } 19 20 return c.JSON(http.StatusOK, resp) 21 } 22 }
In the function above, we fetch the prices for the coins, we then send that to the model.NotifyDevicesOfPriceChange function, which finds devices with matching criteria and sends them a push notification. We then return a JSON response of the prices, devices and status.
That’s all for the routes.
Lastly, let’s define the model. Create a new models.go file in the database/model directory and paste the following code:
1// File: ./database/model/models.go 2 package model 3 4 import ( 5 "database/sql" 6 "encoding/json" 7 "fmt" 8 "io/ioutil" 9 "math/big" 10 "math/rand" 11 "net/http" 12 "time" 13 14 "errors" 15 16 "../../notification" 17 )
Next, let’s define the structs for our object resources. In the same file, paste the following to the bottom:
1// CoinPrice represents a single coin resource 2 type CoinPrice map[string]interface{} 3 4 // Device represents a single device resource 5 type Device struct { 6 ID int64 `json:"id"` 7 UUID string `json:"uuid"` 8 BTCMin int64 `json:"btc_min"` 9 BTCMax int64 `json:"btc_max"` 10 ETHMin int64 `json:"eth_min"` 11 ETHMax int64 `json:"eth_max"` 12 } 13 14 // Devices represents a collection of Devices 15 type Devices struct { 16 Devices []Device `json:"items"` 17 }
Above, we have the CoinPrice map. This will be used to handle the response from the API we will be using for our application. When a response from the API is gotten, we bind it to the CoinPrice map.
The next one is the Device struct. This represents the device resource. It matches the SQL schema of the table we created earlier in the article. When we want to create a new device resource to store in the database or retrieve one, we will use the Device struct.
Finally, we have the Devices struct which is simply a collection of multiple Device structs. We use this if we want to return a collection of Devices.
Go does not allow underscores in the struct names, so we will use the
json:``"``key_name``"format to automatically convert to and from properties with the keys specified.
Let’s start defining our model functions.
In the same file, paste the following code to the bottom of the page:
1// CreateSettings creates a new device and saves it to the db 2 func CreateSettings(db *sql.DB, uuid string) (Device, error) { 3 device := Device{UUID: uuid, BTCMin: 0, BTCMax: 0, ETHMin: 0, ETHMax: 0} 4 5 stmt, err := db.Prepare("INSERT INTO devices (uuid, btc_min, btc_max, eth_min, eth_max) VALUES (?, ?, ?, ?, ?)") 6 if err != nil { 7 return device, err 8 } 9 10 res, err := stmt.Exec(device.UUID, device.BTCMin, device.BTCMax, device.ETHMin, device.ETHMax) 11 if err != nil { 12 return device, err 13 } 14 15 lastID, err := res.LastInsertId() 16 if err != nil { 17 return device, err 18 } 19 20 device.ID = lastID 21 22 return device, nil 23 }
The function above is used to create settings for a new device. In the function, a new device is created using the Device struct. We then write the SQL query we want to use to create a new device.
We run Exec on the SQL query to execute the query. If there’s no error, we get the last inserted ID from the query and assign that to the Device struct we created earlier. We then return the created Device.
Let’s add the next function. In the same file, paste the following code to the bottom:
1// GetSettings fetches the settings for a single user from the db 2 func GetSettings(db *sql.DB, uuid string) (Device, error) { 3 device := Device{} 4 5 if len(uuid) <= 0 { 6 return device, errors.New("Invalid device UUID") 7 } 8 9 err := db.QueryRow("SELECT * FROM devices WHERE uuid=?", uuid).Scan( 10 &device.ID, 11 &device.UUID, 12 &device.BTCMin, 13 &device.BTCMax, 14 &device.ETHMin, 15 &device.ETHMax) 16 17 if err != nil { 18 return CreateSettings(db, uuid) 19 } 20 21 return device, nil 22 }
In the GetSettings function above, we create an empty Device struct. We run the query to fetch a device from the devices table that matches the uuid. We then use the Scan method of the database package to save the row values to the Device Instance.
If no device is found, a new one is created using the CreateSettings function we created earlier, else the device found is returned.
Let’s add the next function. In the same file, paste the following code to the bottom:
1// SaveSettings saves the devices settings 2 func SaveSettings(db *sql.DB, uuid string, field map[string]int64) (Device, error) { 3 device, err := GetSettings(db, uuid) 4 if err != nil { 5 return Device{}, err 6 } 7 8 if btcmin, isset := field["btc_min"]; isset { 9 device.BTCMin = btcmin 10 } 11 12 if btcmax, isset := field["btc_max"]; isset { 13 device.BTCMax = btcmax 14 } 15 16 if ethmin, isset := field["eth_min"]; isset { 17 device.ETHMin = ethmin 18 } 19 20 if ethmax, isset := field["eth_max"]; isset { 21 device.ETHMax = ethmax 22 } 23 24 stmt, err := db.Prepare("UPDATE devices SET btc_min = ?, btc_max = ?, eth_min = ?, eth_max = ? WHERE uuid = ?") 25 if err != nil { 26 return Device{}, err 27 } 28 29 _, err = stmt.Exec(device.BTCMin, device.BTCMax, device.ETHMin, device.ETHMax, device.UUID) 30 if err != nil { 31 return Device{}, err 32 } 33 34 return device, nil 35 }
In the SaveSettings function above, we get the existing settings using the GetSettings function and then we conditionally update the existing value. We then write an SQL query to update the database with the new values. After this, we return the Device struct.
Let’s add the next function. In the same file, paste the following code to the bottom:
1// GetCoinPrices gets the current coin prices 2 func GetCoinPrices(simulate bool) (CoinPrice, error) { 3 coinPrice := make(CoinPrice) 4 currencies := [2]string{"ETH", "BTC"} 5 6 for _, curr := range currencies { 7 if simulate == true { 8 min := 1000.0 9 max := 15000.0 10 price, _ := big.NewFloat(min + rand.Float64()*(max-min)).SetPrec(8).Float64() 11 coinPrice[curr] = map[string]interface{}{"USD": price} 12 continue 13 } 14 15 url := fmt.Sprintf("https://min-api.cryptocompare.com/data/pricehistorical?fsym=%s&tsyms=USD&ts=%d", curr, time.Now().Unix()) 16 res, err := http.Get(url) 17 if err != nil { 18 return coinPrice, err 19 } 20 21 defer res.Body.Close() 22 23 body, err := ioutil.ReadAll(res.Body) 24 if err != nil { 25 return coinPrice, err 26 } 27 28 var f interface{} 29 30 err = json.Unmarshal([]byte(body), &f) 31 if err != nil { 32 return coinPrice, err 33 } 34 35 priceMap := f.(map[string]interface{})[curr] 36 for _, price := range priceMap.(map[string]interface{}) { 37 coinPrice[curr] = map[string]interface{}{"USD": price.(float64)} 38 } 39 } 40 41 return coinPrice, nil 42 }
In the function above, we create a new instance of coinPrice and then we create an array of the two currencies we want to fetch, ETH and BTC. We then loop through the currencies and if simulate is true, we just return the simulated prices for the coins. If it’s false, then for each of the currencies we do the following:
- Fetch the price for the currency from the API.
- Add the price of the currency to the
coinPricemap.
After we are done, we return the prices.
The next and final function we want to add is the NotifyDevicesOfPriceChange function. This is responsible for getting devices that match the minimum and maximum threshold and sending push notifications to them.
In the same file, paste the following code:
1func minMaxQuery(curr string) string { 2 return `(` + curr + `_min > 0 AND ` + curr + `_min > ?) OR (` + curr + `_max > 0 AND ` + curr + `_max < ?)` 3 } 4 5 // NotifyDevicesOfPriceChange returns the devices that are within the range 6 func NotifyDevicesOfPriceChange(db *sql.DB, prices CoinPrice) (Devices, error) { 7 devices := Devices{} 8 for currency, price := range prices { 9 pricing := price.(map[string]interface{}) 10 rows, err := db.Query("SELECT * FROM devices WHERE "+minMaxQuery(currency), pricing["USD"], pricing["USD"]) 11 if err != nil { 12 return devices, err 13 } 14 defer rows.Close() 15 for rows.Next() { 16 device := Device{} 17 err = rows.Scan(&device.ID, &device.UUID, &device.BTCMin, &device.BTCMax, &device.ETHMin, &device.ETHMax) 18 if err != nil { 19 return devices, err 20 } 21 devices.Devices = append(devices.Devices, device) 22 notification.SendNotification(currency, pricing["USD"].(float64), device.UUID) 23 } 24 } 25 return devices, nil 26 }
In the code above we have two functions, the first is minMaxQuery which is a helper function that helps us generate the SQL query for the min and max of a currency.
The second function is the NotifyDevicesOfPriceChange function. In here we loop through the currency prices and for each of the price we check the database for devices that match the minimum and maximum prices.
When we have the devices, we loop through them and send a push notification using the notification.SendNotification method. We then return the devices we sent the notification to.
That’s all for the model package. We have one last package to add and that's the notification package. We used it in the code above to send push notification so let’s define it.
In the notifications directory, create a push.go file and paste the following code:
1// File: ./notification/push.go 2 package notification 3 4 import ( 5 "fmt" 6 "strconv" 7 8 "github.com/pusher/push-notifications-go" 9 ) 10 11 const ( 12 instanceID = "PUSHER_BEAMS_INSTANCE_ID" 13 secretKey = "PUSHER_BEAMS_SECRET_KEY" 14 ) 15 16 // SendNotification sends push notification to devices 17 func SendNotification(currency string, price float64, uuid string) error { 18 notifications, err := pushnotifications.New(instanceID, secretKey) 19 if err != nil { 20 return err 21 } 22 23 publishRequest := map[string]interface{}{ 24 "fcm": map[string]interface{}{ 25 "notification": map[string]interface{}{ 26 "title": currency + " Price Change", 27 "body": fmt.Sprintf("The price of %s has changed to $%s", currency, strconv.FormatFloat(price, 'f', 2, 64)), 28 }, 29 }, 30 } 31 32 interest := fmt.Sprintf("%s_%s_changed", uuid, currency) 33 34 _, err = notifications.Publish([]string{interest}, publishRequest) 35 if err != nil { 36 return err 37 } 38 39 return nil 40 }
Replace the
PUSHER_BEAMS_*key with the credentials in your Pusher dashboard.
In the code above, we have the SendNotification function. In there we instantiate a new Pusher Beams instance using the InstanceID and secretKey defined above the function.
We then create a publishRequest variable which contains the Android notification payload. This payload is what we will send to the Pusher Beams backend and will contain everything needed to send the notification to the Android device.
Next, we create an interest variable which will be the interest we want to push the notification to. The format of the interest will match the one we subscribed to in part one of this tutorial. Next, we call the Publish function of the Pusher Beams package to send the notification to the device.
One final thing we need to do is pull the Pusher Beams package into our $GOPATH. Open your terminal and run the following command:
$ go get github.com/pusher/push-notifications-go
When the command has executed successfully, we can now run the application.
Running our application
Now that we have finished building the application, we need to run both the backend and the Android application.
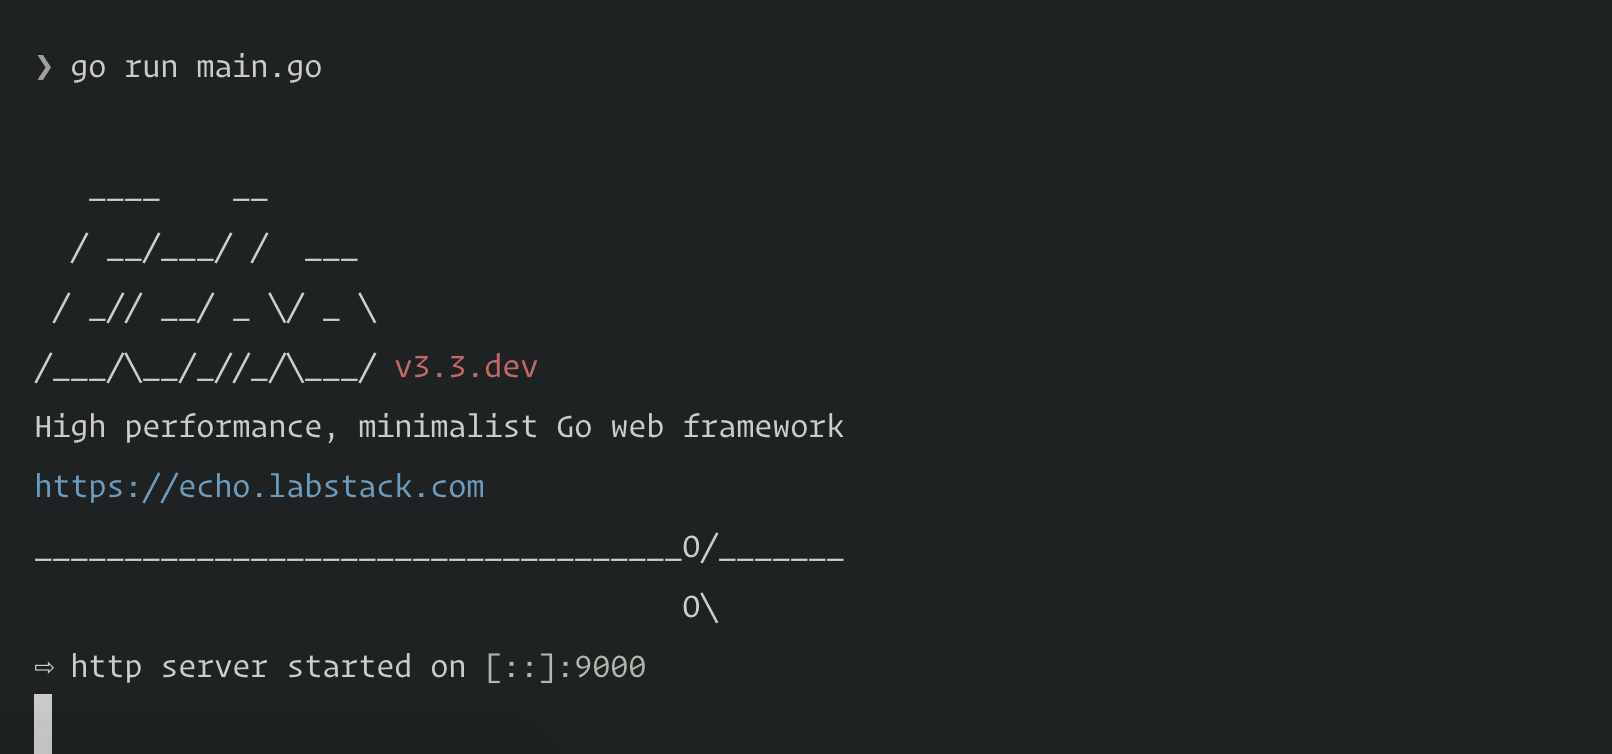
Open your terminal and execute the following command from the root of the project to run the Go application:
$ go run main.go
This should start the server on port 9000.
Next, go to Android Studio and launch your Android project. At this point, you can now see the application. You can go ahead to set the minimum and maximum limits for both the BTC and ETH currency.
Now minimize the application in your simulator and open the notification center. Visit the URL http://localhost:9000/simulate to simulate the currency changes. You should see the notifications come into the device as shown below:
Conclusion
In this article, we have been able to see how you can create a cryptocurrency watcher application for Android using Pusher Beams and Go. This tutorial is available for iOS also here.
The source code to the application built in this article is available on GitHub.


© 2026 Pusher Ltd. All rights reserved.
Pusher Limited is a company registered in England and Wales (No. 07489873) whose registered office is at MessageBird UK Limited, 3 More London Riverside, 4th Floor, London, United Kingdom, SE1 2AQ.