- Products

- Developers
- User stories
- Blog
- Pricing

Create a carpooling app with React Native - Part 1: Setting up the server
- Introduction
- Prerequisites
- What we’ll be building
- Setting up a Pusher app
- Setting up a Google project
- Setting up Laradock
- Configuring the environment
- Adding a virtual host
- Configuring Elasticsearch
- Bringing up the container
- Troubleshooting Laradock issues
- Creating the server component
- Installing the Dependencies
- Adding environment variables
- Loader file
- Setting the type mapping
- Creating users
- Saving routes
- Searching routes
- Update route
- Delete route
- Delete index
- Authenticating requests
- Exposing the server with ngrok
- Conclusion
Introduction
In this series, we’re going to create a carpooling app with React Native. This will be a two-part series showing you how to create a full-stack React Native app which uses PHP as the backend. The first part covers setting up the backend, while the second part will cover building the frontend and running the app.
I’ve previously written a similar tutorial: Build a ride hailing app with React Native. The main difference between the two is that the first one shows how to build an app similar to the following:
The main idea of the above apps is to provide a ride-hailing service to users. This is traditionally called “Ridesharing”.
While this tutorial will show you how to build an app similar to these:
The main idea of the above apps is for users to share their ride with people who are going the same route as them. This is traditionally called “Carpooling”.
Prerequisites
This tutorial requires the following to be already set up on your machine:
- React Native development environment - the series assumes that you already have set up all the software needed to create and run React Native apps. The series will show you how to create the app for both Android and iOS devices. We will use the
react-native initcommand to create a React Native project. You can either have both Android Studio and Xcode set up on your machine or just one of them. Additionally, you can set up Genymotion so you can easily change your in-app location. Be sure to check out the setup instructions if you haven’t setup your machine already. - Docker and Docker Compose - the series assumes that you already have Docker and Docker Compose running on your machine. We will be using those to easily setup a server with all the software that we need. This also assures that we both have the same environment.
- Git - used for cloning repos.
Knowing the basics of creating a React Native app is required. This means you have to know how to run the app on an emulator or your device. You should also have a good grasp of basic React concepts such as props, refs, state, and the component lifecycle.
Knowledge of Docker is required. You should know how to setup Docker on your operating system and setup a containers from scratch. Note that Docker has poor support for Windows 7 and 8. So if you’re using any of those systems, you might have difficulty in following this tutorial.
Knowledge of the following will be helpful, but not required. I’ll try to cover as much detail as I can, so readers with zero knowledge of the following will still be able to follow along:
Lastly, the tutorial assumes that you know your way around the operating system that you’re using. Knowing how to install new software, execute commands in the terminal is required.
What we’ll be building
Before we proceed, it’s important to know what exactly we’ll be building. The app will have two modes:
- sharing - this allows the user to share their ride so that others can make a request to ride with them. For the rest of the series, I’ll be referring to the users who uses this feature as the “rider”.
- hiking - this allows the user to make a request to ride with someone. I’ll be referring to these users as “hikers”.
Below is the entire flow of the app. I’m using Genymotion emulator for the user that plays the rider, and iPhone for the hiker. This is so I can emulate a moving vehicle by using Genymotion’s GPS emulation tool:
I can simply click around the map so that React Native’s Geolocation is triggered. This then allows me to use Pusher Channels to send a message to the hiker so that they’re informed of the rider’s current location.
Now, let’s proceed with the app flow:
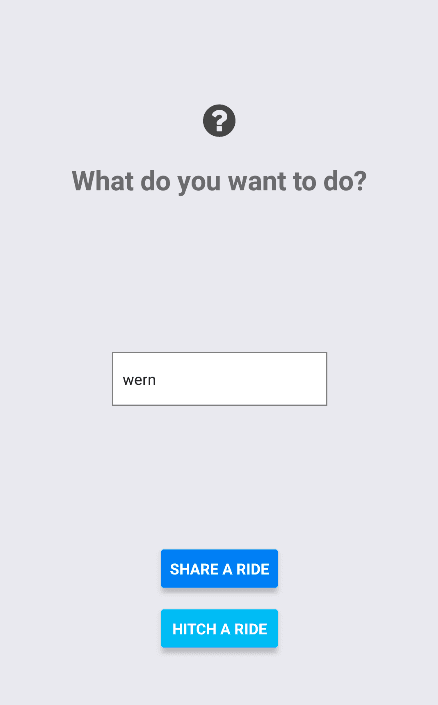
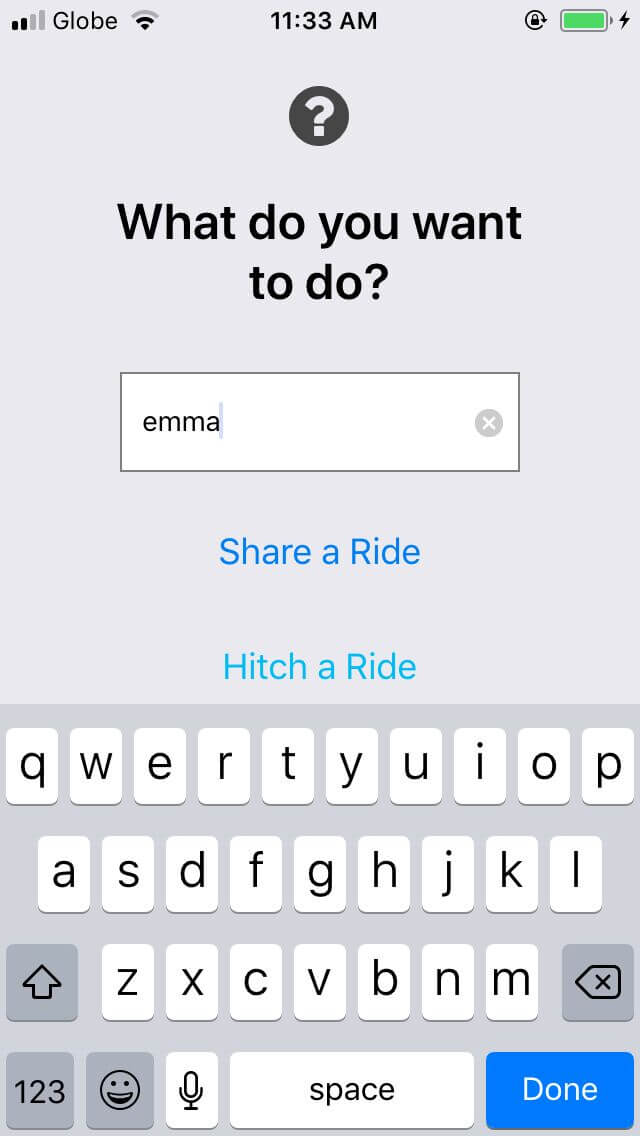
- First, the rider enters their username and clicks Share a ride:
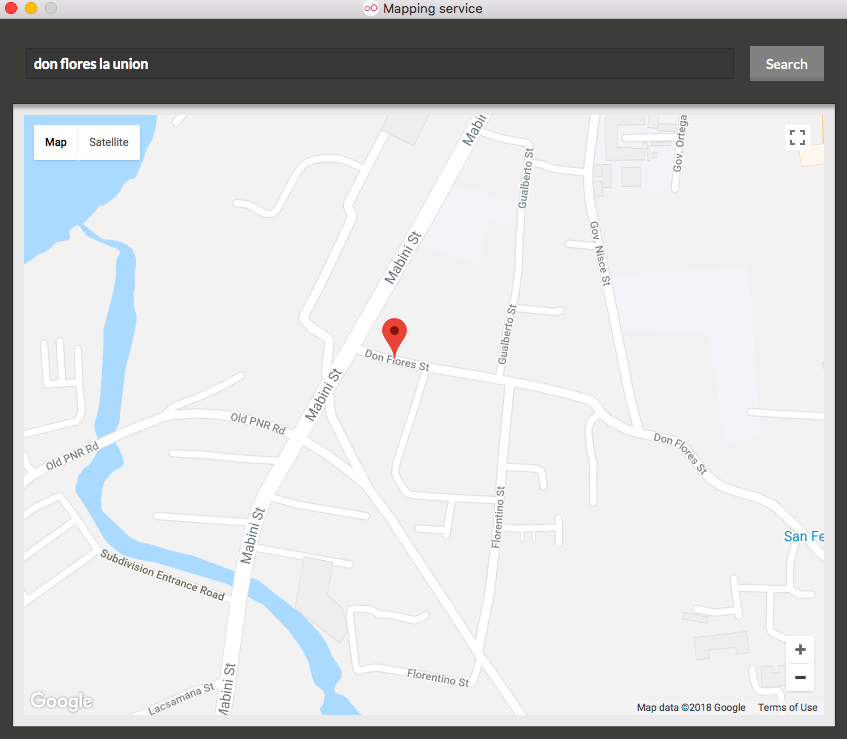
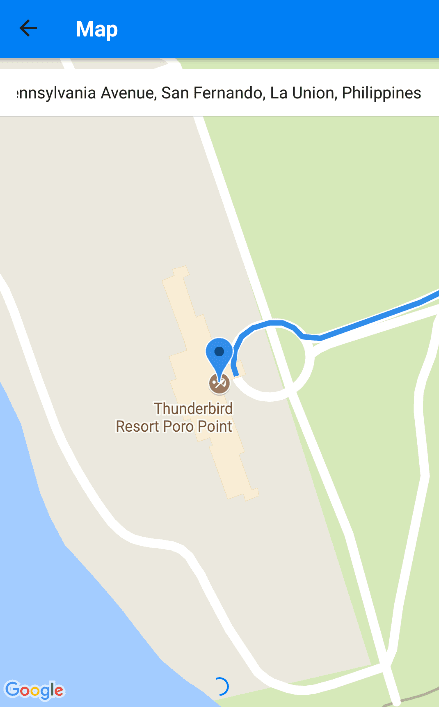
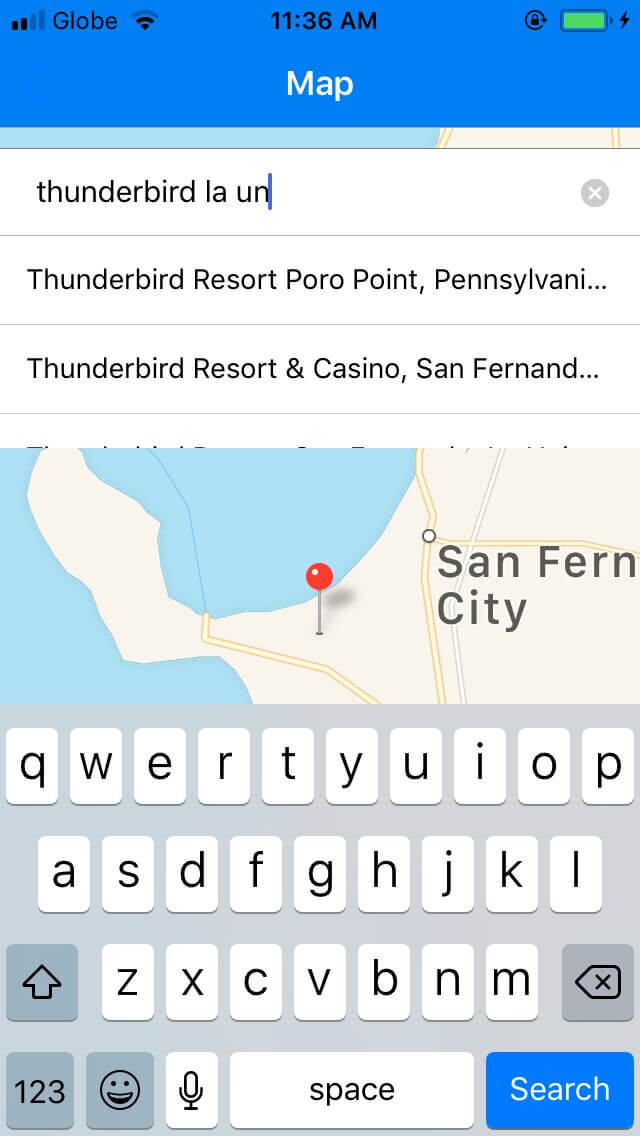
- Rider types in where they want to go and selects it from the drop-down. Google Places Autocomplete makes this feature work:
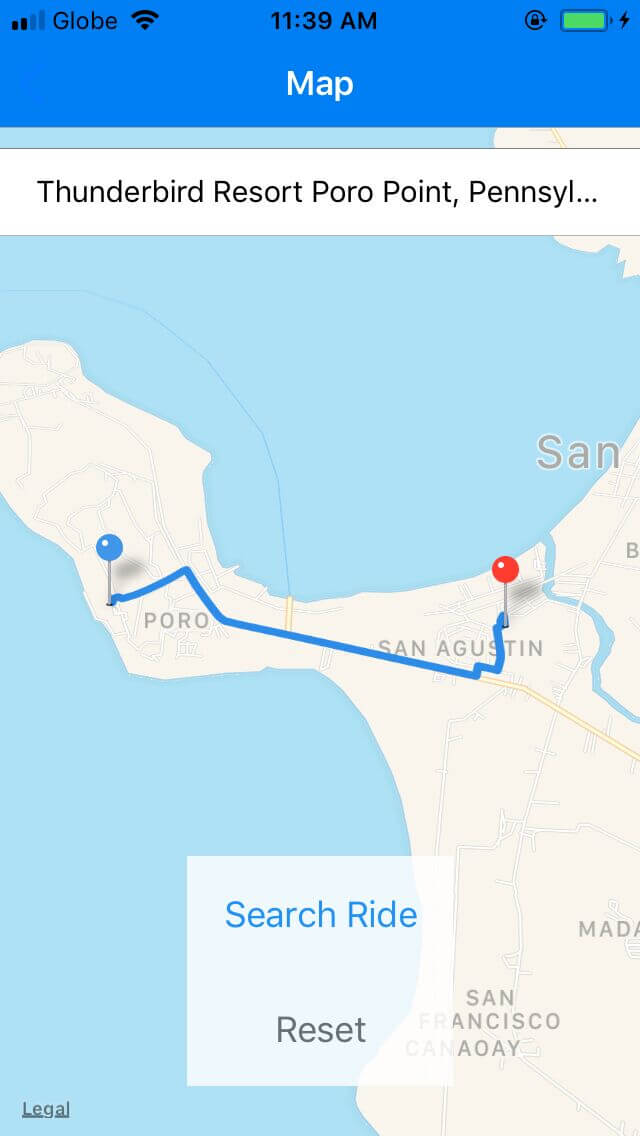
- After selecting a place, the app plots the most desirable route from the origin to the destination. The red marker being the origin, and the blue one being the destination:

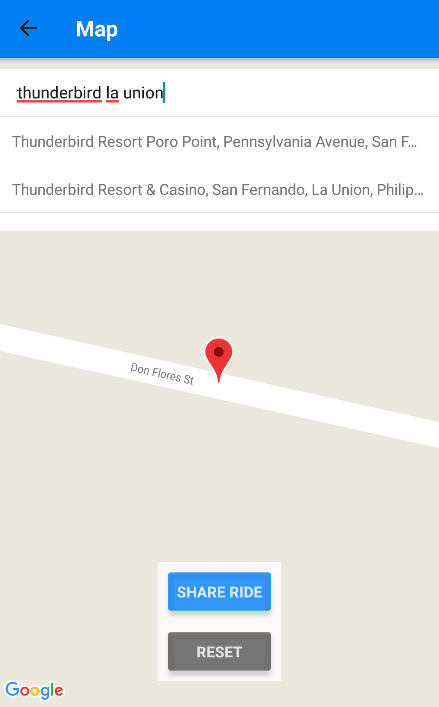
If the rider wants to pick another place, they can click on the Reset button. This will empty the text field for entering the place as well as remove the markers and the route from the map.
- At this point, the rider clicks on the Share Ride button. This triggers a request to the server which then saves all the relevant data to an Elasticsearch index. This allows hikers to search for them later on.
To keep the route information updated, we use React Native’s Geolocation feature to watch the rider’s current location. Every time their location changes, the Elasticsearch index is also updated:
- Now let’s take a look at the hiker’s side of things. First, the hiker enters their username and clicks on Hitch a ride:
- Next, the hiker searches for their destination. To keep things simple, let’s pick the same place where the rider is going:
- Once again, the app plots the most desirable route from the hiker’s origin to their destination:
- The hiker then clicks on the Search Ride button. At this point, the app makes a request to the server to look for riders matching the route added by the hiker. The rider should now receive the request. Pusher Channels makes this feature work:
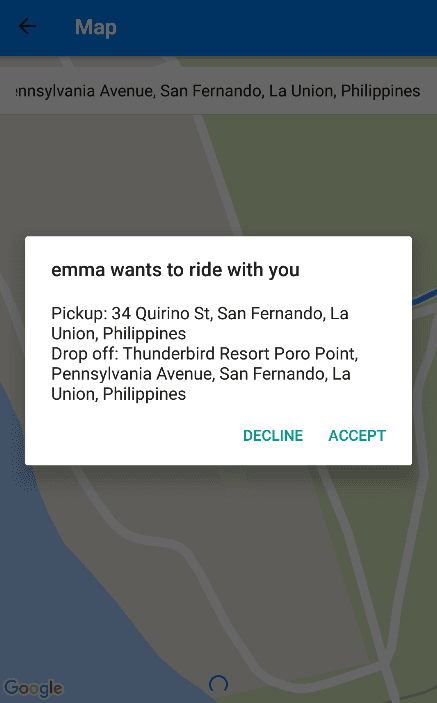
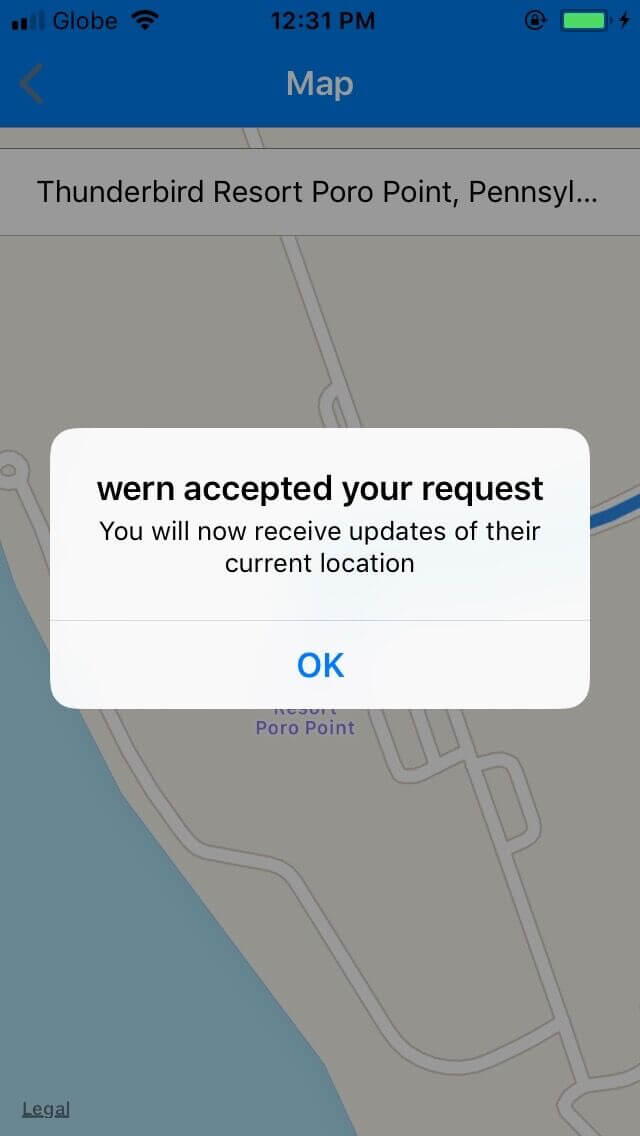
- Once the rider accepts the request, the hiker receives an alert that the rider accepted their request:
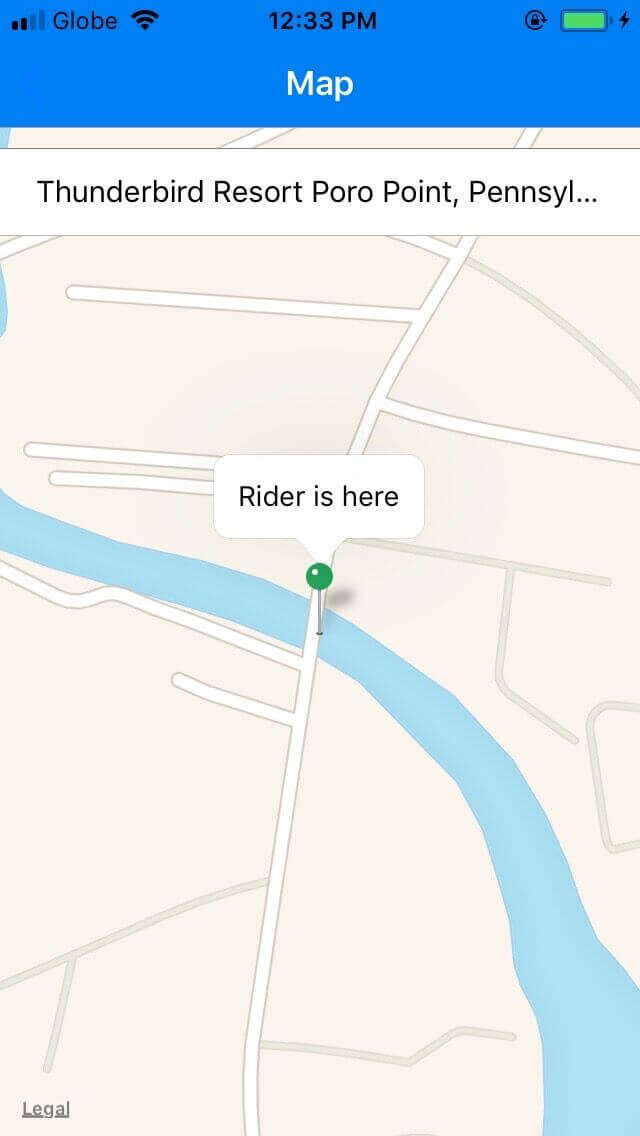
- At this point, the hiker’s map will show rider’s current location. React Native’s Geolocation feature and Pusher Channels make this work:
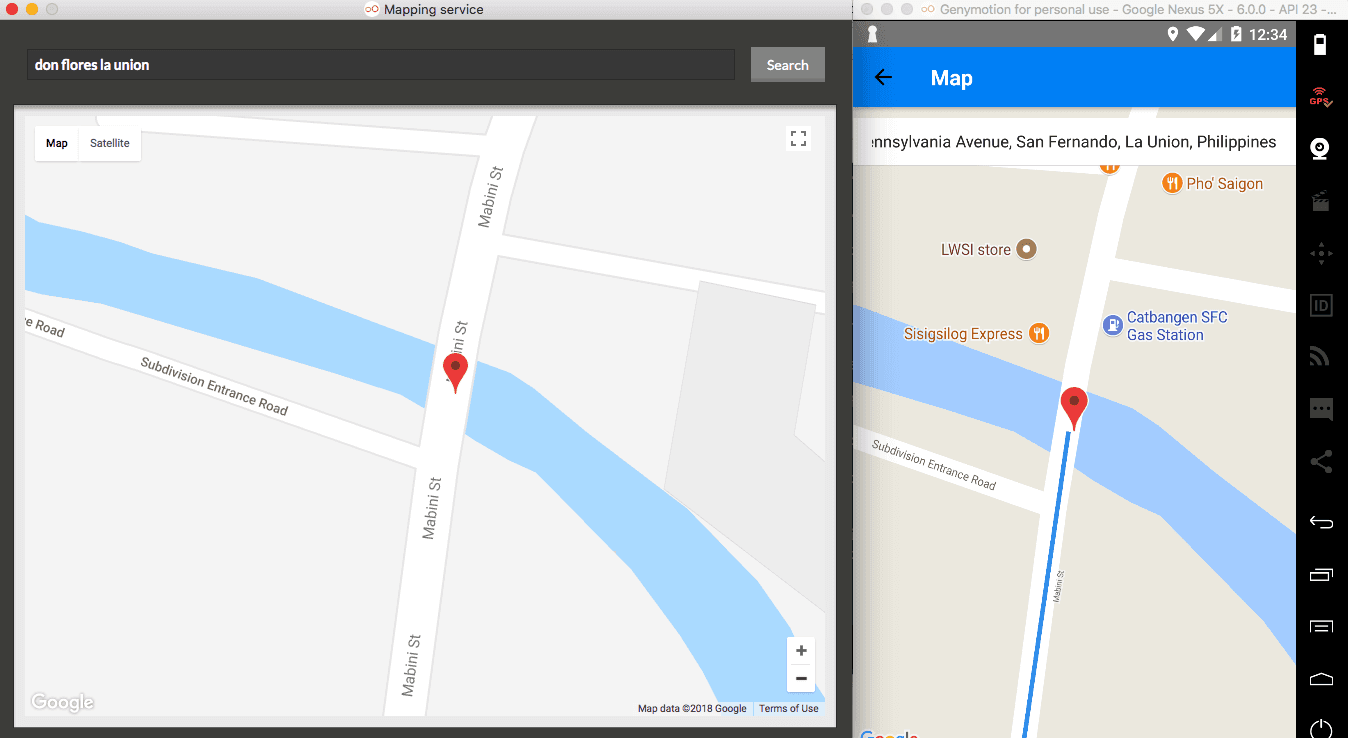
At the same time, the rider’s map will show their current location on the map. This is where you can use Genymotion’s GPS emulation tool to update the rider’s location:
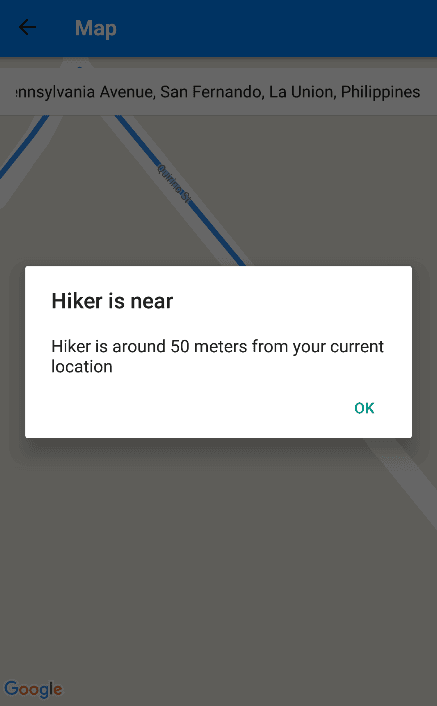
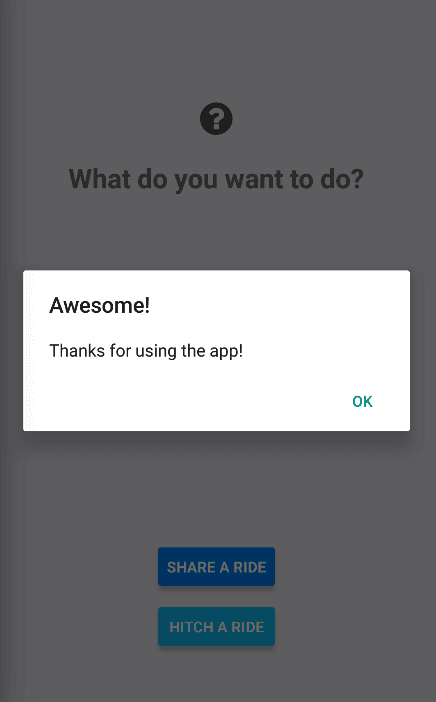
- Once the rider is near the hiker, both users will receive a notification informing them that they’re already near each other:
- Once they are within 20 meters of each other, the app’s UI resets and it goes back to the login screen:
We will use the following technologies to build the app:
- Elasticsearch - for saving and searching for routes.
- Pusher Channels - for establishing realtime communication between the rider and the hiker so they are kept updated where each other is.
- PHP - for saving and searching documents from the Elasticsearch index.
- Google Maps - for showing maps inside the app.
- Google Places Autocomplete - for searching for places.
- Google Directions API - for getting the directions between the origin and the destination of the riders and hikers.
- Geometry Library Google Maps API V3 - for determining whether a specific coordinate lies within a set of coordinates.
The full source code of the app is available on this Github repo.
Setting up a Pusher app
We’ll need to create a Pusher app to use Pusher Channels. Start by creating a Pusher account if you haven’t done so already.
Once you have an account, go to your dashboard and click on Channels apps on the left side of the screen, then click on Create Channels apps. Enter the name of your app and select a desirable cluster, preferably one that’s nearest to your current location:

Once the app is created, click on the App Settings tab and enable client events:
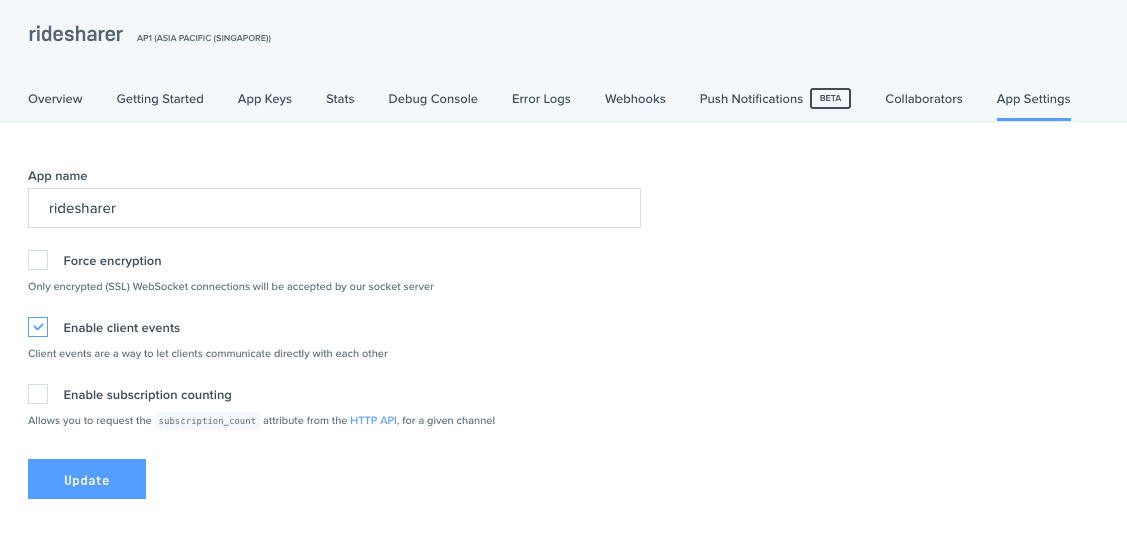
This will allow us to trigger events right from the app itself. That way, the only thing that we need to do on the server is to authenticate requests. Don’t forget to click on Update once you’re done.
The API keys which we’ll be using later are on the App keys tab.
Setting up a Google project
We will be using three of Google’s services to build this app:
- Google Maps
- Google Places
- Google Directions
This requires us to create a Google project at console.developers.google.com so we can use those services.
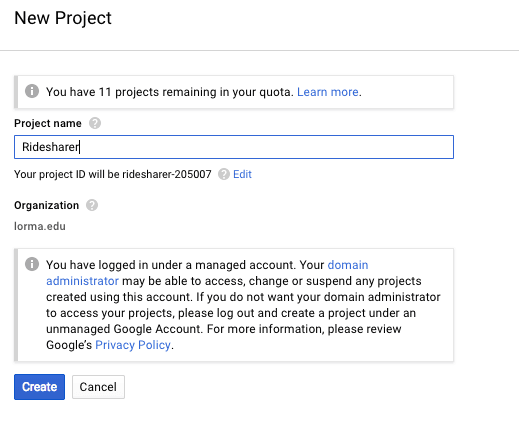
On your dashboard, click on the Select a project dropdown then click on Create project. Enter the name of the project and click Create:
Once the project is created, click on Library on the left side. Look for the following APIs and enable them:
- Maps SDK for Android
- Maps SDK for iOS - note that if you don’t enable this, and followed the installation instructions for iOS, Apple Maps will be used instead.
- Places SDK for Android
- Places SDK for iOS
- Directions API
- Geocoding API
Once those are enabled, click on the Credentials menu on the left side, then click on the Create credentials button and select API key:
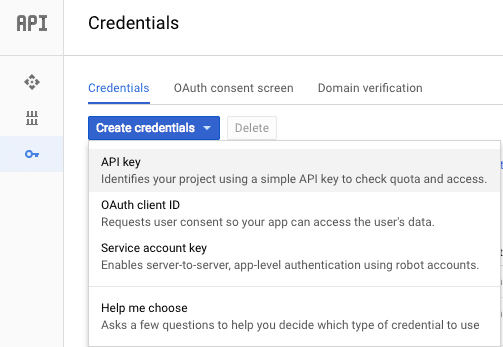
That will generate an API key which allows you to use the services mentioned above. Take note of the key as we will be using it later.
You can choose to restrict access so not just anybody can use your key once they get access to it. To avoid problems while developing the app, I recommend to just leave it for now.
Setting up Laradock
Laradock is a full PHP development environment for Docker. It allows us to easily set up the development server. Go through the following steps to setup Laradock.
Configuring the environment
- Clone the official repo. This will create a
laradockdirectory:
git clone https://github.com/laradock/laradock.git --branch v7.0.0
Note that in the above command we’re cloning a specific release tag (v7.0.0). This is to make sure we’re both using the same version of Laradock. This helps you avoid issues that has to do with different configuration and software versions installed by Laradock. You can choose to clone the most recent version, but you’ll have to handle the compatibility issues on your own.
- Navigate inside the
laradockdirectory and create a copy of the sample.envfile:
1cd laradock 2 cp env-example .env
- Open the
.envfile on your text editor and replace the existing config with the following:
This is the directory where your projects are saved. Go ahead and create a laradock-projects folder outside the laradock folder. Then inside the laradock-projects, create a new folder named ridesharer. This is where we will add the server code:
APP_CODE_PATH_HOST=../laradock-projects
This is the Elasticsearch port configuration. The one below is actually the default one so in most cases, you don’t really need to change anything. But if you have a different configuration, or if you want to use a different port because an existing application is already using these ports then this is a good place to change them:
1ELASTICSEARCH_HOST_HTTP_PORT=9200 2 ELASTICSEARCH_HOST_TRANSPORT_PORT=9300
This is the path where the Apache site configuration is located. We will be updating it at a later step. This is just to let you know that this is where it’s located:
APACHE_SITES_PATH=./apache2/sites
Adding a virtual host
- Open the
laradock/apache2/sites/default.apache.conffile and add a new virtual host (you can also replace the existing one if you’re not using it):
1<VirtualHost *:80> 2 ServerName ridesharer.loc 3 DocumentRoot /var/www/ridesharer 4 Options Indexes FollowSymLinks 5 6 <Directory "/var/www/ridesharer"> 7 AllowOverride All 8 <IfVersion < 2.4> 9 Allow from all 10 </IfVersion> 11 <IfVersion >= 2.4> 12 Require all granted 13 </IfVersion> 14 </Directory> 15 16 </VirtualHost>
The code above tells Apache to serve the files inside the /var/www/ridesharer directory when http://ridesharer.loc is accessed on the browser. If the directory has index.php file in it, then it will get served by default (if the filename is not specified).
The /var/www directory maps to the application directory you’ve specified earlier on the .env file:
APP_CODE_PATH_HOST=../laradock-projects
This means that /var/www/ridesharer is equivalent to /laradock-projects/ridesharer.
This is why we’ve created a ridesharer folder inside the laradock-projects directory earlier. Which means that any file you create inside the ridesharer folder will get served.
- Update the operating system’s
hostsfile to point outridesharer.loctolocalhost:
127.0.0.1 ridesharer.loc
This tells the browser to not go looking anywhere else on the internet when http://ridesharer.loc is accessed. Instead, it will just look in the localhost.
Configuring Elasticsearch
Open the docker-compose.yml file and search for ElasticSearch Container. This will show you the Elasticsearch configuration:
1### ElasticSearch ######################################## 2 elasticsearch: 3 build: ./elasticsearch 4 volumes: 5 - elasticsearch:/usr/share/elasticsearch/data 6 environment: 7 - cluster.name=laradock-cluster 8 - bootstrap.memory_lock=true 9 - "ES_JAVA_OPTS=-Xms512m -Xmx512m" 10 ulimits: 11 memlock: 12 soft: -1 13 hard: -1 14 ports: 15 - "${ELASTICSEARCH_HOST_HTTP_PORT}:9200" 16 - "${ELASTICSEARCH_HOST_TRANSPORT_PORT}:9300" 17 depends_on: 18 - php-fpm 19 networks: 20 - frontend 21 - backend
Under the environment, add the following:
- xpack.security.enabled=false
So it should look like this:
1environment: 2 - cluster.name=laradock-cluster 3 - bootstrap.memory_lock=true 4 - xpack.security.enabled=false 5 - "ES_JAVA_OPTS=-Xms512m -Xmx512m"
This disables the need to authenticate when connecting to Elasticsearch.
You can choose to enable it later so that not just anyone can have access to the Elasticsearch index. But to avoid problems with authentication while we’re developing, we’ll disable it for now.
Bringing up the container
Navigate inside the laradock directory and bring up the container with Docker Compose:
docker-compose up -d apache2 php-fpm elasticsearch workspace
This will install and setup Apache, PHP, and Elasticsearch on the container. There’s also a workspace so you can log in to the container. This allows you to install packages using Composer.
This process should take a while depending on your internet connection.
Troubleshooting Laradock issues
If you’re having problems completing this step, it is most likely a port issue. That is, another process is already using the port that the containers wants to use.
The quickest way to deal with a port issue is to change the default ports that Apache and Elasticsearch are using (or whatever port is already occupied by another process). Open the .env file inside the laradock folder and make the following changes:
For Apache, replace the values for either APACHE_HOST_HTTPS_PORT or APACHE_PHP_UPSTREAM_PORT (or both):
1# APACHE_HOST_HTTPS_PORT=443 2 APACHE_HOST_HTTPS_PORT=445 3 4 # APACHE_PHP_UPSTREAM_PORT=9000 5 APACHE_PHP_UPSTREAM_PORT=9001
For Elasticsearch:
1# ELASTICSEARCH_HOST_HTTP_PORT=9200 2 ELASTICSEARCH_HOST_HTTP_PORT=9211 3 4 # ELASTICSEARCH_HOST_TRANSPORT_PORT=9300 5 ELASTICSEARCH_HOST_TRANSPORT_PORT=9311
It’s a good practice to comment out the default config so you know which one’s you’re replacing.
If the issue you’re having isn’t a port issue, then you can visit Laradock’s issues page and search for the issue you’re having.
Creating the server component
Installing the Dependencies
Once all the software is installed in the container, Docker will automatically bring it up. This allows you to login to the container. You can do that by executing the following command while inside the laradock directory:
docker-compose exec --user=laradock workspace bash
Once you’re inside, navigate inside the ridesharer folder and create a composer.json file:
1{ 2 "require": { 3 "alexpechkarev/geometry-library": "1.0", 4 "elasticsearch/elasticsearch": "^6.0", 5 "pusher/pusher-php-server": "^3.0", 6 "vlucas/phpdotenv": "^2.4" 7 } 8 }
Save the file and execute composer install. This will install the following packages:
geometry-library- as mentioned earlier, this allows us to determine whether a specific coordinate lies within a set of coordinates. We will be using this library to determine if the directions returned by the Google Directions API covers the hiker’s pick-up location (origin).elasticsearch- this library allows us to query the Elasticsearch index so we can add, search, update, or delete documents.pusher-php-server- this is the official Pusher PHP library for communicating with Pusher’s server. We will be using it to authenticate requests coming from the app.vlucas/phpdotenv- for loading environment variables from.envfiles. The.envfile is where we put the Elasticsearch, Google, and Pusher config.
Adding environment variables
Inside the laradock-projects/ridesharer directory, create a .env file and add the following:
1PUSHER_APP_ID="YOUR PUSHER APP ID" 2 PUSHER_APP_KEY="YOUR PUSHER APP KEY" 3 PUSHER_APP_SECRET="YOUR PUSHER APP SECRET" 4 PUSHER_APP_CLUSTER="YOUR PUSHER APP CLUSTER" 5 6 GOOGLE_API_KEY="YOUR GOOGLE API KEY" 7 8 ELASTICSEARCH_HOST="elasticsearch"
This file is where you will put the keys and configuration options that we will be using for the server.
Loader file
Since the majority of the files we will be creating will use either the configuration from the .env file or connect to the Elasticsearch server, we will be using this file to do those task for us. That way, we simply need to include this file on each of the files instead of repeating the same code.
Start by importing the Elasticsearch\ClientBuilder class to the current scope. This allows us to use the ClientBuilder class without having to refer to its namespace Elasticsearch everytime we need to use it:
1// laradock-projects/ridesharer/loader.php 2 use Elasticsearch\ClientBuilder;
Include the vendor autoload file. This allows us to include all the packages that we installed earlier:
require 'vendor/autoload.php';
Load the .env file:
1$dotenv = new Dotenv\Dotenv(__DIR__); 2 $dotenv->load(); 3 4 $elasticsearch_host = getenv('ELASTICSEARCH_HOST'); // get the elasticsearch config
After that, connect to Elasticsearch:
1$hosts = [ 2 [ 3 'host' => $elasticsearch_host 4 ] 5 ]; 6 7 $client = ClientBuilder::create()->setHosts($hosts)->build();
Setting the type mapping
Since we will be working with coordinates in this app, we need to tell Elasticsearch which of the fields we will be using are coordinates. That way, we can query them later using functions which are specifically created to query geo-point data. This is done through a process called Mapping.
Start by including the loader file:
1<?php 2 // laradock-projects/ridesharer/set-map.php 3 require 'loader.php';
Next, we can now proceed with specifying the actual map. Note that an error might occur (for example, the index has already been created, or one of the datatypes we specified isn’t recognized by Elasticsearch) so we’re wrapping everything in a try..catch. This allows us to “catch” the error and present it in a friendly manner:
1try { 2 $indexParams['index'] = 'places'; // the name of the index 3 4 $myTypeMapping = [ 5 '_source' => [ 6 'enabled' => true 7 ], 8 'properties' => [ 9 'from_coords' => [ 10 'type' => 'geo_point' 11 ], 12 'to_coords' => [ 13 'type' => 'geo_point' 14 ], 15 'current_coords' => [ 16 'type' => 'geo_point' 17 ], 18 'from_bounds.top_left.coords' => [ 19 'type' => 'geo_point' 20 ], 21 'from_bounds.bottom_right.coords' => [ 22 'type' => 'geo_point' 23 ], 24 'to_bounds.top_left.coords' => [ 25 'type' => 'geo_point' 26 ], 27 'to_bounds.bottom_right.coords' => [ 28 'type' => 'geo_point' 29 ] 30 ] 31 ]; 32 33 // next: add code for adding the map 34 35 } catch(\Exception $e) { 36 echo 'err: ' . $e->getMessage(); 37 }
Breaking down the code above, we first specify the name of the index we want to use. This shouldn’t already exist within Elasticsearch. If you’re coming from an RDBMS background, an index is synonymous to a database:
$indexParams['index'] = 'places';
For the actual type mapping, we only need to specify two properties: _source and properties.
_source allows us to specify whether to enable returning of the source when getting documents. In Elasticsearch, the _source contains the fields (and their values) that we’ve indexed.
In a real-world app, you don’t really want this option to be enabled as it will affect the search performance. We’re only enabling it so that we don’t have to perform an additional step to fetch the source whenever where querying the index:
1'_source' => [ 2 'enabled' => true 3 ],
The other property that we need to specify is the properties. This accepts the array of field names whose data type we want to specify. Of course, we don’t need to specify the data type of all the fields we plan on using. This is because the data type is already implied in most cases (for example, if it’s wrapped in double or single quotes then it’s a string). But for special data types such as the geo-point, that’s the time where we need to explicitly specify it:
1'from_coords' => [ 2 'type' => 'geo_point' 3 ],
If the field that you want to work with is located deep within other fields, then you use the dot notation to specify the parent:
1'from_bounds.top_left.coords' => [ 2 'type' => 'geo_point' 3 ]
Lastly, add the code for creating the index with the map that we specified:
1$indexParams['body']['mappings']['location'] = $myTypeMapping; // specify the map 2 $response = $client->indices()->create($indexParams); // create the index 3 print_r($response); // print the response
Access http://ridesharer.loc/set-map.php on your browser and it should print out a success response.
Note that if you have another local development environment that’s currently running, it might be the one that takes priority instead of Laradock. So be sure to disable them if you can’t access the URL above.
Creating users
When someone uses the app, they need to login first. If the username they used doesn’t already exist then it’s created.
Start by getting the data passed from the app, in PHP this is commonly done by extracting the field name from the $_POST global variable. But in this case, we’re using the PHP input stream to read the raw POST data from the request body. This is because this is how Axios (the library that we’ll be using in the app later on) submits the data when sending requests to the server:
1<?php 2 // laradock-projects/ridesharer/create-user.php 3 require 'loader.php'; 4 5 $data = json_decode(file_get_contents("php://input"), true); 6 $username = $data['username']; // get the value from the username field
Construct the parameters to be supplied to Elasticsearch. This includes the index and the type. You can think of the type as the table or collection that you want to query.
1$params = [ 2 'index' => 'places', // the index 3 'type' => 'users' // the table or collection 4 ];
Specify the query. In this case, we’re telling Elasticsearch to look for an exact match for the username supplied:
$params['body']['query']['match']['username'] = $username; // look for the username specified
Execute the search query, if it doesn’t return any “hits” then we create a new user using the username that was supplied:
1try { 2 $search_response = $client->search($params); // execute the search query 3 4 if($search_response['hits']['total'] == 0){ // if the username doesn't already exist 5 // create the user 6 $index_response = $client->index([ 7 'index' => 'places', 8 'type' => 'users', 9 'id' => $username, 10 'body' => [ 11 'username' => $username 12 ] 13 ]); 14 } 15 16 echo 'ok'; 17 18 } catch(\Exception $e) { 19 echo 'err: ' . $e->getMessage(); 20 }
Saving routes
Whenever a rider shares a ride, the following information needs to be stored in the index:
- username
- origin
- destination
- origin coordinates
- destination coordinates
- the steps from the origin to destination
Start by getting the data submitted from the app:
1<?php 2 // laradock-projects/ridesharer/save-route.php 3 require 'loader.php'; 4 5 $google_api_key = getenv('GOOGLE_API_KEY'); 6 7 $data = json_decode(file_get_contents("php://input"), true); 8 $start_location = $data['start_location']; // an array containing the coordinates (latitude and longitude) of the rider's origin 9 $end_location = $data['end_location']; // the coordinates of the rider's destination 10 11 $username = $data['username']; // the rider's username 12 $from = $data['from']; // the descriptive name of the rider's origin 13 $to = $data['to']; // the descriptive name of the rider's destination 14 $id = generateRandomString(); // unique ID used for identifying the document
Make a request to the Google Directions API using the file_get_contents() function. The directions endpoint expects the origin and destination to be passed as a query parameter. These two contains the latitude and longitude value pairs (separated by a comma). We simply pass the values supplied from the app.
The file_get_contents() function returns a JSON string so we use the json_decode() function to convert it to an array. Specifying true as the second argument tells PHP to convert it to an array instead of an object (when the second argument is omitted or set to false):
1$steps_data = []; 2 3 $contents = file_get_contents("https://maps.googleapis.com/maps/api/directions/json?origin={$start_location['latitude']},{$start_location['longitude']}&destination={$end_location['latitude']},{$end_location['longitude']}&key={$google_api_key}"); 4 5 $directions_data = json_decode($contents, true);
Loop through the array of steps and construct an array ($steps_data) that only contains the data that we want to store. In this case, it’s only the latitude and longitude values for each of the steps:
1if(!empty($directions_data['routes'])){ 2 $steps = $directions_data['routes'][0]['legs'][0]['steps']; 3 foreach($steps as $step){ 4 $steps_data[] = [ 5 'lat' => $step['start_location']['lat'], 6 'lng' => $step['start_location']['lng'] 7 ]; 8 9 $steps_data[] = [ 10 'lat' => $step['end_location']['lat'], 11 'lng' => $step['end_location']['lng'] 12 ]; 13 } 14 }
Next, construct the data that we’ll save to the Elasticsearch index:
1if(!empty($steps_data)){ 2 3 $params = [ 4 'index' => 'places', 5 'type' => 'location', 6 'id' => $id, 7 'body' => [ 8 'username' => $username, 9 'from' => $from, 10 'to' => $to, 11 'from_coords' => [ // geo-point values needs to have lat and lon 12 'lat' => $start_location['latitude'], 13 'lon' => $start_location['longitude'], 14 ], 15 'current_coords' => [ 16 'lat' => $start_location['latitude'], 17 'lon' => $start_location['longitude'], 18 ], 19 'to_coords' => [ 20 'lat' => $end_location['latitude'], 21 'lon' => $end_location['longitude'], 22 ], 23 'steps' => $steps_data 24 ] 25 ]; 26 27 }
Make the request to index the data:
1try{ 2 $response = $client->index($params); 3 $response_data = json_encode([ 4 'id' => $id 5 ]); 6 7 echo $response_data; 8 }catch(\Exception $e){ 9 echo 'err: ' . $e->getMessage(); 10 }
Here’s the function for generating a unique ID:
1function generateRandomString($length = 10){ 2 $characters = '0123456789abcdefghijklmnopqrstuvwxyzABCDEFGHIJKLMNOPQRSTUVWXYZ'; 3 $charactersLength = strlen($characters); 4 $randomString = ''; 5 for($i = 0; $i < $length; $i++){ 6 $randomString .= $characters[rand(0, $charactersLength - 1)]; 7 } 8 return $randomString; 9 }
Searching routes
When a hiker searches for a ride, a request is made to this file. This expects the origin and destination of the hiker to be passed in the request body. That way, we can make a request to the Google Directions API with those data:
1<?php 2 // /laradock-projects/ridesharer/search-routes.php 3 require 'loader.php'; 4 5 $google_api_key = getenv('GOOGLE_API_KEY'); 6 7 $params['index'] = 'places'; 8 $params['type'] = 'location'; 9 10 $data = json_decode(file_get_contents("php://input"), true); 11 12 // the hiker's origin coordinates 13 $hiker_origin_lat = $data['origin']['latitude']; 14 $hiker_origin_lon = $data['origin']['longitude']; 15 16 // the hiker's destination coordinates 17 $hiker_dest_lat = $data['dest']['latitude']; 18 $hiker_dest_lon = $data['dest']['longitude']; 19 20 $hiker_directions_contents = file_get_contents("https://maps.googleapis.com/maps/api/directions/json?origin={$hiker_origin_lat},{$hiker_origin_lon}&destination={$hiker_dest_lat},{$hiker_dest_lon}&key={$google_api_key}"); 21 22 $hiker_directions_data = json_decode($hiker_directions_contents, true);
Store the hiker’s steps into an array. We will be using it later to determine whether the hiker and the rider have the same route. Note that we’re only storing the start_location for the first step. This is because the start_location of all the succeeding steps overlaps with the end_location of the step that follows:
1$hikers_steps = []; 2 3 $steps = $hiker_directions_data['routes'][0]['legs'][0]['steps']; // extract the steps 4 foreach($steps as $index => $s){ 5 if($index == 0){ 6 $hikers_steps[] = [ 7 'lat' => $s['start_location']['lat'], 8 'lng' => $s['start_location']['lng'] 9 ]; 10 } 11 12 $hikers_steps[] = [ 13 'lat' => $s['end_location']['lat'], 14 'lng' => $s['end_location']['lng'] 15 ]; 16 }
Next, we construct the query to be sent to Elasticsearch. Here we use a d``ecay function called gauss to assign a score to each of the routes that are currently saved in the index. This score is then used to determine the order in which the results are returned, or whether they will be returned at all.
Specifying the min_score means all the documents which don’t meet the supplied score won’t be returned in the response. In the code below, we’re querying for documents which are up to five kilometers away from the origin. But once the documents have a current_coords which are not within 100 meters, the score assigned to them is halved:
1$params['body'] = [ 2 "min_score" => 0.5, // the minimum score for the function to return the record 3 'query' => [ 4 'function_score' => [ 5 'gauss' => [ 6 'current_coords' => [ 7 "origin" => ["lat" => $hiker_origin_lat, "lon" => $hiker_origin_lon], // where to begin the search 8 "offset" => "100m", // only select documents that are up to 100 meters away from the origin 9 "scale" => "5km" // (offset + scale = 5,100 meters) any document which are not within the 100 meter offset but are still within 5,100 meters gets a score of 0.5 10 ] 11 ] 12 ] 13 ] 14 ];
If you want to know more about how the function works, check this article out: The Closer, The Better.
Next, construct the coordinates for the hiker’s origin and destination. We will use this to compute the distance between the hiker’s origin and destination, as well as the hiker’s origin and the rider’s destination. We will need these values later on to determine whether the routes returned from the query matches the hiker’s route:
1$hikers_origin = ['lat' => $hiker_origin_lat, 'lng' => $hiker_origin_lon]; 2 $hikers_dest = ['lat' => $hiker_dest_lat, 'lng' => $hiker_dest_lon];
Send the request and loop through all the results:
1try { 2 $response = $client->search($params); 3 4 if(!empty($response['hits']) && $response['hits']['total'] > 0){ 5 foreach($response['hits']['hits'] as $hit){ 6 7 $source = $hit['_source']; 8 $riders_steps = $source['steps']; 9 10 $current_coords = $source['current_coords']; 11 $to_coords = $source['to_coords']; 12 13 $riders_origin = [ 14 'lat' => $current_coords['lat'], 15 'lng' => $current_coords['lon'] 16 ]; 17 18 $riders_dest = [ 19 'lat' => $to_coords['lat'], 20 'lng' => $to_coords['lon'] 21 ]; 22 23 // check whether the rider's route matches the hiker's route 24 if(isCoordsOnPath($hiker_origin_lat, $hiker_origin_lon, $riders_steps) && canDropoff($hikers_origin, $hikers_dest, $riders_origin, $riders_dest, $hikers_steps, $riders_steps)){ 25 // the rider's username, origin and destination 26 $rider_details = [ 27 'username' => $source['username'], 28 'from' => $source['from'], 29 'to' => $source['to'] 30 ]; 31 32 echo json_encode($rider_details); // respond with the first match 33 break; // break out from the loop 34 } 35 } 36 } 37 38 } catch(\Exception $e) { 39 echo 'err: ' . $e->getMessage(); 40 }
The isCoordsOnPath() function uses the isLocationOnPath() function from the php-geometry library. This accepts the following arguments:
- An array containing the latitude and longitude of the coordinate we want to check.
- An array of arrays containing the latitude and longitude of each of the steps.
- The tolerance value in degrees. This is useful if the place specified isn’t near a road. Here, I’ve used a high value to cover for most cases. As long as the hiker’s origin is somewhat near to a road, then it should be fine.
1function isCoordsOnPath($lat, $lon, $path) { 2 $response = \GeometryLibrary\PolyUtil::isLocationOnPath(['lat' => $lat, 'lng' => $lon], $path, 350); 3 return $response; 4 }
The canDropoff() function determines whether the rider and the hiker are both treading the same route. This accepts the following arguments:
$hikers_origin- the coordinates of the hiker’s origin.$hikers_dest- the coordinates of the hiker’s destination.$riders_origin- the coordinates of the rider’s origin.$riders_destination- the coordinates of the rider’s destination.$hikers_steps- an array containing the hiker’s steps.$riders_steps- an array containing the rider’s steps.
The way this function works is that it first determines who leaves the vehicle last: the rider or the hiker. The app works with the assumption that the rider has to ride the vehicle first, and that they should pick up the hiker before they get to leave the vehicle. Otherwise, the hiker won’t be able to track where the vehicle is. This means that there are only two possible scenarios when it comes to the order of leaving the vehicle:
- rider rides vehicle → rider picks up hiker → rider leaves the vehicle → hiker leaves the vehicle
- rider rides vehicle → rider picks up hiker → hiker leaves the vehicle → rider leaves the vehicle
The tracking starts once the rider picks up the hiker. So we measure the distance between the hiker’s origin and their destination, as well as the hiker’s origin and the rider’s destination. This then allows us to determine who will leave the vehicle last by comparing the distance between the two.
Once we know the order in which the two users leaves the vehicle, we can now use the isCoordsOnPath() function to determine if the destination of the person who will leave the vehicle first is within the route of the person who will leave the vehicle last:
1function canDropoff($hikers_origin, $hikers_dest, $riders_origin, $riders_dest, $hikers_steps, $riders_steps) { 2 // get the distance from the hiker's origin to the hiker's destination 3 $hiker_origin_to_hiker_dest = \GeometryLibrary\SphericalUtil::computeDistanceBetween($hikers_origin, $hikers_dest); 4 5 // get the distance from the hiker's origin to the rider's destination 6 $hiker_origin_to_rider_dest = \GeometryLibrary\SphericalUtil::computeDistanceBetween($hikers_origin, $riders_dest); 7 8 $is_on_path = false; // whether the rider and hiker is on the same path or not 9 10 if($hiker_origin_to_hiker_dest > $hiker_origin_to_rider_dest){ // hiker leaves the vehicle last 11 // if the rider's destination is within the routes covered by the hiker 12 $is_on_path = isCoordsOnPath($riders_dest['lat'], $riders_dest['lng'], $hikers_steps); 13 14 }else if($hiker_origin_to_rider_dest > $hiker_origin_to_hiker_dest){ // rider leaves the vehicle last 15 // if hiker's destination is within the routes covered by the rider 16 $is_on_path = isCoordsOnPath($hikers_dest['lat'], $hikers_dest['lng'], $riders_steps); 17 18 }else{ // if the rider and hiker are both going the same place 19 // check whether either of the conditions above returns true 20 $is_on_path = isCoordsOnPath($hikers_dest['lat'], $hikers_dest['lng'], $riders_steps) || isCoordsOnPath($riders_dest['lat'], $riders_dest['lng'], $hikers_steps); 21 } 22 23 return $is_on_path; 24 25 }
Update route
Every time the location changes, the app makes a request to this file. The app sends the unique ID that the server responded with when the route was created. This allows us to fetch the existing document from the index. We then update the source with the new coordinates:
1<?php 2 // laradock-projects/ridesharer/update-route.php 3 require 'loader.php'; 4 5 $data = json_decode(file_get_contents("php://input"), true); // get the request body and convert it to an array 6 7 $params['index'] = 'places'; 8 $params['type'] = 'location'; 9 $params['id'] = $data['id']; // the id submitted from the app 10 11 // the latitude and longitude values submitted from the app 12 $lat = $data['lat']; 13 $lon = $data['lon']; 14 15 $result = $client->get($params); // get the document based on the id used as the parameter 16 $result['_source']['current_coords'] = [ // update the current coordinates with the latitude and longitude values submitted from the app 17 'lat' => $lat, 18 'lon' => $lon 19 ]; 20 21 $params['body']['doc'] = $result['_source']; // replace the source with the updated data 22 $result = $client->update($params); // update the document 23 24 echo json_encode($result);
Delete route
Once the rider accepts a request from the hiker, the app makes a request to this file so that the existing route will be deleted. We need to do this because we don’t want other hikers to make another request to the same rider (remember the 1:1 ratio of the rider to hiker?). Also, note that we’re using the rider’s username to query the index. We haven’t really put any security measures to only allow a username to be used on a single app instance, but this tells us that a user can only save one route at a time:
1<?php 2 // laradock-projects/ridesharer/delete-route.php 3 require 'loader.php'; 4 5 $data = json_decode(file_get_contents("php://input"), true); 6 7 $params['index'] = 'places'; 8 $params['type'] = 'location'; 9 $params['body']['query']['match']['username'] = $data['username']; // find the rider's username 10 11 $result = $client->search($params); // search the index 12 $id = $result['hits']['hits'][0]['_id']; // only get the first result 13 14 unset($params['body']); 15 $params['id'] = $id; 16 $result = $client->delete($params); 17 18 echo json_encode($result);
Delete index
Deleting the index (delete-index.php ) isn’t really required for the app to work. Though it will be useful when testing the app. This allows you to reset the Elasticsearch index so you can control the results that are returned when you search for riders:
1<?php 2 // laradock-projects/ridesharer/delete-index.php 3 require 'loader.php'; 4 5 try { 6 $params = ['index' => 'places']; 7 $response = $client->indices()->delete($params); 8 print_r($response); 9 } catch(\Exception $e) { 10 echo 'err: ' . $e->getMessage(); 11 }
Authenticating requests
Below is the code for authenticating requests so that Pusher will allow the user to use the Channels service. This requires the keys from the App keys tab earlier. Be sure to replace the placeholders with your keys:
1<?php 2 // laradock-projects/ridesharer/pusher-auth.php 3 require 'vendor/autoload.php'; 4 5 // load the .env file located on the same directory as this file 6 $dotenv = new Dotenv\Dotenv(__DIR__); 7 $dotenv->load(); 8 9 // get the individual config from the .env file. This should be the same as the one's you have on the .env file 10 $app_id = getenv('PUSHER_APP_ID'); 11 $app_key = getenv('PUSHER_APP_KEY'); 12 $app_secret = getenv('PUSHER_APP_SECRET'); 13 $app_cluster = getenv('PUSHER_APP_CLUSTER');
Set the content type to application/json as this is what the Pusher client expects in the client side:
header('Content-Type: application/json');
Connect to the Pusher app using the keys and options. The options include the cluster where the app is running from, and whether to encrypt the connection or not:
1$options = ['cluster' => $app_cluster, 'encrypted' => true]; 2 $pusher = new Pusher\Pusher($app_key, $app_secret, $app_id, $options);
Lastly, get the data sent by the Pusher client and use it as an argument for the socket_auth() method. This method returns the success token required by the Pusher client:
1$channel = $_POST['channel_name']; 2 $socket_id = $_POST['socket_id']; 3 4 echo $pusher->socket_auth($channel, $socket_id);
As you can see, we didn’t really apply any form of authentication in the code above. In a real-world scenario, you want to have some form of authentication before returning the success token. This can be a unique ID that’s only assigned to the users of your app, it can also be a key which is then decrypted to come up with a token used for authenticating the request. This unique ID or key is sent from the client side so the server can verify it.
You can test if the server is working by accessing any of the files you created earlier.
Exposing the server with ngrok
So that you can access the virtual host http://ridesharer.loc from the app, you need to setup ngrok. This allows you to expose your virtual host to the internet.
- Sign up for an ngrok account.
- Go to your dashboard and download ngrok.
- Unzip the archive.
- Authenticate ngrok using your auth token:
.\ngrok authtoken YOUR_AUTH_TOKEN
- Expose the virtual host:
ngrok http -host-header=ridesharer.loc 80
This will give you an output similar to the following:
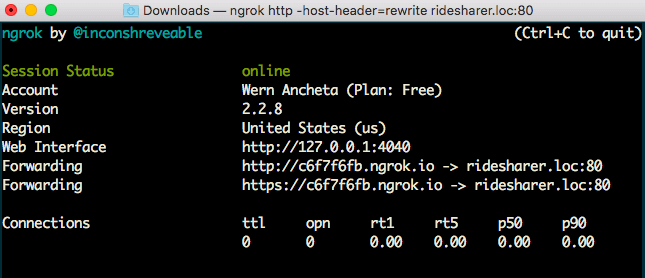
Copy the HTTPS URL as that’s what we’re going to use in the app later on.
Conclusion
That’s it! In this tutorial, we’ve set up the server to be used by the app. You can find the code used in this tutorial on this Github repo. In the second part of this series, we’ll be covering how to create the frontend of the app.


© 2026 Pusher Ltd. All rights reserved.
Pusher Limited is a company registered in England and Wales (No. 07489873) whose registered office is at MessageBird UK Limited, 3 More London Riverside, 4th Floor, London, United Kingdom, SE1 2AQ.