- Products

- Developers
- User stories
- Blog
- Pricing

Create a whiteboard Electron app with React - Part 1: Adding the whiteboard
Introduction
In this tutorial, we’ll take a look at how we can build a whiteboard app using React.
Prerequisites
Basic knowledge of React is required. We’ll also be using Electron, but you don’t even need to know it since we’re only using it as a container.
You need Node and Yarn to install packages.
You’ll also need a Pusher Channels app instance. Enable client events on its settings because we will be triggering events directly from the client side. Create a free sandbox Pusher account or sign in.
Optionally, you need an Ngrok account if you want to test the app with someone outside your network.
App overview
The whiteboard app will allow the users to communicate their ideas via a canvas similar to a physical whiteboard. Thus, it will have the following tools:
- Select - for selecting objects in the canvas so they can be modified or removed.
- Pen - for free-hand drawing.
- Rectangle - for drawing rectangle shapes.
- Circle - for drawing circle shapes.
- Text - for adding text.
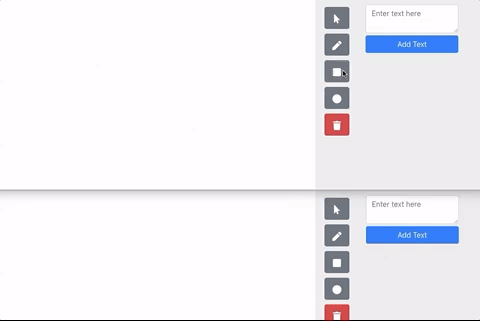
Here’s what the final output for this part will look like:
You can find the code for this tutorial on its GitHub repo.
Note that I’ll be using the terms “canvas” and “whiteboard” interchangeably throughout the article, but they will mean the same thing.
Choosing the tool
The main challenge with building a whiteboard is the implementation of canvas. With plain JavaScript, we have a bunch of options, but only FabricJS and Konva seem to fit the bill.
The next step is to find out if any of these libraries have decent React integration. Of the two, only Konva meets the requirement with its React Konva library.
The only problem is I don’t have prior Konva experience and the various elements (for example, rectangle and circle) are actually rendered using components. There’s also no free-drawing tool which is often the most important.
Finally, I found this React Sketch package from Thomas. It’s exactly what we need to quickly create a whiteboard app. And it uses FabricJS behind the scenes so I know that it’s going to be good since I previously used FabricJS on another project.
Bootstrapping the app
Now that you know why we ended up using React Sketch, it’s time to start building the app. I’ve already created a starter project which has navigation and all the styles already set up. This will serve as the starting point for this tutorial. Go ahead and clone it on your working directory:
git clone https://github.com/anchetaWern/ElectronWhiteboard
Switch to the starter branch and install the dependencies:
1git checkout starter 2 yarn
Extending the React Sketch package
In this section, we’ll extend the React Sketch package in order for it to be able to trigger client events when a whiteboard object is created, updated, or removed.
This is an optional section since I’ve already included the compiled version of the updated package in the node_modules/react-sketch/dist folder of the part1 branch.
If you’re planning to make use of the same package in the future or you want to learn how the package works, I encourage you to follow along. Otherwise, simply skip to the next section.
If you decide to skip this section, you need to copy this file over to the node_modules/react-sketch/dist directory of the project.
Installing the dependencies
If you’re still here, the next step is to clone the React Sketch package so we can update it accordingly:
git clone https://github.com/tbolis/react-sketch.git
If you’re on Mac, you need to install Macports. This software allows you to install various open source software that’s required to compile FabricJS. Go ahead and download the installer file from this page and install it on your machine. Once it’s installed, you need to install the following packages via Macports:
sudo port install pkgconfig cairo pango libpng jpeg giflib libsrvg
These are all required to compile FabricJS.
If you’re on Ubuntu or any other Linux distribution, you won’t have any problem because these open-source tools are native to Linux. But if you don’t have it, you can simply install it via your default way of installing software.
For Windows, you need to install Node 8.11 because it’s required by windows-build-tools. This will install Python 2.7 and Visual Studio build tools on your machine:
npm install -g windows-build-tools
You also need node-gyp:
npm install -g node-gyp
Updating the code
We’re now ready to update the code. Start by declaring the additional props that we will be supplying to this component:
1// react-sketch/src/SketchField.jsx 2 static propTypes = { 3 // <existing code> 4 style: PropTypes.object, 5 6 // add these: 7 onUpdate: PropTypes.func, // function to execute when an object is modified 8 username: PropTypes.string, // username of the current user 9 shortid: PropTypes.func // helper for generating random unique IDs for objects 10 }
Next, update the _onObjectAdded function to add a unique ID for an object that was created. Then execute the onUpdate function that we will pass as props later on:
1_onObjectAdded = (e) => { 2 // <existing code> 3 this._history.keep([obj, state, state]) 4 5 // add these: 6 if (!obj.sender) { 7 const id = this.props.shortid.generate(); 8 Object.assign(obj, { id }); 9 this.props.onUpdate(JSON.stringify(obj), 'add', this.props.username, id); 10 } 11 }
The above function is automatically triggered whenever a new object is added to the canvas. That’s why it’s the perfect place to execute the function that will update the UI of all the other users in the channel.
Note that we’re checking for the non-existence of the sender property (username of the user who added the object) in the object before we trigger the function for updating the UI of the other users because it will be a catastrophe if we don’t.
We already know that the _onObjectAdded function is automatically executed every time a new object is added. So if we’re not checking for the existence of the sender property, this.props.onUpdate will basically ping-pong between the users in the channel.
As you’ll see in the src/screens/Whiteboard.js file later, the sender property is being added to the object when the event for updating the canvas (client-whiteboard-updated) is received. This effectively prevents the receiver from triggering the same event to all the other users.
Do the same for the _onObjectModified function. This function is automatically executed every time an object is updated:
1_onObjectModified = (e) => { 2 // <existing code> 3 this._history.keep([obj, prevState, currState]); 4 // add these: 5 if (!obj.sender) { 6 let strObj = JSON.stringify(obj); 7 this.props.onUpdate(strObj, 'update', this.props.username, obj.id); 8 } 9 }
Next, add a function for getting the currently selected object. This will get called from the src/screens/Whiteboard.js file later to get the id of the currently selected object for removal.
As you’ve seen in the _onObjectAdded function earlier, this is a unique ID assigned to the object. By using it, all the other users can find the object so they can also remove it from their canvas:
1getSelected = () => { 2 let canvas = this._fc; 3 let activeObj = canvas.getActiveObject(); 4 return activeObj; 5 }
The setSelected function is used for programmatically setting an active (currently selected) object in the canvas. We will call it when the other users in the channel receive the event for updating the whiteboard.
If the event has a type of remove, this function sets the object with the id passed in the event as active. From there, we simply use the existing removeSelected function to remove the object from the canvas:
1setSelected = (id) => { 2 let canvas = this._fc; 3 var objToSelect = canvas.getObjects().find((o) => { 4 return id == o.id; 5 }); 6 canvas.setActiveObject(objToSelect); 7 canvas.requestRenderAll(); 8 }
Next, add a function for programmatically adding an object to the canvas. This gets fired on all the other users in the channel every time a user adds a new object. Note that each object type has a different way of initialization:
1addObject = (obj) => { 2 3 let canvas = this._fc; 4 let shapeData = JSON.parse(obj); 5 6 let shape = null; 7 const type = this._capsFirstLetter(shapeData.type); 8 if (type == 'Path') { 9 let string_path = ''; 10 shapeData.path.forEach((x) => { 11 string_path += x.join(' '); 12 }); 13 14 shape = new fabric.Path(string_path); 15 delete shapeData.path; 16 shape.set(shapeData); 17 } else if (type == 'I-text') { 18 shape = new fabric.Text(shapeData.text); 19 delete shapeData.text; 20 shape.set(shapeData); 21 } else { 22 // for Rectangle and Circle objects 23 shape = new fabric\[type\](shapeData); 24 } 25 26 canvas.add(shape); 27 }
Here’s the _capsFirstLetter function. It’s used to convert the first letter of a string to uppercase so it matches an actual FabricJS object type:
1_capsFirstLetter = (str) => { 2 return str.charAt(0).toUpperCase() + str.slice(1); 3 }
Next, add the function for modifying existing objects. This gets called every time an existing object is updated by another user in the channel:
1modifyObject = (obj) => { 2 3 let objData = JSON.parse(obj); 4 let canvas = this._fc; 5 6 var objToModify = canvas.getObjects().find((o) => { 7 return objData.id == o.id; 8 }); 9 objToModify.set(objData); // update the object 10 objToModify.setCoords(); // useful if the object's coordinates in the canvas also changed (usually by moving) 11 canvas.requestRenderAll(); // refresh the canvas so changes will appear 12 }
Next, update the addText function to include the id to the object. This id will be passed from the src/screens/Whiteboard.js file later:
1addText = (text, options = {}) => { 2 // <existing code> 3 Object.assign(options, opts); 4 iText.set({ 5 'id': options.id, // add this 6 // <existing code> 7 }); 8 }
Building the package
Now we’re ready to install all the dependencies and build the package:
1yarn 2 yarn prebuild 3 yarn build
This generates a dist/index.js file. Copy that file and replace the node_modules/react-sketch/dist/index.js file inside the ElectronWhiteboard folder with it to update React Sketch in your project.
Remember to do this before you compile the ElectronWhiteboard project using yarn start or yarn build so it uses the updated version of the package instead of the original one. You can also add a build script to automatically do that if you want.
Login screen
Create a src/screens/Login.js file and add the following:
1import React, { Component } from "react"; 2 import { Container, Row, Col, Button, Input } from 'reactstrap'; 3 import Pusher from "pusher-js"; 4 5 import uniquename from "../helpers/uniquename"; 6 7 const channel_name = uniquename(); 8 9 const PUSHER_APP_KEY = process.env.REACT_APP_PUSHER_APP_KEY; 10 const PUSHER_APP_CLUSTER = process.env.REACT_APP_PUSHER_APP_CLUSTER; 11 const BASE_URL = "http://localhost:5000"; 12 13 class LoginScreen extends Component { 14 15 state = { 16 myUsername: "", 17 channelName: channel_name, 18 isLoading: false 19 } 20 21 constructor(props) { 22 super(props); 23 this.pusher = null; 24 this.group_channel = null; // channel for communicating changes to the canvas 25 } 26 27 // next: add render function 28 29 }
Next, render the login UI. This will ask for the user’s username and channel they want to enter. Note that when logging in, the channel doesn’t already need to exist:
1render() { 2 return ( 3 <Container> 4 <Row> 5 <Col lg={12}> 6 <div className="centered"> 7 <div className="textInputContainer"> 8 <Input 9 type="text" 10 placeholder="myUsername" 11 onChange={this.onUpdateText} 12 value={this.state.myUsername} /> 13 </div> 14 15 <div className="textInputContainer"> 16 <Input 17 type="text" 18 placeholder="channelName" 19 onChange={this.onUpdateText} 20 value={this.state.channelName} /> 21 </div> 22 23 <div className="buttonContainer"> 24 <Button 25 type="button" 26 color="primary" 27 onClick={this.login} 28 disabled={this.state.isLoading} 29 block> 30 {this.state.isLoading ? "Logging in…" : "Login"} 31 </Button> 32 </div> 33 34 </div> 35 </Col> 36 </Row> 37 </Container> 38 ); 39 }
Here’s the function for updating the value of the text fields:
1onUpdateText = (evt) => { 2 const field = evt.target.getAttribute("placeholder"); 3 this.setState({ 4 [field]: evt.target.value 5 }); 6 };
When the user logs in, we authenticate them with Pusher so they can trigger events from the client side. Once authenticated, we subscribe them to a common channel where all the changes in the whiteboard will be communicated:
1login = () => { 2 3 const { myUsername, channelName } = this.state; 4 5 this.setState({ 6 isLoading: true 7 }); 8 9 this.pusher = new Pusher(PUSHER_APP_KEY, { 10 authEndpoint: `${BASE_URL}/pusher/auth`, 11 cluster: PUSHER_APP_CLUSTER, 12 encrypted: true 13 }); 14 15 this.group_channel = this.pusher.subscribe(`private-group-${channelName}`); 16 this.group_channel.bind("pusher:subscription_error", (status) => { 17 console.log("error subscribing to group channel: ", status); 18 }); 19 20 this.group_channel.bind("pusher:subscription_succeeded", () => { 21 console.log("subscription to group succeeded"); 22 23 // navigate to the whiteboard screen 24 this.props.navigation.navigate("Whiteboard", { 25 myUsername, 26 pusher: this.pusher, 27 group_channel: this.group_channel 28 }); 29 30 }); 31 32 }
Don’t forget to add a .env file at the project root. This contains your Pusher app credentials:
1REACT_APP_PUSHER_APP_KEY="YOUR PUSHER APP KEY" 2 REACT_APP_PUSHER_APP_CLUSTER="YOUR PUSHER APP CLUSTER"
Unique name helper
Here’s the code for the unique name helper:
1// src/helpers/uniquename.js 2 var generateName = require("sillyname"); 3 4 const generateUsername = () => { 5 const min = 10; 6 const max = 99; 7 const number = Math.floor(Math.random() * (max - min + 1)) + min; 8 const username = generateName().replace(" ", "_") + number; 9 return username; 10 }; 11 12 export default generateUsername;
Whiteboard screen
Now we’re ready to add the code for the Whiteboard screen. Create a src/screens/Whiteboard.js file and add the following:
1import React, { Component } from "react"; 2 import { Container, Row, Col, Button, Input } from 'reactstrap'; 3 import { SketchField, Tools } from 'react-sketch'; 4 5 import { FaMousePointer, FaPen, FaCircle, FaSquare, FaTrash } from 'react-icons/fa'; 6 7 import shortid from 'shortid'; // for generating unique IDs
Next, initialize the state and the instance variables. this.tools contains the tools that the users can use to draw objects in the whiteboard. This corresponds to the object types available in FabricJS:
1class WhiteboardScreen extends Component { 2 3 state = { 4 text: '', 5 myUsername: '', 6 tool: Tools.Pencil 7 } 8 9 constructor(props) { 10 super(props); 11 12 this.tools = [ 13 { 14 name: 'select', 15 icon: <FaMousePointer />, 16 tool: Tools.Select 17 }, 18 { 19 name: 'pencil', 20 icon: <FaPen />, 21 tool: Tools.Pencil 22 }, 23 { 24 name: 'rect', 25 icon: <FaSquare />, 26 tool: Tools.Rectangle 27 }, 28 { 29 name: 'circle', 30 icon: <FaCircle />, 31 tool: Tools.Circle 32 } 33 ]; 34 35 this.auto_create_tools = ['circle', 'rect']; // tools that will automatically create their corresponding object when selected 36 37 // next: add settings for auto-created objects 38 } 39 40 // next: add componentDidMount 41 }
Next, add the default settings for the objects that will be automatically created upon selection. Note that the user can always modify the object afterward so it’s safe to create them with some default settings:
1this.initial_objects = { 2 'circle': { 3 radius: 75, 4 fill: 'transparent', 5 stroke: '#000', 6 strokeWidth: 3, 7 top: 60, 8 left: 500 9 }, 10 11 'rect': { 12 width: 100, 13 height: 50, 14 fill: 'transparent', 15 stroke: '#000', 16 strokeWidth: 3, 17 top: 100, 18 left: 330 19 } 20 }
Once the component is mounted, we get the navigation params that were passed from the login screen earlier:
1componentDidMount() { 2 3 const { navigation } = this.props; 4 this.myUsername = navigation.getParam("myUsername"); 5 this.pusher = navigation.getParam("pusher"); 6 this.group_channel = navigation.getParam("group_channel"); 7 8 this.setState({ 9 myUsername: this.myUsername 10 }); 11 12 // next: add code for listening for canvas updates 13 }
Next, we listen for the event triggered by the user who updates the canvas. Every time this gets fired, we call the textGatherer function. This is a JavaScript closure that allows us to create an internal scope for storing payload data.
We’re doing this because not all messages contain all the data we need in order to update the canvas. A single object update or creation may require the use of five or more messages in order to send its full data. This is necessary because of Pusher’s 10KB per message limit which we’ll talk about later.
Going back to the code below, we check for the is_final property in the payload before we can start processing the message. Having this property in the message means that this is the last part of the message. Only then can we get the contents accumulated by the closure and convert it to an object.
That way, we can assign additional properties to it before we convert it back to a JSON string so we can pass it to the addObject and modifyObject functions:
1let textGatherer = this._gatherText(); 2 3 this.group_channel.bind('client-whiteboard-updated', (payload) => { 4 textGatherer(payload.data); 5 6 if (payload.is_final) { 7 const full_payload = textGatherer(); // get the gathered text 8 let obj = ''; 9 if (full_payload) { 10 obj = JSON.parse(full_payload); 11 12 if (payload.id) { 13 Object.assign(obj, { id: payload.id, sender: payload.sender }); 14 } else { 15 Object.assign(obj, { sender: payload.sender }); 16 } 17 } 18 19 if (payload.action === 'add') { 20 this._sketch.addObject(JSON.stringify(obj)); 21 } else if(payload.action === 'update') { 22 this._sketch.modifyObject(JSON.stringify(obj)); 23 } else if(payload.action === 'remove') { 24 this._sketch.setSelected(payload.id); 25 this._sketch.removeSelected(); 26 } 27 28 textGatherer = this._gatherText(); // reset to an empty string 29 } 30 31 });
Here’s the code for the _gatherText function:
1_gatherText = () => { 2 let sentence = ''; 3 return (txt = '') => { 4 return sentence += txt; 5 } 6 }
Next, render the UI. This is where we make use of the SketchField component that we updated earlier (if you followed along). this._sketch contains the reference to the component itself, it allows us to use methods from within the component class. tool is the tool that’s used to draw something on the canvas. onUpdate, username, and shortid are the custom ones (they’re not from the original library) we added earlier. Additionally, we have a tool for removing objects and adding text:
1render() { 2 return ( 3 <Container fluid> 4 <Row> 5 <Col lg={9}> 6 { 7 this.state.myUsername && 8 <SketchField 9 className="canvas" 10 ref={c => (this._sketch = c)} 11 width='1024px' 12 height='768px' 13 tool={this.state.tool} 14 lineColor='black' 15 lineWidth={3} 16 onUpdate={this.sketchUpdated} 17 username={this.state.myUsername} 18 shortid={shortid} /> 19 } 20 </Col> 21 22 <Col lg={3} className="Sidebar"> 23 <div className="tools"> 24 25 {this.renderTools()} 26 27 <div className="tool"> 28 <Button 29 color="danger" 30 size="lg" 31 onClick={this.removeSelected} 32 > 33 <FaTrash /> 34 </Button> 35 </div> 36 </div> 37 38 <div> 39 <div className="textInputContainer"> 40 <Input 41 type="textarea" 42 name="text_to_add" 43 id="text_to_add" 44 placeholder="Enter text here" 45 value={this.state.text} 46 onChange={this.onUpdateText} /> 47 <div className="buttonContainer"> 48 <Button type="button" color="primary" onClick={this.addText} block>Add Text</Button> 49 </div> 50 </div> 51 </div> 52 53 </Col> 54 </Row> 55 </Container> 56 ); 57 }
Here’s the function for rendering the buttons for picking the tools:
1renderTools = () => { 2 return this.tools.map((tool) => { 3 return ( 4 <div className="tool" key={tool.name}> 5 <Button 6 color="secondary" 7 size="lg" 8 onClick={this.pickTool} 9 data-name={tool.name} 10 data-tool={tool.tool} 11 > 12 {tool.icon} 13 </Button> 14 </div> 15 ); 16 }); 17 }
The pickTool function is executed when any of the buttons is clicked. This will simply update the value of tool in the state. But if the selected tool is one of those “auto-create” ones, we generate a unique ID and add it as a property to the default object settings (this.initial_objects) before we add it to the canvas.
We also change the tool back to the select tool so the user can select the object and start modifying it to their liking:
1pickTool = (event) => { 2 const button = event.target.closest('button'); 3 const tool = button.getAttribute('data-tool'); 4 const tool_name = button.getAttribute('data-name'); 5 6 this.setState({ 7 tool 8 }, () => { 9 if (this.auto_create_tools.indexOf(tool_name) !== -1) { 10 11 const obj = this.initial_objects[tool_name]; // get the initial object settings 12 const id = shortid.generate(); // generate a random unique ID 13 Object.assign(obj, { id: id, type: tool_name }); // add the ID to the object 14 15 this._sketch.addObject(JSON.stringify(obj)); // add the object to the canvas 16 17 // change the tool back to select 18 setTimeout(() => { 19 this.setState({ 20 tool: Tools.Select 21 }); 22 }, 500); 23 24 } 25 26 }); 27 } 28 29 // next: add onUpdateText
Next, add the function for updating the value of the text field for entering the text to be added to the canvas:
1onUpdateText = (event) => { 2 this.setState({ 3 text: event.target.value 4 }); 5 } 6 7 // next: add addText
When the button for adding a text is clicked, we call the addText method from inside the SketchField component. This accepts the text value to be added, and an optional object containing additional options for the text. In this case, we’re simply using it to pass the unique object ID:
1addText = () => { 2 if (this.state.text) { 3 const id = shortid.generate(); 4 this._sketch.addText(this.state.text, { id }); // add a text object to the canvas 5 6 this.setState({ 7 text: '' 8 }); 9 } 10 } 11 12 // next: add sketchUpdated function
Next is the sketchUpdated function. This function is called every time an object is added, modified, or removed from the canvas. It uses the updateOtherUsers function to publish the changes to all the other users on the channel. But before doing so, it first splits up the object based on a specific length.
As mentioned earlier, Pusher has a 10KB limit for publishing messages. This is plenty for the Circle, Rectangle, and Text objects but not for the path (free-drawing) object.
It’s considered a complex shape so it takes a lot more data to describe it. Which means that the 10KB limit is not enough. So the solution is to split up the obj into multiple parts.
Each part contains a specific number of characters. In this case, we’re using 8,000 because 10KB is roughly 10,000 characters. The extra 2,000 is for all the other data that we’re publishing. For the final part, we simply add an is_final property to the payload to signal the receiver that the message is ready to be assembled:
1sketchUpdated = (obj, action, sender, id = null) => { 2 if (this.state.myUsername) { 3 4 let length_per_part = 8000; // maximum number of characters that can be alloted to a FabricJS object 5 let loop_count = Math.ceil(obj.length / length_per_part); 6 7 let from_str_index = 0; 8 for (let x = 0; x < loop_count; x++) { 9 const str_part = obj.substr(from_str_index, length_per_part); 10 11 const payload = { 12 action: action, 13 id: id, 14 data: str_part, 15 sender: this.state.myUsername 16 }; 17 18 if (x + 1 === loop_count) { // if this is the final part 19 Object.assign(payload, { is_final: true }); 20 } 21 22 this.updateOtherUsers(payload); 23 from_str_index += length_per_part; 24 } 25 } 26 }
Here’s the updateOtherUsers function:
1updateOtherUsers = (payload) => { 2 this.group_channel.trigger('client-whiteboard-updated', payload); 3 }
Lastly, we have the removeSelected function. This is where we get the currently selected object and publish its id to all the other users in the channel:
1removeSelected = () => { 2 const activeObj = this._sketch.getSelected(); 3 4 const payload = { 5 action: 'remove', 6 is_final: true, 7 id: activeObj.id, 8 sender: this.state.myUsername 9 }; 10 11 this.updateOtherUsers(payload); 12 this._sketch.removeSelected(); // remove the object from the user's canvas 13 }
Server code
Here’s the server code. Right now, we’re simply using it to authenticate the user with Pusher so they can send client events:
1// server/server.js 2 var express = require("express"); 3 var bodyParser = require("body-parser"); 4 var Pusher = require("pusher"); 5 const cors = require("cors"); 6 7 require("dotenv").config(); 8 9 var app = express(); 10 app.use(bodyParser.json()); 11 app.use(bodyParser.urlencoded({ extended: false })); 12 app.use(cors()); 13 14 var pusher = new Pusher({ 15 appId: process.env.APP_ID, 16 key: process.env.APP_KEY, 17 secret: process.env.APP_SECRET, 18 cluster: process.env.APP_CLUSTER 19 }); 20 21 // for checking if the server works 22 app.get("/", (req, res) => { 23 res.send("all good..."); 24 }); 25 26 app.post("/pusher/auth", (req, res) => { 27 const socketId = req.body.socket_id; 28 const channel = req.body.channel_name; 29 console.log("authing..."); 30 var auth = pusher.authenticate(socketId, channel); 31 return res.send(auth); 32 }); 33 34 var port = process.env.PORT || 5000; 35 app.listen(port);
Don’t forget to update the server/.env file to include your Pusher app credentials:
1APP_ID="YOUR PUSHER APP ID" 2 APP_KEY="YOUR PUSHER APP KEY" 3 APP_SECRET="YOUR PUSHER APP SECRET" 4 APP_CLUSTER="YOUR PUSHER APP CLUSTER"
Running the app
At this point, you can now run the app. Start by running the server:
1cd server 2 node server.js
Optionally, you can use ngrok so you can test the app with someone outside your network. Don’t forget to update the base URL in the login screen if you do so:
1// src/screens/Login.js 2 const BASE_URL = "http://localhost:5000";
Finally, run the app itself:
1yarn start 2 yarn electron-dev
Conclusion
In this tutorial, we learned how to use FabricJS and React Sketch library to create a whiteboard app in React.
You can find the code for this tutorial on its GitHub repo.


© 2026 Pusher Ltd. All rights reserved.
Pusher Limited is a company registered in England and Wales (No. 07489873) whose registered office is at MessageBird UK Limited, 3 More London Riverside, 4th Floor, London, United Kingdom, SE1 2AQ.