- Products

- Developers
- User stories
- Blog
- Pricing

Build a web traffic monitor with Python
Introduction
In today’s tech world, it is important to know where the traffic on your website comes from because it helps content creators and website owners understand their visitors better. Website owners can further use this information to improve their website, render better advertisements or generally improve their content based on this data.
In this tutorial, we will build a simple website and a traffic monitor, the traffic monitor will display details about visitors on the website. For every visitor, there will multiple columns such as time of visit, continent, country, city, operating system, browser, and pages visited. Here is a display of what the final application will look like:
From the image above, we can see an incognito window to the left and the traffic monitor dashboard window to the right. In the incognito window, we visit our website on the local address 127.0.0.1:5000 and it updates in realtime on the traffic monitor dashboard. It registers that a new user has visited the website and displays the associated data. The user data is also saved to the database so that whenever we open the traffic monitor dashboard, the data persists.
We will build the backend server for this application using the Python framework called Flask. The source code for this tutorial is available here on GitHub.
Prerequisites
To follow along with this tutorial, a basic knowledge of Python, Flask, and JavaScript (ES6 syntax) is required. You will also need the following installed:
Virtualenv is great for creating isolated Python environments, so we can install dependencies in an isolated environment, and not pollute our global packages directory.
Let’s install virtualenv with this command:
$ pip install virtualenv
Setting up the app environment
Let’s create our project folder, and activate a virtual environment in it. Run the commands below:
1$ mkdir python-pusher-traffic-monitor 2 $ cd python-pusher-traffic-monitor 3 $ virtualenv .venv 4 $ source .venv/bin/activate # Linux based systems 5 $ \path\to\env\Scripts\activate # Windows users
Now that we have the virtual environment setup, we can install Flask within it with this command:
$ pip install flask
Let’s also install httpagentparser:
$ pip install httpagentparser
Before we do anything else, we need to install the Pusher library as we will need that for realtime updates.
Setting up Pusher
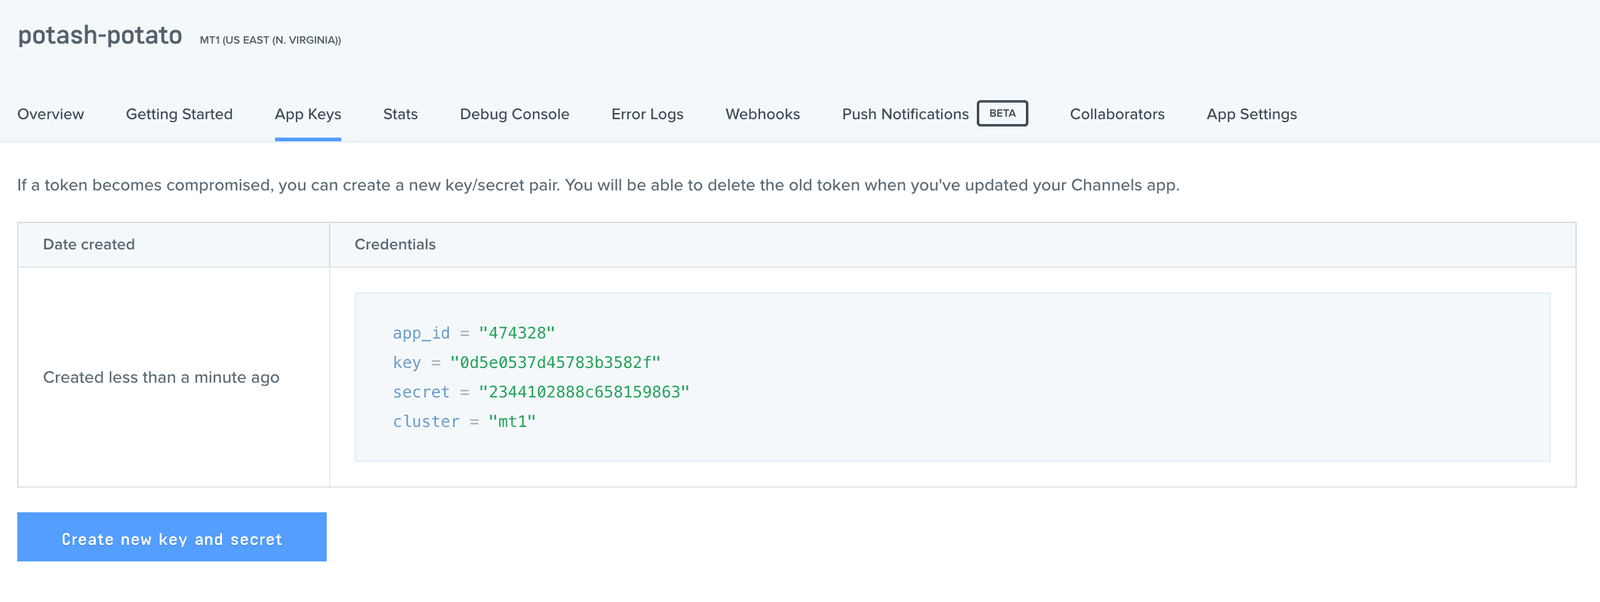
The first step will be to get a Pusher Channels application. We will need the application credentials for our realtime features to work.
Go to the Pusher website and create an account. After creating an account, you should create a new application. Follow the application creation wizard and then you should be given your application credentials, we will use this later in the article.
We also need to install the Pusher Python Library to send events to Pusher. Install this using the command below:
$ pip install pusher
File and Folder Structure
We don’t need to create so many files and folders for this application since it’s a simple one. Here’s the file/folder structure:
1├── python-pusher-traffic-monitor 2 ├── app.py 3 ├── dbsetup.py 4 ├── static 5 └── templates
The static folder will contain the static files to be used as is defined by Flask standards. The templates folder will contain the HTML templates. In our application, app.py is the main entry point and will contain our server-side code. To keep things modular, we will write all the code that we need to interact with the database in dbsetup.py.
Create the app.py and dbsetup.py files, and then the static and templates folders.
Building the backend
Let’s start by working on the file that will handle the database operations. In the dbsetup.py file, we will write all the code that is needed for creating a database and interacting with it. Open the dbsetup.py file and paste the following:
1import sqlite3 2 from sqlite3 import Error 3 4 def create_connection(database): 5 try: 6 conn = sqlite3.connect(database, isolation_level=None, check_same_thread = False) 7 conn.row_factory = lambda c, r: dict(zip([col[0] for col in c.description], r)) 8 9 return conn 10 except Error as e: 11 print(e) 12 13 def create_table(c,sql): 14 c.execute(sql) 15 16 def update_or_create_page(c,data): 17 sql = "SELECT * FROM pages where name=? and session=?" 18 c.execute(sql,data[:-1]) 19 result = c.fetchone() 20 if result == None: 21 create_pages(c,data) 22 else: 23 print(result) 24 update_pages(c, result['id']) 25 26 def create_pages(c, data): 27 print(data) 28 sql = ''' INSERT INTO pages(name,session,first_visited) 29 VALUES (?,?,?) ''' 30 c.execute(sql, data) 31 32 def update_pages(c, pageId): 33 print(pageId) 34 sql = ''' UPDATE pages 35 SET visits = visits+1 36 WHERE id = ?''' 37 c.execute(sql, [pageId]) 38 39 def create_session(c, data): 40 sql = ''' INSERT INTO sessions(ip, continent, country, city, os, browser, session, created_at) 41 VALUES (?,?,?,?,?,?,?,?) ''' 42 c.execute(sql, data) 43 44 def select_all_sessions(c): 45 sql = "SELECT * FROM sessions" 46 c.execute(sql) 47 rows = c.fetchall() 48 return rows 49 50 def select_all_pages(c): 51 sql = "SELECT * FROM pages" 52 c.execute(sql) 53 rows = c.fetchall() 54 return rows 55 56 def select_all_user_visits(c, session_id): 57 sql = "SELECT * FROM pages where session =?" 58 c.execute(sql,[session_id]) 59 rows = c.fetchall() 60 return rows 61 62 def main(): 63 database = "./pythonsqlite.db" 64 sql_create_pages = """ 65 CREATE TABLE IF NOT EXISTS pages ( 66 id integer PRIMARY KEY, 67 name varchar(225) NOT NULL, 68 session varchar(255) NOT NULL, 69 first_visited datetime NOT NULL, 70 visits integer NOT NULL Default 1 71 ); 72 """ 73 sql_create_session = """ 74 CREATE TABLE IF NOT EXISTS sessions ( 75 id integer PRIMARY KEY, 76 ip varchar(225) NOT NULL, 77 continent varchar(225) NOT NULL, 78 country varchar(225) NOT NULL, 79 city varchar(225) NOT NULL, 80 os varchar(225) NOT NULL, 81 browser varchar(225) NOT NULL, 82 session varchar(225) NOT NULL, 83 created_at datetime NOT NULL 84 ); 85 """ 86 87 # create a database connection 88 conn = create_connection(database) 89 if conn is not None: 90 # create tables 91 create_table(conn, sql_create_pages) 92 create_table(conn, sql_create_session) 93 print("Connection established!") 94 else: 95 print("Could not establish connection") 96 97 if __name__ == '__main__': 98 main()
Next, run the dbsetup.py file so that it creates a new SQLite database for us. We can run it with this command:
$ python dbsetup.py
We should see this text logged to the terminal — ‘Connection established!’ — and there should be a new file — pythonsqlite.db — added to the project’s root directory.
Next, let’s open the app.py file and start writing the backend code that will handle incoming requests. We are going to register multiple routes here. Four of these routes will load a webpage each while the other routes will process submitted data and return a JSON response.
We will also create a Pusher instance and use it to broadcast data through two channels that we will shortly define — pageview and numbers — in the application. After that, we will import the database handler methods we defined in dbsetup.py so that we can use them in the app.py file. Open the app.py file and paste the following:
1from flask import Flask, render_template, request, session, jsonify 2 import urllib.request 3 from pusher import Pusher 4 from datetime import datetime 5 import httpagentparser 6 import json 7 import os 8 import hashlib 9 from dbsetup import create_connection, create_session, update_or_create_page, select_all_sessions, select_all_user_visits, select_all_pages 10 11 app = Flask(__name__) 12 app.secret_key = os.urandom(24) 13 14 # configure pusher object 15 pusher = Pusher( 16 app_id='PUSHER_APP_ID', 17 key='PUSHER_APP_KEY', 18 secret='PUSHER_APP_SECRET', 19 cluster='PUSHER_APP_CLUSTER', 20 ssl=True) 21 22 database = "./pythonsqlite.db" 23 conn = create_connection(database) 24 c = conn.cursor() 25 26 userOS = None 27 userIP = None 28 userCity = None 29 userBrowser = None 30 userCountry = None 31 userContinent = None 32 sessionID = None 33 34 def main(): 35 global conn, c 36 37 def parseVisitor(data): 38 update_or_create_page(c,data) 39 pusher.trigger(u'pageview', u'new', { 40 u'page': data[0], 41 u'session': sessionID, 42 u'ip': userIP 43 }) 44 pusher.trigger(u'numbers', u'update', { 45 u'page': data[0], 46 u'session': sessionID, 47 u'ip': userIP 48 }) 49 50 @app.before_request 51 def getAnalyticsData(): 52 global userOS, userBrowser, userIP, userContinent, userCity, userCountry,sessionID 53 userInfo = httpagentparser.detect(request.headers.get('User-Agent')) 54 userOS = userInfo['platform']['name'] 55 userBrowser = userInfo['browser']['name'] 56 userIP = "72.229.28.185" if request.remote_addr == '127.0.0.1' else request.remote_addr 57 api = "https://www.iplocate.io/api/lookup/" + userIP 58 try: 59 resp = urllib.request.urlopen(api) 60 result = resp.read() 61 result = json.loads(result.decode("utf-8")) 62 userCountry = result["country"] 63 userContinent = result["continent"] 64 userCity = result["city"] 65 except: 66 print("Could not find: ", userIP) 67 getSession() 68 69 def getSession(): 70 global sessionID 71 time = datetime.now().replace(microsecond=0) 72 if 'user' not in session: 73 lines = (str(time)+userIP).encode('utf-8') 74 session['user'] = hashlib.md5(lines).hexdigest() 75 sessionID = session['user'] 76 pusher.trigger(u'session', u'new', { 77 u'ip': userIP, 78 u'continent': userContinent, 79 u'country': userCountry, 80 u'city': userCity, 81 u'os': userOS, 82 u'browser': userBrowser, 83 u'session': sessionID, 84 u'time': str(time), 85 }) 86 data = [userIP, userContinent, userCountry, userCity, userOS, userBrowser, sessionID, time] 87 create_session(c,data) 88 else: 89 sessionID = session['user'] 90 91 @app.route('/') 92 def index(): 93 data = ['home', sessionID, str(datetime.now().replace(microsecond=0))] 94 parseVisitor(data) 95 return render_template('index.html') 96 97 @app.route('/about') 98 def about(): 99 data = ['about',sessionID, str(datetime.now().replace(microsecond=0))] 100 parseVisitor(data) 101 return render_template('about.html') 102 103 @app.route('/dashboard') 104 def dashboard(): 105 return render_template('dashboard.html') 106 107 @app.route('/dashboard/<session_id>', methods=['GET']) 108 def sessionPages(session_id): 109 result = select_all_user_visits(c,session_id) 110 return render_template("dashboard-single.html",data=result) 111 112 @app.route('/get-all-sessions') 113 def get_all_sessions(): 114 data = [] 115 dbRows = select_all_sessions(c) 116 for row in dbRows: 117 data.append({ 118 'ip' : row['ip'], 119 'continent' : row['continent'], 120 'country' : row['country'], 121 'city' : row['city'], 122 'os' : row['os'], 123 'browser' : row['browser'], 124 'session' : row['session'], 125 'time' : row['created_at'] 126 }) 127 return jsonify(data) 128 129 if __name__ == '__main__': 130 main() 131 app.run(debug=True)
In the code above, we imported the required modules and objects, then we initialized a new Flask application. We also initialized and configured Pusher before defining all the routes and their handler functions.
Replace the PUSHER_APP_* keys with the values on your Pusher dashboard.
With the Pusher object instantiated, we can trigger events on whatever channels we define.
The trigger method has the following syntax:
pusher.trigger("a_channel", "an_event", {key: "data to pass with event"})
You can find the docs for the Pusher Python library here, to get more information on configuring and using Pusher in Python.
The getAnalyticsData function gets the visitor’s IP address and retrieves data using the urllib module to read information from the Iplocate API.
In the code above, we have defined four routes that will render web pages when visited, let’s create these web pages in the next section and use the frontend to communicate with our Python backend.
Setting up the app view
To begin, we need to create four files in the templates directory. These files will be named:
index.html— this is the home page for the websiteabout.html— this is the about page for the websitedashboard.html— this is the traffic monitor dashboarddashboard-single.html— this is the dashboard page that displays more info (i.e. the types of pages a user has visited) on a single visitor.
Open the ./templates/index.html file and paste the following:
1<!DOCTYPE html> 2 <html> 3 <head> 4 <title>Pusher Python Realtime Traffic Monitoring</title> 5 </head> 6 <body> 7 <h1>This is the homepage</h1> 8 </body> 9 </html>
Open the ./templates/about.html file and paste the following:
1<!DOCTYPE html> 2 <html> 3 <head> 4 <title>Pusher Python Realtime Traffic Monitoring</title> 5 </head> 6 <body> 7 <h1>This is the about page</h1> 8 </body> 9 </html>
Before we write the code for dashboard-single.html and dashboard files, we will pull in some CSS and JS from https://startbootstrap.com. Go to the URL and click Download. Unzip the file and copy the css and js directories into the static directory of our project.
Now, let’s continue building the frontend of our application, so open the ./templates/dashboard.html file and paste the following:
1<!DOCTYPE html> 2 <html lang="en"> 3 <head> 4 <meta charset="utf-8"> 5 <meta http-equiv="X-UA-Compatible" content="IE=edge"> 6 <meta name="viewport" content="width=device-width, initial-scale=1, shrink-to-fit=no"> 7 <meta name="description" content=""> 8 <meta name="author" content=""> 9 <title>SB Admin - Start Bootstrap Template</title> 10 11 <link rel="stylesheet" href="https://maxcdn.bootstrapcdn.com/bootstrap/4.0.0/css/bootstrap.min.css"> 12 <link href="https://cdnjs.cloudflare.com/ajax/libs/font-awesome/4.7.0/css/font-awesome.min.css" rel="stylesheet" type="text/css"> 13 <link href="https://cdn.datatables.net/1.10.16/css/dataTables.bootstrap4.min.css" rel="stylesheet"> 14 <link href="{{ url_for('static', filename='css/sb-admin.css') }}" rel="stylesheet"> 15 </head> 16 <body class="fixed-nav sticky-footer bg-dark" id="page-top"> 17 18 <!-- Navigation--> 19 <nav class="navbar navbar-expand-lg navbar-dark bg-dark fixed-top" id="mainNav"> 20 <a class="navbar-brand" href="index.html">Start Bootstrap</a> 21 <button class="navbar-toggler navbar-toggler-right" type="button" data-toggle="collapse" data-target="#navbarResponsive" aria-controls="navbarResponsive" aria-expanded="false" aria-label="Toggle navigation"> 22 <span class="navbar-toggler-icon"></span> 23 </button> 24 <div class="collapse navbar-collapse" id="navbarResponsive"> 25 <ul class="navbar-nav navbar-sidenav" id="exampleAccordion"> 26 <li class="nav-item" data-toggle="tooltip" data-placement="right" title="Dashboard"> 27 <a class="nav-link" href="/dashboard"> 28 <i class="fa fa-fw fa-dashboard"></i> 29 <span class="nav-link-text">Dashboard</span> 30 </a> 31 </li> 32 </ul> 33 </div> 34 </nav> 35 <div class="content-wrapper"> 36 <div class="container-fluid"> 37 38 <!-- Breadcrumbs--> 39 <ol class="breadcrumb"> 40 <li class="breadcrumb-item"> 41 <a href="#">Dashboard</a> 42 </li> 43 <li class="breadcrumb-item active">My Dashboard</li> 44 </ol> 45 46 <!-- Icon Cards--> 47 <div class="row"> 48 <div class="col-xl-3 col-sm-6 mb-3"> 49 <div class="card text-white bg-primary o-hidden h-100"> 50 <div class="card-body"> 51 <div class="mr-5">Total session <span id="total-sessions">26</span></div> 52 </div> 53 <a class="card-footer text-white clearfix small z-1" href="#"> 54 <span class="float-left">View Details</span> 55 <span class="float-right"> 56 <i class="fa fa-angle-right"></i> 57 </span> 58 </a> 59 </div> 60 </div> 61 <div class="col-xl-3 col-sm-6 mb-3"> 62 <div class="card text-white bg-warning o-hidden h-100"> 63 <div class="card-body"> 64 <div class="mr-5">Total visitors <span id="total-visitors">26</span></div> 65 </div> 66 <a class="card-footer text-white clearfix small z-1" href="#"> 67 <span class="float-left">View Details</span> 68 <span class="float-right"> 69 <i class="fa fa-angle-right"></i> 70 </span> 71 </a> 72 </div> 73 </div> 74 <div class="col-xl-3 col-sm-6 mb-3"> 75 <div class="card text-white bg-success o-hidden h-100"> 76 <div class="card-body"> 77 <div class="mr-5">Total Page Views <span id="total-pageviews">123</span></div> 78 </div> 79 <a class="card-footer text-white clearfix small z-1" href="#"> 80 <span class="float-left">View Details</span> 81 <span class="float-right"> 82 <i class="fa fa-angle-right"></i> 83 </span> 84 </a> 85 </div> 86 </div> 87 <div class="col-xl-3 col-sm-6 mb-3"> 88 <div class="card text-white bg-danger o-hidden h-100"> 89 <div class="card-body"> 90 <div class="mr-5">Unique Page Views <span id="unique-pageviews">123</span></div> 91 </div> 92 <a class="card-footer text-white clearfix small z-1" href="#"> 93 <span class="float-left">View Details</span> 94 <span class="float-right"> 95 <i class="fa fa-angle-right"></i> 96 </span> 97 </a> 98 </div> 99 </div> 100 </div> 101 102 <!-- Example DataTables Card--> 103 <div class="card mb-3"> 104 <div class="card-header"> 105 <i class="fa fa-table"></i> User Sessions</div> 106 <div class="card-body"> 107 <div class="table-responsive"> 108 <table class="table table-bordered" id="dataTable" width="100%" cellspacing="0"> 109 <thead> 110 <tr> 111 <th>Time</th> 112 <th>IP Address</th> 113 <th>Continent</th> 114 <th>Country</th> 115 <th>City</th> 116 <th>Opertating System</th> 117 <th>Browser</th> 118 <th></th> 119 </tr> 120 </thead> 121 <tfoot> 122 <tr> 123 <th>Time</th> 124 <th>IP Address</th> 125 <th>Continent</th> 126 <th>Country</th> 127 <th>City</th> 128 <th>Opertating System</th> 129 <th>Browser</th> 130 <th></th> 131 </tr> 132 </tfoot> 133 <tbody id="customer-table"> 134 </tbody> 135 </table> 136 </div> 137 </div> 138 <div class="card-footer small text-muted">Updated at <span id="session-update-time"></span></div> 139 </div> 140 </div> 141 142 <!-- /.container-fluid--> 143 <!-- /.content-wrapper--> 144 145 <footer class="sticky-footer"> 146 <div class="container"> 147 <div class="text-center"> 148 <small>Copyright © Your Website 2018</small> 149 </div> 150 </div> 151 </footer> 152 153 <!-- Bootstrap core JavaScript--> 154 <script src="https://code.jquery.com/jquery-3.2.1.slim.min.js"></script> 155 <script src="https://cdnjs.cloudflare.com/ajax/libs/popper.js/1.12.9/umd/popper.min.js"></script> 156 <script src="https://maxcdn.bootstrapcdn.com/bootstrap/4.0.0/js/bootstrap.min.js"></script> 157 <script src="https://cdnjs.cloudflare.com/ajax/libs/axios/0.18.0/axios.min.js"></script> 158 <script src="https://cdn.datatables.net/1.10.16/js/jquery.dataTables.min.js"></script> 159 <script src="https://cdn.datatables.net/1.10.16/js/dataTables.bootstrap4.min.js"></script> 160 <script src="https://js.pusher.com/4.0/pusher.min.js"></script> 161 162 <!-- Custom scripts for this page--> 163 <script src="{{ url_for('static', filename='js/app.js') }}"></script> 164 <script src="{{ url_for('static', filename='js/sb-admin.js') }}"></script> 165 </div> 166 </body> 167 </html>
Finally, open the ./templates/dashboard-single.html file and paste the following:
1<!DOCTYPE html> 2 <html lang="en"> 3 <head> 4 <meta charset="utf-8"> 5 <meta http-equiv="X-UA-Compatible" content="IE=edge"> 6 <meta name="viewport" content="width=device-width, initial-scale=1, shrink-to-fit=no"> 7 <meta name="description" content=""> 8 <meta name="author" content=""> 9 <title>SB Admin - Start Bootstrap Template</title> 10 11 <link rel="stylesheet" href="https://maxcdn.bootstrapcdn.com/bootstrap/4.0.0/css/bootstrap.min.css"> 12 <link href="https://cdnjs.cloudflare.com/ajax/libs/font-awesome/4.7.0/css/font-awesome.min.css" rel="stylesheet" type="text/css"> 13 <link href="https://cdn.datatables.net/1.10.16/css/dataTables.bootstrap4.min.css" rel="stylesheet"> 14 <link href="{{ url_for('static', filename='css/sb-admin.css') }}" rel="stylesheet"> 15 </head> 16 <body class="fixed-nav sticky-footer bg-dark" id="page-top"> 17 18 <!-- Navigation--> 19 <nav class="navbar navbar-expand-lg navbar-dark bg-dark fixed-top" id="mainNav"> 20 <a class="navbar-brand" href="index.html">Start Bootstrap</a> 21 <button class="navbar-toggler navbar-toggler-right" type="button" data-toggle="collapse" data-target="#navbarResponsive" aria-controls="navbarResponsive" aria-expanded="false" aria-label="Toggle navigation"> 22 <span class="navbar-toggler-icon"></span> 23 </button> 24 <div class="collapse navbar-collapse" id="navbarResponsive"> 25 <ul class="navbar-nav navbar-sidenav" id="exampleAccordion"> 26 <li class="nav-item" data-toggle="tooltip" data-placement="right" title="Dashboard"> 27 <a class="nav-link" href="/dashboard"> 28 <i class="fa fa-fw fa-dashboard"></i> 29 <span class="nav-link-text">Dashboard</span> 30 </a> 31 </li> 32 </ul> 33 </div> 34 </nav> 35 <div class="content-wrapper"> 36 <div class="container-fluid"> 37 <!-- Breadcrumbs--> 38 <ol class="breadcrumb"> 39 <li class="breadcrumb-item"> 40 <a href="#">Dashboard</a> 41 </li> 42 <li class="breadcrumb-item active">My Session</li> 43 </ol> 44 <!-- Example DataTables Card--> 45 <div class="card mb-3"> 46 <div class="card-header"> 47 <i class="fa fa-table"></i> User Sessions</div> 48 <div class="card-body"> 49 <div class="table-responsive"> 50 <table class="table table-bordered" id="userSessions" width="100%" cellspacing="0"> 51 <thead> 52 <tr> 53 <th>Time</th> 54 <th>Page</th> 55 <th>Session_id</th> 56 <th>No of Visits</th> 57 <th></th> 58 </tr> 59 </thead> 60 <tfoot> 61 <tr> 62 <th>Time</th> 63 <th>Page</th> 64 <th>Session_id</th> 65 <th>No of Visits</th> 66 <th></th> 67 </tr> 68 </tfoot> 69 <tbody id="customer-table"> 70 {% for row in data %} 71 <tr> 72 <td>{{ row.first_visited }}</td> 73 <td>{{ row.name }}</td> 74 <td>{{ row.session }}</td> 75 <td>{{ row.visits }}</td> 76 </tr> 77 {% endfor %} 78 </tbody> 79 </table> 80 </div> 81 </div> 82 <div class="card-footer small text-muted">Updated at <span id="session-update-time"></span></div> 83 </div> 84 </div> 85 <!-- /.container-fluid--> 86 <!-- /.content-wrapper--> 87 <footer class="sticky-footer"> 88 <div class="container"> 89 <div class="text-center"> 90 <small>Copyright © Your Website 2018</small> 91 </div> 92 </div> 93 </footer> 94 <!-- Scroll to Top Button--> 95 <a class="scroll-to-top rounded" href="#page-top"> 96 <i class="fa fa-angle-up"></i> 97 </a> 98 <!-- Logout Modal--> 99 <div class="modal fade" id="exampleModal" tabindex="-1" role="dialog" aria-labelledby="exampleModalLabel" aria-hidden="true"> 100 <div class="modal-dialog" role="document"> 101 <div class="modal-content"> 102 <div class="modal-header"> 103 <h5 class="modal-title" id="exampleModalLabel">Ready to Leave?</h5> 104 <button class="close" type="button" data-dismiss="modal" aria-label="Close"> 105 <span aria-hidden="true">×</span> 106 </button> 107 </div> 108 <div class="modal-body">Select "Logout" below if you are ready to end your current session.</div> 109 <div class="modal-footer"> 110 <button class="btn btn-secondary" type="button" data-dismiss="modal">Cancel</button> 111 <a class="btn btn-primary" href="login.html">Logout</a> 112 </div> 113 </div> 114 </div> 115 </div> 116 <!-- Bootstrap core JavaScript--> 117 <script src="https://code.jquery.com/jquery-3.2.1.slim.min.js"></script> 118 <script src="https://cdnjs.cloudflare.com/ajax/libs/popper.js/1.12.9/umd/popper.min.js"></script> 119 <script src="https://maxcdn.bootstrapcdn.com/bootstrap/4.0.0/js/bootstrap.min.js"></script> 120 <script type="text/javascript" src="https://cdnjs.cloudflare.com/ajax/libs/axios/0.18.0/axios.min.js"></script> 121 <script src="https://cdn.datatables.net/1.10.16/js/jquery.dataTables.min.js"></script> 122 <script src="https://cdn.datatables.net/1.10.16/js/dataTables.bootstrap4.min.js"></script> 123 <script src="https://js.pusher.com/4.0/pusher.min.js"></script> 124 125 <script src="{{ url_for('static', filename='js/app.js') }}"></script> 126 <script src="{{ url_for('static', filename='js/sb-admin.js') }}"></script> 127 </div> 128 </body> 129 </html>
The markup we have written in all four files define the structure of the elements on the DOM when each page is rendered. We have also loaded the JavaScript Pusher package in the dashboard.html and dashboard-single.html files.
Next, we will listen for Pusher updates on the frontend of our application using the Pusher magic.
Listening for realtime updates
In this step, we will listen for Pusher events from the Backend API and use the data to update the traffic monitor dashboard pages in realtime. First, let’s create a new file — app.js— in the js folder that is located in the static directory.
Next, open the ./static/js/app.js file and paste the following:
1// Configure Pusher instance 2 const pusher = new Pusher('PUSHER_APP_KEY', { 3 cluster: 'PUSHER_APP_CLUSTER', 4 encrypted: true 5 }); 6 7 var months = ["Jan", "Feb", "Mar", "Apr", "May", "Jun", "Jul", "Aug", "Sep", "Oct", "Nov", "Dec"]; 8 9 $(document).ready(function(){ 10 var dataTable = $("#dataTable").DataTable() 11 // var userSessions = $("#userSessions").DataTable() 12 var pages = $("#pages").DataTable() 13 14 axios.get('/get-all-sessions') 15 .then(response => { 16 response.data.forEach((data) => { 17 insertDatatable(data) 18 }) 19 var d = new Date(); 20 var updatedAt = `${d.getFullYear()}/${months[d.getMonth()]}/${d.getDay()} ${d.getHours()}:${d.getMinutes()}:${d.getSeconds()}` 21 document.getElementById('session-update-time').innerText = updatedAt 22 }) 23 24 var sessionChannel = pusher.subscribe('session'); 25 sessionChannel.bind('new', function(data) { 26 insertDatatable(data) 27 }); 28 29 var d = new Date(); 30 var updatedAt = `${d.getFullYear()}/${months[d.getMonth()]}/${d.getDay()} ${d.getHours()}:${d.getMinutes()}:${d.getSeconds()}` 31 document.getElementById('session-update-time').innerText = updatedAt 32 }); 33 34 function insertDatatable(data){ 35 var dataTable = $("#dataTable").DataTable() 36 dataTable.row.add([ 37 data.time, 38 data.ip, 39 data.continent, 40 data.country, 41 data.city, 42 data.os, 43 data.browser, 44 `<a href=${"/dashboard/"+data.session}>View pages visited</a>` 45 ]); 46 dataTable.order([0, 'desc']).draw(); 47 }
Replace the
PUSHER_APP_*keys with the keys on your Pusher dashboard.
In the code above, first, we register a new instance of Pusher then we use Axios to get all the sessions that have been saved to the database when the document is ready. We also created a new Pusher channel called sessionChannel and subscribed to a session event.
We defined a function insertDatatable and it inserts a new user record whenever Pusher sends an update.
That is everything! We can run the application now using this command:
$ flask run
Now we can visit 127.0.0.1:5000 to see the website and 127.0.0.1:5000/dashboard to see the traffic monitor dashboard, here’s a display of what both screens look like when viewed side by side.
Conclusion
In this tutorial, we have learned how to integrate a realtime traffic monitor with our website using Python’s Flask, Pusher and JavaScript.
The source code for this tutorial is available on GitHub.


© 2025 Pusher Ltd. All rights reserved.
Pusher Limited is a company registered in England and Wales (No. 07489873) whose registered office is at MessageBird UK Limited, 3 More London Riverside, 4th Floor, London, United Kingdom, SE1 2AQ.