- Products

- Developers
- User stories
- Blog
- Pricing

Emit data in Vue.js with custom events
Introduction
Introduction
You are using Vue.js from a while now. Have you ever wondered how you can communicate with your parent component? Let’s say you have a task scheduled from your child component, and you want to notify your parent one once the task is finished. How can you achieve that? In Vue.js, we have custom events that help you to communicate with your parents enabling you to send data(messages) as well.
In this tutorial,we’ll see how this can be achieved 🙃 , but I want you to know that this is an advanced concept in Vue.js.
Demo
Here you have a simple demo of the final product 🙃

Prerequisites
In order to follow this tutorial, knowledge of JavaScript and Node.js is required. You should also have the following installed on your machine:
- Node.js (>=8.9.0)
- NPM(bundled with Node.js installer) or Yarn
- Vue-CLI
Create the project
We’ll use the new Vue CLI to scaffold our project, so ensure you have this tool installed on your machine as said in the prerequisites section. It is such a great tool that enhances the developer productivity. Head over to your terminal and type this command to create your project: vue create your-project-name . Feel free to name your project as you want 🙃 .
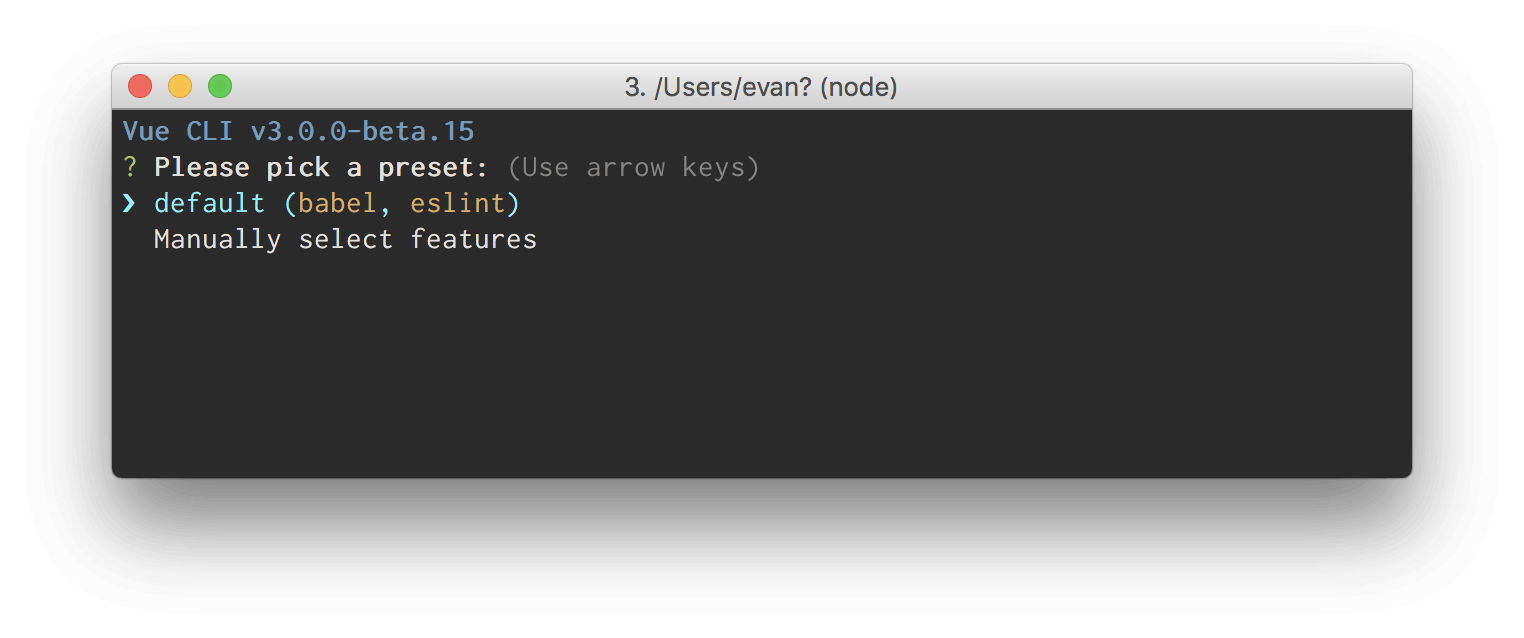
You will be prompted to pick a preset. You can either choose the default preset which comes with a basic Babel + ESLint setup, or select "Manually select features" to pick the features you need.
For the sake of the tutorial, we’ll choose the default preset as it best fits our needs.
Now you should have a pretty fresh generated project. In the next part we’ll get a deep insight of how we can send custom events.
Sending our custom event
Here we are intending to send a welcome message from our child component to the parent.
Amend your HelloWorld.vue like the following:
1//../src/components/HelloWorld.vue 2 3 <template> 4 <div class="hello"> 5 <h1 class="is-size-3">{{ msg }}</h1> 6 <br> 7 <div class="container" style="width: 35%;"> 8 <input class="input" type="text" v-model="welcomeMsg"> <br/><br/> 9 <button class="button is-primary is-medium" @click="changeMsg">Click to change welcome message</button> 10 </div> 11 </div> 12 </template> 13 14 <script> 15 /* eslint-disable */ 16 export default { 17 name: "HelloWorld", 18 data() { 19 return { 20 welcomeMsg: "" 21 } 22 }, 23 props: { 24 msg: String 25 }, 26 methods: { 27 changeMsg() { 28 this.$emit("changeMsg", this.welcomeMsg); 29 console.log('message emit from child component') 30 } 31 } 32 }; 33 </script> 34 <!-- Add "scoped" attribute to limit CSS to this component only --> 35 <style scoped> 36 h3 { 37 margin: 40px 0 0; 38 } 39 ul { 40 list-style-type: none; 41 padding: 0; 42 } 43 li { 44 display: inline-block; 45 margin: 0 10px; 46 } 47 a { 48 color: #42b983; 49 } 50 </style>
In the template section of the code we an input to type our message and a button to submit the message to the parent component. We bind the welcomeMsg data to the input field using the v-model directive as you can see. The tricky part lies in how we send the message.
You may have noticed the changeMsg function which is called whenever the button is clicked. Yeah you guess it 😜 . This is where we emit our custom event. Inside its body, we emit our event changeMsg with our data as it happens the welcomeMsg.
This is what we’ve done in just one line: this.$emit("changeMsg", this.welcomeMsg);.
We also log some text to make sure the event has been sent.
Our HelloWorld.vue component has also a msg property for getting the message from the parent component and renders it in a <h1/> tag.
Listening to our custom event
In the previous section we sent our custom event from our child component. In this part, we’ll learn how to handle this event and to manipulate data it is carrying.
Copy and paste the following piece of code inside your App.vue component:
1//../src/components/HelloWorld.vue 2 <template> 3 <div id="app"> 4 <img alt="Vue logo" src="./assets/logo.png"> 5 <HelloWorld @changeMsg="setMessage" :msg="welcomeMsg"/> 6 </div> 7 </template> 8 9 <script> 10 /* eslint-disable */ 11 import HelloWorld from "./components/HelloWorld.vue"; 12 export default { 13 name: "app", 14 data() { 15 return { 16 welcomeMsg: "Hello World" 17 }; 18 }, 19 methods: { 20 setMessage(msg) { 21 this.welcomeMsg = msg; 22 } 23 }, 24 components: { 25 HelloWorld 26 } 27 }; 28 </script> 29 <style> 30 #app { 31 font-family: "Avenir", Helvetica, Arial, sans-serif; 32 -webkit-font-smoothing: antialiased; 33 -moz-osx-font-smoothing: grayscale; 34 text-align: center; 35 color: #2c3e50; 36 margin-top: 60px; 37 } 38 </style>
We import our child component as it happens the HelloWorld.vue one, and we listen to our custom event changeMsg : <HelloWorld @changeMsg="setMessage" :msg="welcomeMsg"/>
The syntax @changeMsg is telling our app that a custom event named changeMsg is sent and defines what to do in order to react to it. We therefore define the setMessage function to handle our custom event. Inside its body, we assign the message sent to the welcomeMsg data; this data is also passed to our HelloWorld.vue component through the msg prop.
Run the app
Now, you can run your app with the following command:
yarn serve or npm run serve
Open your browser at the following location: localhost:8080 to get your full app working nicely.
Try to type a message like “Welcome to my app” and hit the button to emit the custom event to your parent, you should see your message rendered. Great right ?! 😎
Conclusion
Throughout this tutorial, we learnt how we can send custom events to communicate between child and parent components. I hope this tutorial has been useful to you and you will keep improving as you practice. This is the repo of the tutorial.


© 2025 Pusher Ltd. All rights reserved.
Pusher Limited is a company registered in England and Wales (No. 07489873) whose registered office is at MessageBird UK Limited, 3 More London Riverside, 4th Floor, London, United Kingdom, SE1 2AQ.