- Products

- Developers
- User stories
- Blog
- Pricing

Build a Twitter feed using Swift
Introduction
Every second, thousands of tweets are tweeted on Twitter. To make sense of it all, we can track what interests us by following tweets with certain hashtags. In this tutorial, we're going to build an iOS realtime Twitter feed app with Pusher to track a custom set of hashtags.
In the backend, we'll have a Node.js process listening for tweets that contain one or more defined hashtags. When we find one, we'll publish an object with the tweet information to a Pusher channel.
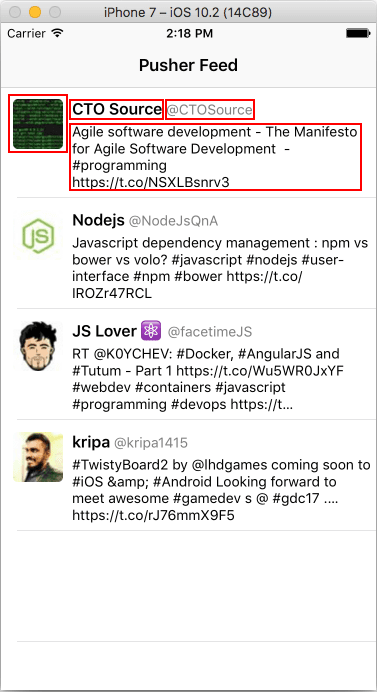
On the other hand, the iOS app will be listening for new tweets in that channel to add them to a feed. To keep things simple, the app will only show some basic information for each tweet. This is how the app looks like in action:
The complete source code of the Node.js process and the iOS app is on Github for reference.
Let's get started!
Setting up Pusher Channels
Create a free account with Pusher.
When you first log in, you'll be asked to enter some configuration options to create you app:
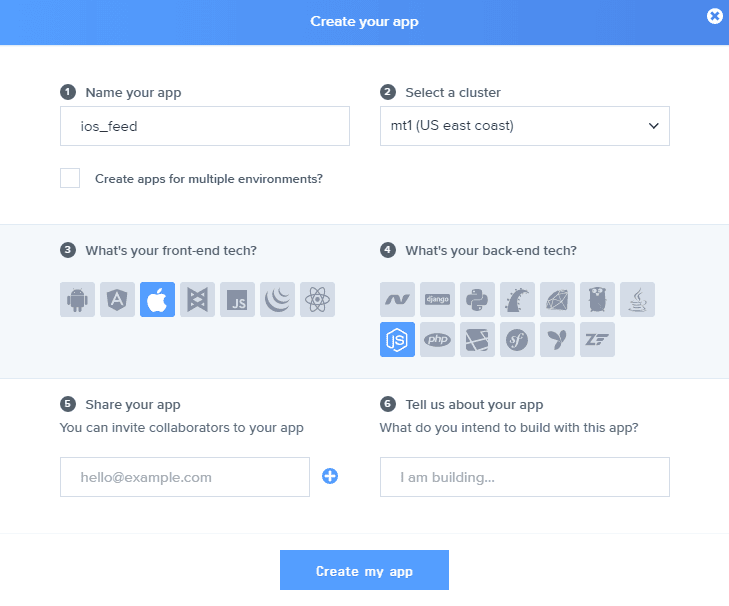
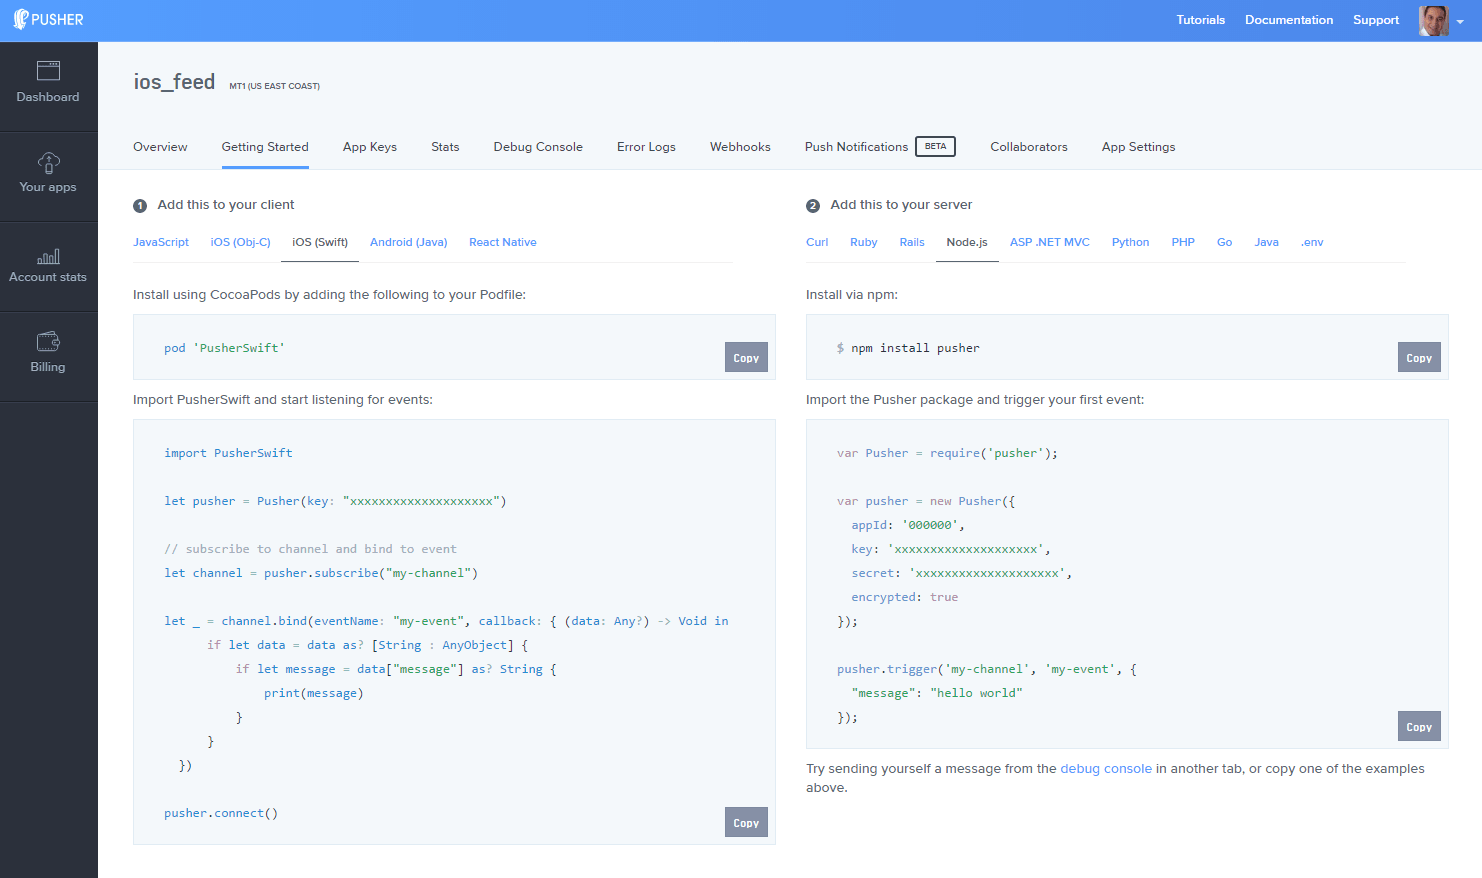
Enter a name, choose iOS as your frontend tech, and Node.js as your backend tech. This will give you some sample code to get you started:
But don't worry, this won't lock you into this specific set of technologies, you can always change them. With Pusher, you can use any combination of libraries.
Then go to the App Keys tab to copy your App ID, Key, and Secret credentials, we'll need them later.
Setting up a Twitter app
Log in to your Twitter account and go to https:/apps.twitter.com/app/new to create a new application.
You'll have to enter the following:
- Name (your application name, which shouldn't have to be taken, for instance, pusher_hashtags_1)
- Description (your application description)
- Website (your application's publicly accessible home page. We're not going to use it, so you can enter http://127.0.0.1).
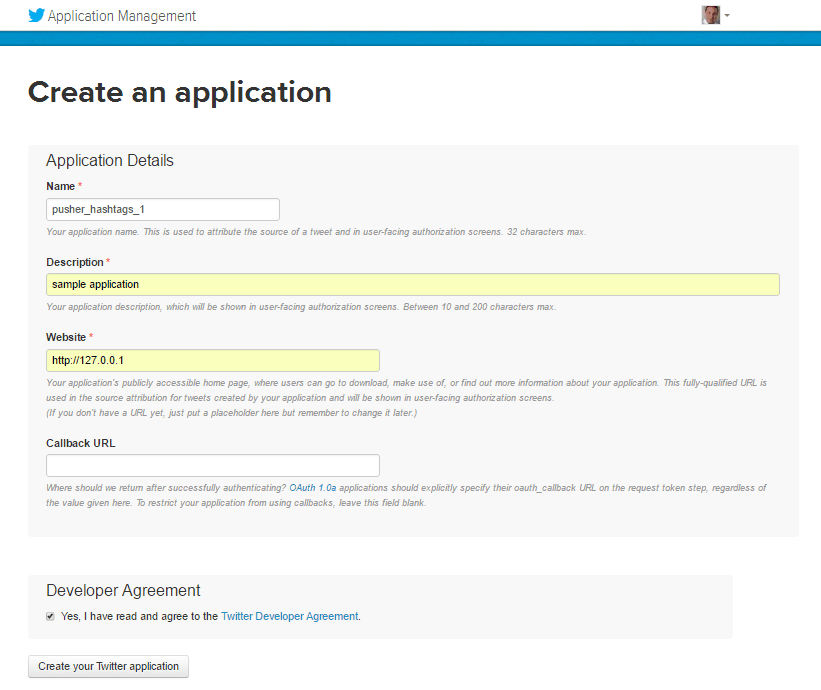
After you agree to Twitter's developer agreement, your application will be created.
Now go to the Keys and Access Token section and create your access token by clicking on the Create my access token button:
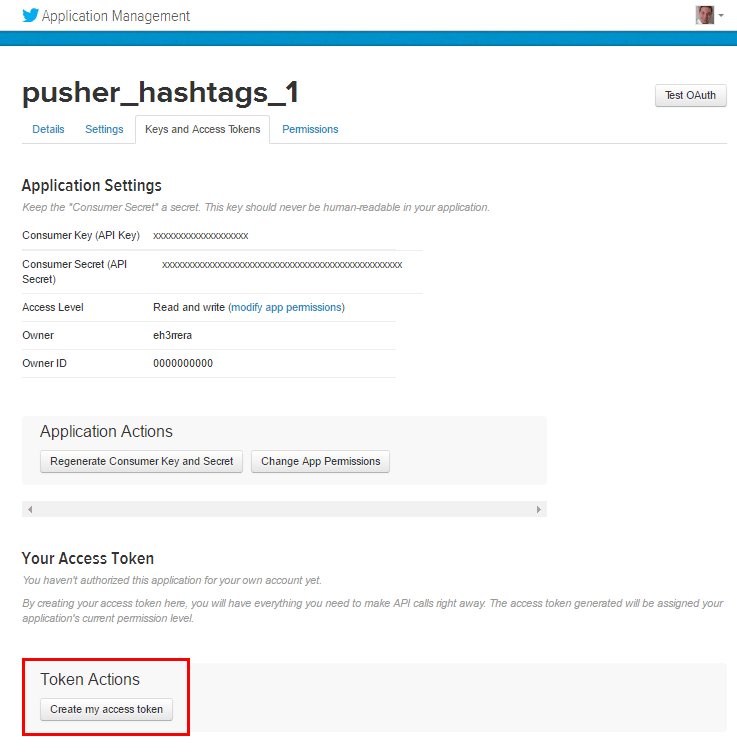
Save your consumer key, consumer secret, access token, and access token secret since we'll need them later.
The backend
We'll get the tweets by using the Twitter Streaming API with the help of the twit library.
You can clone the GitHub repository and run npm install to set up dependencies.
Then, create a config.js file from config.sample.js :
cp config.js.sample config.js
And enter your Twitter and Pusher information:
1module.exports = { 2 twitter: { 3 consumer_key : '<INSERT_TWITTER_CONSUMER_KEY_HERE>', 4 consumer_secret : '<INSERT_TWITTER_CONSUMER_SECRET_HERE>', 5 access_token : '<INSERT_TWITTER_ACCESS_TOKEN_HERE>', 6 access_token_secret : '<INSERT_TWITTER_ACCESS_TOKEN_SECRET_HERE>', 7 }, 8 9 pusher: { 10 appId : '<INSERT_PUSHER_APP_ID_HERE>', 11 key : '<INSERT_PUSHER_KEY_ID_HERE>', 12 secret : '<INSERT_PUSHER_SECRET_ID_HERE>', 13 encrypted : true, 14 }, 15 16 hashtagsToTrack: ['#nodejs', '#swift', '#ios', 'programming'], 17 18 channel: 'hashtags', 19 20 event: 'new_tweet', 21}
You can also change the hashtags to track if you want.
Our main file, app.js, is simple. After some setup code, we configure the Twitter stream to filter tweets by the hashtags to track:
1const config = require('./config'); 2const Twit = require('twit'); 3const Pusher = require('pusher'); 4 5const T = new Twit(config.twitter); 6 7const pusher = new Pusher(config.pusher); 8 9const stream = T.stream('statuses/filter', { track: config.hashtagsToTrack });
When a new tweet matches our conditions, we'll extract the properties our iOS client will need to create an object and publish it to a Pusher channel as a new_tweet event:
1... 2 3stream.on('tweet', (tweet) => { 4 const message = { 5 message: tweet.text, 6 username: tweet.user.screen_name, 7 name: tweet.user.name, 8 }; 9 10 pusher.trigger(config.channel, config.event, message); 11});
And that's all this process does, let's see how the iOS client is built.
Setting up the Xcode project
We'll be using iOS 10 and Swift 3 to build our app, so Xcode 8 is required.
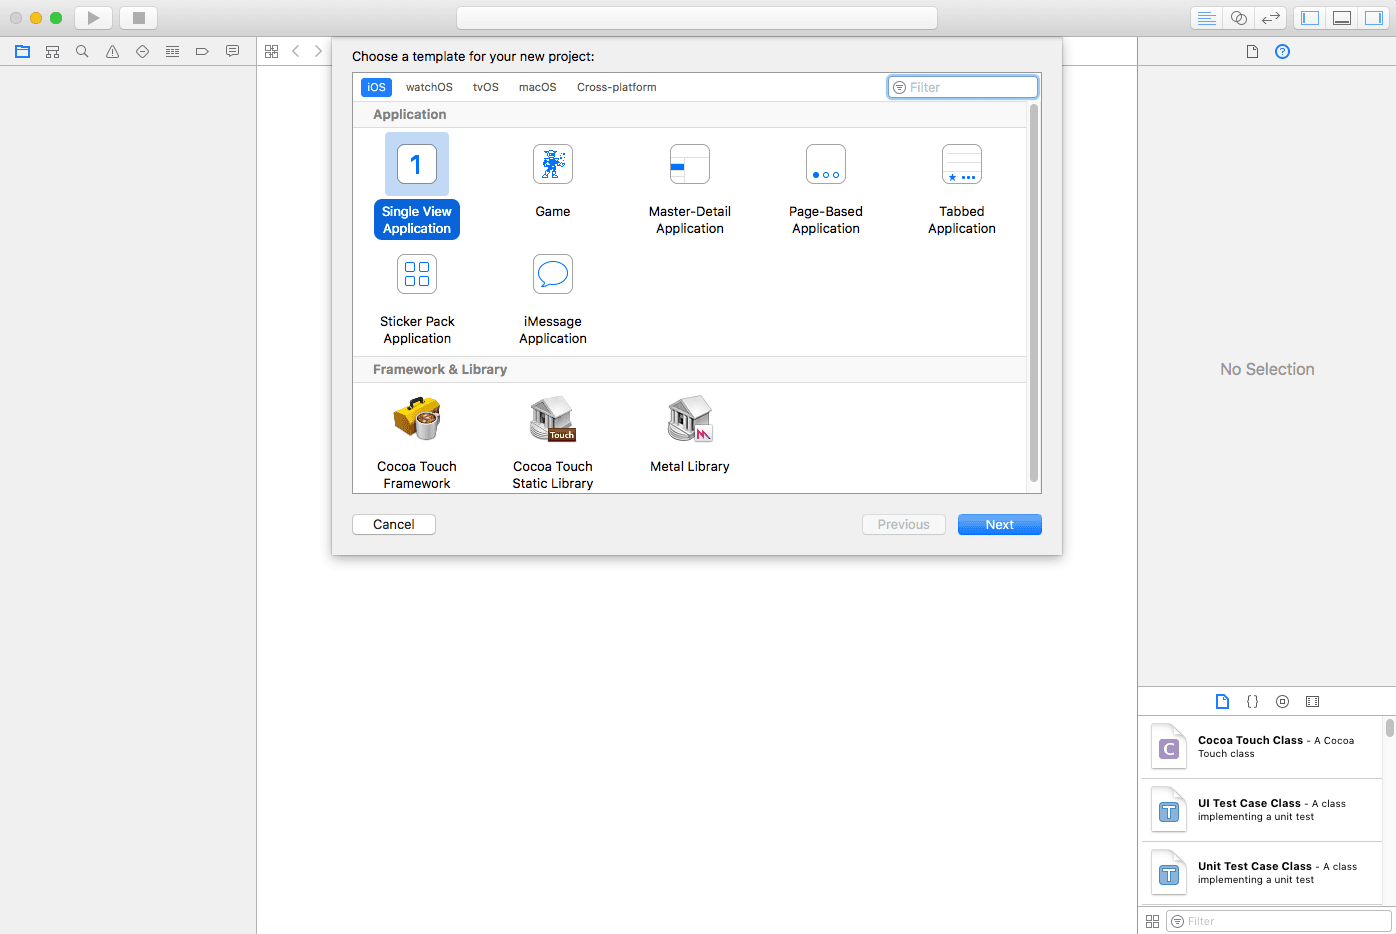
To start, open Xcode and create a Single View Application:
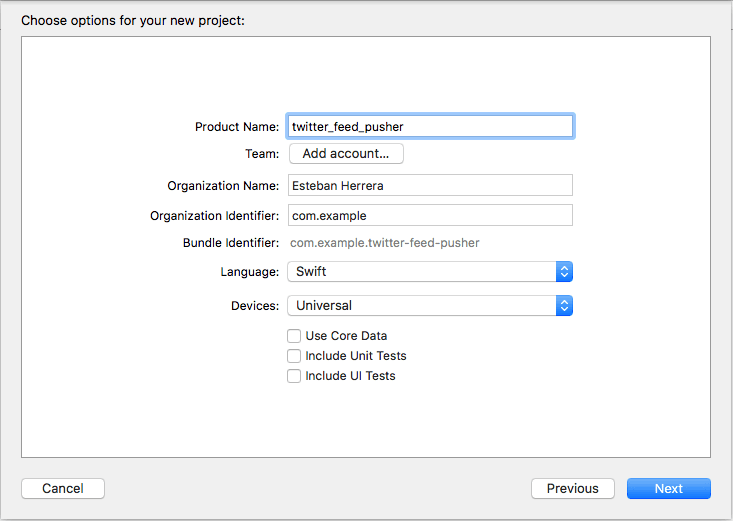
Give it a name, choose Swift as the language and Universal in the Devices option:
Now, we're going to install the project dependencies with CocoaPods. Close your Xcode project, and in a terminal window go to the top-level directory of your project and execute this command:
pod init
This will create a text file named Podfile with some defaults, open it and add as dependencies PusherSwift and AlamofireImage. It should look like this:
1# Uncomment the next line to define a global platform for your project 2# platform :ios, '9.0' 3 4target 'twitter_feed_pusher' do 5 # Comment the next line if you're not using Swift and don't want to use dynamic frameworks 6 use_frameworks! 7 8 # Pods for twitter_feed_pusher 9 pod 'PusherSwift' 10 pod 'AlamofireImage' 11 12end
Now you can install the dependencies in your project with:
pod install
And from now on, make sure to open the generated Xcode workspace instead of the project file:
open twitter_feed_pusher.xcworkspace
For apps like this, creating everything programmatically is easier. We won't use the Interface Builder or the storyboard file that Xcode creates (Main.storyboard).
So let's start by opening the file AppDelegate.swift to manually create the window in which our app is going to live and specify a rootViewController:
1import UIKit 2 3@UIApplicationMain 4class AppDelegate: UIResponder, UIApplicationDelegate { 5 6 var window: UIWindow? 7 8 func application(_ application: UIApplication, didFinishLaunchingWithOptions launchOptions: 9 [UIApplicationLaunchOptionsKey: Any]?) -> Bool { 10 11 // Override point for customization after application launch. 12 window = UIWindow(frame: UIScreen.main.bounds) 13 window?.makeKeyAndVisible() 14 15 window?.rootViewController = UINavigationController(rootViewController: ViewController()) 16 17 return true 18 } 19 20 ... 21}
In the above code, we're using the ViewController file Xcode created for us.
Now let's use a UITableViewController, this will give us for free an UITableViewDataSource and an UITableViewDelegate.
Open the ViewController class and make it extend from UITableViewController:
1import UIKit 2 3class ViewController: UITableViewController { 4 ... 5}
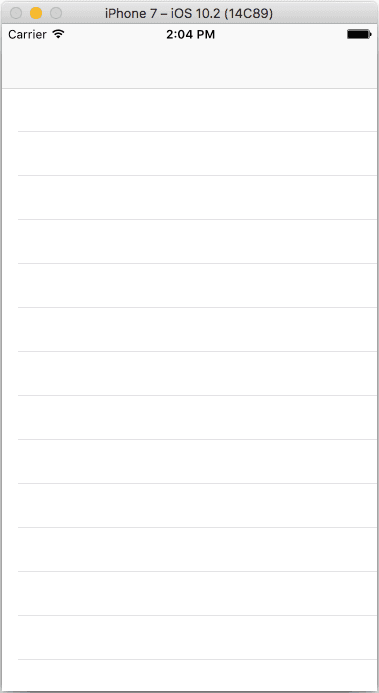
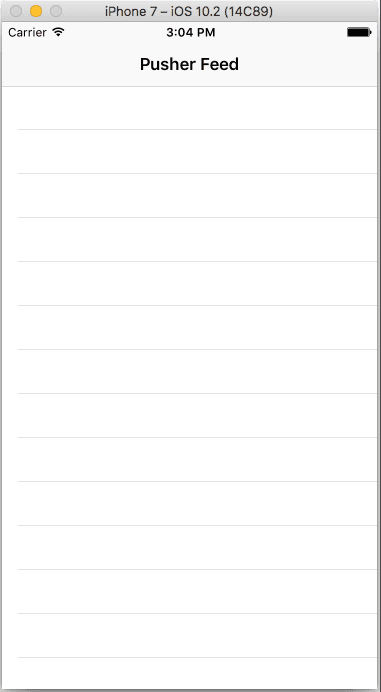
If you run the app at this point, you should see something like the following:
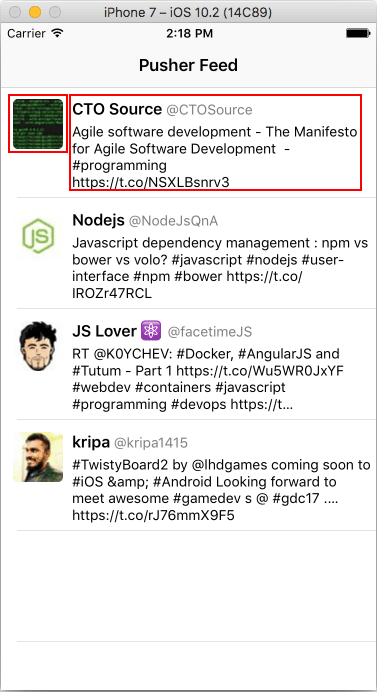
Now let's take a closer look at how the app is going to present a tweet. It has a profile image, the name of the user, the Twitter username, and the text of the tweet:
So let's create a new Swift file, Tweet.swift, to create a structure that will hold the tweet's information:
1import Foundation 2 3struct Tweet { 4 let name: String 5 let username: String 6 let message: String 7}
We don't have to create a property to hold the profile image URL, we can get it from the username.
We're going to need a custom cell class for our UITableView. Once again, create a new Swift file, this time with the name TweetCell.swift and the following content:
1import UIKit 2 3class TweetCell: UITableViewCell { 4 5 override init(style: UITableViewCellStyle, reuseIdentifier: String?) { 6 super.init(style: style, reuseIdentifier: reuseIdentifier) 7 } 8 9 required init?(coder aDecoder: NSCoder) { 10 fatalError("init(coder:) has not been implemented") 11 } 12 13}
To simplify the layout, our cell is going to have a UIImageView for the image profile and a UITextView for the rest of the content, which will be formatted as an attributed string:
So let's add these views along with some properties:
1class TweetCell: UITableViewCell { 2 3 let profileImage: UIImageView = { 4 let imageView = UIImageView() 5 imageView.layer.cornerRadius = 5 6 imageView.clipsToBounds = true 7 imageView.translatesAutoresizingMaskIntoConstraints = false 8 9 return imageView 10 }() 11 12 let messageText: UITextView = { 13 let textView = UITextView() 14 textView.translatesAutoresizingMaskIntoConstraints = false 15 textView.isUserInteractionEnabled = false 16 17 return textView 18 }() 19 20 ... 21}
It's important to set translatesAutoresizingMaskIntoConstraints to false because we're going to use the NSLayoutAnchor API to position our views.
Let's add the UIImageView at the top-left corner of the cell, with an offset of 12 points on both left and top, and a width and height of 50:
1class TweetCell: UITableViewCell { 2 3 ... 4 5 override init(style: UITableViewCellStyle, reuseIdentifier: String?) { 6 super.init(style: style, reuseIdentifier: reuseIdentifier) 7 8 addSubview(profileImage) 9 10 profileImage.topAnchor.constraint(equalTo: self.topAnchor, constant: 12).isActive = true 11 profileImage.leftAnchor.constraint(equalTo: self.leftAnchor, constant: 12).isActive = true 12 profileImage.widthAnchor.constraint(equalToConstant: 50).isActive = true 13 profileImage.heightAnchor.constraint(equalToConstant: 50).isActive = true 14 } 15 16 ... 17}
And the UITextView at the left of the profile image, with a top and left offset of 4 points and using all the available space of the cell:
1class TweetCell: UITableViewCell { 2 ... 3 4 override init(style: UITableViewCellStyle, reuseIdentifier: String?) { 5 ... 6 7 addSubview(messageText) 8 9 messageText.topAnchor.constraint(equalTo: self.topAnchor, constant: 4).isActive = true 10 messageText.leftAnchor.constraint(equalTo: profileImage.rightAnchor, constant: 4).isActive = true 11 messageText.bottomAnchor.constraint(equalTo: self.bottomAnchor).isActive = true 12 messageText.rightAnchor.constraint(equalTo: self.rightAnchor).isActive = true 13 } 14 15 ... 16}
Now let's add a property observer so when an object of type Tweet is set on this cell, we can compose our attributed string and set the value of the profile image (don't forget to import AlamofireImage):
1import UIKit 2import AlamofireImage 3 4class TweetCell: UITableViewCell { 5 6 var tweet: Any? { 7 didSet { 8 guard let t = tweet as? Tweet else { return } 9 10 // Add the name in bold 11 let attributedText = NSMutableAttributedString(string: t.name, attributes: [NSFontAttributeName: UIFont.boldSystemFont(ofSize: 16)]) 12 13 // Add the Twitter username in grey color (and a new line) 14 attributedText.append(NSAttributedString(string: " @\(t.username)\n", attributes: [NSFontAttributeName: UIFont.systemFont(ofSize: 14), NSForegroundColorAttributeName: UIColor.gray])) 15 16 // Modify the line spacing of the previous line so they look a litle separated 17 let paragraphStyle = NSMutableParagraphStyle() 18 paragraphStyle.lineSpacing = 5 19 let range = NSMakeRange(0, attributedText.string.characters.count) 20 attributedText.addAttribute(NSParagraphStyleAttributeName, value: paragraphStyle, range: range) 21 22 // Add the message 23 attributedText.append(NSAttributedString(string: t.message, attributes: [NSFontAttributeName: UIFont.systemFont(ofSize: 14)])) 24 25 messageText.attributedText = attributedText 26 27 // Compose the image URL with the username and set it with AlamofireImage 28 let imageUrl = URL(string: "https://twitter.com/" + t.username + "/profile_image") 29 profileImage.af_setImage(withURL: imageUrl!) 30 } 31 } 32 33 ... 34}
Now, in the ViewController class, let's create a cell identifier, an array that will control our tweets and the Pusher object:
1import UIKit 2import PusherSwift 3 4class ViewController: UITableViewController { 5 6 let cellId = "cellId" 7 var tweets = [Tweet]() 8 var pusher: Pusher! = nil 9 10 ... 11}
So we can register the type TweetCell and instantiate the Pusher object inside viewDidLoad:
1class ViewController: UITableViewController { 2 3 ... 4 5 override func viewDidLoad() { 6 super.viewDidLoad() 7 8 navigationItem.title = "Pusher Feed" 9 10 tableView.register(TweetCell.self, forCellReuseIdentifier: cellId) 11 12 pusher = Pusher( 13 key: "<INSERT_YOUR_PUSHER_KEY_HERE>" 14 ) 15 16 } 17}
We will listen to new tweets by subscribing to the channel hashtags and binding the event new_tweet :
1class ViewController: UITableViewController { 2 3 ... 4 5 override func viewDidLoad() { 6 7 ... 8 9 let channel = pusher.subscribe("hashtags") 10 11 let _ = channel.bind(eventName: "new_tweet", callback: { (data: Any?) -> Void in 12 if let data = data as? [String : AnyObject] { 13 14 // Extract the Tweet information 15 let message = data["message"] as! String 16 let name = data["name"] as! String 17 let username = data["username"] as! String 18 19 // Create a tweet 20 let tweet = Tweet(name: name, username: username, message: message) 21 22 // Insert it at the beginning of the array 23 self.tweets.insert(tweet, at: self.tweets.startIndex) 24 25 // Insert the new tweet at the beginning of the table and scroll to that position 26 let indexPath = IndexPath(row: 0, section: 0) 27 self.tableView.insertRows(at: [indexPath], with: UITableViewRowAnimation.automatic) 28 self.tableView.scrollToRow(at: indexPath, at: UITableViewScrollPosition.none, animated: true) 29 } 30 }) 31 32 pusher.connect() 33 } 34}
This way, we can extract the tweet information, create a Tweet instance and insert it in the array and in the tableView to display it.
Of course, for this to happen, we also need to implement the following methods:
1class ViewController: UITableViewController { 2 3 ... 4 5 override func tableView(_ tableView: UITableView, numberOfRowsInSection section: Int) -> Int { 6 return tweets.count 7 } 8 9 override func tableView(_ tableView: UITableView, cellForRowAt indexPath: IndexPath) -> UITableViewCell { 10 let cell = tableView.dequeueReusableCell(withIdentifier: cellId, for: indexPath) as! TweetCell 11 12 // At this point, the didSet block will set up the cell's views 13 cell.tweet = tweets[indexPath.item] 14 15 return cell; 16 } 17}
One last detail. The cells need to have a dynamic height to accommodate the text of the tweet. One easy way to achieve this is by disabling the scrolling on the cell's UITextView:
1class TweetCell: UITableViewCell { 2 3 ... 4 5 let messageText: UITextView = { 6 let textView = UITextView() 7 ... 8 9 textView.isScrollEnabled = false 10 11 return textView 12 }() 13 14 ... 15}
Estimating an average row height, and setting the rowHeight property this way:
1class ViewController: UITableViewController { 2 3 ... 4 5 override func viewDidLoad() { 6 ... 7 8 tableView.estimatedRowHeight = 100.0 9 tableView.rowHeight = UITableViewAutomaticDimension 10 11 ... 12 } 13 14 ... 15}
And we're done!
Testing the app
Run the iOS app in the simulator or in a real device:
And execute the backend with:
node app.js
Or if you only want to test the app, you can use the Pusher Debug Console on your dashboard:
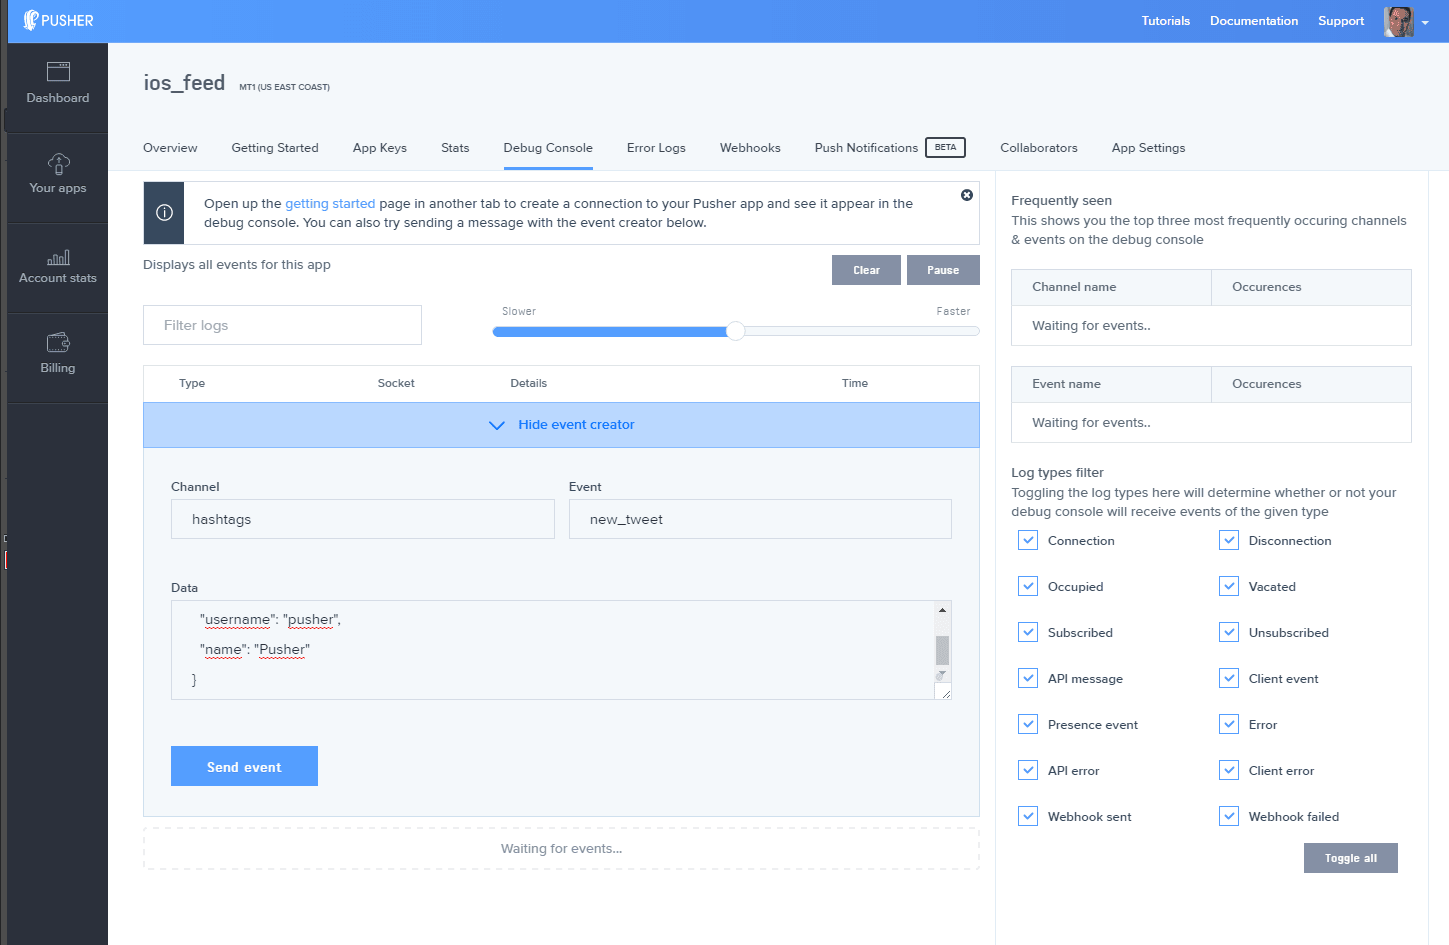
When a new_tweet event is received in the Pusher channel, the new tweet will come up in the iOS app:
Conclusion
You can find the final version of the backend here and the final version of the iOS app here.
Hopefully, this tutorial has shown you how to build a Twitter feed for an iOS app with Pusher in an easy way. You can improve the app by showing more information or saving it to a database.
Further reading


© 2026 Pusher Ltd. All rights reserved.
Pusher Limited is a company registered in England and Wales (No. 07489873) whose registered office is at MessageBird UK Limited, 3 More London Riverside, 4th Floor, London, United Kingdom, SE1 2AQ.