- Products

- Developers
- User stories
- Blog
- Pricing

Build a to-do list app for the Apple watch
Introduction
Introduction
In this post, you will build a realtime iOS application involving a watch and an iPhone. We will be creating a realtime todo watch app with an accompanying iPhone app.
Here is how your application will look afterward:
Prerequisites
To follow along in this article, you need the following:
- A Pusher Channel app. You can create one here (take note of your app keys as you’ll need them later).
- Xcode installed on your machine. You can download here.
- Node JS and NPM (Node Package Manager) installed on your machine. Check here for the latest releases.
Let’s get started.
Building the backend
Our app will be powered by a local Node.js server. Create a folder on your machine, say todo-backend. Create a package.json file inside it and set it up like so:
1// File: ./package.json 2 { 3 "name": "todo", 4 "version": "1.0.0", 5 "description": "", 6 "main": "index.js", 7 "scripts": { 8 "test": "echo \"Error: no test specified\" && exit 1" 9 }, 10 "keywords": [], 11 "author": "", 12 "license": "ISC", 13 "dependencies": { 14 "body-parser": "^1.18.3", 15 "express": "^4.16.4", 16 "pusher": "^2.2.0" 17 } 18 }
This file contains a description to our app and the dependencies we will make use of. Next, create an index.js file and paste this:
1// File: ./index.js 2 const express = require('express'); 3 const bodyParser = require('body-parser'); 4 const Pusher = require('pusher'); 5 const app = express(); 6 7 app.use(bodyParser.json()); 8 9 var pusher = new Pusher({ 10 appId: 'PUSHER_APP_ID', 11 key: 'PUSHER_APP_KEY', 12 secret: 'PUSHER_APP_SECRET', 13 cluster: 'PUSHER_APP_CLUSTER' 14 }); 15 16 app.post('/addItem', function (req, res) { 17 pusher.trigger('todo', 'addItem', { text: req.body.value}); 18 res.send(200); 19 }) 20 21 app.listen(process.env.PORT || 5000);
Here, we added a single endpoint that will add todo items. Our watch app will make use of this API and send a todo trigger to Pusher.
Replace
PUSHER_APP_*placeholders with the credentials from your dashboard
Run the npm install command in the directory to install the Node modules after which you run your server using:
$ node index.js
The localhost runs on port 5000.
Building the iOS app
Creating a project
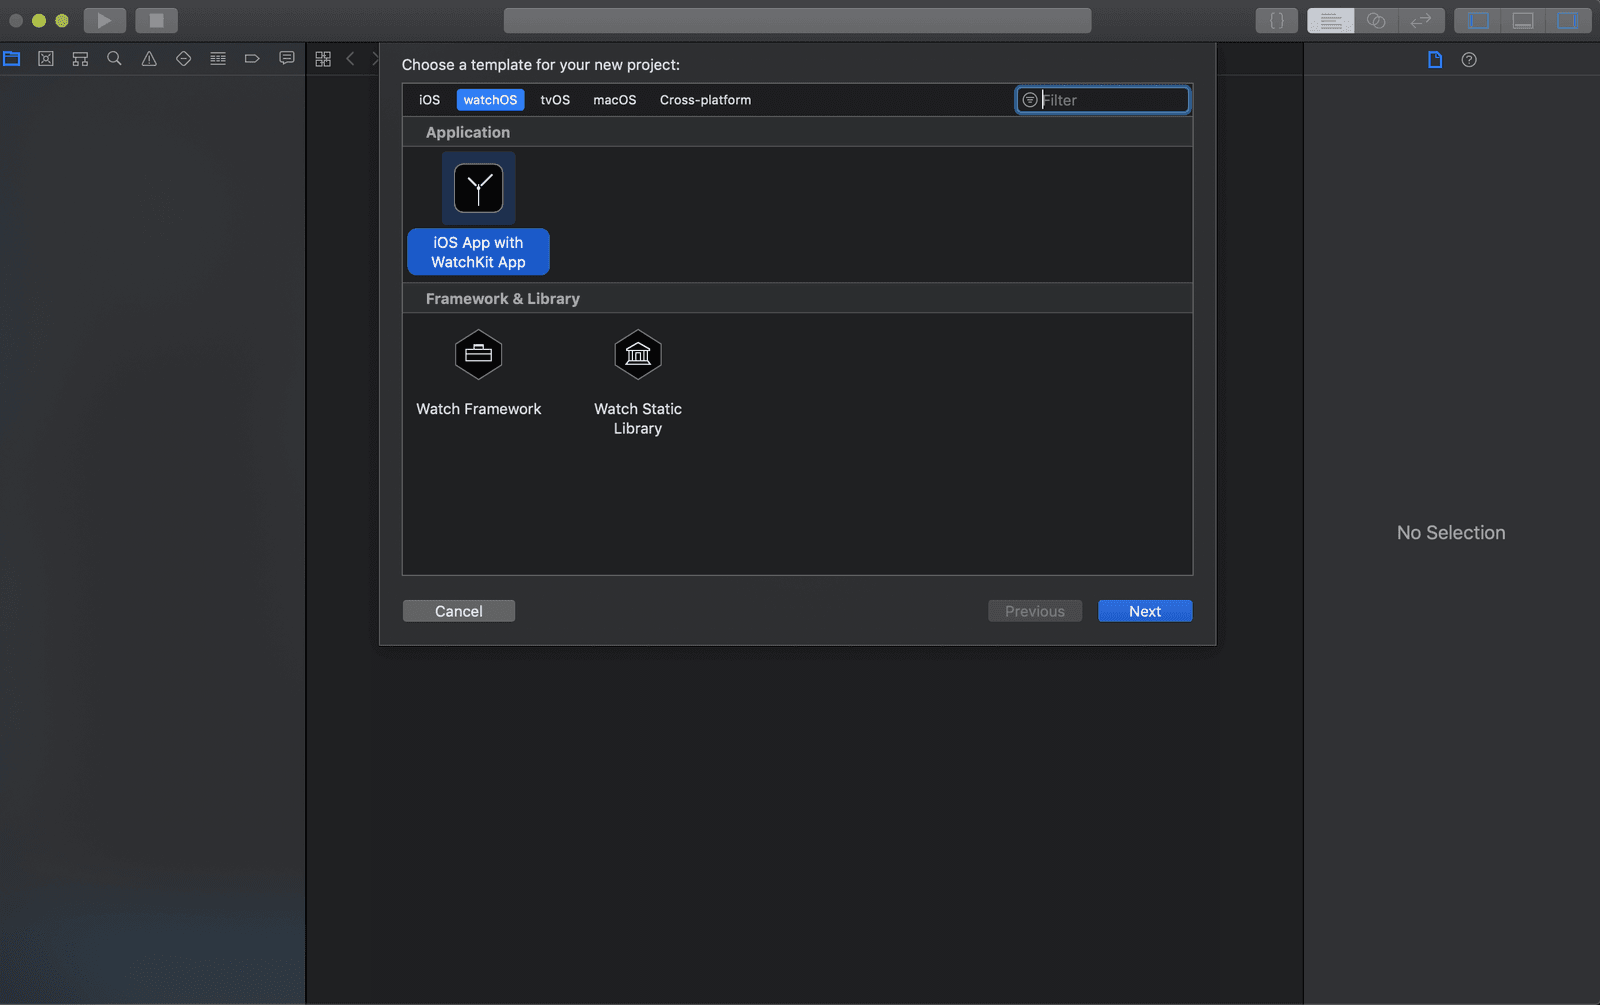
Open your Xcode and create a new project. You will be presented with a template wizard. Choose watchOS and select iOS App with WatchKit App.
Next, you enter a product name - say TodoWatchApp, team, and organization details. Choose Swift as the default language and choose Next. You will then be asked to choose the directory where you want the project to be created. After this, you’re good to go!
Here is how the directory of your project should look.
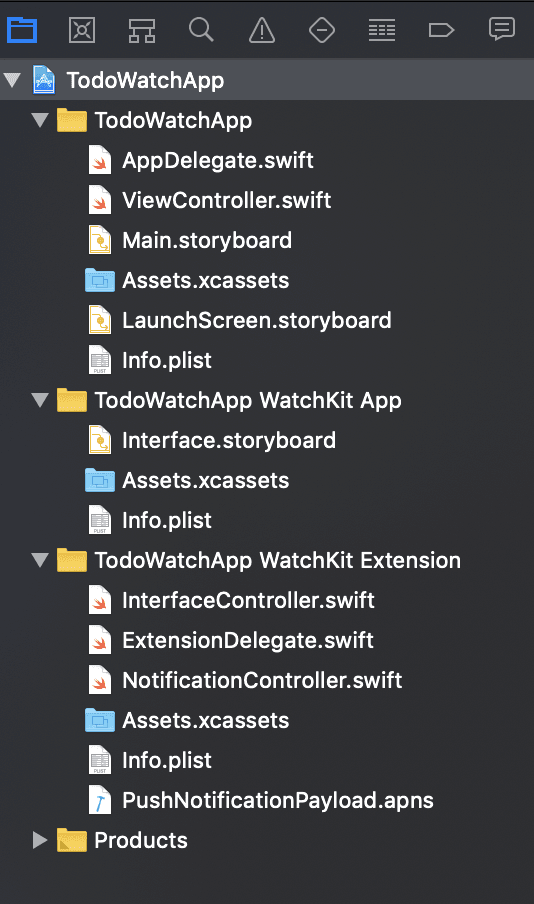
This is quite different from when you are developing just the main app. We have three folders, one for the phone app and two for the watch.
The TodoWatchApp WatchKit App folder is where we design the interface for the watch while the TodoWatchApp WatchKit Extension is where we will write the logic and view controllers.
Building our iOS phone app
So, we will start with the phone app. The phone app will listen to triggers from Pusher. These triggers will be sent by the app. First, we will need to add the Pusher dependency. Follow these steps to set it up.
Run this command on your main app directory:
$ pod init
This will create a Podfile where you can insert your dependencies. Paste this into the file:
1# File: ./Podfile 2 target 'TodoWatchApp' do 3 use_frameworks! 4 pod 'PusherSwift' 5 end 6 7 target 'TodoWatchApp WatchKit App' do 8 use_frameworks! 9 end 10 11 target 'TodoWatchApp WatchKit Extension' do 12 use_frameworks! 13 end
We only added the dependency for the main app as the library does not support watchOS yet. You can follow this GitHub issue to learn the latest on that.
Next, run this command still in the main app directory:
$ pod install
After the installation is complete, close your project -TodoWatchApp.xcodeproj. Still in Xcode, open TodoWatchApp.xcworkspace located in the folder of your project. This was generated after you installed your dependencies.
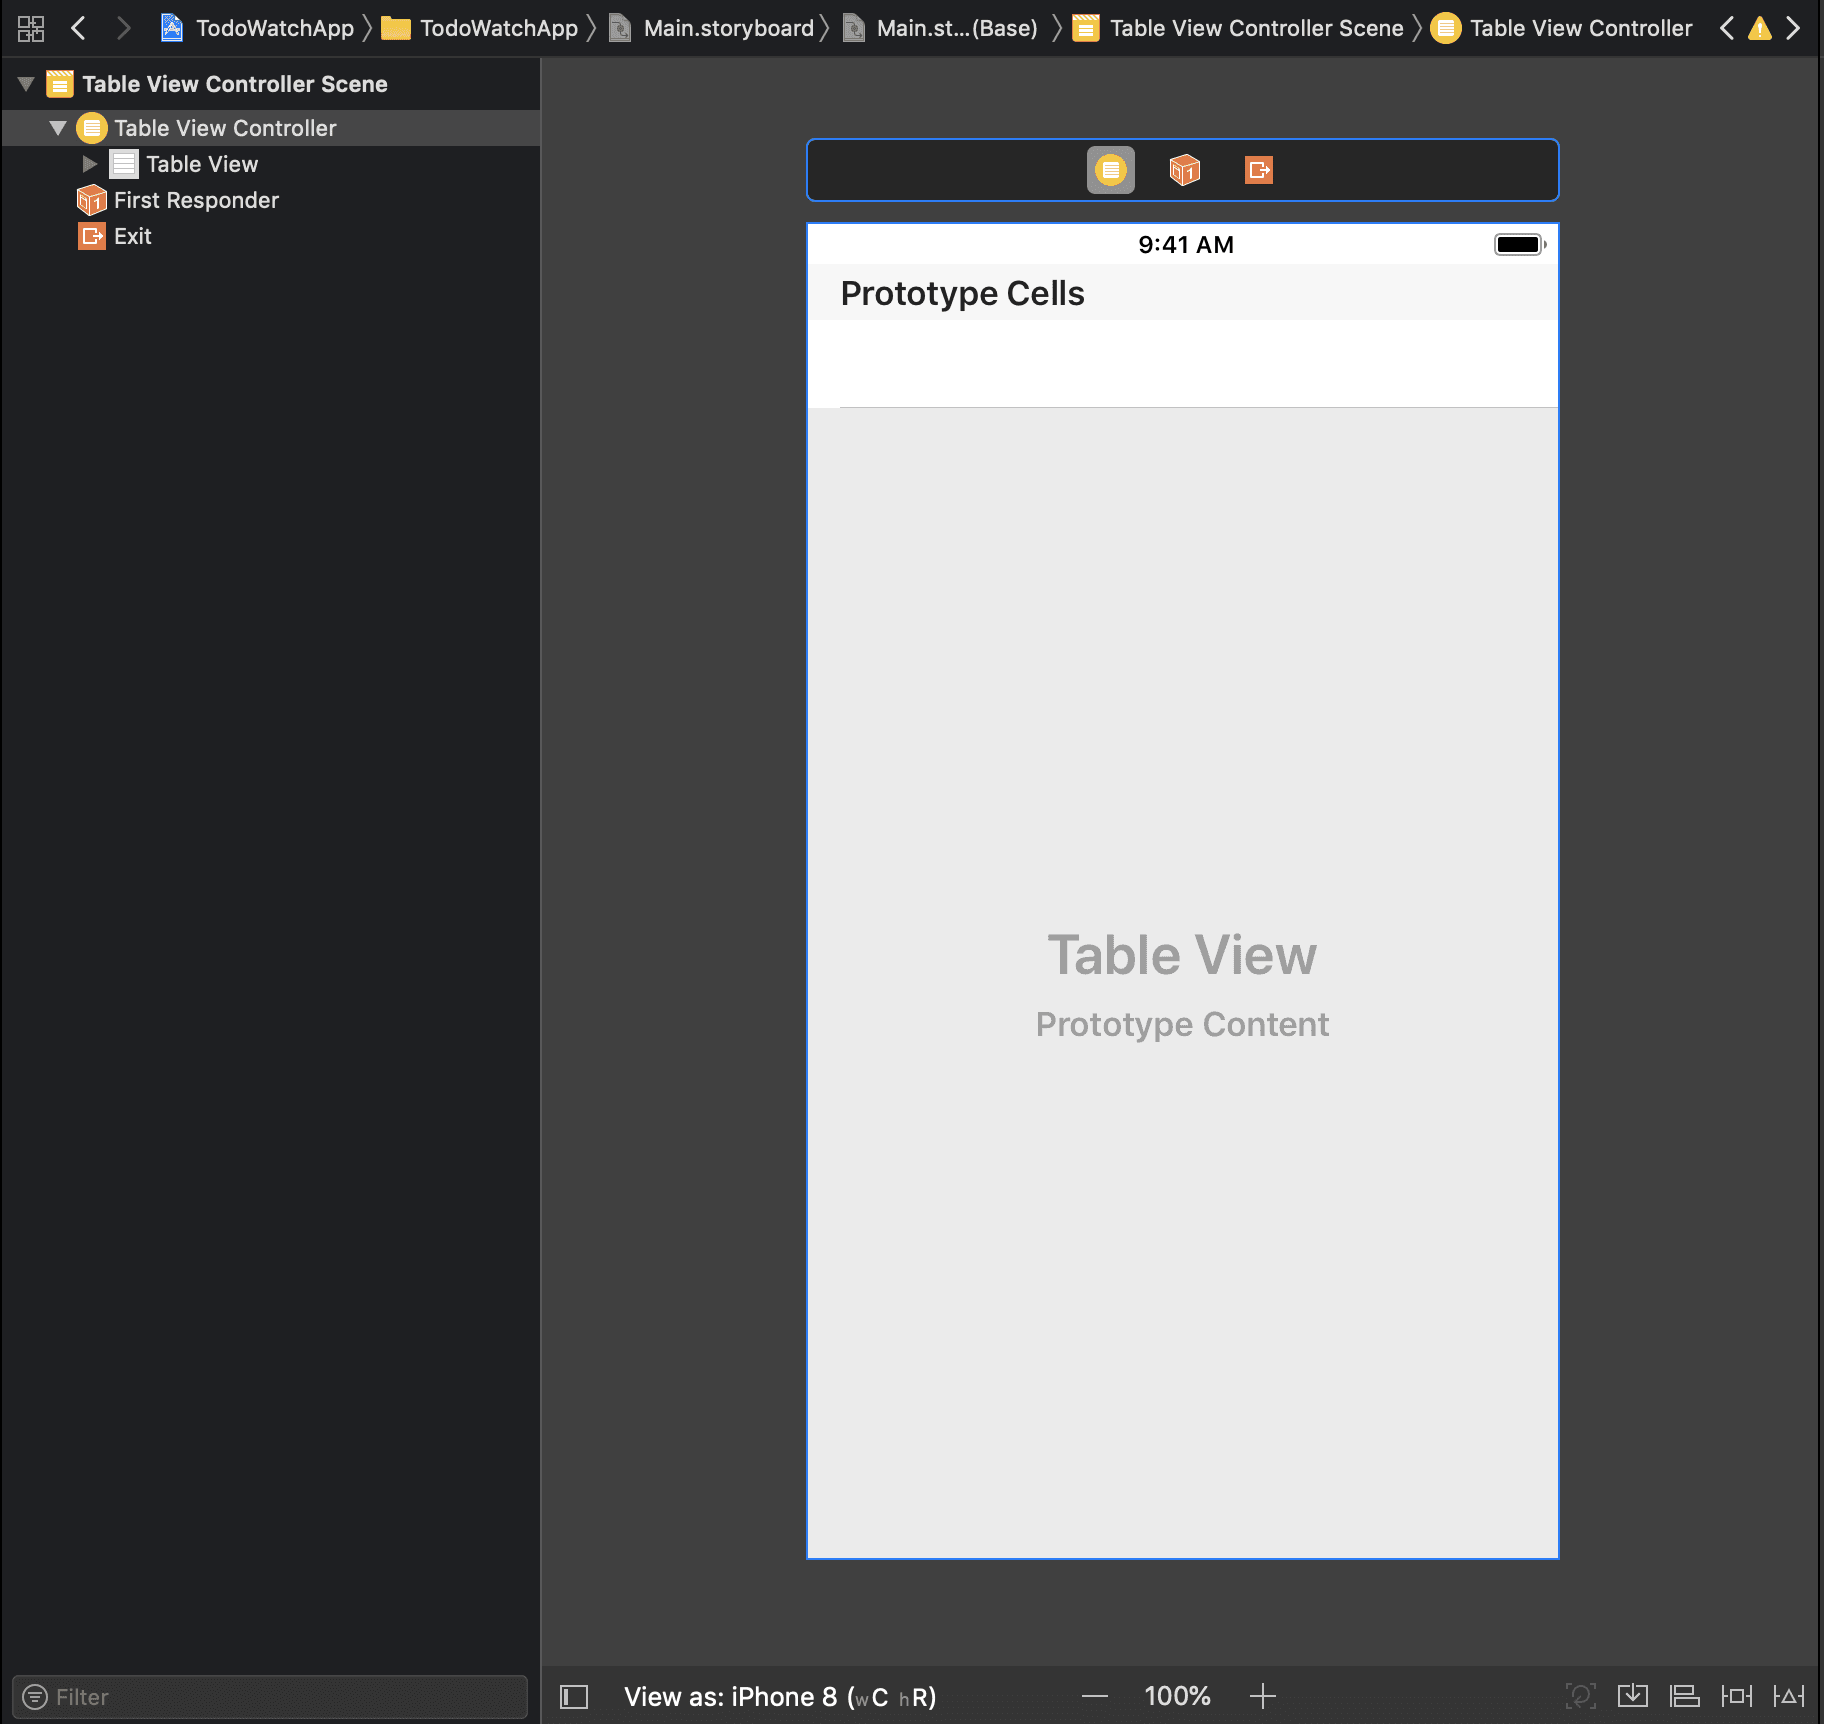
For now, we will work with the TodoWatchApp folder. Now, let us design the interface for the app. All the app needs is a table view to display the todo items. Open the Main.storyboard file, delete the default ViewController scene. Now, drag the TableViewController element and drop on the empty light grey area. You should now have something like this:
Set the controller to be the initial controller. You can do that in the identity inspector pane.
Go to your ViewController.swift class and change the class it is extending from UIViewController to UITableViewController.
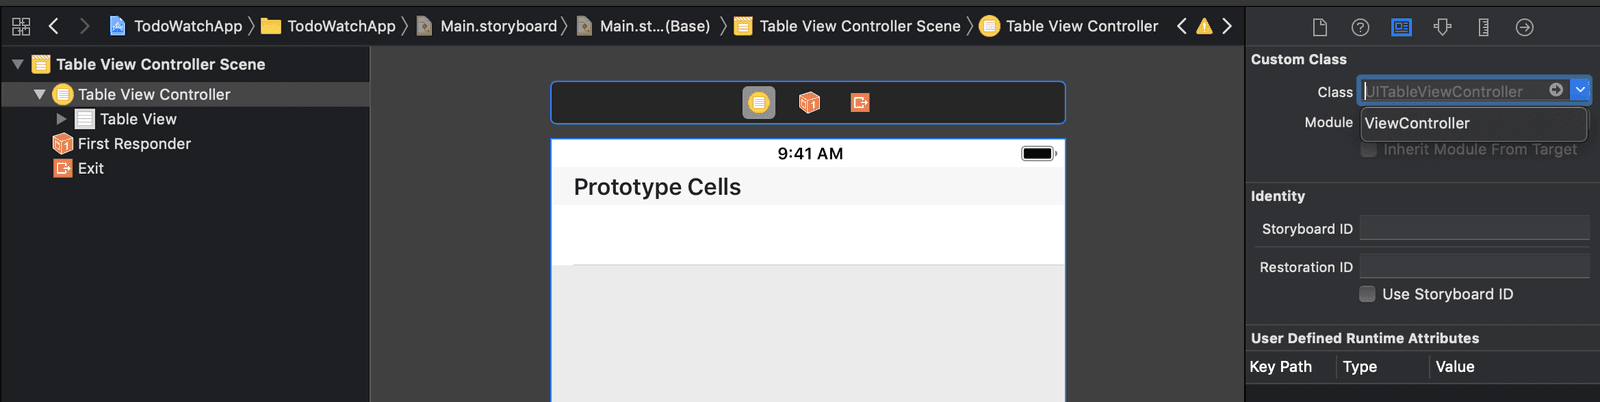
The UITableViewController still extends the UIViewController class but it is specially configured to table views. Go back to your storyboard, select the Table View Controller element, in the identity inspector (third icon at the top right as seen in the image ), change the class to your ViewController class like so:
Next, select the Table Cell which is a grandchild of the Table View Controller element, in the attributes inspector, enter an identifier of your choice or better still, use cell. This is the unique name used to identify the row name in the Swift file, later on.
Next, let us design how each row of the table view will look like. We will just want a label displaying the todo item. Simply drag a label to the Content View of the Table Cell. Your design should now look like this:
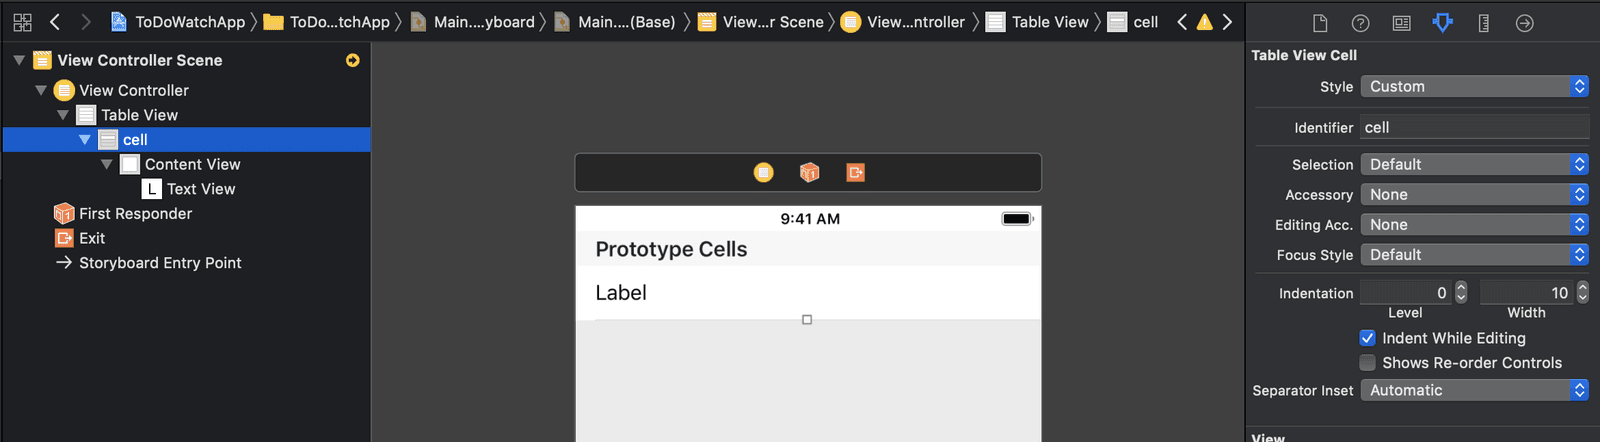
The additions we just made are reflected in the screenshot above.
Next, create a TableCell.swift file and paste this:
1// File: ./TableCell.swift
2 import Foundation
3 import UIKit
4
5 class TableCell: UITableViewCell {
6
7 @IBOutlet weak var textView: UILabel!
8
9 func setLabel(labelValue:String) {
10 textView.text = labelValue
11 }
12 }
This class mimics how each row in the table view will look. It has just one UILabel as we earlier specified on our storyboard. Now that we have created this file, go back to the Main.storyboard , select the cell, in the attributes inspector, replace the default class there with TableCell like so:
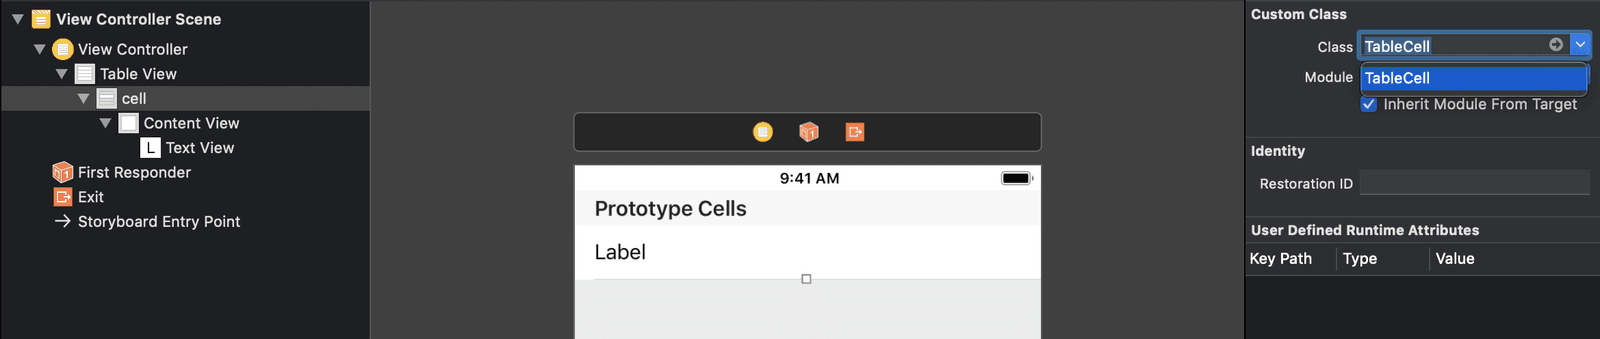
Be sure to link the
@IBOutletvariable from your storyboard to the file.
Now, let us hook things up in our ViewController swift file. Paste this in the file:
1// File: ./ViewController.swift
2 import UIKit
3 import PusherSwift
4
5 class ViewController: UITableViewController {
6 var pusher: Pusher!
7
8 var itemList = [String]() {
9 didSet {
10 self.tableView.reloadData()
11 }
12 }
13
14 override func viewDidLoad() {
15 super.viewDidLoad()
16 setupPusher()
17 }
18
19 override func tableView(_ tableView: UITableView, numberOfRowsInSection section: Int) -> Int {
20 return itemList.count
21 }
22
23 override func tableView(_ tableView: UITableView, cellForRowAt indexPath: IndexPath) -> UITableViewCell {
24 // inflate each row
25 let currentItem = itemList[indexPath.row]
26 let todoCell = tableView.dequeueReusableCell(withIdentifier: "cell") as! TableCell
27 todoCell.setLabel(labelValue: currentItem)
28 return todoCell
29 }
30 }
Let us go through what we have here: first, we declared a Pusher variable and our list. In the viewDidLoad method, we call the setupPusher method which we will look at shortly.
The other two methods are for the table view, to get the size of the table and to get data for each row. Next, paste the setupPusher function inside the class like so:
1func setupPusher() {
2 let options = PusherClientOptions(
3 host: .cluster("PUSHER_APP_CLUSTER")
4 )
5
6 pusher = Pusher(
7 key: "PUSHER_APP_KEY",
8 options: options
9 )
10
11 // subscribe to channel and bind to event
12 let channel = pusher.subscribe("todo")
13
14 let _ = channel.bind(eventName: "addItem", callback: { (data: Any?) -> Void in
15 if let data = data as? [String : AnyObject] {
16 let value = data["text"] as! String
17 self.itemList.append(value)
18 }
19 })
20
21 pusher.connect()
22 }
This method initializes Pusher and listens to the todo channel for updates.
Replace the Pusher holder with keys found on your dashboard
With this, we are done with our phone app. We will now build the watch app.
Building our watchOS app
Go to the TodoWatchApp WatchKit App folder, open the Interface.storyboard. Delete the controller scenes except for the Interface Controller Scene. Now drag a group element library to the watch screen. Set the orientation of the group to horizontal. Next, add a label and a button as children to the group.
We will use a custom icon for the button. You can download the icon here. Open the Assets.xcassets in the TodoWatchApp WatchKit App folder and import the new image asset. Make sure it is named add_item. After importing, go back to the Interface.storyboard , select the button, and select the icon as the background in the identity inspector. Clear the title on the button, then set the width and height to fixed using 20 as the value.
Next, we will hookup an action from the add button in the storyboard to our InterfaceController file. We use the assistant editor(icon with rings at top right) to split the two files like so:
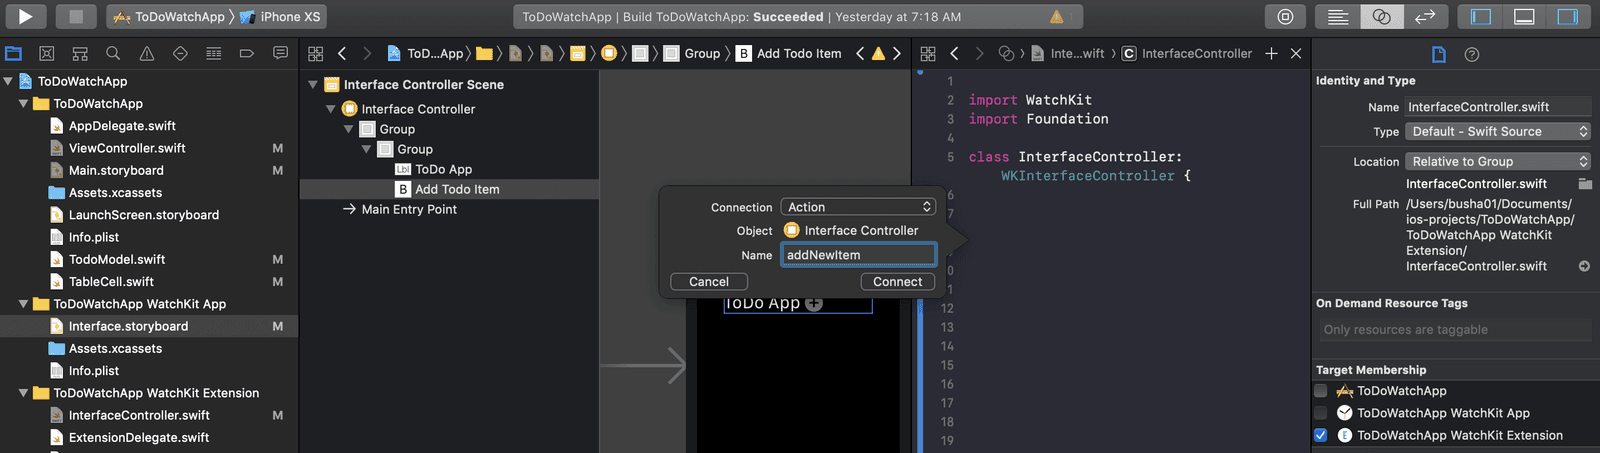
After that, open the InterfaceController.swift file in the TodoWatchApp WatchKit Extension folder and make sure your file looks like this:
1// File: ./InterfaceController.swift
2 import WatchKit
3 import Foundation
4
5 class InterfaceController: WKInterfaceController {
6 @IBAction func addNewItem() {
7 let suggestionsArray = ["Visit Neo", "Write Pusher article"]
8
9 presentTextInputController(withSuggestions: suggestionsArray,allowedInputMode: WKTextInputMode.allowEmoji, completion: { (result) -> Void in
10
11 guard let choice = result else { return }
12
13 let newItem = choice[0] as! String
14 self.postValue(value: newItem)
15 })
16 }
17
18 func postValue(value:String){
19 let parameters = ["value": value] as [String : Any]
20 let url = URL(string: "http://127.0.0.1:5000/addItem")!
21 let session = URLSession.shared
22
23 var request = URLRequest(url: url)
24 request.httpMethod = "POST"
25
26 do {
27 request.httpBody = try JSONSerialization.data(
28 withJSONObject: parameters,
29 options: .prettyPrinted
30 )
31 } catch let error {
32 print(error.localizedDescription)
33 }
34
35 request.addValue("application/json", forHTTPHeaderField: "Content-Type")
36 request.addValue("application/json", forHTTPHeaderField: "Accept")
37
38 let task = session.dataTask(with: request as URLRequest, completionHandler: { data, response, error in
39 guard error == nil else {
40 return
41 }
42
43 guard let data = data else {
44 return
45 }
46
47 do {
48 //create json object from data
49 if let json = try JSONSerialization.jsonObject(with: data, options: .mutableContainers) as? [String: Any] {
50 print(json)
51 }
52 } catch let error {
53 print(error.localizedDescription)
54 }
55 })
56
57 task.resume()
58 }
59 }
Here, when the add button is clicked, the watch opens the input controller where you can either handwrite your todo, or choose from the suggestions, or dictate it. When you confirm your text, the watch sends the item to the server.
You can now run both applications on the simulator. You can select the WatchApp build so it runs both simulators at once.
When you run the app, it should look like this:
Conclusion
Here, we have been able to successfully build an iOS app to show realtime functionalities between the main app, the watch app and, Pusher. You can still play around this in the GitHub repository.


© 2026 Pusher Ltd. All rights reserved.
Pusher Limited is a company registered in England and Wales (No. 07489873) whose registered office is at MessageBird UK Limited, 3 More London Riverside, 4th Floor, London, United Kingdom, SE1 2AQ.