- Products

- Developers
- User stories
- Blog
- Pricing

How to build a serverless mobile app with React Native and AWS Amplify
Introduction
Introduction
AWS Amplify is a command line tool-chain that helps you to develop and connect AWS cloud services directly to any frontend environment, whether a library such as ReactJS or a mobile development framework, React Native. Building a full-stack mobile app in the real world requires a lot of basic requirements to be fulfilled. AWS Amplify tries to reduce the amount of time spent on building an application using it.
This tutorial is a step-by-step guide to connect AWS Amplify and AWS AppSync services with your React Native application. You are also going to use Expo CLI to scaffold a React Native app quickly.
Prerequisites
You are going to need the following installed on your local dev machine in order to follow this tutorial.
- Node.js/npm installed on your local machine version >=
10.x.x - watchman to watch file changes in a React Native app
[expo-cli](https://www.npmjs.com/package/expo-cli)version >=2.13.0- AWS account
- @aws-amplify/cli version >=
1.1.18
You should have some familiarity with React Native and mobile development, and be able to troubleshoot your own dev environment.
Note: Working with development environments can be a bit tricky. Since, you are going to use Expo CLI for this tutorial.
What is AWS Amplify?
Amazon Web Services is a well-known technology that provides cloud services. These services include hosting, storage, database technologies and managing serverless applications for both mobile and web. React Native already has an advantage by quickly and easily bootstrapping an app using tools like Expo (previously known as create-react-native-app). However, writing and managing a backend service for your app can be challenging. To help us JavaScript developers the AWS mobile team is exclusively managing a project called AWS Amplify that helps to embed cloud services and provide an infrastructure with features in the form of APIs as follows:
- Authentication
- GraphQL Client through an API, in most uses cases, AWS AppSync with offline and real-time features
- Push Notifications
- Interactions in the form of conversational bots
- Cloud Storage
- Internationalization
To install amplify CLI tool, run the following command.
npm install -g @aws-amplify/cli
Creating the Expo app
To create a new Expo application, run the following command from a terminal window.
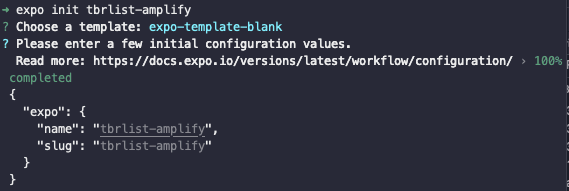
expo init tbrlist-amplify
The Expo command line interface will prompt a few questions regarding the template of the project to be generated and the name and which package manager (npm/yarn?) to use to install npm dependencies. On initializing the new project it will ask you follow questions. Choose the below:
- Choose a template: expo-template-blank
- Please enter a few initial configuration values: “name”: “trblist Amplify”
Take a look below for the first two questions and use npm to install app dependencies.
After scaffolding a new Expo project navigate inside the directory using cd tbrlist-amplify.
Configure AWS amplify app
To begin with configuration, it is important to have an AWS account signup. This will make it easier for you to follow the rest of the tutorial. After logging in your default browser into the AWS console, open up the command line window in the Expo app project’s root. Run the following command:
amplify configure
Press enter to continue and it will ask you to login to AWS console account with your login credentials by opening a new browser window. Once logged in, go back to terminal window and press enter to continue, again. The CLI tool will now prompt you with a different set of questions in order to set up a cloud service and create a user in the cloud. Follow closely.
- Choose a region: us-east-2
- Specify the username of the new IAM user: tbrlist-amplify
On entering the username, press enter and it will open AWS console again in a browser window for you to add a user.
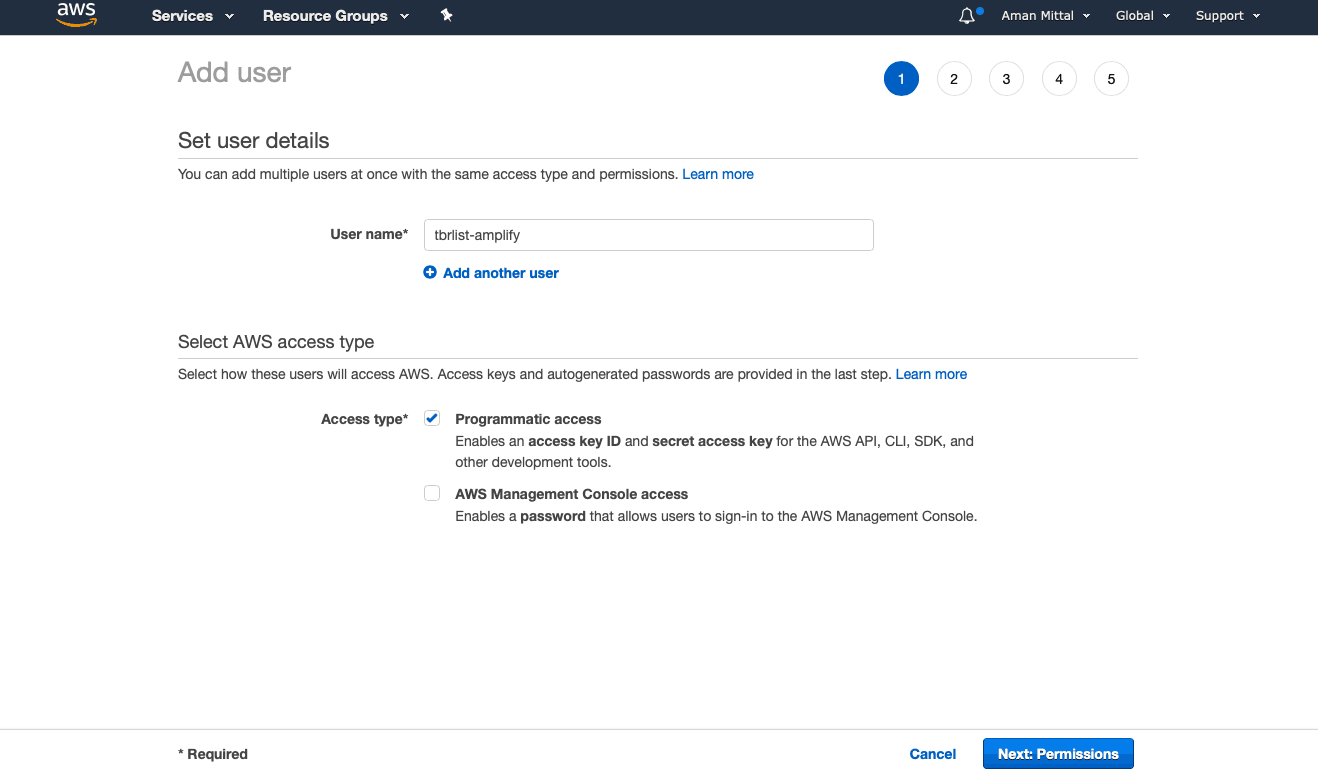
Make sure in the above screen that Programmatic access is checked as shown. This allows you to add the user you are now creating to create resources in the form of different APIs and tools by providing you with an access key and secret key. Click on the button Next: Permissions.
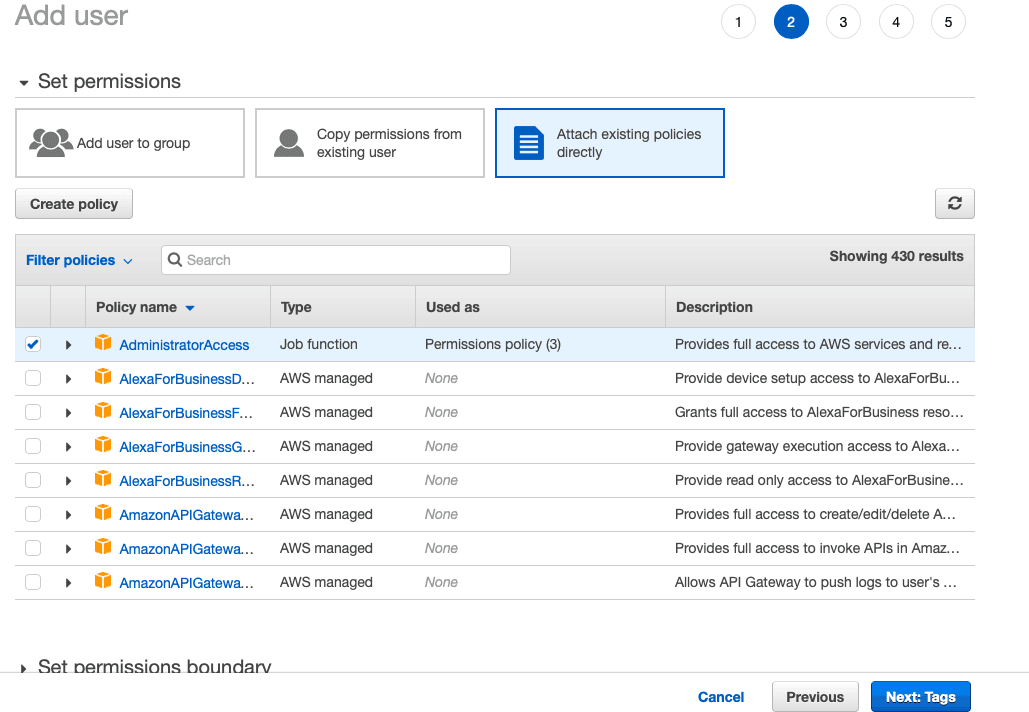
On the next page, you will see that policy has already been selected by default. This provides you the full access to AWS services by enabling your user to be as an administrator. Click Next: Tags. On the next page, leave it blank.
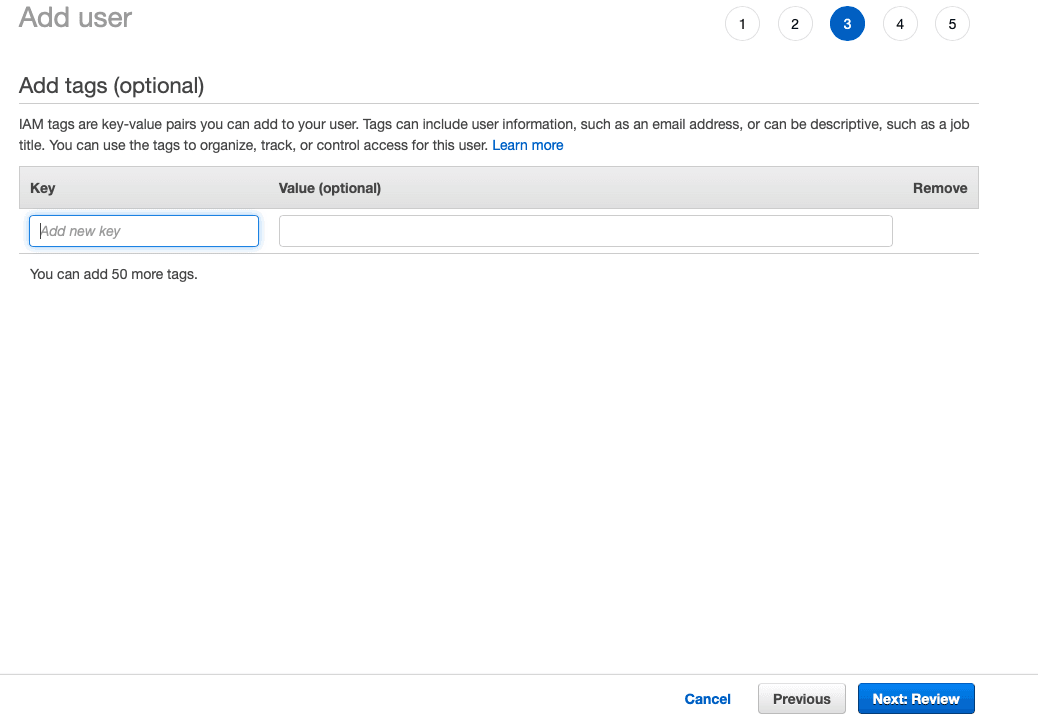
Now, click Next: Review.
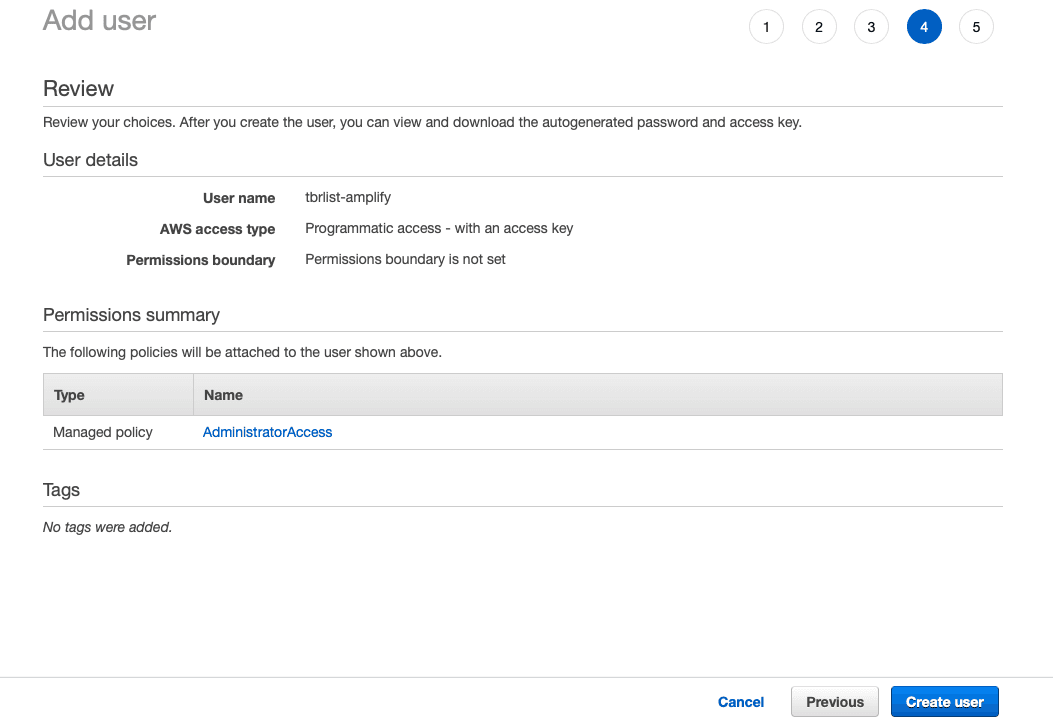
Everything is good, now click Create user.

You will get an Access key and a secret key. Copy them and please enter these keys on your terminal.

For Profile Name, we are going to enter the project name to keep things simple for now.

You will get a success message that the new user has been setup and the command line prompt will exit as you can see this from the above image. The configuration of the AWS Amplify user is complete.
Initializing AWS Amplify
In this section, you will be initializing the Expo app in order to make it work with the AWS cloud services. The first step in this process is to run the below command from a terminal window inside the app directory.
amplify init
This command will you ask another set of questions in order to setup amplify SDK inside the Expo project. In the below screen you will find these questions and the answers you need to select. Most of them are default as prompted by the CLI tool. Except for the name of the environment and the default editor, you can choose the settings as default.
For the name of the environment you can either choose the name of the operating system you are working on or the environments such as dev, local or production. To choose a default editor, you are prompter with different options such as Visual Studio Code.

When asked if you would like to use an AWS profile, choose Yes, using the user profile you created when configuring the CLI earlier: tbrlist-amplify.

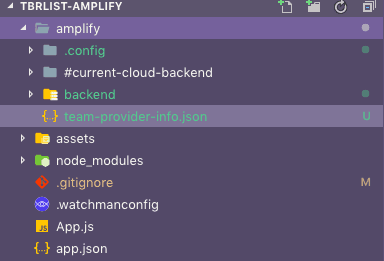
After a few moments, it will create a new directory inside our Expo app called amplify that mostly contains configuration files. It will also edit .gitignore file so make sure you have that file at the root of your project.
To see if everything is connected and working, from the terminal, run npm start and then choose either ios or android simulator to run the React Native app.
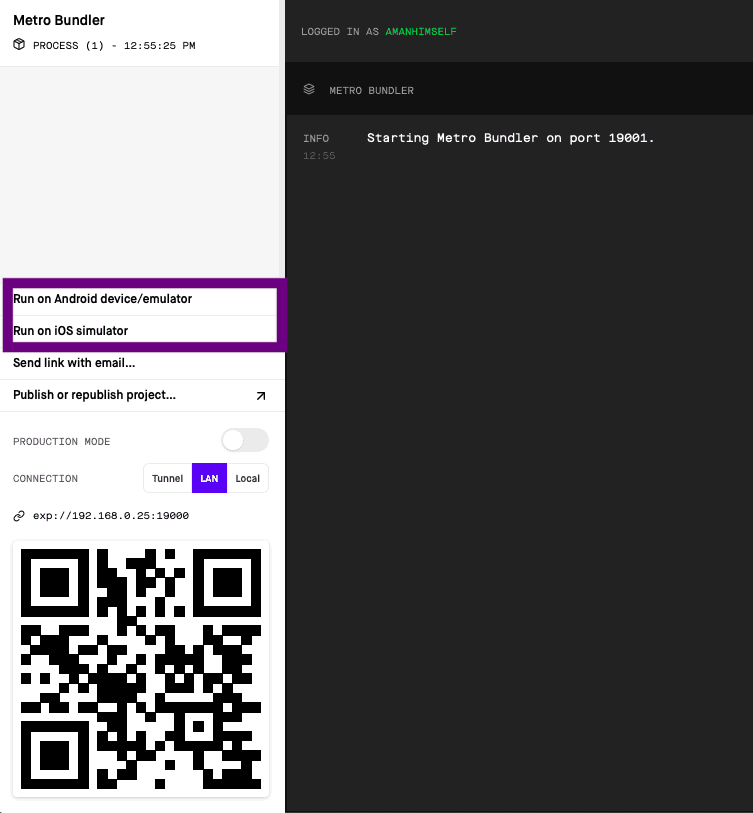
Note: Android developers make sure that a virtual device (AVD) is already running or a device is connected to your dev machine in order to run the app. If everything runs successfully, you will get the following screen in your simulator or a real device.

Building the app
In this section, you are going to build the UI part of the React Native and Expo application. The idea behind the demo application for this tutorial is to create a "To-be-read" listing app such that if you read books (like me), you can track which books you want to read this year. In the application, you are going to provide two input fields. One to record the name of the book and the other one is for the author of the book. Open the App.js file and define an initial state.
1// App.js 2 state = { 3 title: '', 4 author: '', 5 books: [] 6 };
The state in the App component contains three properties. The title is equivalent to the title of a book, author for a book's author name and last one is an array that keeps records of all whole list. Modify the App component further as below.
1// App.js 2 import React from 'react'; 3 import { StyleSheet, Text, TextInput, Button, View } from 'react-native'; 4 export default class App extends React.Component { 5 state = { 6 title: '', 7 author: '', 8 books: [] 9 }; 10 onChangeText = (key, val) => { 11 this.setState({ [key]: val }); 12 }; 13 render() { 14 return ( 15 <View style={styles.container}> 16 <TextInput 17 style={styles.input} 18 value={this.state.title} 19 onChangeText={val => this.onChangeText('title', val)} 20 placeholder="What do you want to read?" 21 /> 22 <TextInput 23 style={styles.input} 24 value={this.state.author} 25 onChangeText={val => this.onChangeText('author', val)} 26 placeholder="Who wrote it?" 27 /> 28 <Button 29 onPress={() => alert('Success!')} 30 title="Add to TBR" 31 color="#eeaa55" 32 /> 33 </View> 34 ); 35 } 36 } 37 const styles = StyleSheet.create({ 38 container: { 39 flex: 1, 40 backgroundColor: '#fff', 41 paddingHorizontal: 10, 42 paddingTop: 50 43 }, 44 input: { 45 height: 50, 46 borderBottomWidth: 2, 47 borderBottomColor: 'blue', 48 marginVertical: 10 49 } 50 });
The above App component is a close version of how the app is going to behave in the future. So far you have both the input fields and a button. Each input field has an onPress method that will trigger the API to update the database later when making connections to the GraphQL API. The Button component above also displays a success alert message when clicked.
On running the command npm start, open the app on the desired simulator. You will get the following result.

Adding a GraphQL API using AppSync
To add a GraphQL API to the current app, we are going to leverage AWS AppAsync. It uses GraphQL, an API query language solely focus on data-driven applications. You don’t have to write and hook a complete backend infrastructure. It offers realtime updates and built-in offline support along with first-class integration with ElasticSearch, DynamoDB, and AWS Lambda.
From the terminal window, run the below command.
amplify add api
On the running the above command, the CLI tool prompts you whether to initiate a GraphQL API or a REST API. Note that any REST API created using this service will lead to the use of Lambda functions that require Node.js functions to be written. Choose the option GraphQL API here.

It will continue to ask you a set of questions. Here is the recommended answer to each question that you need to fill in order to proceed with this tutorial.
- Provide API name: tbrlist
- Choose an authorization type for the API: API key
- Do you have an annotated GraphQL schema? No
- Do you want a guided schema creation? Yes
- What best describes your project: Single object with fields (e.g., “Todo” with ID, name, description)
- Do you want to edit the schema now? Yes
Answering Yes to the last question will open the default text editor on your local machine with a new file called schema.graphql. In this file, you can modify the default schema for your GraphQL API object. Since you choose a single object that can have multiple fields, edit the file as follows:
1type Book @model { 2 id: ID! 3 title: String! 4 author: String 5 }
The @model is for storing types in Amazon DynamoDB. Yes, behind the scenes, the data passed through the GraphQL API to store will be stored in DynamoDB. Note that this schema represents a single model of how data is going to be saved. Also, you can completely change this schema or tweak a little according to your needs later from the AWS Console. Once you have edited the schema as above, save the file and go back to terminal window and press enter to continue. It will then complete the setup.
This step creates a local configuration for the AppSync API. If you need to modify anything, you can before executing the next command. Once the next command amplify push is executed, it will write all those changes you did in the cloud services in the real time. Now run the command.
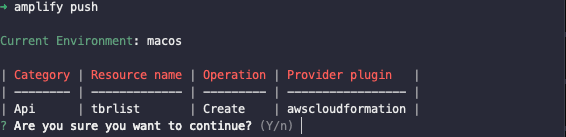
You will get a prompt, Do you want to generate code for your newly created GraphQL API? We are going to with the default and press Y for yes. Once the GraphQL schema compilation is done you will get a success message and a new configuration file in the project's root called aws-export.js. You are going to use this file to send queries and mutations.
To make sure that the API is created, visit AWS Console and in the AWS services section on the home page, search for AWS AppSync. You will be directed to a page where the GraphQL APIs are stored such as below.

Mutating the GraphQL API
In order to proceed, you are now required to install a dependency related to AWS Amplify. Open a terminal window and execute the following command.
npm install --save aws-amplify
This dependency will allow you to make API calls to the GraphQL service. Open up App.js file and let us first configure a little more to be able to communicate with the database API. Add the following just after you have imported everything.
1import Amplify from '@aws-amplify/core'; 2 import config from './aws-exports'; 3 Amplify.configure(config);
Next, import API and graphqlOperation helpers from @aws-amplify/api. Using both of them will help you execute any query on performing an action, such as fetching books or any mutation such as creating a new record.
import API, { graphqlOperation } from '@aws-amplify/api';
Let us create the first mutation to add a new book. Mutations in GraphQL are similar to modifying data in a REST API using either HTTP POST or PUT.
1const AddBook = ` 2 mutation ($title: String! $author: String) { 3 createBook(input: { 4 title: $title 5 author: $author 6 }) { 7 id title author 8 } 9 } 10 `;
This mutation AddBook take a title and an author field of type String. In the end, it just returns the whole book object along with an id that is automatically created by the GraphQL API in the database. However, this mutation will be useful when it executes. In the next snippet of code, you are going to add a new asynchronous function called addBook just before the render function of the App component.
1addBook = async () => { 2 if (this.state.title === '' || this.state.author === '') return; 3 const book = { title: this.state.title, author: this.state.author }; 4 try { 5 const books = [...this.state.books, book]; 6 this.setState({ books, title: '', author: '' }); 7 await API.graphql(graphqlOperation(AddBook, book)); 8 console.log('success'); 9 } catch (err) { 10 console.log('error: ', err); 11 } 12 };
In the above snippet, there is an if statement to check whether there is an empty field or not. If there is one, don’t mutate data to the database and just return in our case for this demo. You can, however, extend this and show an error to the user on the UI. Next, using try/catch syntax, API.graphql is executed to add the record to the database by running the mutation AddBook.
Also, add this function to the onPress prop on the Button component.
<Button onPress={this.addBook} title="Add to TBR" color="#eeaa55" />
Here is result you get.

To verify that the data has been stored there are two ways. First, since there is a console.log statement, in the Expo logs generated, on add the book, it should prompt the word success.

The second way is to visit the API's data source. Select the API first, then from sidebar menu, select Data Sources and then click Resource.
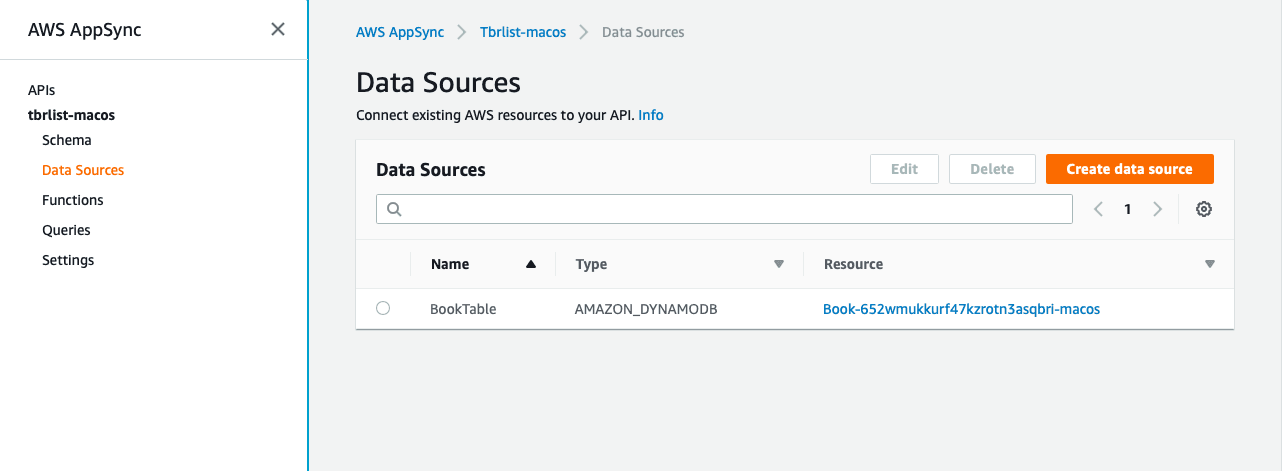
You will now be directed DynamoDB page associated with the API where data table is actually stored as you can see below.
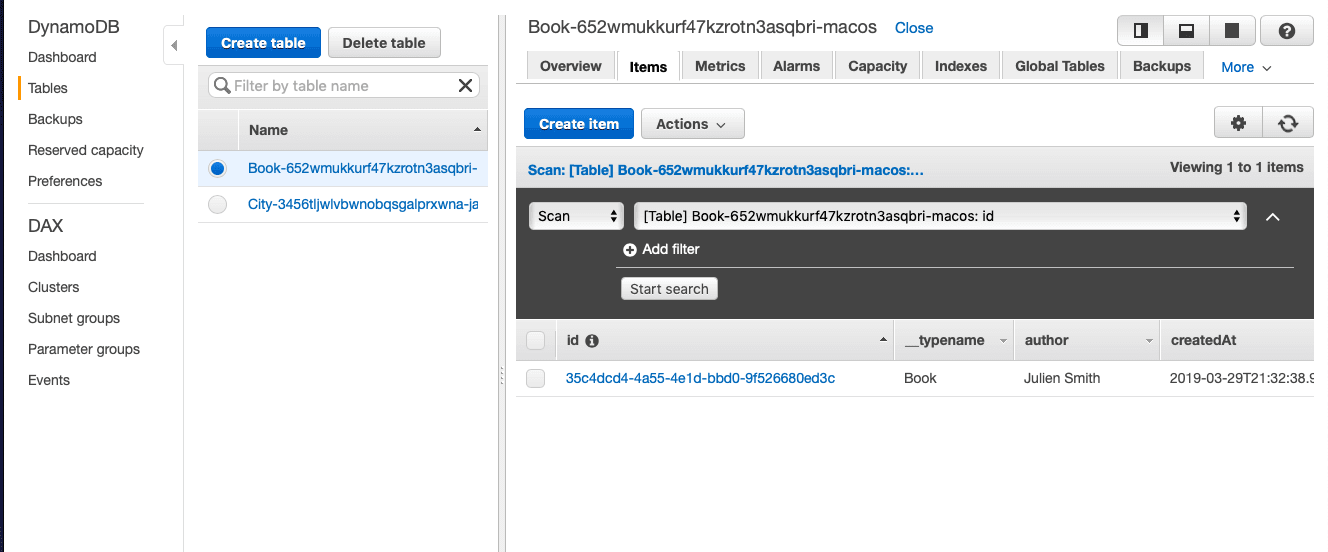
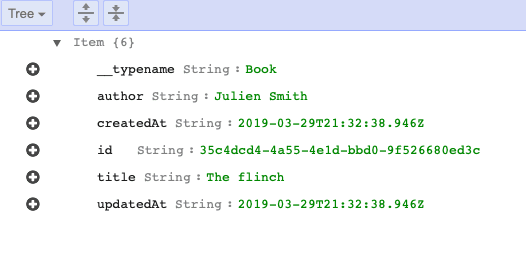
In the below image do notice that fields such as _typename, id, createdAt and updatedAt are automatically created the AppSync API.
Here is the complete App.js code so far.
1//App.js 2 import React from 'react'; 3 import { StyleSheet, Text, TextInput, Button, View } from 'react-native'; 4 import Amplify from 'aws-amplify'; 5 import config from './aws-exports'; 6 Amplify.configure(config); 7 import { API, graphqlOperation } from 'aws-amplify'; 8 const AddBook = ` 9 mutation ($title: String! $author: String) { 10 createBook(input: { 11 title: $title 12 author: $author 13 }) { 14 id title author 15 } 16 } 17 `; 18 export default class App extends React.Component { 19 state = { 20 title: '', 21 author: '', 22 books: [] 23 }; 24 onChangeText = (key, val) => { 25 this.setState({ [key]: val }); 26 }; 27 addBook = async () => { 28 if (this.state.title === '' || this.state.author === '') return; 29 const book = { title: this.state.title, author: this.state.author }; 30 try { 31 const books = [...this.state.books, book]; 32 this.setState({ books, title: '', author: '' }); 33 console.log('books: ', books); 34 await API.graphql(graphqlOperation(AddBook, book)); 35 console.log('success'); 36 } catch (err) { 37 console.log('error: ', err); 38 } 39 }; 40 render() { 41 return ( 42 <View style={styles.container}> 43 <TextInput 44 style={styles.input} 45 value={this.state.title} 46 onChangeText={val => this.onChangeText('title', val)} 47 placeholder="What do you want to read?" 48 /> 49 <TextInput 50 style={styles.input} 51 value={this.state.author} 52 onChangeText={val => this.onChangeText('author', val)} 53 placeholder="Who wrote it?" 54 /> 55 <Button onPress={this.addBook} title="Add to TBR" color="#eeaa55" /> 56 </View> 57 ); 58 } 59 } 60 const styles = StyleSheet.create({ 61 container: { 62 flex: 1, 63 backgroundColor: '#fff', 64 paddingHorizontal: 10, 65 paddingTop: 50 66 }, 67 input: { 68 height: 50, 69 borderBottomWidth: 2, 70 borderBottomColor: 'blue', 71 marginVertical: 10 72 } 73 });
Querying the data from the API
Now, add a query to fetch the list of books and display them below the input fields in the app's UI. Open App.js file and add the below snippet just above the existing GraphQL mutation.
1const Listbooks = ` 2 query { 3 listBooks { 4 items { 5 id title author 6 } 7 } 8 } 9 `;
To fetch the list of books from the data source, add a lifecycle method just below where you have initialized the state inside the App component.
1async componentDidMount() { 2 try { 3 const books = await API.graphql(graphqlOperation(ListBooks)); 4 console.log('books: ', books); 5 this.setState({ books: books.data.listBooks.items }); 6 } catch (err) { 7 console.log('error: ', err); 8 } 9 }
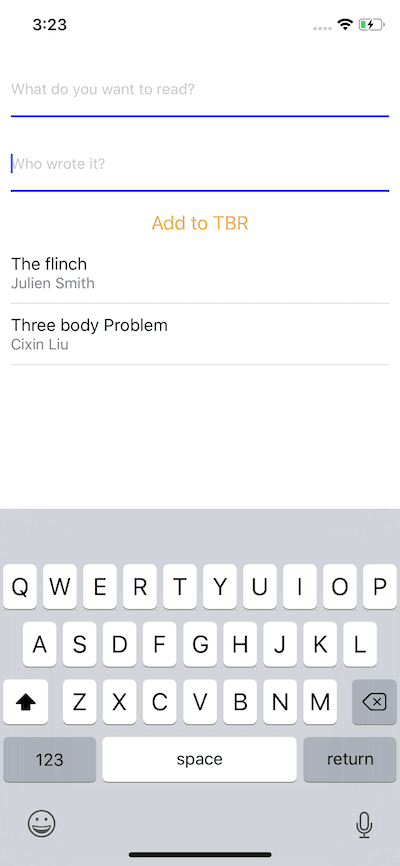
Fetching data using a query is simpler than sending a mutation. Here is the complete code of App.js file with a query and the list books rendered with its own styling after the Button component using JavaScript's map function.
1// App.js 2 import React from 'react'; 3 import { StyleSheet, Text, TextInput, Button, View } from 'react-native'; 4 import Amplify from 'aws-amplify'; 5 import config from './aws-exports'; 6 Amplify.configure(config); 7 import { API, graphqlOperation } from 'aws-amplify'; 8 const ListBooks = ` 9 query { 10 listBooks { 11 items { 12 id title author 13 } 14 } 15 } 16 `; 17 const AddBook = ` 18 mutation ($title: String! $author: String) { 19 createBook(input: { 20 title: $title 21 author: $author 22 }) { 23 id title author 24 } 25 } 26 `; 27 export default class App extends React.Component { 28 state = { 29 title: '', 30 author: '', 31 books: [] 32 }; 33 async componentDidMount() { 34 try { 35 const books = await API.graphql(graphqlOperation(ListBooks)); 36 console.log('books: ', books); 37 this.setState({ books: books.data.listBooks.items }); 38 } catch (err) { 39 console.log('error: ', err); 40 } 41 } 42 onChangeText = (key, val) => { 43 this.setState({ [key]: val }); 44 }; 45 addBook = async () => { 46 if (this.state.title === '' || this.state.author === '') return; 47 const book = { title: this.state.title, author: this.state.author }; 48 try { 49 const books = [...this.state.books, book]; 50 this.setState({ books, title: '', author: '' }); 51 console.log('books: ', books); 52 await API.graphql(graphqlOperation(AddBook, book)); 53 console.log('success'); 54 } catch (err) { 55 console.log('error: ', err); 56 } 57 }; 58 render() { 59 return ( 60 <View style={styles.container}> 61 <TextInput 62 style={styles.input} 63 value={this.state.title} 64 onChangeText={val => this.onChangeText('title', val)} 65 placeholder="What do you want to read?" 66 /> 67 <TextInput 68 style={styles.input} 69 value={this.state.author} 70 onChangeText={val => this.onChangeText('author', val)} 71 placeholder="Who wrote it?" 72 /> 73 <Button onPress={this.addBook} title="Add to TBR" color="#eeaa55" /> 74 {this.state.books.map((book, index) => ( 75 <View key={index} style={styles.book}> 76 <Text style={styles.title}>{book.title}</Text> 77 <Text style={styles.author}>{book.author}</Text> 78 </View> 79 ))} 80 </View> 81 ); 82 } 83 } 84 const styles = StyleSheet.create({ 85 container: { 86 flex: 1, 87 backgroundColor: '#fff', 88 paddingHorizontal: 10, 89 paddingTop: 50 90 }, 91 input: { 92 height: 50, 93 borderBottomWidth: 2, 94 borderBottomColor: 'blue', 95 marginVertical: 10 96 }, 97 book: { 98 borderBottomWidth: 1, 99 borderBottomColor: '#ddd', 100 paddingVertical: 10 101 }, 102 title: { fontSize: 16 }, 103 author: { color: 'rgba(0, 0, 0, .5)' } 104 });
Below image is the final result of the application.
Conclusion
Congratulations! You have successfully built a cross-platform mobile app by integrating frameworks like React Native and Expo with services AWS AppSync and Amplify. If you want to dig deep, possibilities are endless for the serverless architecture. Refer to the AWS Amplify community page for more examples and use cases.
You can find the complete code for this tutorial in this GitHub repository.


© 2026 Pusher Ltd. All rights reserved.
Pusher Limited is a company registered in England and Wales (No. 07489873) whose registered office is at MessageBird UK Limited, 3 More London Riverside, 4th Floor, London, United Kingdom, SE1 2AQ.