- Products

- Developers
- User stories
- Blog
- Pricing

Rich notifications with Vapor - Part 1: Building the backend
Introduction
Introduction
In this tutorial we are going to build our backend service using Vapor. It will be responsible for sending a notification to our iOS application.
Sometimes sending notifications with only text just isn’t quite enough. This is where rich notifications come in. We can add images and videos to our notification to give the user a richer experience directly from their notification center.
Prerequisites
- A basic understanding of Vapor. Before you continue, refer to the Getting started with Vapor tutorials: Part One and Part Two.
- Xcode 10+
- MacOS
- Vapor 3.0. Check out the install instructions.
- An iOS device for testing notifications.
- An understanding of iOS development and Xcode environment.
- CocoaPods. Check out the install instructions.
- A REST client such as Postman and a basic understanding of how to use it.
Setting up our Vapor backend
Creating our Vapor project
From a terminal in your working directory enter the following command to create your Vapor application.
1$ vapor new RichNotifyServer 2 $ cd RichNotifyServer
Now we will build your application before opening it in Xcode. Remember your first build could take some time to complete. Vapor update will make sure that you have the latest packages.
1$ vapor build 2 $ vapor update
Now open your project in Xcode. Remember to open using Xcode you must run the following command in terminal:
$ vapor xcode -y
Also remember to change the run scheme to be the “run” scheme in case it is not already set to this.
Adding our dependency
We need to add the Pusher Beams package to our Swift Package Manager (SPM). Start by opening the Package.swift file from the project navigator. This is our dependencies management file, a bit like our Podfile or Cartfile in iOS development.
Below the line that gives us our Vapor package dependency:
.package(url: "https://github.com/vapor/vapor.git", from: "3.0.0"),
Add the following to add our Pusher Beams dependency:
.package(url: "git@github.com:pusher/push-notifications-server-swift.git", .branch("master")),
We need to tell SPM what dependencies each target should have. We do this by editing targets section in the same file. Find the line:
.target(name: "App", dependencies: ["FluentSQLite", "Vapor"]),
Edit it so that it becomes:
.target(name: "App", dependencies: ["FluentSQLite", "Vapor", "PushNotifications"]),
We’ve added the name of our dependency to the array of dependencies for the app target. For more information on the dependency visit Beams docs. For more information relating to SPM, refer to Swift package manager. Your Package.swift file should now look something like this:
1// Package.swift
2 // swift-tools-version:4.0
3 import PackageDescription
4
5 let package = Package(
6 name: "RichNotifyServer",
7 dependencies: [
8 // 💧 A server-side Swift web framework.
9 .package(url: "https://github.com/vapor/vapor.git", from: "3.0.0"),
10 .package(url: "git@github.com:pusher/push-notifications-server-swift.git", .branch("master")),
11 // 🔵 Swift ORM (queries, models, relations, etc) built on SQLite 3.
12 .package(url: "https://github.com/vapor/fluent-sqlite.git", from: "3.0.0")
13 ],
14 targets: [
15 .target(name: "App", dependencies: ["FluentSQLite", "Vapor", "PushNotifications"]),
16 .target(name: "Run", dependencies: ["App"]),
17 .testTarget(name: "AppTests", dependencies: ["App"])
18 ]
19 )
Now we need to close Xcode and install the package and reopen it. It’s best practice in Vapor to create and install files outside of our Xcode project using command line tools and then reopen Xcode using the toolbox command. After closing Xcode run the following command in the terminal in our working directory.
$ swift build
Reopen Xcode by running:
$ vapor xcode -y
Creating a Beams instance
Log in or create your Pusher account to access the dashboard to create a new Beams instance.
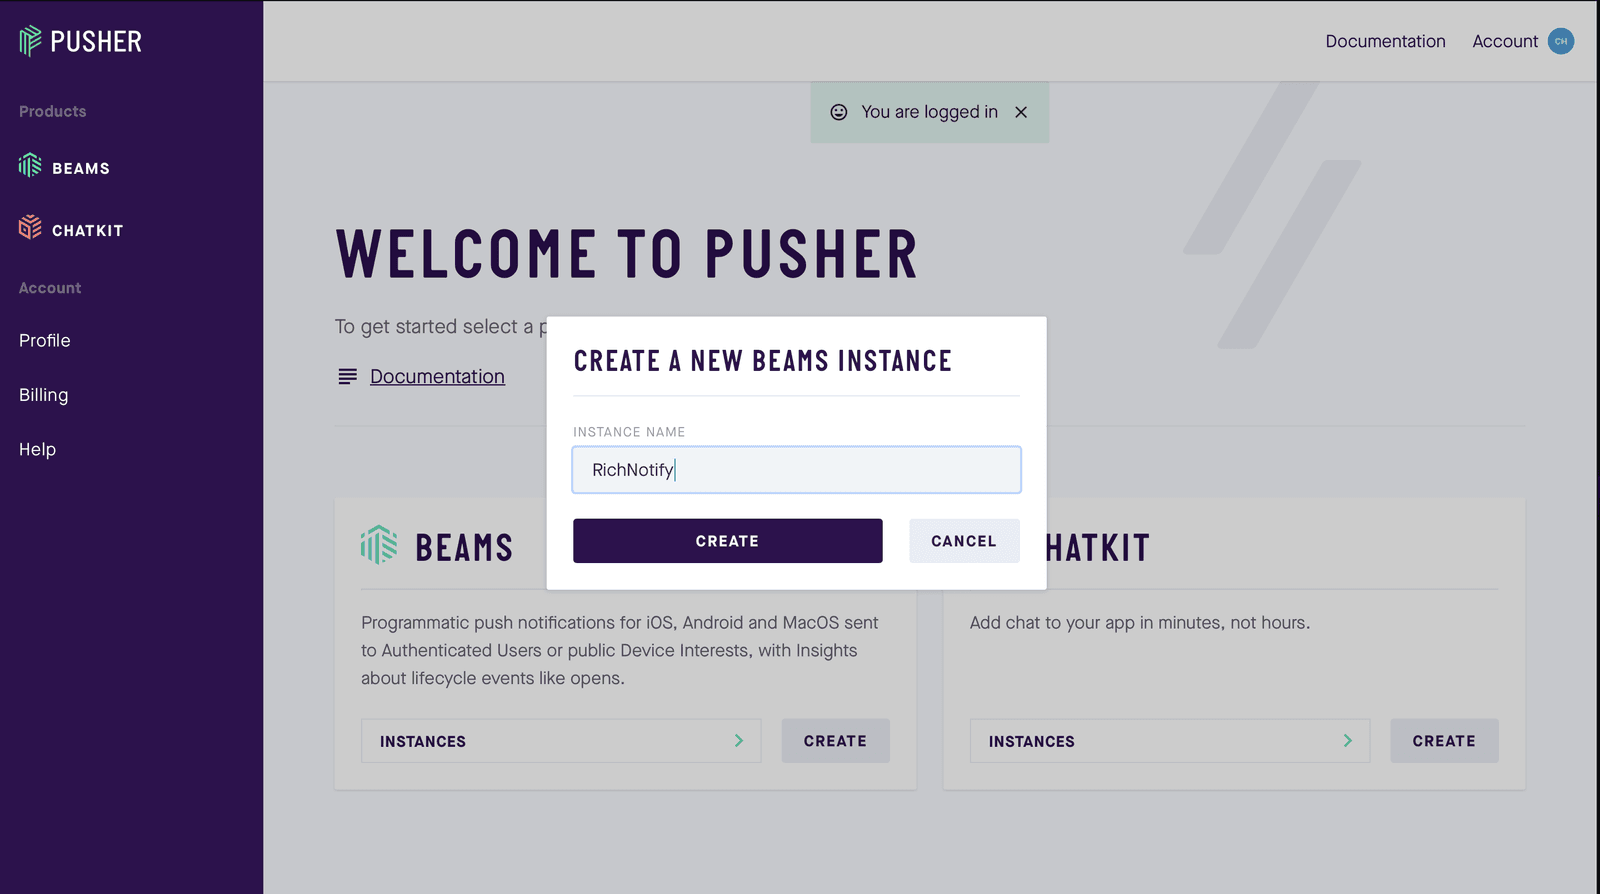
Complete step one of the iOS setup guide, we will pick up the remainder later on in this tutorial. Press the X to exit the setup guide and you will be returned to your dashboard for that instance. Scroll to the bottom of this page and you will find your Pusher Beams instance ID and secret key, make note of these you will need them later.
Sending notifications
Rich notifications
Rich notifications allow you to send different types of multi-media content. There are specific types of supported content that you can send. You can find up to date information on those content types here. You should also make note of the maximum size these files can be.
Creating our routes
We will be creating a simple application with one post request that we can use in order to send different push notifications using our REST client.
Open your routes.swift file and replace the contents with the following:
1//../Sources/App/routes.swift
2 import Vapor
3 import Vapor
4 // 1
5 import PushNotifications
6 /// Register your application's routes here.
7 public func routes(_ router: Router) throws {
8 // 2
9 router.post(PushContent.self, at: "push/") { req, data -> String in
10 PushNotificationService.send(content: data)
11 return "Push Success"
12 }
13 }
14
15 // 3
16 struct PushContent: Content {
17 let title: String
18 let message: String
19 let dataURL: String
20 }
21
22 //4
23 class PushNotificationService {
24 class func send(content: PushContent) throws {
25 let pushNotifications = PushNotifications(instanceId: "YOUR_INSTANCE_ID" , secretKey:"YOUR_SECRET_KEY")
26 let interests = ["general"]
27 let publishRequest = [
28 "apns": [
29 "aps": [
30 "alert": [
31 "title": content.title,
32 "body": content.message
33 ],
34 "mutable-content": 1
35 ],
36 "data": [
37 "attachment-url": content.dataURL
38 ]
39 ]
40 ]
41 pushNotifications.publishToInterests(interests, publishRequest, completion: { publishID in
42 print("Published \(publishID)")
43 })
44 }
45 }
- We need to import the new PushNotifications dependency we have just installed.
- Here we create a new POST route that is capable of sending a specific push notification based on the data that is passed in using the wrapper class we have defined below.
- This is the structure that our post request is expecting the data to arrive in. This includes a string that contains the URL of the data that we want to show in our notification.
- This is our wrapper class. Here we create an instance of the dependency we have installed using the Beams instances ID and secret key you created earlier. We only have one interest in our app (which is general). We create a publish request using for APNS using the message that is passed in using the method call and we then publish this using our dependency. Make note of the
"mutable-content"flag in the data structure, this will be intercepted by our notification service extension in iOS to display the data. Also make note of our"data"key that includes our data url. Our application will use this information in order to download the image or video that we have sent.
Hit the run button in Xcode, you should see a message in the console saying it has started and is listening on http://localhost:8080. Leave this running in the background whilst you complete part two.
Conclusion
We’ve learnt how to add a dependency the Beams server side SDK as a dependency to Vapor and setup a basic route that can publish notifications to an iOS app that has registered for the interest. We’ve learnt about the different types of rich push notifications that can be sent and their limitations.
Now that you have a basic backend setup we need to go ahead and create the iOS application that can display these notifications. Stay tuned for part two!
The source code for this project can be found here.


© 2026 Pusher Ltd. All rights reserved.
Pusher Limited is a company registered in England and Wales (No. 07489873) whose registered office is at MessageBird UK Limited, 3 More London Riverside, 4th Floor, London, United Kingdom, SE1 2AQ.