- Products

- Developers
- User stories
- Blog
- Pricing

Using Pusher Channels to remotely update an application's configuration
Introduction
In this tutorial, I will describing how to remotely update the configuration of a mobile app.
Sometimes the unexpected happens - a public API key was swapped, a new logo was created. While these are not really terrible things, the major issue is how to inform older clients of this change.
For web applications, this is relatively easy but the same cannot be said for mobile applications as it will require the app store approval process and hoping the user updates their app.
The app basically functions as a search client for users of the GitHub platform. Users enter a particular username and it displays the user’s information in a simple card. We will bundle a personal access token key in the app but will later create a newer one and revoke the older one in the GitHub's dashboard, then create a new key and use Pusher Channels to notify all users of the change.
Searching for a user via the GitHub API can be done without authentication but the user's email will not be provided. If the request is authenticated, the email address is returned in the response.
This makes it interesting for our usecase as requests with the revoked keys will actually still resolve but the user card will not contain the email address while clients that have gotten the new key will get email addresses.
Prerequisites
- Yarn
- React Native ( >= 0.50)
- Pusher account and a Channels application. Sign up for Pusher and create an app.
- A GitHub account.
Building the application
We will need to create a new React-Native app before proceeding with anything. To do that, we will need to run the following command:
react-native init pusherchannelsconfig
If an error that says
command not found: react-native. You will need to install thereact-nativetoolchain. That can be done byyarn global add react-native
Once the application has been created, we will then proceed to building the user interface. We will need two screens to complete the user story of this app:
- A search screen
- A result screen
We will build the search screen first. You will need to create a file called Search.js in your application root. Since we will be making HTTP requests, we will need a library that can help with that, I have settled on axios. The following command will create the Search.js file and install the axios library.
1$ touch Search.js 2 $ yarn add axios
Once the above succeeds, you need to paste the following code into the newly created Search.js file.
1// pusherchannelsconfig/Search.js 2 import React, { Component } from 'react'; 3 import { Alert, Button, TextInput, View, Text, StyleSheet } from 'react-native'; 4 import axios from 'axios'; 5 6 const USERNAME = 'adelowo'; 7 8 class Search extends Component { 9 state = { 10 useKey: true, 11 }; 12 13 fetchProfile = () => { 14 const config = this.state.useKey 15 ? { auth: { username: USERNAME, password: this.props.authKey } } 16 : {}; 17 18 return axios.get(`https://api.github.com/users/${this.state.text}`, config); 19 }; 20 21 render() { 22 return ( 23 <View> 24 <TextInput 25 style={{ height: 40 }} 26 placeholder="Type here to search for a GitHub user!" 27 onChangeText={text => this.setState({ text })} 28 /> 29 <Button 30 onPress={() => { 31 this.fetchProfile() 32 .then(res => { 33 this.props.cb(res.data); 34 }) 35 .catch(err => { 36 if (err.response) { 37 if (err.response.data.message === 'Bad credentials') { 38 this.setState({ useKey: false }); 39 this.fetchProfile().then(res => { 40 this.props.cb(res.data); 41 }); 42 43 return; 44 } 45 } 46 Alert.alert( 47 'an error occurred while fetching the user profile' 48 ); 49 }); 50 }} 51 title="Press Me" 52 /> 53 </View> 54 ); 55 } 56 } 57 58 export default Search;
In the above code, we create a React Native search component. It houses the search bar and whenever the button titled Search is clicked, it connects to the GitHub API to fetch the user's profile.
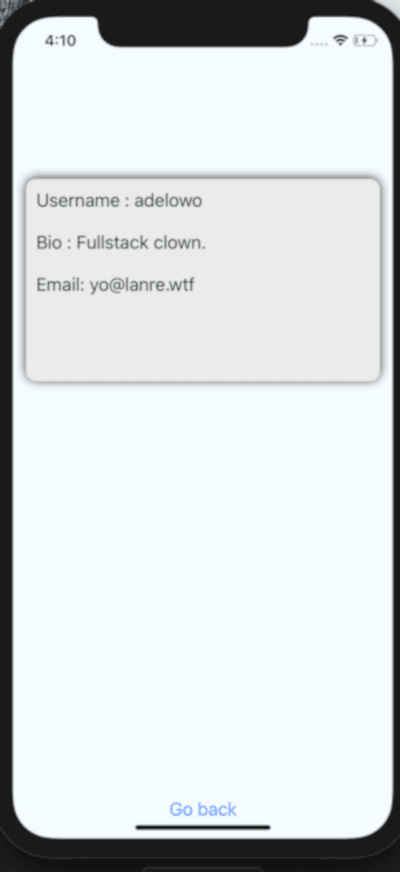
The next step of action is to build the result page. The result page will be a simple card that contains the profile information of the user.
The only dependency we need here is a library called react-native-simple-card. To install it, run the following command in the root directory.
$ yarn add react-native-simple-card
You will also need to create a file named UserView.js. That can be done with:
$ touch UserView.js
In the newly created UserView.js. paste the following contents:
1// pusherchannelsconfig/UserView.js 2 import React, { Component } from 'react'; 3 import { Button, Image, StyleSheet, Text, View } from 'react-native'; 4 import SingleCardView from 'react-native-simple-card'; 5 6 class UserView extends Component { 7 render() { 8 console.log(this.props); 9 return ( 10 <View> 11 <SingleCardView 12 elevation={1} 13 shadowColor="rgb(50,50,50)" 14 shadowOpacity={1} 15 marginTop={150} 16 height={200} 17 > 18 <Text style={{ padding: 10, fontSize: 18 }}> 19 Username : {this.props.user.login} 20 </Text> 21 <Text style={{ padding: 10, fontSize: 18 }}> 22 Bio : {this.props.user.bio} 23 </Text> 24 <Text style={{ padding: 10, fontSize: 18 }}> 25 Email: {this.props.user.email} 26 </Text> 27 </SingleCardView> 28 29 <Button title="Go back" onPress={this.props.clear} /> 30 </View> 31 ); 32 } 33 } 34 35 export default UserView;
This is as simple as can be. The user's information is passed to this component and the relevant fields are picked and displayed.
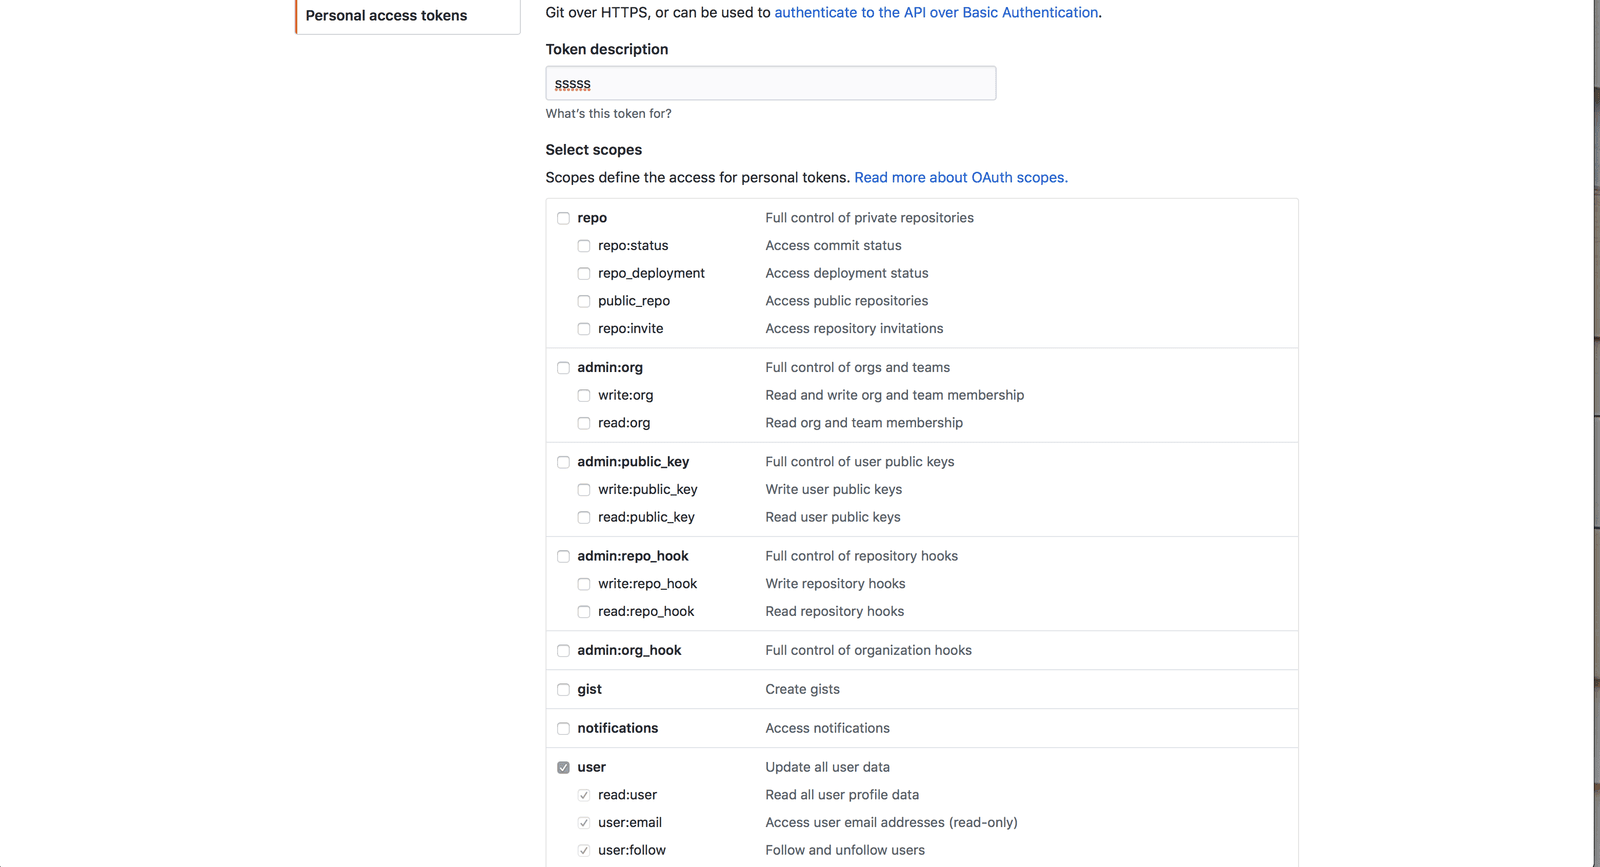
You will need to create an access token on GitHub by visiting this URL. Make sure to select user scope as shown below:
The next thing will be to connect the components we have created above together. You will need to edit the App.js file. Delete all of it's contents and replace it with the following:
1// pusherchannelsconfig/App.js 2 3 import React, { Component } from 'react'; 4 import { Alert, Button, TextInput, View, Text, StyleSheet } from 'react-native'; 5 import Search from './Search'; 6 import UserView from './UserView'; 7 8 const appKey = 'PUSHER_CHANNELS_APP_KEY'; 9 const cluster = 'eu'; 10 11 export default class App extends Component { 12 constructor(props) { 13 super(props); 14 this.state = { 15 text: '', 16 key: 'GITHUB_PERSONAL_TOKEN', 17 showUserProfile: false, 18 user: null, 19 }; 20 } 21 22 onCallBack = user => { 23 this.setState({ user: user, showUserProfile: true }); 24 }; 25 26 onReset = () => { 27 this.setState({ user: null, showUserProfile: false }); 28 }; 29 30 render() { 31 return ( 32 <View style={styles.container}> 33 <View style={{ padding: 10 }}> 34 {this.state.showUserProfile ? ( 35 <UserView clear={this.onReset} user={this.state.user} /> 36 ) : ( 37 <Search cb={this.onCallBack} authKey={this.state.key} /> 38 )} 39 </View> 40 </View> 41 ); 42 } 43 } 44 45 const styles = StyleSheet.create({ 46 container: { 47 flex: 1, 48 justifyContent: 'center', 49 alignItems: 'center', 50 backgroundColor: '#F5FCFF', 51 }, 52 });
Remember to use your credentials.
You can run the application by running the following command in the root directory.
1$ react-native run-ios 2 $ ## OR 3 $ react-native run-android
You can go ahead to search for a user - If you don't know any username, you can go ahead to make use of adelowo or fabpot.
Updating the personal access token
If you were following. you will notice that in the App.js file, we kept a reference of our access token in this.state.key.In the following steps, we will need to revoke the current key and create a new one.
Navigate to GitHub to create an access token. Feel free to revoke the older key as the app will be aware of revoked keys and make the request without any key. Remember that in this instance the only advantage authenticating with the personal access key is the email address that is returned in the response.
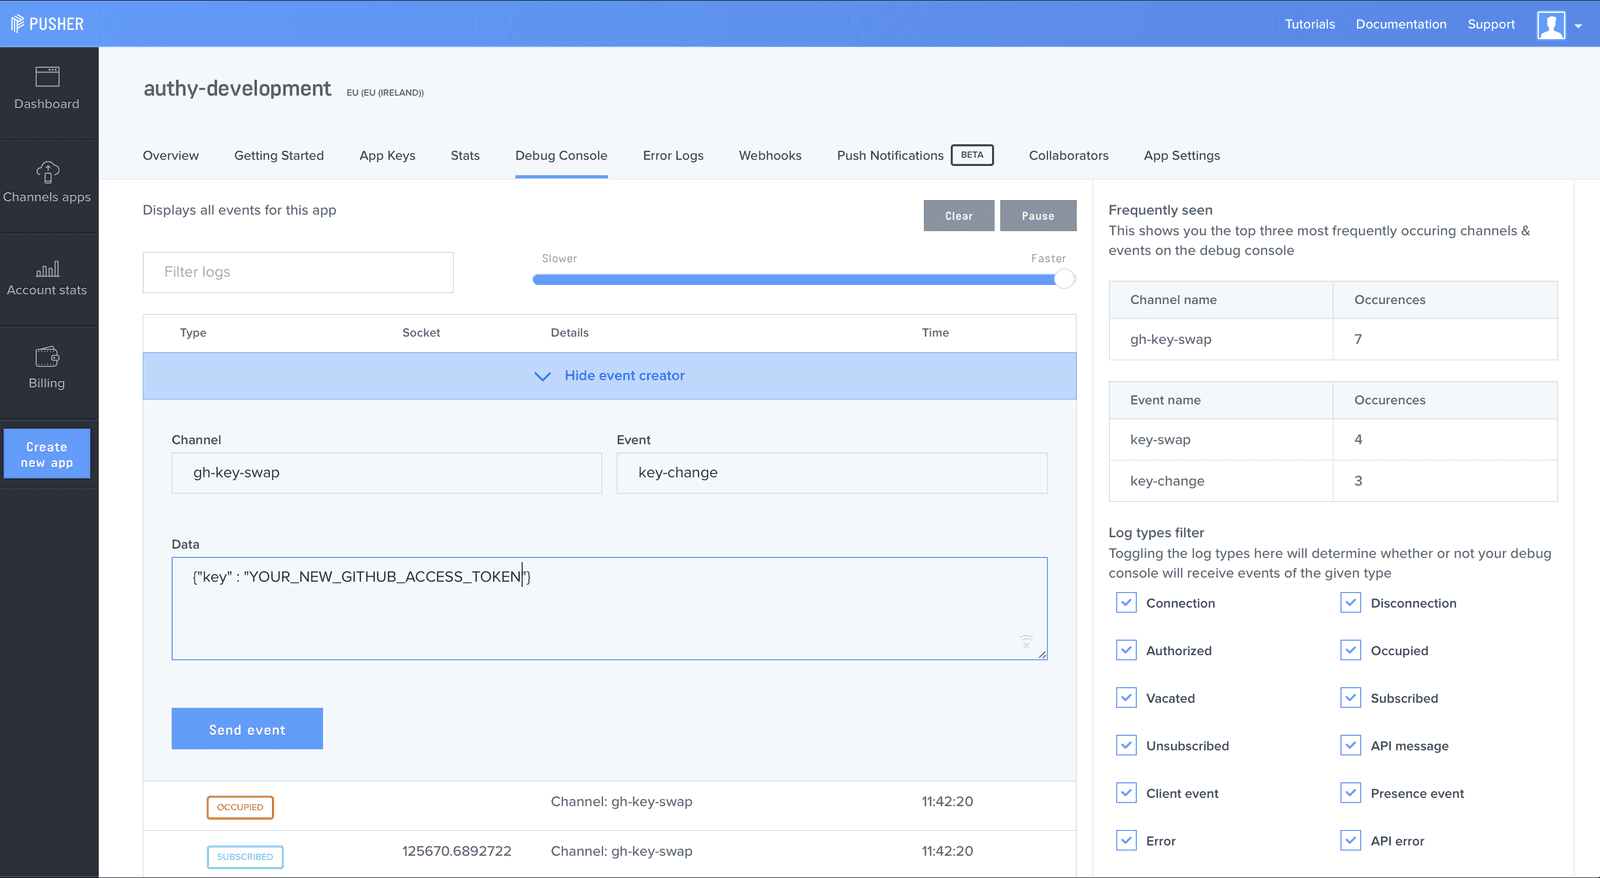
You will need to visit your Channels dashboard and navigate to the Debug console. You will use the Debug console to send the new key to all mobile clients. Once the application receives it, it will replace the previous key with what was gotten from Pusher Channels.
There is one more step we need to take which is update our app to be aware of Pusher Channels. We will need to install the pusher-js library.
$ yarn add pusher-js
You will also need to update App.jswith the following:
1// pusherchannelsconfig/App.js 2 3 // New import statement 4 import Pusher from 'pusher-js/react-native'; 5 6 const channelName = 'gh-key-swap'; 7 8 constructor(props) { 9 // Update the constructor to look like this 10 super(props); 11 this.state = { 12 text: '', 13 key: 'GITHUB_PERSONAL_ACCESS_TOKEN', 14 showUserProfile: false, 15 user: null, 16 }; 17 this.pusher = new Pusher(appKey, { cluster }); 18 this.listenForChanges(); 19 } 20 21 // Here is a newer method 22 listenForChanges = () => { 23 const channel = this.pusher.subscribe(channelName); 24 25 channel.bind('key-change', data => { 26 Alert.alert('Reloading Authentication key', 'Press ok to continue'); 27 this.setState({ user: null, showUserProfile: false, key: data.key }); 28 }); 29 };
Once that has been added, verify your App.jsis similar to the code below:
1// pusherchannelsconfig/App.js 2 3 import React, { Component } from 'react'; 4 import { Alert, Button, TextInput, View, Text, StyleSheet } from 'react-native'; 5 import Search from './Search'; 6 import UserView from './UserView'; 7 import Pusher from 'pusher-js/react-native'; 8 9 const appKey = 'PUSHER_CHANNELS_APP_KEY' 10 const cluster = 'PUSHER_CHANNELS_CLUSTER'; 11 12 const channelName = 'gh-key-swap'; 13 14 export default class App extends Component { 15 constructor(props) { 16 super(props); 17 this.state = { 18 text: '', 19 key: 'GITHUB_PERSONAL_ACCESS_TOKEN', 20 showUserProfile: false, 21 user: null, 22 }; 23 this.pusher = new Pusher(appKey, { cluster }); 24 this.listenForChanges(); 25 } 26 27 listenForChanges = () => { 28 const channel = this.pusher.subscribe(channelName); 29 30 channel.bind('key-change', data => { 31 Alert.alert('Reloading Authentication key', 'Press ok to continue'); 32 this.setState({ user: null, showUserProfile: false, key: data.key }); 33 }); 34 }; 35 36 onCallBack = user => { 37 this.setState({ user: user, showUserProfile: true }); 38 }; 39 40 onReset = () => { 41 this.setState({ user: null, showUserProfile: false }); 42 }; 43 44 render() { 45 return ( 46 <View style={styles.container}> 47 <View style={{ padding: 10 }}> 48 {this.state.showUserProfile ? ( 49 <UserView clear={this.onReset} user={this.state.user} /> 50 ) : ( 51 <Search cb={this.onCallBack} authKey={this.state.key} /> 52 )} 53 </View> 54 </View> 55 ); 56 } 57 } 58 59 const styles = StyleSheet.create({ 60 container: { 61 flex: 1, 62 justifyContent: 'center', 63 alignItems: 'center', 64 backgroundColor: '#F5FCFF', 65 }, 66 });
Input a new username in the search box and make the request. Remember to revoke the previous access token that was initially created as that will be the way to test the application. You will notice that the search requests still resolves with the newer token.
If you will like to test this further, revoke all tokens from your GitHub dashboard and try searching for a user. This will still go through but you will notice that the user's email address is not included in the card.

This can be taken further by storing the newer key in some form of persistent storage system.
Conclusion
In this tutorial, we have leveraged Pusher Channels as a way to remotely update an application's configuration. This can be useful when it takes a long time for users to update to a newer version. The entire source code of this tutorial can be found on GitHub.


© 2026 Pusher Ltd. All rights reserved.
Pusher Limited is a company registered in England and Wales (No. 07489873) whose registered office is at MessageBird UK Limited, 3 More London Riverside, 4th Floor, London, United Kingdom, SE1 2AQ.