- Products

- Developers
- User stories
- Blog
- Pricing

Build a realtime table with Android
Introduction
If you are building an app that handles extensive amounts of data, you might want to implement realtime tables at some point. Let’s take a content management system for instance. Large amounts of data are added and removed often, and we would like the changes to be available to consumers in realtime.
In this tutorial, we will be utilizing the Pusher Channels Android SDK's client-side library to quickly and easily build a realtime data table.
We’ll be using a few developer tools to achieve this fit, including:
- Android Studio - The Official IDE for Android Development, it provides the fastest tools for building apps on every type of Android device.
- Pusher Channels - A free, realtime, easy to use pub/sub service. Pusher makes realtime as easy as using basic events.
The flow of our app is that the user will fill out a form to add a new employee to an employees table and click a “save” button. This will send a POST request to our server. In this tutorial, we will use a simple NodeJS server to provide a single API endpoint. Once our server receives the POST request, it will render the data to all connected clients, which will show the data on their tables in realtime.
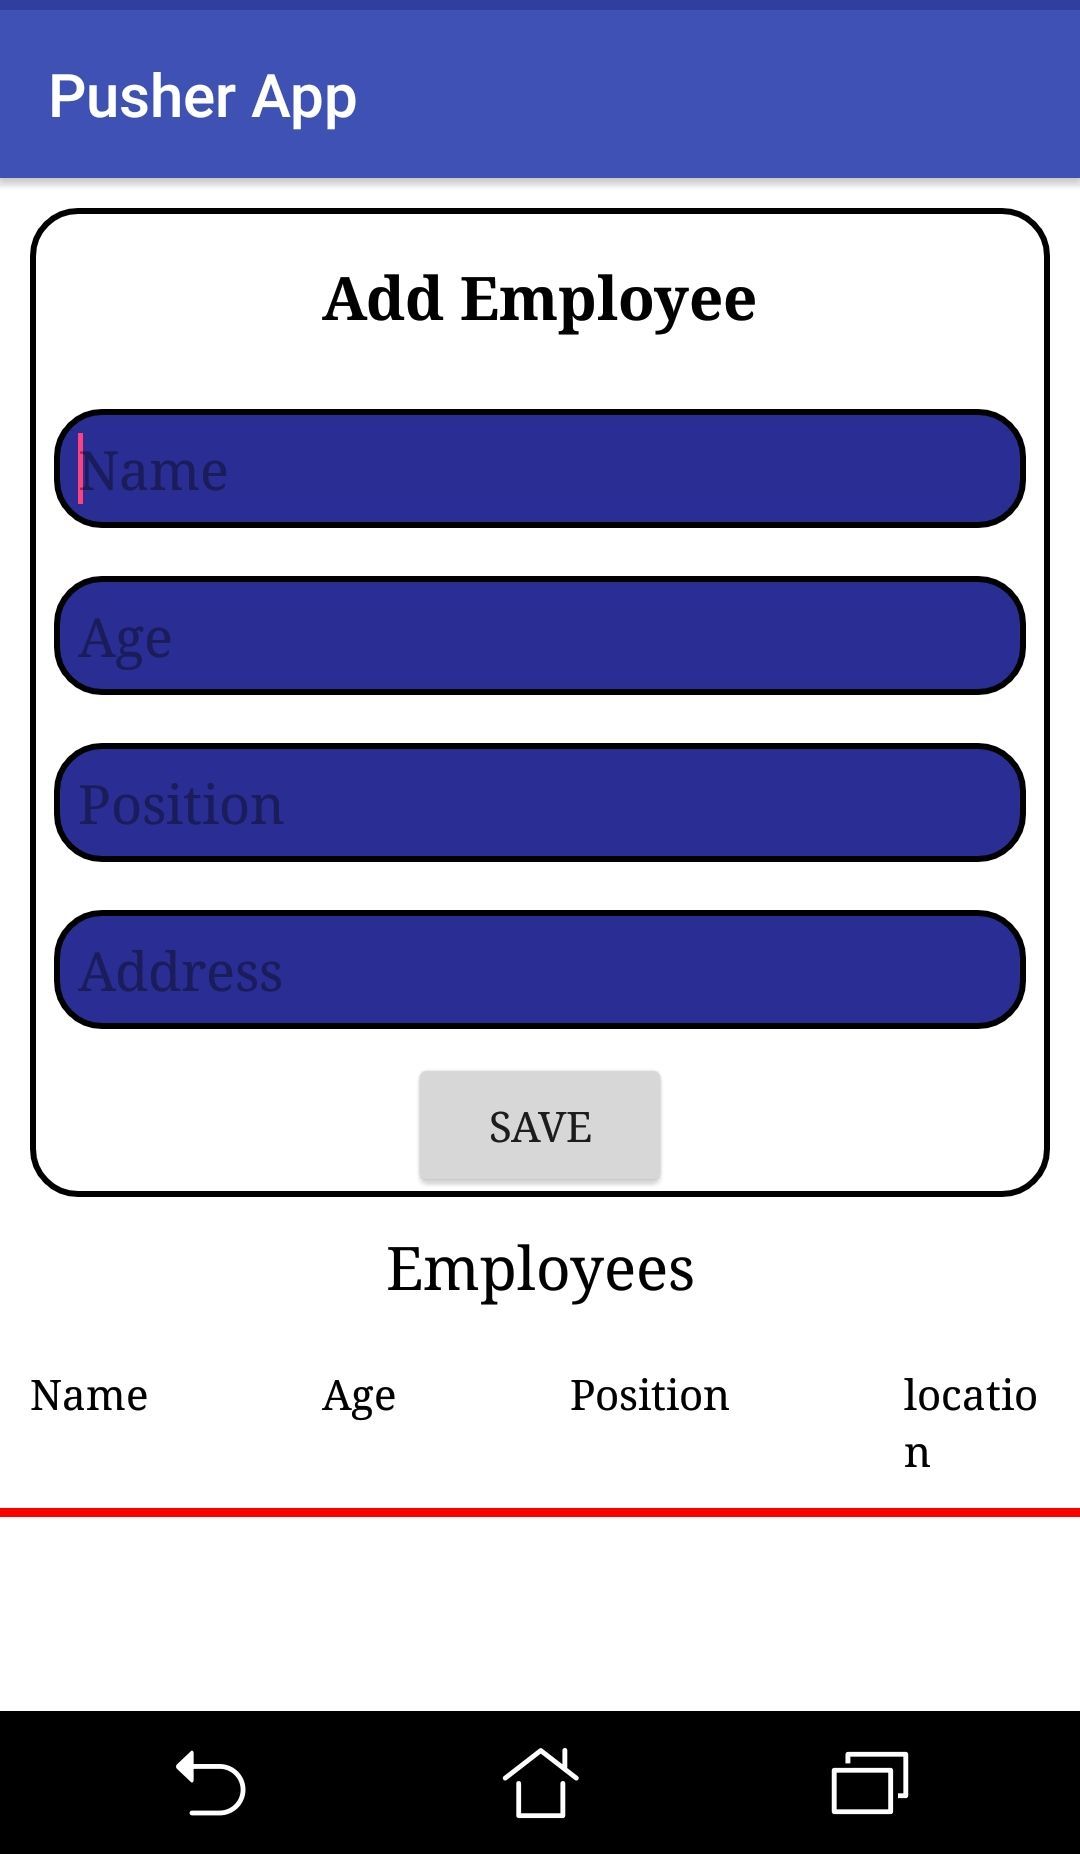
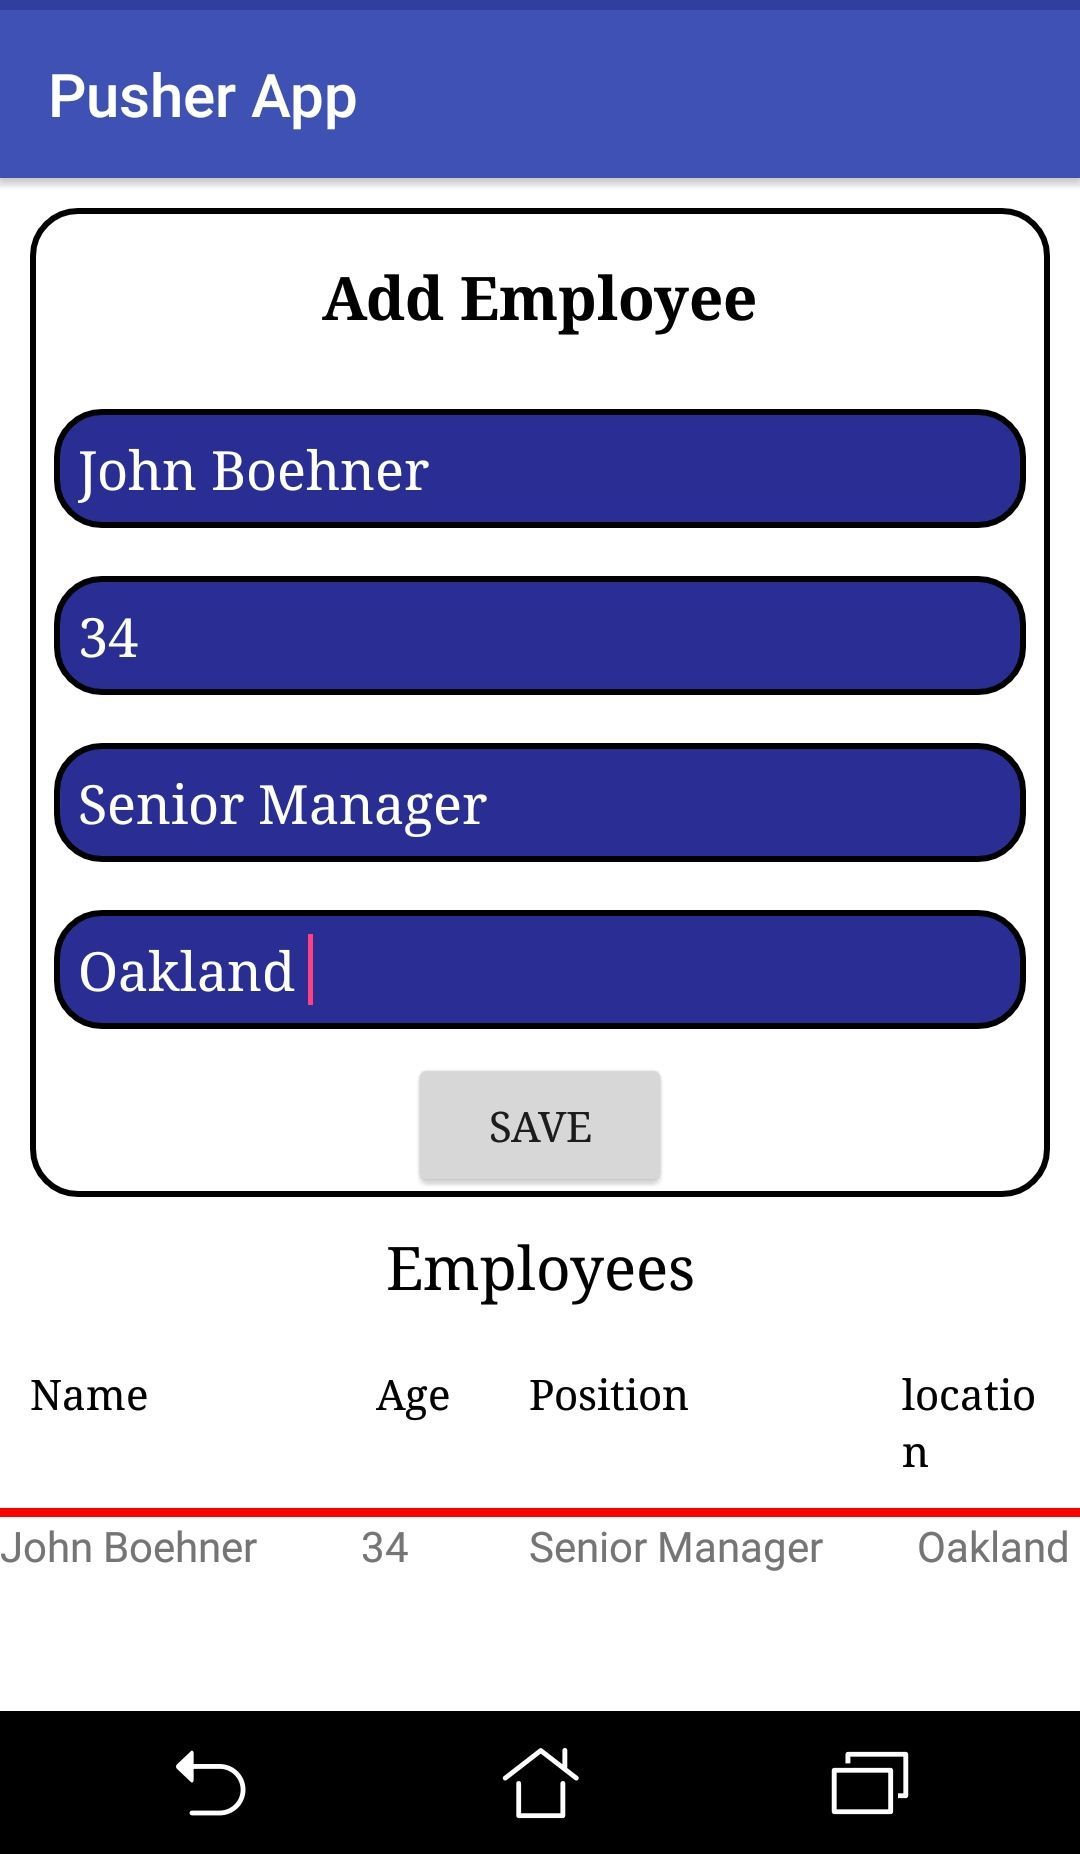
Here is a glimpse of what we are going to build:

Set Up
Create a new project:
- Open Android Studio and select New Project from the File menu.
- Set the minimum SDK for the app to be API 16 (Android 4.1, Jelly Bean).
- Click through the wizard, ensuring that Empty Activity is selected. Leave the Activity Name set to
MainActivity, and leave the Layout Name set toactivity_main.
Add the Pusher Channels Android SDK to gradle:
Once you’ve set up your application on Android Studio, or your preferred IDE, then install Pusher as a dependency. In the build.gradle file of your application module, add:
1repositories { 2 maven { url 'http://clojars.org/repo' } 3 } 4 5 dependencies { 6 compile 'com.pusher:pusher-java-client:1.0.0' 7 compile 'com.loopj.android:android-async-http:1.4.9' 8 compile 'com.google.code.gson:gson:2.2.4' 9 }
Sync the gradle project. Pusher along with other modules we’ll need later, should now be installed.
However, you can find your Pusher credentials when you create an app after signing up for a free account. Be sure to keep them handy for when we start adding some realtime features.
Client-Side
Creating the form
In the created project, open the activity_main.xml file and create the input form to collate the user details:
1<?xml version="1.0" encoding="utf-8"?> 2 <LinearLayout xmlns:android="http://schemas.android.com/apk/res/android" 3 xmlns:app="http://schemas.android.com/apk/res-auto" 4 xmlns:tools="http://schemas.android.com/tools" 5 android:orientation="vertical" 6 android:layout_width="match_parent" 7 android:layout_height="match_parent" 8 android:background="#fff"> 9 <ScrollView 10 android:layout_width="match_parent" 11 android:layout_height="wrap_content"> 12 <LinearLayout 13 android:layout_width="match_parent" 14 android:layout_height="wrap_content" 15 android:orientation="vertical"> 16 17 <LinearLayout 18 android:layout_width="match_parent" 19 android:layout_height="wrap_content" 20 android:orientation="vertical" 21 android:layout_margin="10dp" 22 android:layout_centerVertical="true" 23 android:background="@drawable/layoutstyle" 24 android:layout_centerHorizontal="true"> 25 26 <TextView 27 android:layout_gravity="center" 28 android:layout_margin="16dp" 29 android:textSize="20sp" 30 android:textStyle="bold" 31 android:textColor="#000" 32 android:fontFamily="serif" 33 android:layout_width="wrap_content" 34 android:layout_height="wrap_content" 35 android:text="Add Employee"/> 36 37 <EditText 38 android:background="@drawable/buttonstyle" 39 android:layout_margin="8dp" 40 android:id="@+id/edtName" 41 android:padding="8dp" 42 android:fontFamily="serif" 43 android:textColor="#fff" 44 android:hint="Name" 45 android:layout_width="match_parent" 46 android:layout_height="wrap_content" /> 47 48 <EditText 49 android:padding="8dp" 50 android:background="@drawable/buttonstyle" 51 android:layout_margin="8dp" 52 android:id="@+id/edtAge" 53 android:fontFamily="serif" 54 android:textColor="#fff" 55 android:layout_width="match_parent" 56 android:hint="Age" 57 android:layout_height="wrap_content" /> 58 <EditText 59 android:background="@drawable/buttonstyle" 60 android:layout_margin="8dp" 61 android:id="@+id/edtPosition" 62 android:padding="8dp" 63 android:textColor="#fff" 64 android:hint="Position" 65 android:fontFamily="serif" 66 android:layout_width="match_parent" 67 android:layout_height="wrap_content" /> 68 <EditText 69 android:background="@drawable/buttonstyle" 70 android:layout_margin="8dp" 71 android:fontFamily="serif" 72 android:id="@+id/edtAddress" 73 android:padding="8dp" 74 android:textColor="#fff" 75 android:hint="Address" 76 android:layout_width="match_parent" 77 android:layout_height="wrap_content" /> 78 79 <Button 80 android:id="@+id/BtnSave" 81 android:layout_gravity="center" 82 android:fontFamily="serif" 83 android:layout_width="wrap_content" 84 android:layout_height="wrap_content" 85 android:onClick="AddEmployee" 86 android:text="Save"/> 87 88 </LinearLayout> 89 </LinearLayout> 90 </ScrollView> 91 </LinearLayout>
Next we define some custom button styles and layout styles to give our app the desired user interface as can be seen in the snapshots earlier posted. So create two new drawable files called buttonstyle.xml and layoutstyle.xml and copy the codes therein into them.
These files only add round shapes to the EditText fields and LinearLayout. Hence, you could decide not to add my designs to your own work. However, to run the app with my designs and avert any xml errors, simply copy these files from the gist we attached above and paste in your own drawable files or simply delete every occurrence of buttonstyle.xml or layoutstyle``.xml in your xml. Your app will work just fine either way.
Then open the MainActivity.java class and update it as follows to provide references to the EditText objects. This allows us to get the text from them:
1package com.example.ekene.pushapp; 2 3 import android.support.v7.app.AppCompatActivity; 4 import android.os.Bundle; 5 import android.widget.EditText; 6 7 public class MainActivity extends AppCompatActivity { 8 9 private EditText edtName, edtAge, edtPosition, edtAddress; 10 private Button btnSave; 11 @Override 12 protected void onCreate(Bundle savedInstanceState) { 13 super.onCreate(savedInstanceState); 14 setContentView(R.layout.activity_main); 15 16 edtName = (EditText)findViewById(R.id.edtName); 17 edtAddress = (EditText)findViewById(R.id.edtAddress); 18 edtAge = (EditText)findViewById(R.id.edtAge); 19 edtPosition = (EditText)findViewById(R.id.edtPosition); 20 } 21 }
Creating the table
Next we create the Employee’s Table where we’ll render the form data. We’ll do this with Android Studio’s TableLayout and TableRow. So inside the activity_main.xml file, just below the form’s Linear Layout, we add:
1<TextView 2 android:layout_width="match_parent" 3 android:layout_height="wrap_content" 4 android:textColor="#000" 5 android:textSize="20sp" 6 android:fontFamily="serif" 7 android:text="Employees" 8 android:gravity="center"/> 9 10 <TableLayout 11 android:layout_marginTop="10dp" 12 android:id="@+id/table_layout" 13 android:layout_width="match_parent" 14 android:layout_height="wrap_content"> 15 16 <TableRow 17 android:layout_height="wrap_content" 18 android:layout_width="match_parent" 19 android:id="@+id/table_row1" 20 android:padding="10dp"> 21 22 <TextView 23 android:id="@+id/name" 24 android:fontFamily="serif" 25 android:layout_height="wrap_content" 26 android:layout_width="match_parent" 27 android:layout_weight="1" 28 android:textColor="#000" 29 android:text="Name"/> 30 <TextView 31 android:id="@+id/age" 32 android:textColor="#000" 33 android:fontFamily="serif" 34 android:layout_height="wrap_content" 35 android:layout_width="match_parent" 36 android:layout_weight="1" 37 android:text="Age"/> 38 <TextView 39 android:textColor="#000" 40 android:id="@+id/position" 41 android:fontFamily="serif" 42 android:layout_height="wrap_content" 43 android:layout_width="match_parent" 44 android:layout_weight="1" 45 android:text="Position"/> 46 <TextView 47 android:textColor="#000" 48 android:id="@+id/address" 49 android:fontFamily="serif" 50 android:layout_height="wrap_content" 51 android:layout_width="match_parent" 52 android:layout_weight="1" 53 android:text="location"/> 54 55 </TableRow> 56 <View 57 android:layout_height="3dip" 58 android:layout_width="match_parent" 59 android:background="#ff0000"/> 60 </TableLayout> 61 </LinearLayout> 62 </ScrollView> 63 </LinearLayout>
Basically, this table is temporarily serving as a mock up for our application at this point. Later on we’’ll be creating the table dynamically with a ListView.
Adding new employees to the table
To add new records to our table, we set up the event listener for the ‘Save’ button like so:
1public class MainActivity extends AppCompatActivity implements View.OnClickListener { 2 3 private EditText edtName, edtAge, edtPosition, edtAddress; 4 private Button btnSave; 5 6 @Override 7 protected void onCreate(Bundle savedInstanceState) { 8 super.onCreate(savedInstanceState); 9 setContentView(R.layout.activity_main); 10 11 // get our input fields by its ID 12 edtName = (EditText)findViewById(R.id.edtName); 13 edtAddress = (EditText)findViewById(R.id.edtAddress); 14 edtAge = (EditText)findViewById(R.id.edtAge); 15 edtPosition = (EditText)findViewById(R.id.edtPosition); 16 17 // get our button by its ID 18 btnSave = (Button) findViewById(R.id.BtnSave); 19 20 // set its click listener 21 btnSave.setOnClickListener(this); 22 }
We’ll then define a method that will execute when the save button is clicked to get the data from our input fields and post to the server.
1@Override 2 public void onClick(View v) { 3 addEmployee(); 4 } 5 6 private void addEmployee() { 7 }
The addEmployee() method will simply get the values from the EditText objects and POST it to the server. In this tutorial, we’ll be using the AsyncHTTPClient library to send records to our server.
So let’s go ahead with creating and sending our request parameters in the MainActivity.java file:
1package com.example.ekene.pushapp; 2 3 import com.loopj.android.http.AsyncHttpClient; 4 import com.loopj.android.http.JsonHttpResponseHandler; 5 import com.loopj.android.http.RequestParams; 6 import org.json.JSONArray; 7 import android.text.TextUtils; 8 9 public class MainActivity extends AppCompatActivity { 10 11 private void addEmployee(View v) { 12 13 String employeeName = edtName.getText().toString(); 14 String employeeAge = edtAge.getText().toString(); 15 String employeePosition = edtPosition.getText().toString(); 16 String employeeAddress = edtAddress.getText().toString(); 17 18 // return if the input fields are blank 19 if (TextUtils.isEmpty(employeeName) && TextUtils.isEmpty(employeeAge) && 20 TextUtils.isEmpty(employeePosition)&& 21 TextUtils.isEmpty(employeeAddress)) { 22 return; 23 } 24 25 RequestParams params = new RequestParams(); 26 // set our JSON object 27 params.put("name", employeeName); 28 params.put("age", employeeAge); 29 params.put("position", employeePosition); 30 params.put("address", employeeAddress); 31 32 // create our HTTP client 33 AsyncHttpClient client = new AsyncHttpClient(); 34 ... 35 }
We’ll then define a String variable called RECORDS_ENDPOINT in MainActivity and set it to point to the URL of our server e.g:
private static final String RECORDS_ENDPOINT = "http://localhost:3000/records";
Then let’s make it so that when the request is successful it clears the inputFields, or when it fails it alerts the user that it “Couldn’t Post” with a Toast.
So we continue creating our HTTP client inside the MainActivity like so:
1.... 2 client.post(RECORDS_ENDPOINT, params, new JsonHttpResponseHandler(){ 3 4 @Override 5 public void onSuccess( 6 int statusCode, 7 cz.msebera.android.httpclient.Header[] headers, 8 JSONArray response) { 9 super.onSuccess(statusCode, headers, response); 10 runOnUiThread(new Runnable() { 11 @Override 12 public void run() { 13 edtName.setText(""); 14 edtAge.setText(""); 15 edtPosition.setText(""); 16 edtAddress.setText(""); 17 } 18 }); 19 } 20 21 @Override 22 public void onFailure( 23 int statusCode, 24 cz.msebera.android.httpclient.Header[] headers, 25 String responseString, 26 Throwable throwable) { 27 super.onFailure(statusCode, headers, responseString, throwable); 28 Toast.makeText( 29 getApplicationContext(), "Couldn't Post!", 30 Toast.LENGTH_LONG 31 ).show(); 32 } 33 }); 34 } 35 }
At this point the client is set up to send the input to the server. Next we’ll set up our mini API
Server-side
At this point we will integrate Pusher at the back end. Pusher is a simple hosted API for quickly, easily and securely implementing realtime two-way functionality on web and mobile apps. To achieve this, we’ll need to set it up on the server-side.
Install NodeJS and Express if you haven’t already. Generate your table-backend with:
1$ express table-backend 2 $ cd table-backend 3 $ npm install
Now install the Pusher Node library with:
$ npm install pusher --save
Now we initialize the Pusher object in our app.js file with the application credentials:
1var Pusher = require('pusher'); 2 var express = require('express'); 3 var options = PusherOptions(); 4 options.setCluster(PUSHER_APP_CLUSTER); 5 var pusher = new Pusher({ 6 appId: "your app id", 7 key: "your app key", 8 secret: "your app secret" 9 });
Next we create the endpoint that receives JSON from the client. Then we’ll fire up a Pusher event called new_record on a channel called records, passing along the data we received from the client.
1app.post('/records', function(req, res){ 2 var record = req.body; 3 pusher.trigger('records', 'new_record', record); 4 res.json({success: 200}); 5 });
Next open your AndroidManifest.xml file and enable internet permissions. Just before the Application tag, add:
<uses-permission android:name="android.permission.INTERNET"/>
Now let’s fire up our server, and run the mobile app either on an emulator or on any android device. Meanwhile, open up the Pusher Debug Console for your app on your dashboard. Then on your emulator or device, you should see the Add Employee form, fill in the fields and and click the Save button, you should see the information you just supplied pop up in realtime on your Debug Console.
Render Live Table Records
We’ve come a long way but we are not done, Let’s now have our Android client listen for incoming employee records, and show them in a list.
So in activity_main.xml, add a ListView as the last child of LinearLayout and above the TableLayout that wraps our table headings. Your layout XML starting from the TableLayout should look like so:
1<TableLayout 2 android:layout_marginTop="10dp" 3 android:id="@+id/table_layout" 4 android:layout_width="match_parent" 5 android:layout_height="wrap_content"> 6 7 <TableRow 8 android:layout_height="wrap_content" 9 android:layout_width="match_parent" 10 android:id="@+id/table_row1" 11 android:padding="10dp"> 12 13 <TextView 14 android:id="@+id/name" 15 android:fontFamily="serif" 16 android:layout_height="wrap_content" 17 android:layout_width="match_parent" 18 android:layout_weight="1" 19 android:textColor="#000" 20 android:text="Name"/> 21 <TextView 22 android:id="@+id/age" 23 android:textColor="#000" 24 android:fontFamily="serif" 25 android:layout_height="wrap_content" 26 android:layout_width="match_parent" 27 android:layout_weight="1" 28 android:text="Age"/> 29 <TextView 30 android:textColor="#000" 31 android:id="@+id/position" 32 android:fontFamily="serif" 33 android:layout_height="wrap_content" 34 android:layout_width="match_parent" 35 android:layout_weight="1" 36 android:text="Position"/> 37 <TextView 38 android:textColor="#000" 39 android:id="@+id/address" 40 android:fontFamily="serif" 41 android:layout_height="wrap_content" 42 android:layout_width="match_parent" 43 android:layout_weight="1" 44 android:text="location"/> 45 46 </TableRow> 47 <View 48 android:layout_height="3dip" 49 android:layout_width="match_parent" 50 android:background="#ff0000"/> 51 </TableLayout> 52 // add a listview to display our table records 53 <ListView 54 android:id="@+id/records_view" 55 android:layout_width="match_parent" 56 android:layout_height="500dp" 57 android:layout_marginTop="16dp"> 58 </ListView> 59 </LinearLayout> 60 </ScrollView> 61 </LinearLayout>
In order to display each message within the ListView, we’ll have to create an adapter that turns a list into a set of views. In our MainActivity onCreate method, let’s bind our ListView to this adapter like so: NB we haven’t created the adapter yet, we’ll do that in a bit.
1public class MainActivity extends AppCompatActivity implements View.OnClickListener { 2 ... 3 private RecordAdapter recordAdapter; 4 @Override 5 protected void onCreate(Bundle savedInstanceState) { 6 ... 7 recordAdapter= new RecordAdapter(this, new ArrayList<Record>()); 8 final ListView recordsView = (ListView) findViewById(R.id.records_view); 9 recordsView.setAdapter(recordAdapter); 10 }
Next we create the Record.java class which comprises a single row in the List:
1public class Record { 2 public String age; 3 public String name; 4 public String position; 5 public String address; 6 }
Next we create the adapter. Create a new class RecordAdapter. We initialized it in the MainActivity Class with our MainActivity‘s context. We’ll create it like so:
1public class RecordAdapter extends BaseAdapter { 2 3 private Context recordContext; 4 private List<Record> recordList; 5 6 public RecordsAdapter(Context context, List<Record> records) { 7 recordList = records; 8 recordContext = context; 9 }
Because we extended BaseAdapter, Android Studio will prompt us to implement it’s three associating methods getCount, getItem and getItemId, which we can do like so:
1@Override 2 public int getCount() { 3 return recordList.size(); 4 } 5 @Override 6 public Object getItem(int i) { 7 return recordList.get(i); 8 } 9 @Override 10 public long getItemId(int i) { 11 return i; 12 }
Finally we’ll have to implement a method called getView() that will convert an item in the ArrayList of Records to a view. But first we need to create a RecordViewHolder private class to encapsulate the views we would like to be part of the message. In this case, we’re going to have a:
- nameView - for the employees name
- ageView - for the employees name
- nameView - for the employees name
- nameView - for the employees name
So within our RecordAdapter, add a private nested class:
1private static class RecordViewHolder { 2 3 public TextView nameView; 4 public TextView positionView; 5 public TextView ageView; 6 public TextView addressView; 7 }
Next we create another layout resource file called record.xml. This layout will hold the views we defined in the RecordViewHolder class and render it to the list. Hence it’ll contain four TextViews for the name, age, position and address respectively.
1<?xml version="1.0" encoding="utf-8"?> 2 <LinearLayout xmlns:android="http://schemas.android.com/apk/res/android" 3 android:orientation="horizontal" android:layout_width="match_parent" 4 android:layout_height="match_parent"> 5 <TextView 6 android:id="@+id/record_name" 7 android:fontFamily="serif" 8 android:layout_height="wrap_content" 9 android:layout_width="match_parent" 10 android:layout_weight="1" 11 android:textColor="#000" 12 android:text="Name"/> 13 <TextView 14 android:id="@+id/record_age" 15 android:textColor="#000" 16 android:fontFamily="serif" 17 android:layout_height="wrap_content" 18 android:layout_width="match_parent" 19 android:layout_weight="1" 20 android:text="Age"/> 21 <TextView 22 android:textColor="#000" 23 android:id="@+id/record_position" 24 android:fontFamily="serif" 25 android:layout_height="wrap_content" 26 android:layout_width="match_parent" 27 android:layout_weight="1" 28 android:text="Position"/> 29 <TextView 30 android:textColor="#000" 31 android:id="@+id/record_address" 32 android:fontFamily="serif" 33 android:layout_height="wrap_content" 34 android:layout_width="match_parent" 35 android:layout_weight="1" 36 android:text="location"/> 37 </LinearLayout>
Now that we have a RecordViewHolder to encapsulate the visual elements that comprise a record, and a record.xml layout to inflate those elements into, we can go ahead and implement our getView method inside our RecordAdapter class like so:
1@Override 2 public View getView(int i, View view, ViewGroup viewGroup) { 3 RecordViewHolder holder; 4 5 if (view ==null){ 6 LayoutInflater recordInflater = (LayoutInflater) 7 recordContext.getSystemService(Activity.LAYOUT_INFLATER_SERVICE); 8 view = recordInflater.inflate(R.layout.record, null); 9 10 holder = new RecordViewHolder(); 11 holder.ageView = (TextView) view.findViewById(R.id.record_age); 12 holder.nameView = (TextView) view.findViewById(R.id.record_name); 13 holder.positionView = (TextView) view.findViewById(R.id.record_position); 14 holder.addressView = (TextView) view.findViewById(R.id.record_address); 15 view.setTag(holder); 16 17 }else { 18 holder = (RecordViewHolder) view.getTag(); 19 } 20 21 Record record = (Record) getItem(i); 22 holder.nameView.setText(record.name); 23 holder.ageView.setText(record.age); 24 holder.positionView.setText(record.position); 25 holder.addressView.setText(record.address); 26 return view; 27 }
What we want to do now is, when we receive an event from Pusher about a new record, we want to add that new record to our RecordAdapter and update our recordsList with that new employee record. Here’s how we achieve that:
1//... 2 public class RecordsAdapter extends BaseAdapter { 3 //... 4 public void add(Record record) { 5 recordList.add(record); 6 notifyDataSetChanged(); 7 } 8 }
This will add the record to the recordsList and notifyDataSetChange() will refresh the adapter, showing the new record.
Now we can go back to MainActivity and start listening for Pusher records:
1@Override 2 protected void onCreate(Bundle savedInstanceState) { 3 ... 4 // initialize Pusher 5 Pusher pusher = new Pusher("pusher_key"); 6 pusher.setCluster("app_cluster"); 7 // subscribe to our "records" channel 8 Channel channel = pusher.subscribe("records"); 9 // listen for the "new_record" event 10 channel.bind("new_record", new SubscriptionEventListener() { 11 ... 12 }); 13 // connect to the Pusher API 14 pusher.connect(); 15 }
Now that we have initialized Pusher, connected to the API, and subscribed to the records channel, we can add our SubscriptionEventListener to execute when an event comes in. All we’ll need to do is parse the JSON (for this example we used the Gson library to parse it into the Record object) and then add it to the RecordAdapter inside the MainActivity like so:
1channel.bind("new_record", new SubscriptionEventListener() { 2 @Override 3 public void onEvent(String channelName, String eventName, final String data) { 4 runOnUiThread(new Runnable() { 5 @Override 6 public void run() { 7 Gson gson = new Gson(); 8 Record record = gson.fromJson(data, Record.class); 9 recordAdapter.add(record); 10 recordsView.setSelection(recordsAdapter.getCount() - 1); 11 } 12 }); 13 } 14 });
At this point, whenever we have a new_record event come in, we simply add it to our RecordAdapter, and the new record will appear in realtime! wow, that was amazing!
Now run your app on an emulator or any android device, and give it a spin. If you encounter any issues, do consult the source code. If you have an android device, you can install the app here and see how it works.
Conclusion
With this walk through, you should be able to build cross platform realtime apps with ease. Other Pusher features are available but their use depends on the requirements of your app. You can have a look at Pusher’s documentation for a deeper comprehension of the project.
Appendix: Pusher Setup
-
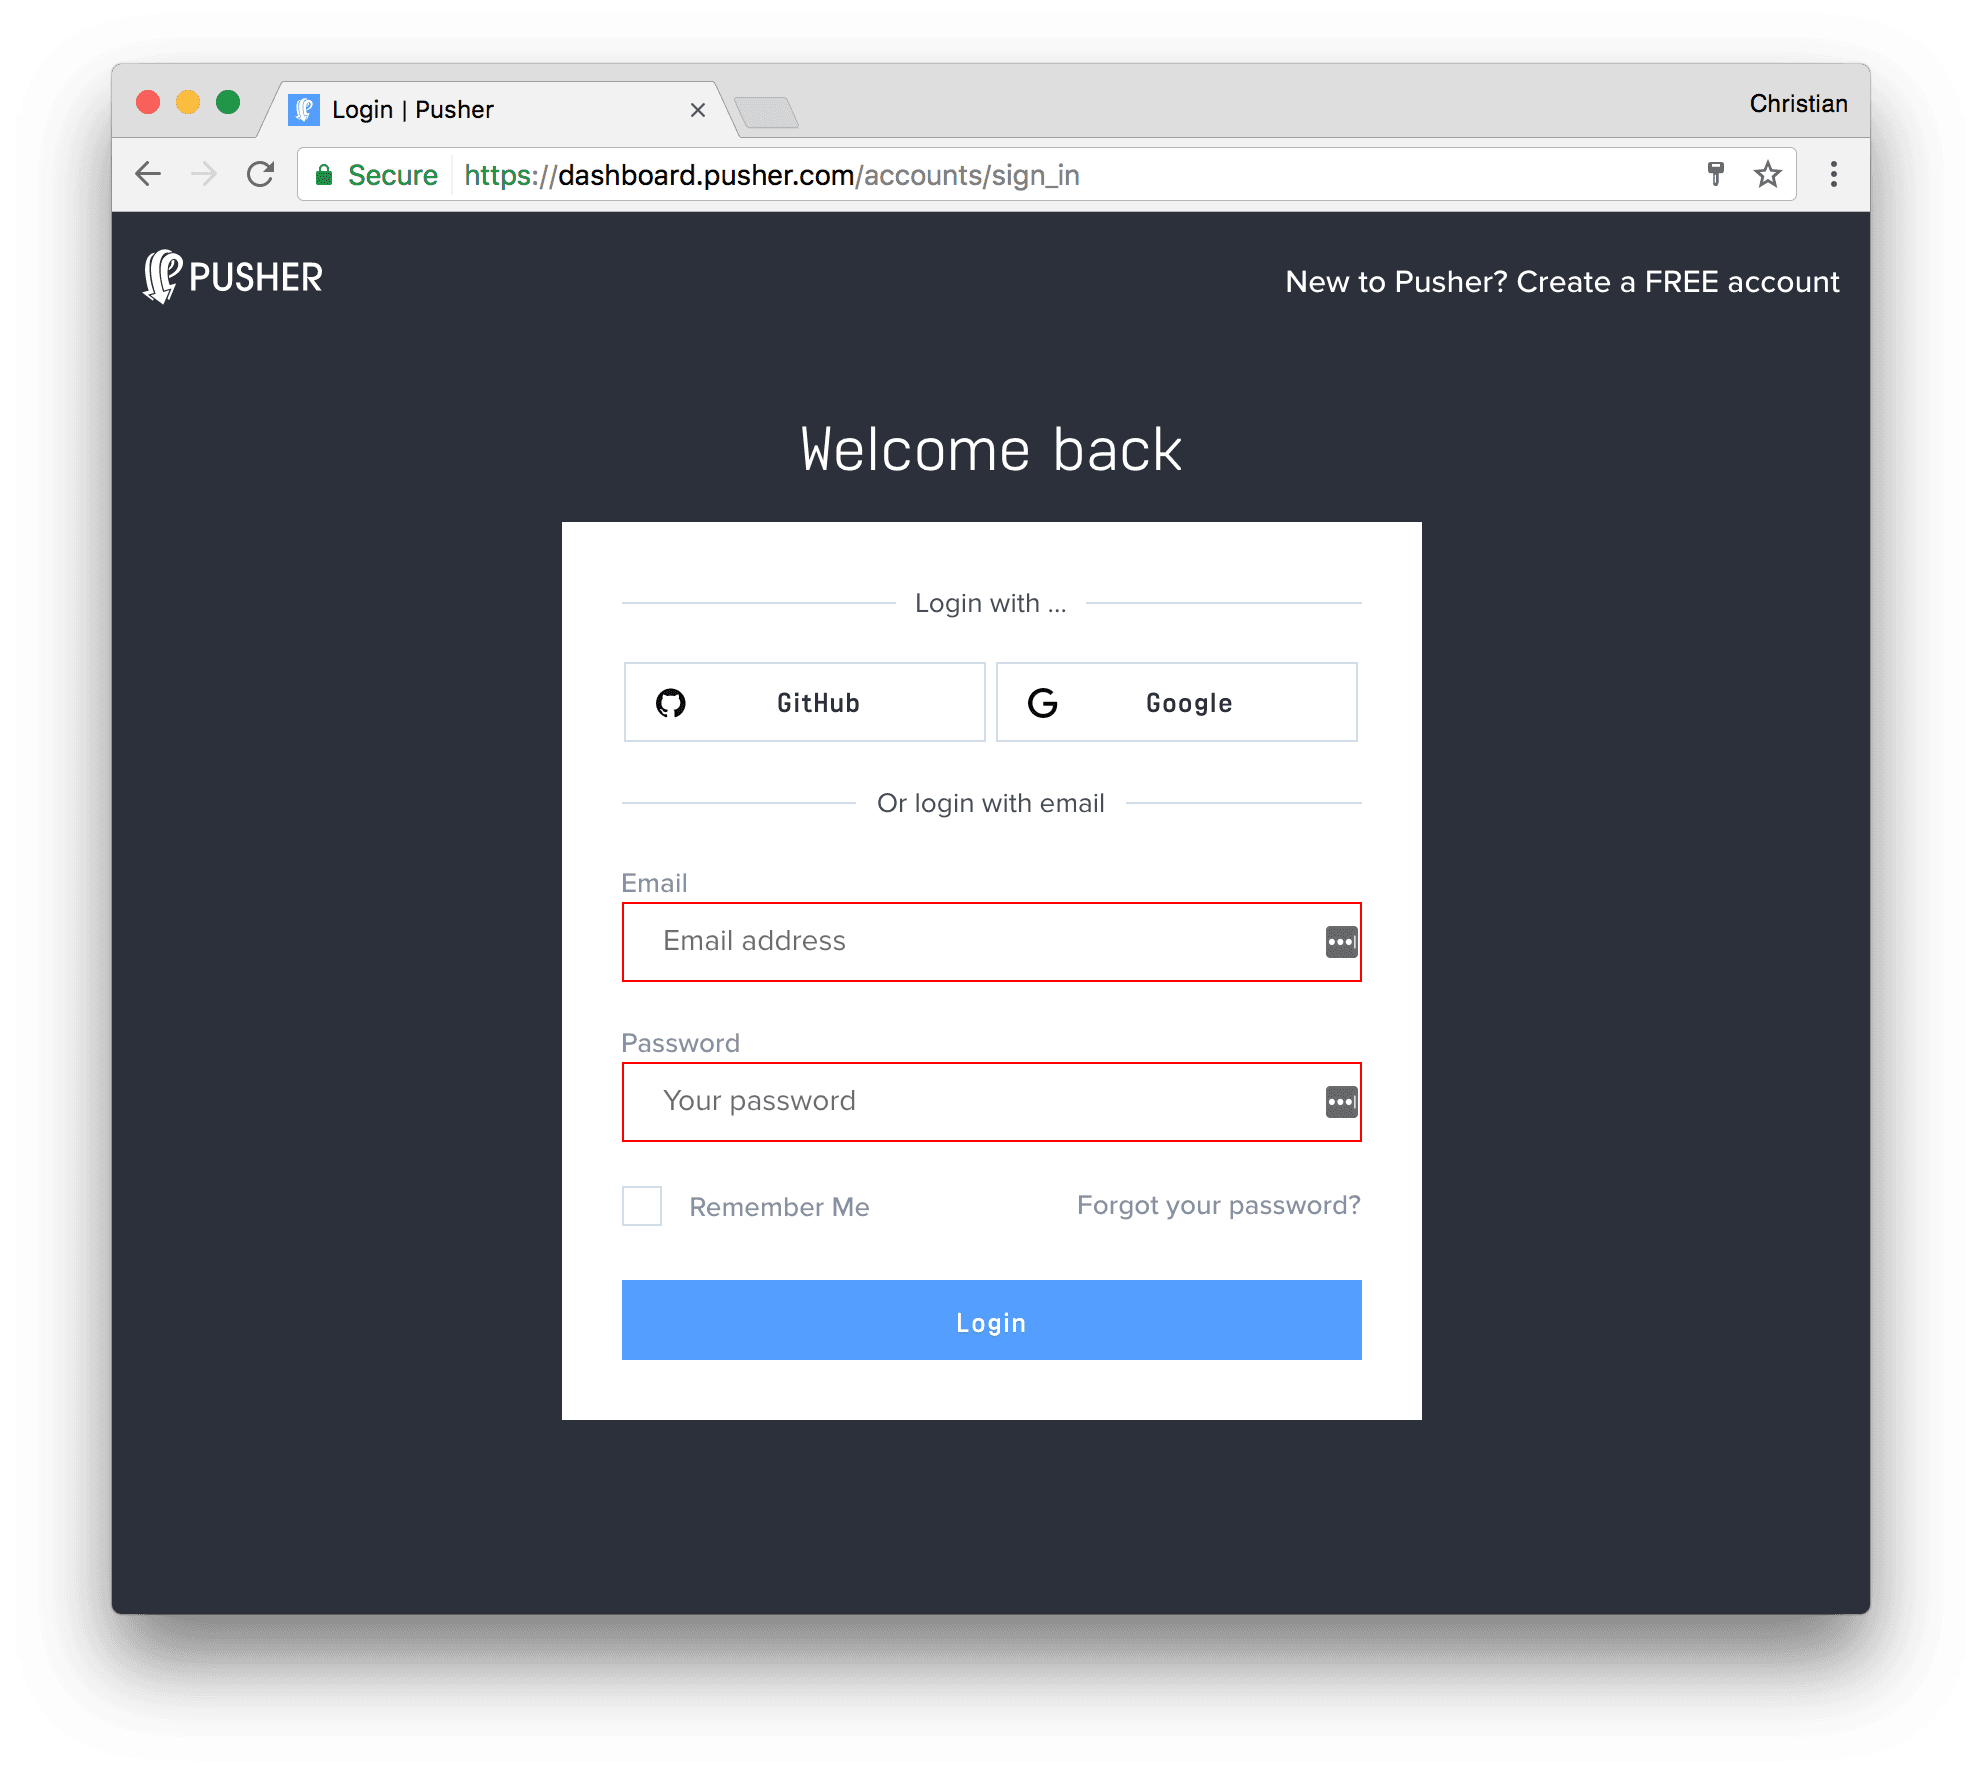
Sign up for a free Pusher account:
-
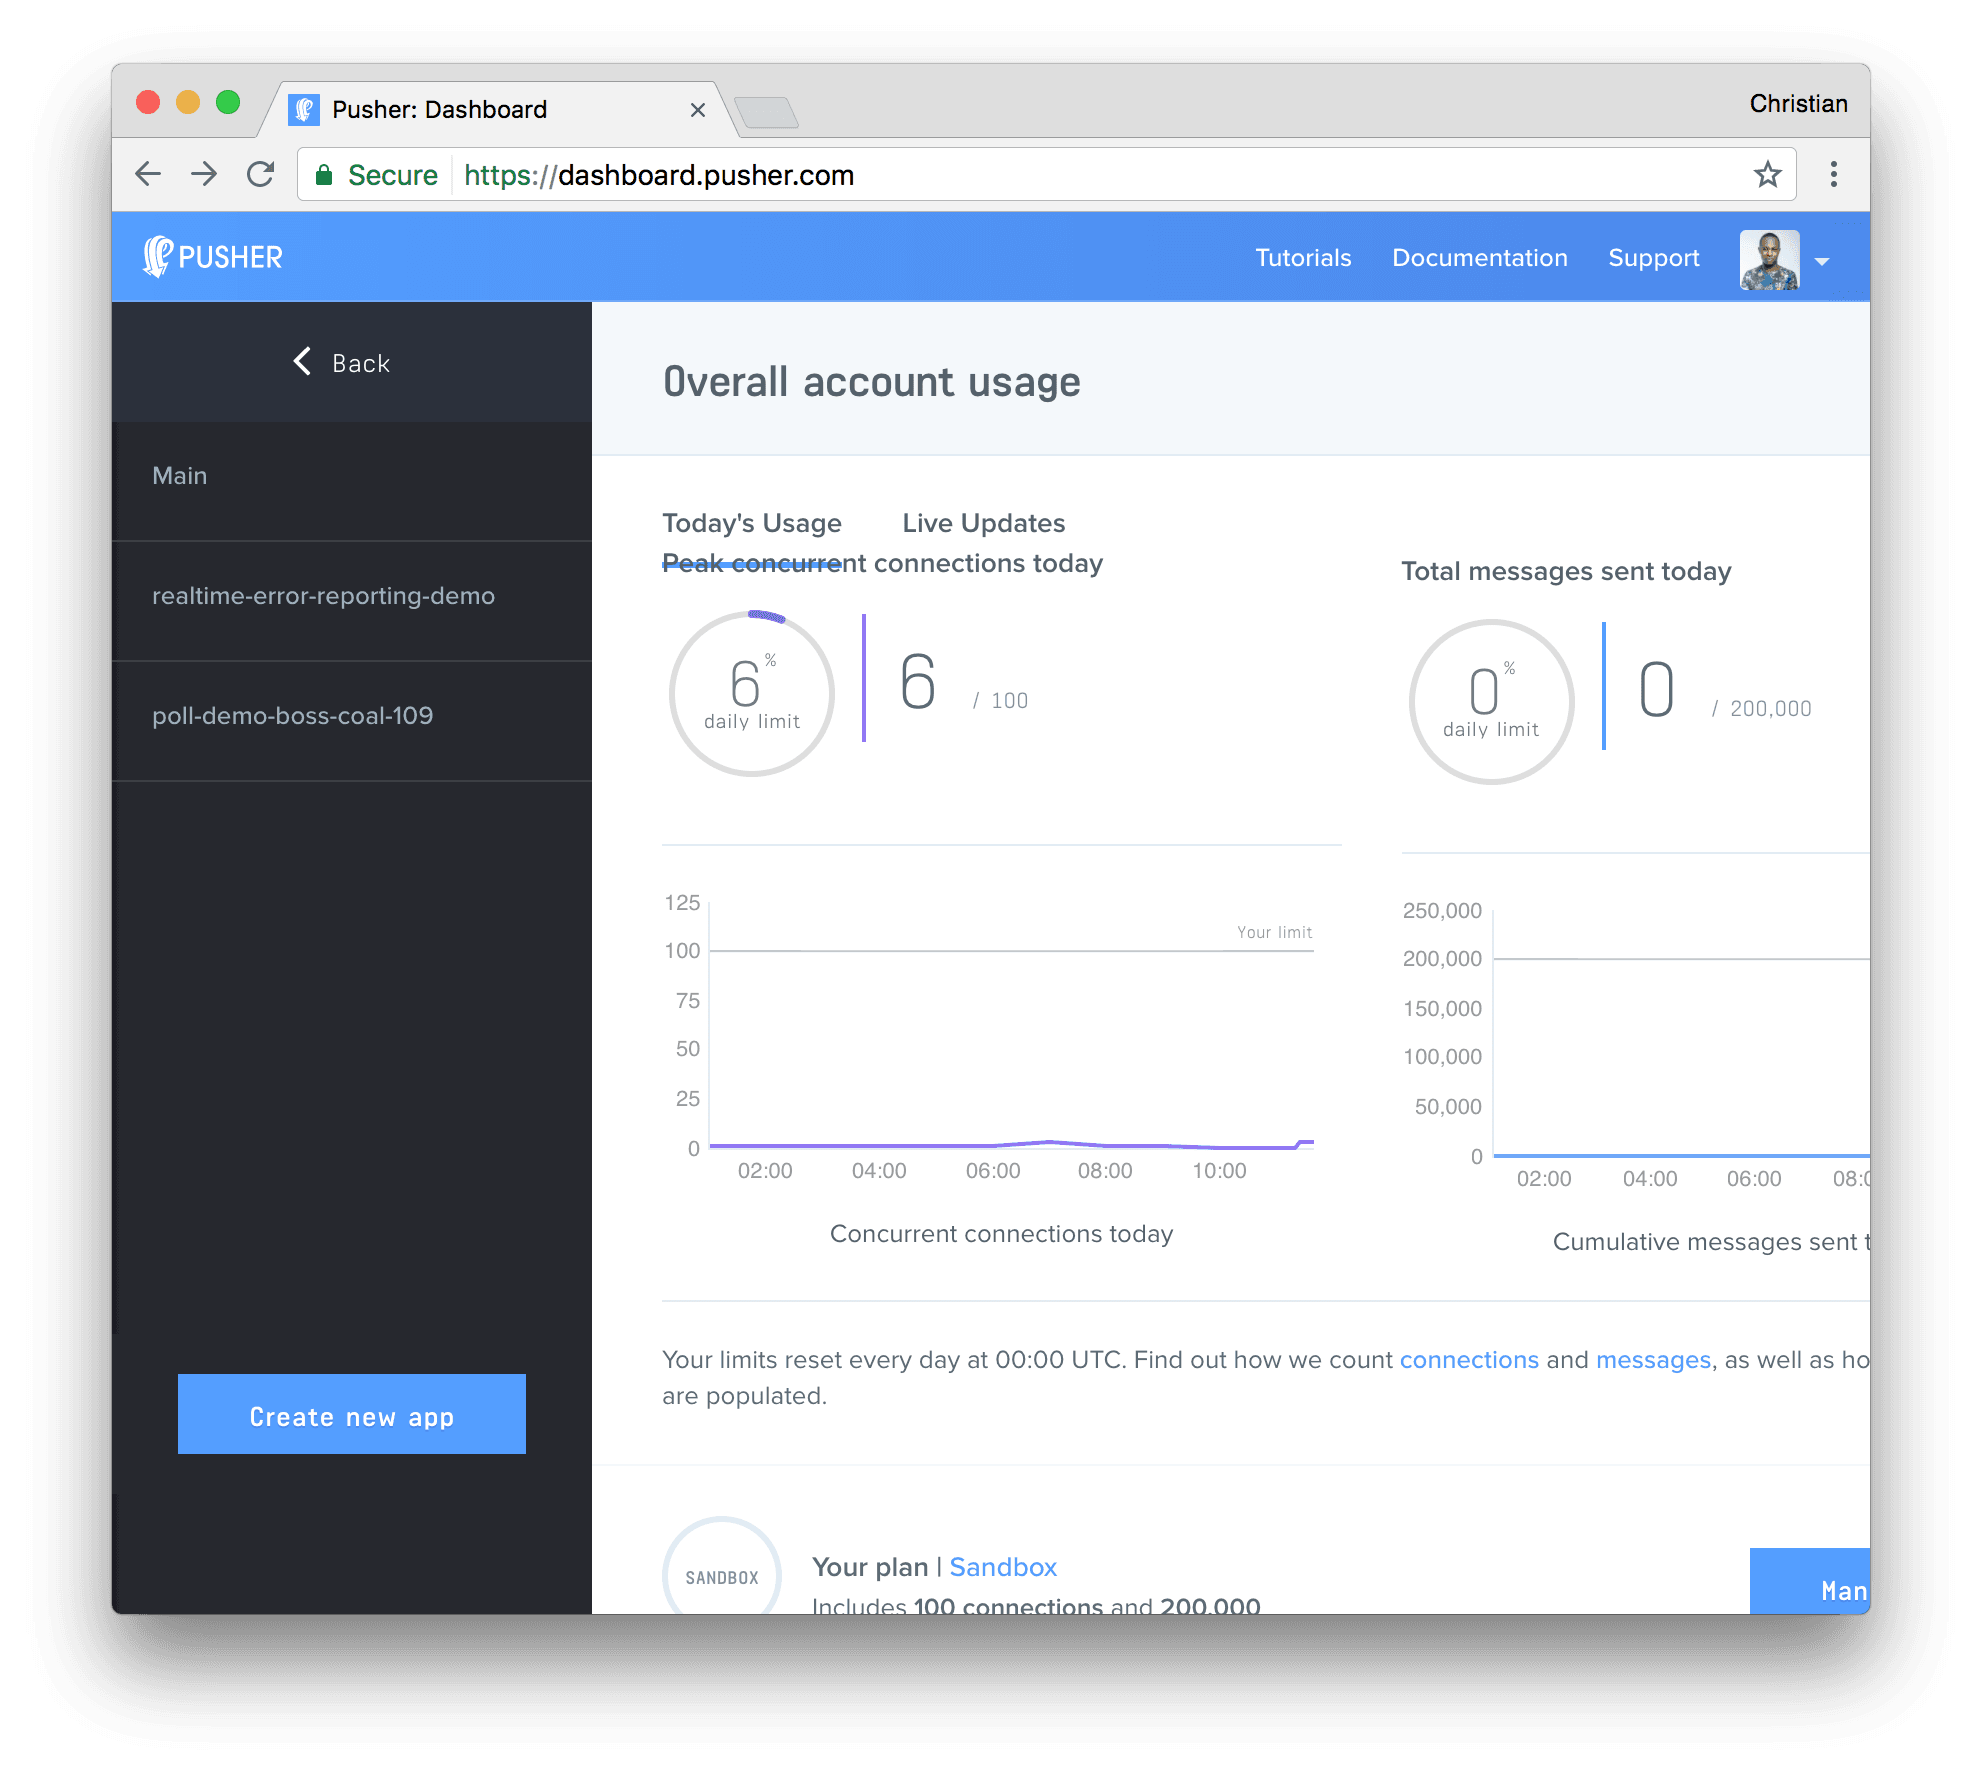
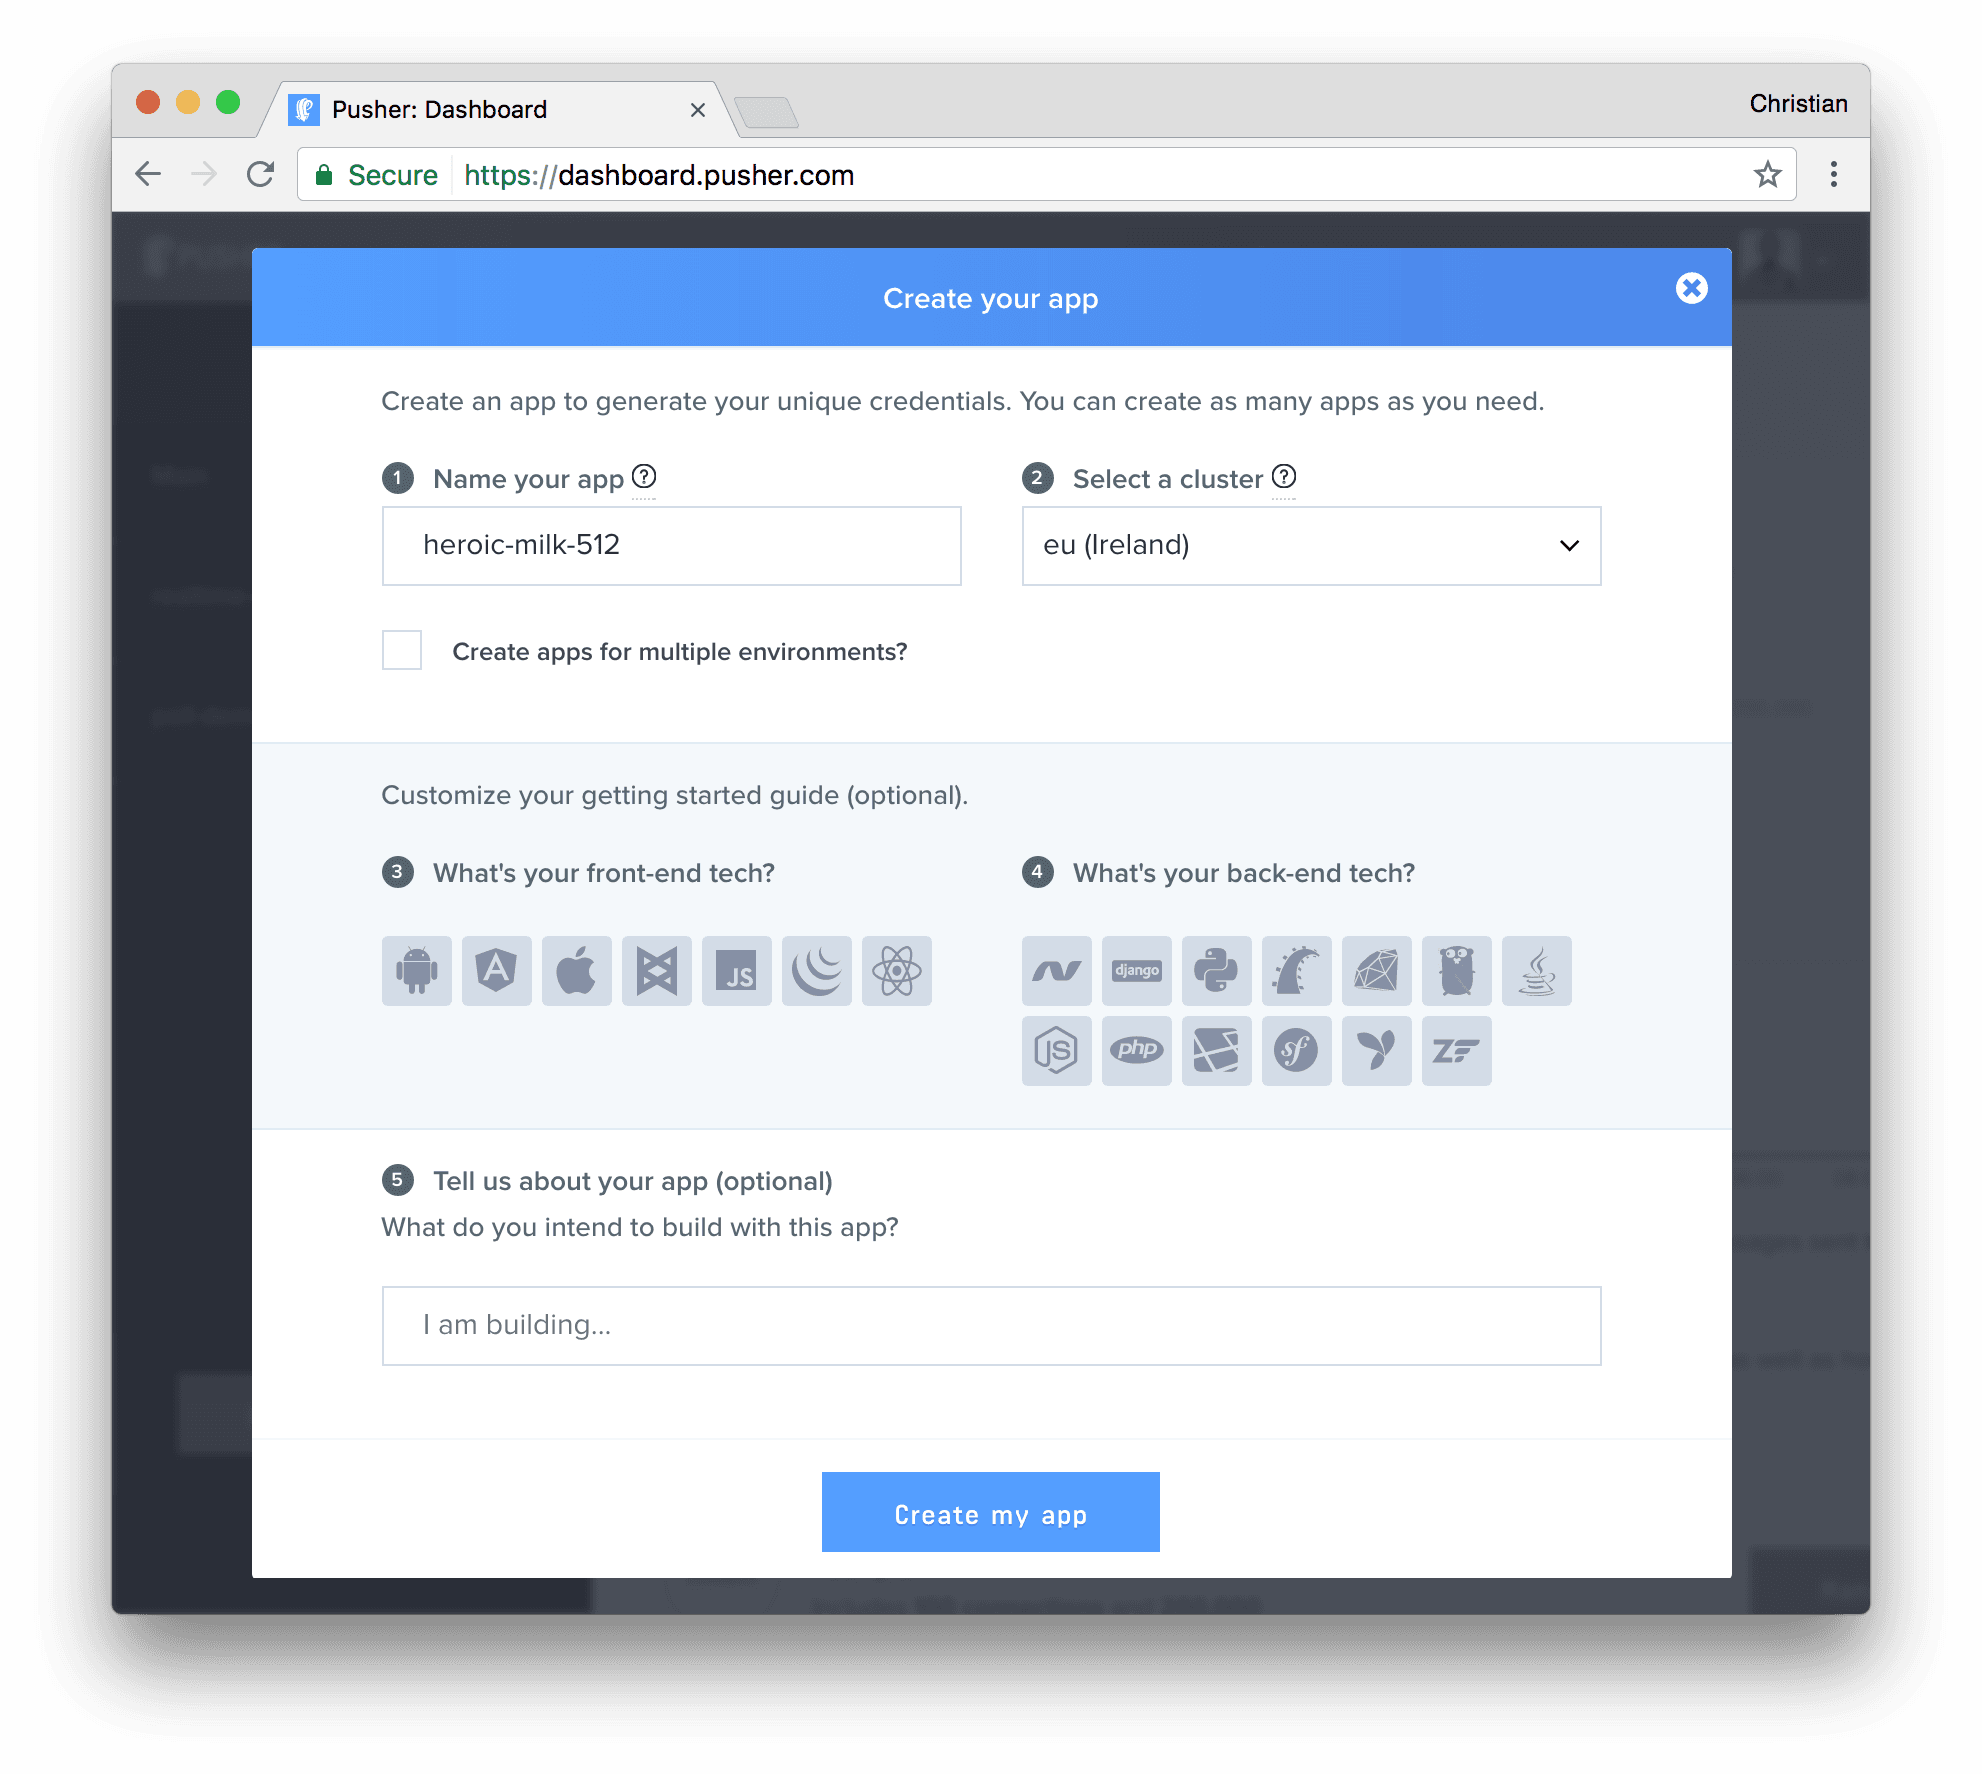
Create a new app by selecting Apps on the sidebar and clicking Create New button on the bottom of the sidebar:
-
Configure an app by providing basic information requested in the form presented. You can also choose the environment you intend to integrate Pusher with for a better setup experience:
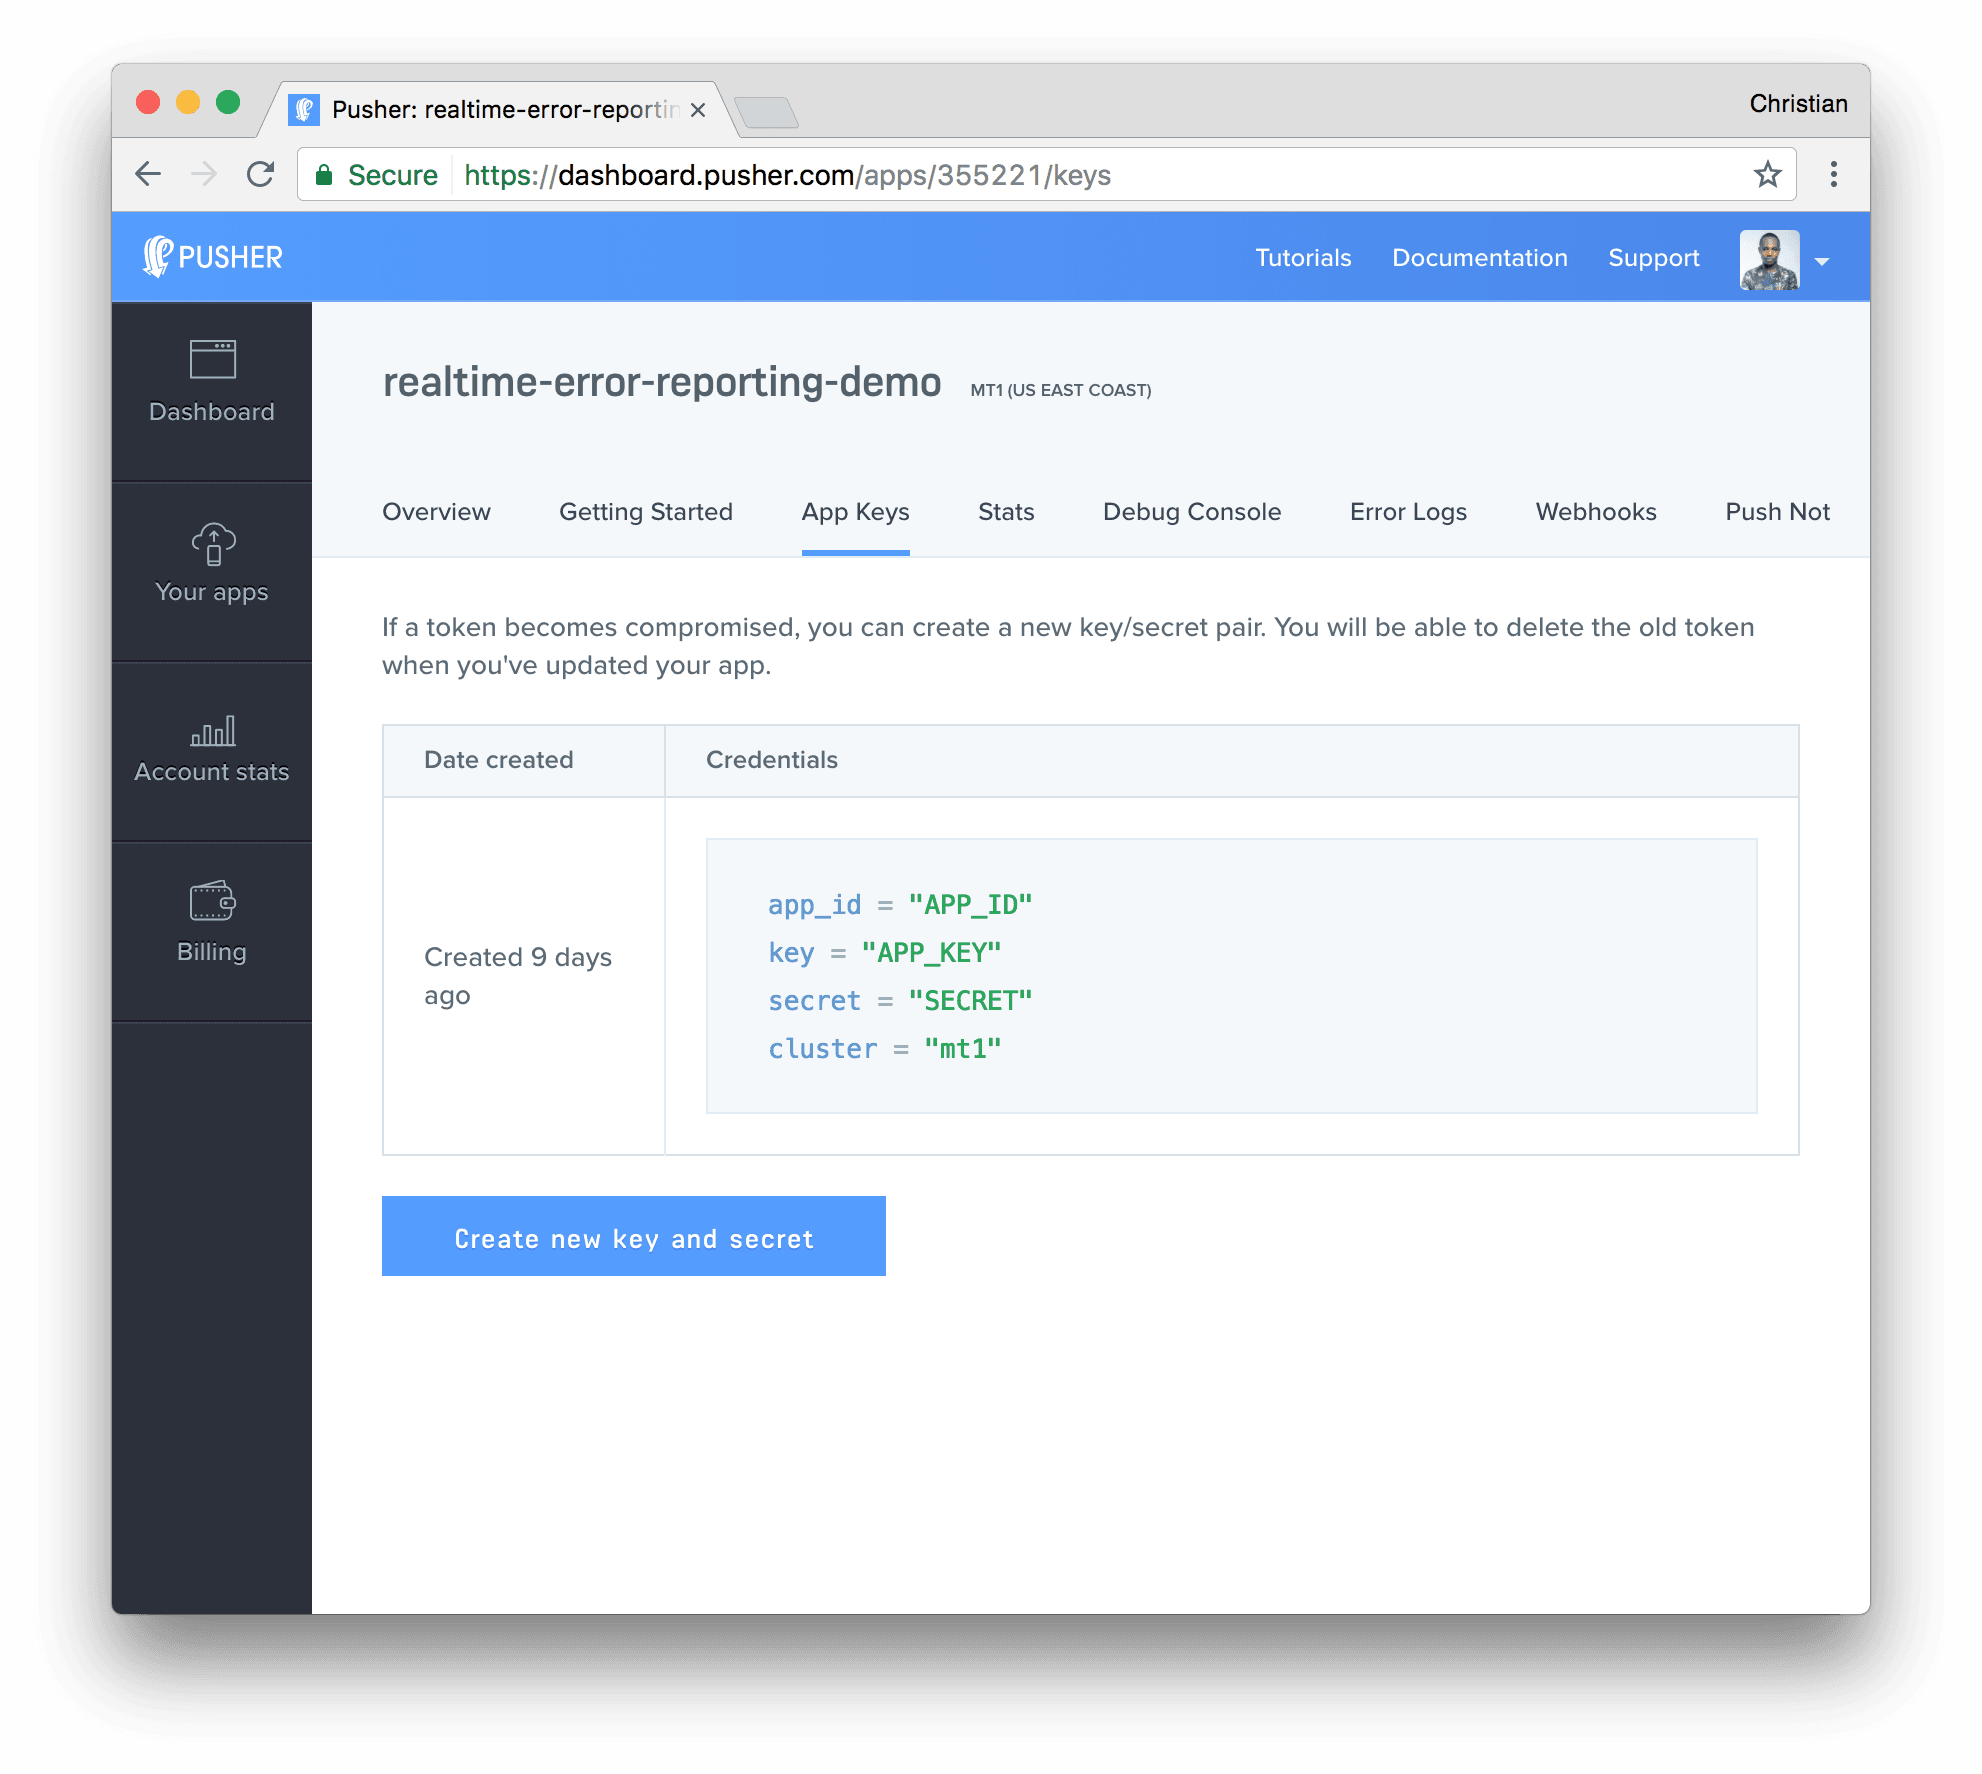
-
You can retrieve your keys from the App Keys tab:


© 2026 Pusher Ltd. All rights reserved.
Pusher Limited is a company registered in England and Wales (No. 07489873) whose registered office is at MessageBird UK Limited, 3 More London Riverside, 4th Floor, London, United Kingdom, SE1 2AQ.