- Products

- Developers
- User stories
- Blog
- Pricing

Build realtime likes with Laravel
Introduction
In June 2017, Twitter updated their web and Android apps with an interesting feature: realtime tweet statistics. In case you’re not familiar with Twitter, it simply means that you get to see the number of Likes or Retweets of a tweet increase (or decrease) as people around the world like or retweet it, without having to refresh the page.
In this article, I’ll be demonstrating how to build your very own realtime likes count on the web using Laravel and Pusher. Here’s how our app will work when we’re done:
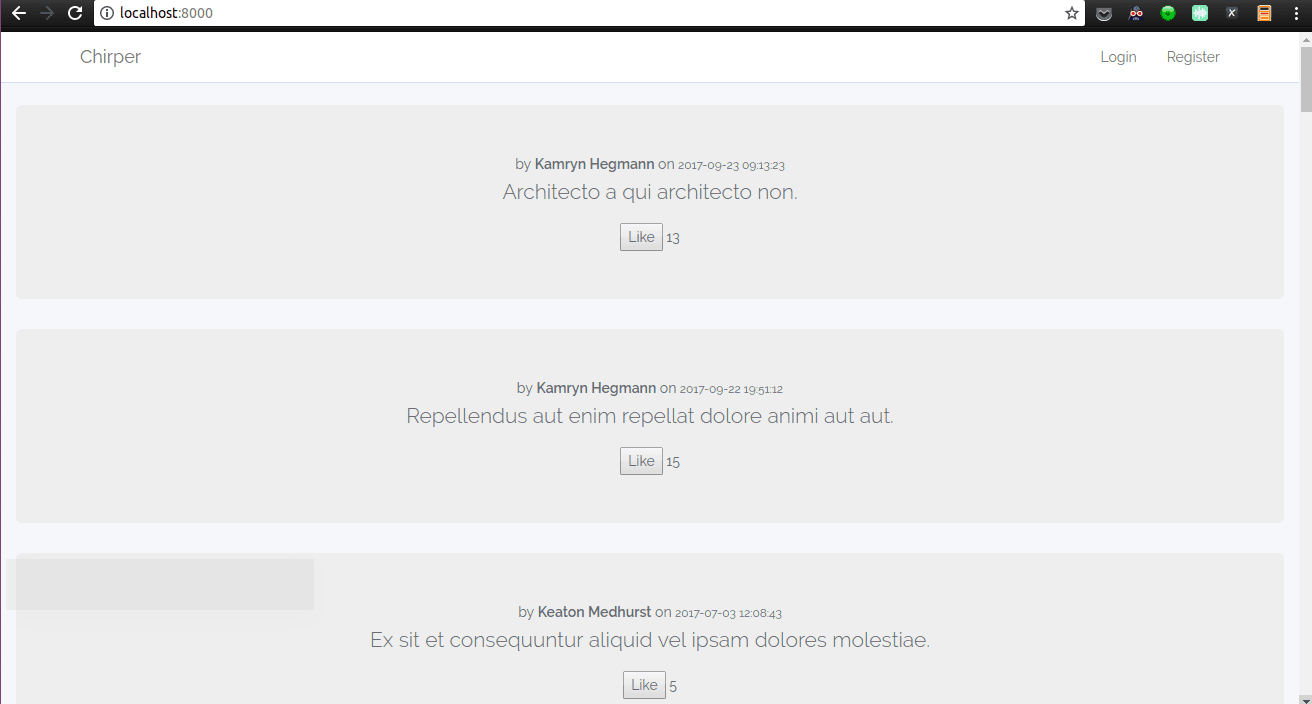
We’ll build a very simple app (which I’ll unimaginatively call Chirper) and stuff it with some fake data so we can get moving fast. On the home page of our app, users will see all chirps with the most recent ones first, and they can click a button to Like or Unlike them. Whenever a user likes or unlikes a chirp, the likes count displayed next to the chirp should increment or decrement in every other browser where the page is open.
Setup the project
I’ll be using Laravel 5.4 in this post, but the techniques here should work for any version of Laravel 5.3 or above:
composer create-project laravel/laravel=5.4.* chirper
Then set your app details in your .env file:
1APP_NAME=Chirper 2 DB_DATABASE=chirper
Remember to set your DB_USERNAME and DB_PASSWORD as appropriate for your machine, and to create a database named “Chirper”.
Next, we'll set up our data structures. To keep things simple, our app will have just two main entities: users and chirps. Since Laravel already provides us with a User model and migration, we just need to set up the Chirp model and migration.
php artisan make:model Chirp -m
For chirps, we'll store:
- the text
- the date it was posted
- the user who posted it, and
- the number of likes it has received
So we edit the up method in the migration file generated by the above command to look like this:
1public function up() 2 { 3 Schema::create('chirps', function (Blueprint $table) { 4 $table->increments('id'); 5 $table->string('text'); 6 $table->unsignedInteger('user_id'); 7 $table->integer('likes_count')->default(0); 8 $table->timestamp('posted_at'); 9 10 $table->foreign('user_id')->references('id')->on('users'); 11 }); 12 }
Let's open up our Chirp model and make some changes to it. First, we have to tell Laravel that this model doesn't use the regular timestamps (created_at and updated_at). Then we need to allow its attributes to all be assigned in one go. Lastly, we'll add an accessor so we can easily retrieve the details of the User who posted the chirp.
1class Chirp extends Model 2 { 3 public $timestamps = false; 4 5 protected $guarded = []; 6 7 public function author() 8 { 9 return $this->belongsTo(User::class, 'user_id', 'id'); 10 } 11 }
Next, we’ll write a seed to generate some fake users and their chirps for our app. If you open up the file database/factories/ModelFactory.php, you'll notice that Laravel already provides us with a seeder for Users. Let's add one for Chirps:
1$factory->define(App\Chirp::class, function (Faker\Generator $faker) { 2 3 return [ 4 'text' => $faker->sentence(), 5 'likes_count' => $faker->randomDigitNotNull, 6 'posted_at' => $faker->dateTimeThisYear(), 7 'user_id' => random_int(1, 10) 8 ]; 9 });
And then we call the factory functions in our database/seeds/DatabaseSeeder.php:
1<?php 2 3 use App\Chirp; 4 use App\User; 5 use Illuminate\Database\Seeder; 6 7 class DatabaseSeeder extends Seeder 8 { 9 public function run() 10 { 11 factory(User::class, 10)->create(); 12 factory(Chirp::class, 30)->create(); 13 } 14 }
Now, if we run
php artisan migrate --seed
We should see our database tables have been created and filled with fake data. Note: if you run into this error "Specified key was too long; max key length is 767 bytes " when you run migrations, follow these instructions to fix it.
Setup the views
Next, we'll run the command:
php artisan make:auth
We won't be using any auth features, but we'll run this because it also saves us time by setting up some frontend templates and JavaScript for us.
Let's set up our home routes and view.
First, replace the home route in your routes/web.php with our home route:
Route::get('/', 'HomeController@index');
Then in app/Controllers/HomeController.php, we'll implement the index method. (Don't forget to remove the auth middleware in the constructor):
1public function index() 2 { 3 $chirps = Chirp::with('author') 4 ->orderBy('posted_at', 'desc') 5 ->get(); 6 return view('home', ['chirps' => $chirps]); 7 }
In this method we simply retrieve all chirps along with their author details and pass them to the view to render.
Lastly, we set up the view, a simple UI that displays a list of chirps, with the author name, time posted and a Like button below it next to the number of likes the chirp has.
We’ll add a few attributes to some elements, though:
- an **
onclick**handler for eachLikebutton. - a
data-chirp-idon each button so we can identify which chirp the button references. - an
idon eachlikes_countwhich includes the chirp’s id so we can easily locate it viadocument.querySelector.
1@extends('layouts.app') 2 3 @section('content') 4 <div class="container-fluid text-center"> 5 6 @foreach($chirps as $chirp) 7 <div class="jumbotro"> 8 <div>by 9 <b>{{ $chirp->author->name }}</b> 10 on 11 <small>{{ $chirp->posted_at }}</small> 12 </div> 13 14 <div> 15 <p>{{ $chirp->text }}</p> 16 </div> 17 18 <div class="row"> 19 <button onclick="actOnChirp(event);" data-chirp-id="{{ $chirp->id }}">Like</button> 20 <span id="likes-count-{{ $chirp->id }}">{{ $chirp->likes_count }}</span> 21 </div> 22 23 24 </div> 25 @endforeach 26 </div> 27 @endsection
Let’s start our app to be sure everything’s fine thus far:
php artisan serve
Now visit your homepage at http://localhost:8000 and you should see all the chirps displayed neatly.
Implement the like logic
Now we'll implement the logic for liking and unliking a chirp.
First of all, we'll take a look at our frontend. When a user clicks on 'Like', we want a couple of things to happen:
- The text on the button changes from
LiketoUnlike. - The likes count displayed next to the chirp increases by 1.
- An AJAX request is made to the server to increment the likes_count in the database by 1.
- The likes count displayed next to the chirp increases by 1 in all other tabs/windows where the page is open. (This is where Pusher comes in.)
Similarly, for "unliking":
- The text on the button changes from
UnliketoLike. - The likes count displayed next to the chirp decreases by 1.
- An AJAX request is made to the server to decrement the likes_count in the database by 1.
- The likes count displayed next to the chirp decreases by 1 in all other tabs/windows where the page is open. (Again, the Pusher magic.)
In order for us to easily manage these two types of events, we'll introduce the concept of chirp actions. For our basic use case here, we'll just have two types of actions: Like and Unlike. Both actions will go to the same endpoint, where the server will do the database update and return a 200 OK response. Let's define a route for that:
Route::post('/chirps/{id}/act', 'HomeController@actOnChirp');
The Like button should make a request of this form:
1{ 2 "action": "Like" 3 }
In the case of unlikes, the action will be "Unlike". In our controller, we retrieve the action value and increment or decrement as needed. We'll use the same HomeController to keep things simple:
1public function actOnChirp(Request $request, $id) 2 { 3 $action = $request->get('action'); 4 switch ($action) { 5 case 'Like': 6 Chirp::where('id', $id)->increment('likes_count'); 7 break; 8 case 'Unlike': 9 Chirp::where('id', $id)->decrement('likes_count'); 10 break; 11 } 12 return ''; 13 }
Now let's implement the JavaScript for liking/unliking. Because the code isn't much, we'll add it directly to the "content" section of our home.blade.php:
In your base layout (layouts/app.blade.php), add a section for scripts after the script tag that includes app.js (so it gets run after Echo and Axios have been initialized):
1<script src="{{ asset('js/app.js') }}"></script> 2 @yield('js')
We'll inject our page's JavaScript into that section in our home.blade.php
1@section('js') 2 <script> 3 var updateChirpStats = { 4 Like: function (chirpId) { 5 document.querySelector('#likes-count-' + chirpId).textContent++; 6 }, 7 8 Unlike: function(chirpId) { 9 document.querySelector('#likes-count-' + chirpId).textContent--; 10 } 11 }; 12 13 14 var toggleButtonText = { 15 Like: function(button) { 16 button.textContent = "Unlike"; 17 }, 18 19 Unlike: function(button) { 20 button.textContent = "Like"; 21 } 22 }; 23 24 var actOnChirp = function (event) { 25 var chirpId = event.target.dataset.chirpId; 26 var action = event.target.textContent; 27 toggleButtonText[action](event.target); 28 updateChirpStats[action](chirpId); 29 axios.post('/chirps/' + chirpId + '/act', 30 { action: action }); 31 }; 32 33 </script> 34 @endsection
First, we have two objects containing two methods each, corresponding to the two possible actions. The names of the methods are capitalised so we can easily call them via the text on the button.
The first object contains methods to update the likes count displayed below the chirp, while the second contains methods to change the text on the button. We've separated these two functionalities because of our criteria no. 4 above: for a different user viewing this page at the same time, only the likes count should update; the text on the button shouldn't change.
We attach an onclick handler (actOnChirp) to each chirp like button as they are rendered. In this method, we perform the desired actions: change the button text, update the likes count and send the action to the server using Axios, which comes bundled with Laravel.
At this point, visiting the home page and clicking the Like button for a chirp works as expected. All good so far.
Broadcast the event with Pusher
We need to do one more thing when a chirp is liked or unliked is to ensure the likes count shown in every browser on that page shows the newly updated value. We'll do this by broadcasting a new event whenever a chirp is acted on. Pusher gives us the means to do this with their messaging system, and Laravel provides an events and broadcasting system that supports Pusher out of the box.
First, let's create the event class:
php artisan make:event ChirpAction
For the browser to update the likes count on the UI accordingly, it needs to know two things:
- which chirp was acted on
- what kind of action
We need to send this data along with this event when broadcasting it, so let's open up the generated app/Events/ChirpAction.php and add those two. Our class should look something like this:
1<?php 2 3 namespace App\Events; 4 5 use Illuminate\Queue\SerializesModels; 6 use Illuminate\Foundation\Events\Dispatchable; 7 use Illuminate\Broadcasting\InteractsWithSockets; 8 9 class ChirpAction 10 { 11 use Dispatchable, InteractsWithSockets, SerializesModels; 12 13 public $chirpId; 14 public $action; 15 16 public function __construct($chirpId, $action) 17 { 18 $this->chirpId = $chirpId; 19 $this->action = $action; 20 } 21 }
And now we need to fire this event whenever a new chirp action occurs. So we edit our HomeController's actOnChirp method to include this:
1public function actOnChirp(Request $request, $id) 2 { 3 $action = $request->get('action'); 4 switch ($action) { 5 case 'Like': 6 Chirp::where('id', $id)->increment('likes_count'); 7 break; 8 case 'Unlike': 9 Chirp::where('id', $id)->decrement('likes_count'); 10 break; 11 } 12 event(new ChirpAction($id, $action)); // fire the event 13 return ''; 14 }
At this point, whenever a chirp is liked or unliked, the event will be fired. But it's only local to the server, so let's fix that by implementing broadcasting to other clients.
Create a free Pusher account if you don’t have one already. Then visit your dashboard and create a new app, taking note of your app’s credentials. We’ll need them in a bit.
Let’s set things up on the frontend. We'll use Laravel Echo to listen for and respond to broadcasts via Pusher.
First install the needed dependencies:
npm install --save laravel-echo pusher-js
In your resources/assets/bootstrap.js, uncomment/add these lines:
1import Echo from 'laravel-echo' 2 3 window.Pusher = require('pusher-js'); 4 5 window.Echo = new Echo({ 6 broadcaster: 'pusher', 7 key: 'your-pusher-key', 8 cluster: 'your-app-cluster' 9 });
Replace your-pusher-key and your-app-cluster with your app's Pusher key and cluster as seen in your Pusher dashboard.
In the script section of our home.blade.php, we'll tell Echo to listen for chirp actions and update the chirp's likes counts accordingly:
1Echo.channel('chirp-events') 2 .listen('ChirpAction', function (event) { 3 console.log(event); 4 var action = event.action; 5 updateChirpStats[action](event.chirpId); 6 })
I've named my channel 'chirp-events', but you can use anything you like. The event variable passed to the function will contain the properties we defined earlier on our ChirpAction event (action and chirpId), so we can simply access them and update the UI for the corresponding chirp.
We're logging the event data to our console, just for debugging purposes, so we can see what's going on.
Then we install all our dependencies and compile our frontend assets so our updates to bootstrap.js show up:
npm install && npm run dev
Now, let's set up Echo and Pusher on the server. First, we'll install the Pusher library:
composer require pusher/pusher-php-server
Next, we'll configure our server to use broadcasting via Pusher. Add this to the aliases array of your config/app.php:
'Pusher' => Pusher\Pusher::class
Also uncomment this line from the providers array to enable broadcasting:
App\Providers\BroadcastServiceProvider::class,
Let's configure our broadcasting and Pusher settings. Laravel already comes with a config/broadcasting.php for this which pulls values from the .env file, so open up the .env file and edit it:
1BROADCAST_DRIVER=pusher 2 3 PUSHER_APP_ID=XXXXXXXXX 4 PUSHER_APP_KEY=YYYYYYYY 5 PUSHER_APP_SECRET=ZZZZZZZZ
Replace the stubs above with your app credentials from your Pusher dashboard.
Lastly, add your cluster in the options array of config/broadcasting.``php.
After making these changes, you might need to run php artisan config:cache so your changes get persisted from the .env to the config files.
To enable broadcasting of our event, we'll make it implement the ShouldBroadcastNow interface. (Normally, we would use the ShouldBroadcast interface, but then we would need to setup and configure queues. Using ShouldBroadcastNow forces the event to be dispatched immediately.)
We'll also implement a broadcastOn method that returns the channel (or channels) we want our event to be broadcast on. We'll use the same channel name we used on the frontend.
At this point, our event class looks like this:
1namespace App\Events; 2 3 use Illuminate\Broadcasting\Channel; 4 use Illuminate\Queue\SerializesModels; 5 use Illuminate\Foundation\Events\Dispatchable; 6 use Illuminate\Broadcasting\InteractsWithSockets; 7 use Illuminate\Contracts\Broadcasting\ShouldBroadcastNow; 8 9 class ChirpAction implements ShouldBroadcastNow 10 { 11 use Dispatchable, InteractsWithSockets, SerializesModels; 12 13 public $chirpId; 14 public $action; 15 16 public function __construct($chirpId, $action) 17 { 18 $this->chirpId = $chirpId; 19 $this->action = $action; 20 } 21 22 public function broadcastOn() 23 { 24 return new Channel('chirp-events'); 25 } 26 }
Okay, we're all set! Open up the homepage of your app in two different tabs and try Liking and Unliking from the different windows. You should see the events get logged to your browser console like this:

Note: If you find an error logged to your console about the WebSocket connection being closed instead, try restarting your browser.
Exclude the sender
You might have noticed that we have a small problem: when you click "Like" or "Unlike", the count increases or decreases by two, not one. This happens because the event is currently being broadcast to everyone, including the tab that sent it. So the first increase is due to the button click, and the second is due to the received message. We need to find a way of excluding the sender of the message from receiving it too. Luckily, we can do that easily with Laravel, by changing one line of code in our HomeController's actOnChirp method:
1// replace this... 2 event(new ChirpAction($id, $action)); 3 4 // with this... 5 broadcast(new ChirpAction($id, $action))->toOthers();
And now, if you Like or Unlike a chirp, you should see it shows up in the other window(s) and increments only by 1 on this window. Here's what actually goes on here:
- Pusher provides each connected tab with an identifier called the socket ID. Whenever a Pusher message is sent containing this id, Pusher knows not to send the message to whichever tab owns that ID.
- Laravel Echo automatically attaches this socket ID to the request sent by Axios as a header,
X-Socket-Id. You can view it by runningEcho.socketId()in your console. - By using the
broadcast...toOtherscombo, we're letting Laravel know that it should include the socket ID in its message data, so Pusher can exclude that tab. That's all there is to it.
Conclusion
This is just a proof-of-concept to demonstrate how this could be implemented with event broadcasting via Pusher. There are a lot more complex use cases available, so here's your chance to get started building more powerful things with Pusher and Laravel. Let us know what you build in the comments.


© 2026 Pusher Ltd. All rights reserved.
Pusher Limited is a company registered in England and Wales (No. 07489873) whose registered office is at MessageBird UK Limited, 3 More London Riverside, 4th Floor, London, United Kingdom, SE1 2AQ.