- Products

- Developers
- User stories
- Blog
- Pricing

Add live comments in Gatsby
Introduction
According to Wikipedia, a static web page (sometimes called a flat page/stationary page) is a web page that is delivered to the user exactly as stored, in contrast to dynamic web pages which are generated by a web application
Gatsby is a modern static site generator that allows you to build static web pages using React and GraphQl. Getting started with Gatsby is pretty easy and its installation is an npm install or yarn install away.
Today we’ll be adding a realtime comment section to the sports blog we’ll be building. We’ll call our blog the “Football transfer buzz with Gordon Mc-gossip”. Our application will contain a post and allow users to leave comments and everyone gets to see it in realtime.
Prerequisites
- Kindly ensure you have Node, Npm or Yarn installed on your machine before moving past this section. This will be needed for running and managing the dependencies needed by our application.
- Also, no knowledge of React is required, but a basic understanding of JavaScript may be helpful.
- Pusher Channels. This is a solution allows you to build realtime applications with its easy to use pub/sub messaging API. Sign up for a Pusher account.
- Gatsby: this is a static site generator. ( minimum version
"gatsby": "^1.9.247")
Install Gatsby
Installing Gatsby is pretty easy once you have Node installed on your machine. Simply run:
1# for npm users 2 npm i -g gatsby-cli
1# for yarn users 2 yarn global add gatsby-cli
This Gatsby CLI comes with a few helpful commands that can help you build and test your apps locally.
Create your app
To create our project, simply run:
1# new gatsby project 2 gatsby new gatsby-site-pusher
This will create our new project Transfer-Buzz and install its dependencies. If you cd into your new project directory, it will look like this.
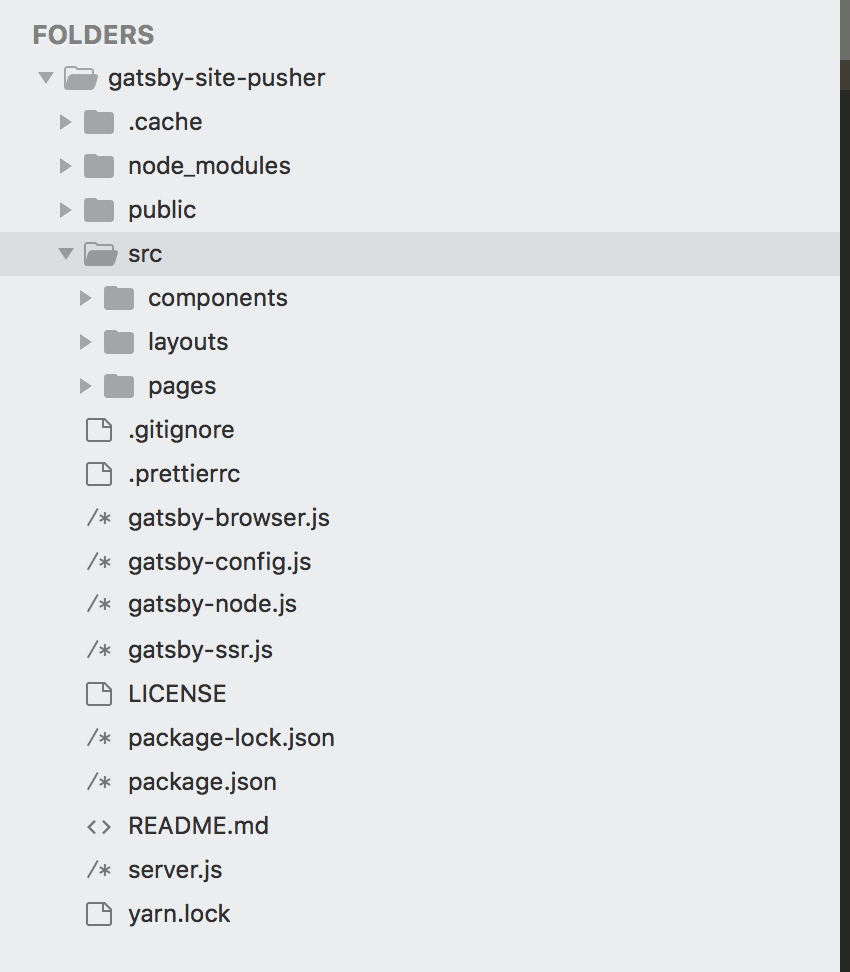
Most of the work we’ll be doing would be in the src/ directory. The components we’ll create would go into the src/components directory and pages would go into the src/pages directory.
Install dependency:
1# for npm users 2 npm i --save pusher-js
1# for yarn users 2 yarn add pusher-js
Get our Pusher credentials
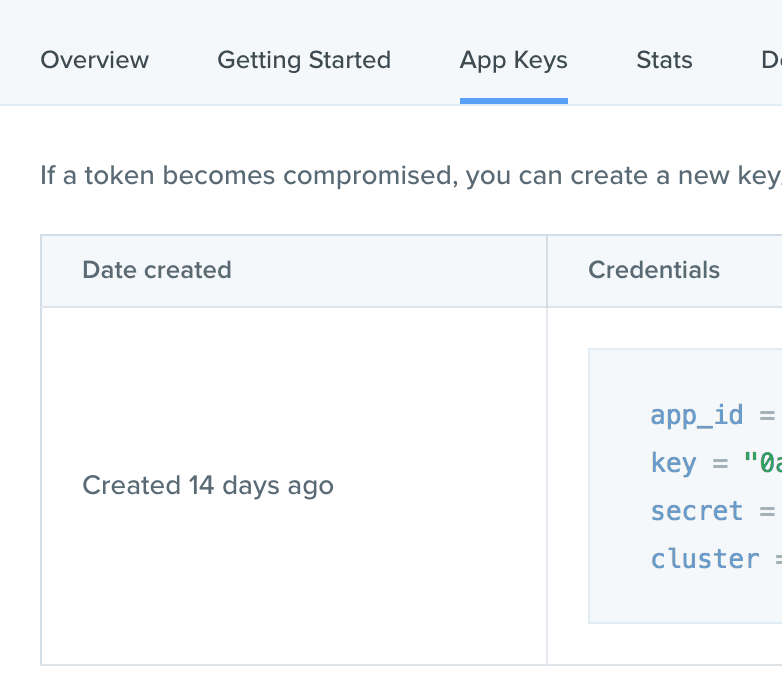
To get started with Pusher Channels, sign up or sign in. Then go to the dashboard and create a Channels app instance. Once that is done, click on App Keys and note your credentials. We'll be needing them in a bit.
Creating our app components
The first component we’ll create is our CommentList component. This will be responsible for listing the comments left by users.
1// src/components/comment-list.js 2 3 import React from 'react' 4 5 export default ({comments}) => { 6 comments = comments.map((comment, i) => ( 7 <div key={i} style={{ 8 padding: '5px', 9 border: '1px solid grey' 10 }}> 11 <p><strong>{comment.author}:</strong></p> 12 <p>{comment.message}</p> 13 </div> 14 )) 15 return ( 16 <section> 17 <strong>Comments: </strong>{comments} 18 </section> 19 ) 20 }
This simply takes an array of comments with attributes {author, message} and returns a CommentList component.
Next, is the Comment component, which will have a form for accepting new comments and list comments below.
1// src/components/comment.js 2 import React, { Component } from 'react' 3 import CommentList from './comment-list' 4 import Pusher from 'pusher-js' 5 6 /** 7 * initialize pusher with your credentials. 8 * Get 'key' from pusher dashboard 9 */ 10 const pusher = new Pusher('key', { 11 cluster: 'eu', 12 encrypted: true 13 }) 14 15 // subscribe your pusher instance to the channel 'sport-buzz-news' 16 const channel = pusher.subscribe('sport-buzz-news') 17 18 /* global fetch */ 19 export default class Comment extends Component { 20 constructor (props) { 21 super(props) 22 this.state = { 23 comments: [], 24 author: '', 25 message: '' 26 } 27 } 28 29 /** 30 * This will load components from the server on app startup, 31 * and also subscribe our app to listen for updates 32 */ 33 async componentDidMount () { 34 const comments = await fetch('http://localhost:8080/comments').then(res => res.json()) 35 this.setState({comments: [...comments, ...this.state.comments]}) 36 this.receiveUpdateFromPusher() 37 } 38 39 componentWillUnmount () { 40 pusher.unsubscribe('sport-buzz-news') 41 } 42 43 /** 44 * add new comments to the top of the list 45 * once there's an update 46 */ 47 receiveUpdateFromPusher () { 48 channel.bind('new-comment', comment => { 49 this.setState({ 50 comments: [comment, ...this.state.comments] 51 }) 52 }) 53 console.log('app subscription to event successful') 54 } 55 56 handleChange (type, event) { 57 if (type === 'author') { 58 this.setState({author: event.target.value}) 59 return 60 } 61 if (type === 'message') { 62 this.setState({message: event.target.value}) 63 } 64 } 65 66 /** 67 * post comment to the server 68 */ 69 async postComment (author, message) { 70 await fetch('http://localhost:8080/comment', { 71 body: JSON.stringify({author, message}), 72 method: 'POST', 73 headers: { 74 'user-agent': 'Mozilla/4.0 ', 75 'content-type': 'application/json' 76 } 77 }) 78 } 79 80 handleSubmit (event) { 81 event.preventDefault() 82 this.postComment(this.state.author, this.state.message) 83 this.setState({author: '', message: ''}) 84 } 85 86 render () { 87 return ( 88 <div> 89 <form onSubmit={this.handleSubmit.bind(this)}> 90 <label> 91 Name: 92 <input type='text' value={this.state.author} onChange={this.handleChange.bind(this, 'author')} /> 93 </label> 94 <label> 95 <br /> 96 Message: 97 <textarea type='text' value={this.state.message} onChange={this.handleChange.bind(this, 'message')} /> 98 </label> 99 <br /> 100 <input type='submit' value='Submit' /> 101 </form> 102 <CommentList comments={this.state.comments} /> 103 </div> 104 ) 105 } 106 }
Here, when the component gets mounted, we try to load previous comments from the server and pass that data as props to the CommentList component.
NOTE: Remember to update placeholders with your Pusher credentials.
Putting content on our page
Open your src/pages/index.js file which should already exist. You should replace its content with this:
1// src/pages/index.js 2 3 import React from 'react' 4 import Comment from '../components/comment' 5 6 const IndexPage = () => ( 7 <div> 8 <h1>Leroy Aziz Sané left out of German squad for the world cup</h1> 9 <p> 10 A lot of talks is currently ongoing about the Manchester City winger Leroy Sane being left out of the German team. 11 He was a prolific player this season with Mancity winning the premier league andthe significant contribution he brought to the team in front of Goal. 12 The decision by the German coach, Low to leave him out of the squad list was totally unexpected. Football really is a funny sport. 13 </p> 14 <p> 15 Let me know your thoughts in the comment section below 16 </p> 17 <Comment /> 18 </div> 19 ) 20 21 export default IndexPage
This contains a post we made and the Comment component we imported above.
Getting data in Gatsby
Gatsby uses GraphQL for getting data. It could be from any source. There are a few files where changes need to be made to get data. We have gatsby-node.js, gatsby-browser.js, gatsby-config.js among others.
What we’re concerned about right now is gatsby-config.js. It is responsible for passing data down to our src/components/header.js component. This gets data locally from the file and it’s an easy way to initialize your application with data.
Open up your src/components/header.js file and you should see this:
1// src/components/header.js 2 3 import React from 'react' 4 import Link from 'gatsby-link' 5 6 const Header = ({ siteTitle }) => ( 7 <div 8 style={{ 9 background: 'rebeccapurple', 10 marginBottom: '1.45rem' 11 }} 12 > 13 <div 14 style={{ 15 margin: '0 auto', 16 maxWidth: 960, 17 padding: '1.45rem 1.0875rem' 18 }} 19 > 20 <h1 style={{ margin: 0 }}> 21 <Link 22 to='/' 23 style={{ 24 color: 'white', 25 textDecoration: 'none' 26 }} 27 > 28 {siteTitle} 29 </Link> 30 </h1> 31 </div> 32 </div> 33 ) 34 35 export default Header
It takes a prop called siteTitle which was exported from the file gatsby-config.js.
Feel free to go ahead and change the value for title in gatsby.js to Football transfer buzz with Gordon Mc-Gossip'.
Setting up the server
Comments sent by users need to go somewhere, that’s what the server is for. It will save the comment, and publish it to Pusher who will trigger an update to all clients subscribed to that channel and listening for that event.
First, we’ll need to add the dependencies needed by our server.
1# for yarn users 2 yarn add express body-parser cors pusher
1# for npm users 2 npm i express body-parser cors pusher
Create the file server.js and add the following:
1// server.js 2 const express = require('express') 3 const app = express() 4 const bodyParser = require('body-parser') 5 const cors = require('cors') 6 const Pusher = require('pusher') 7 8 app.use(cors()) 9 app.use(bodyParser.urlencoded({ extended: true })) 10 app.use(bodyParser.json()) 11 12 const port = process.env.PORT || 8080 13 14 const pusher = new Pusher({ 15 appId: 'appId', 16 key: 'key', 17 secret: 'secret', 18 cluster: 'eu', 19 encrypted: true 20 }) 21 22 let comments = [ 23 { 24 author: 'robo', 25 message: 'i totally didn\'t see that coming' 26 } 27 ] 28 29 /** 30 * receive new comment from the client 31 * update the comments array with the new entry 32 * publish update to Pusher 33 */ 34 app.post('/comment', function (req, res) { 35 const {author, message} = req.body 36 comments = [...[{author, message}], ...comments] 37 pusher.trigger('sport-buzz-news', 'new-comment', {author, message}) 38 res.sendStatus(200) 39 }) 40 41 // send all comments to the requester 42 app.get('/comments', function (req, res) { 43 res.json(comments) 44 }) 45 46 app.listen(port, function () { 47 console.log('Node app is running at localhost:' + port) 48 })
Here, we initialize Pusher with our credentials gotten from our dashboard. When we get a request on localhost:8080/comments we return all comments gotten so far and receive comments sent to POST localhost:8080/comment.
Running the app
We’ll use one of Gatsby’s helpful CLI commands to start our application. Simply run:
1# gatsby cli command 2 gatsby develop
This will start our application on port 8000 and can be accessed here http://localhost:8000/.
You’ll also need to start the server by running:
1# start node server 2 node server.js
Our server application will run on http://localhost:8080/ and all API calls would go here.
More
Gatsby allows you to export as a static content when going to production. It could prefetch your data from any data source and bundle it into the generated static file.
To do that, simply run:
1# make production build 2 gatsby build
NOTE: Gatsby will perform an optimized production build for your site generating static HTML and per-route JavaScript code bundles.
Conclusion
We’ve been able to build a simple blog application with a live comment section. This was done using Pusher and Gatsby. The repo for this tutorial lives here. Feel free to contribute.


© 2026 Pusher Ltd. All rights reserved.
Pusher Limited is a company registered in England and Wales (No. 07489873) whose registered office is at MessageBird UK Limited, 3 More London Riverside, 4th Floor, London, United Kingdom, SE1 2AQ.