- Products

- Developers
- User stories
- Blog
- Pricing

Build realtime comments using ASP.NET
- Introduction
- Setting up a Pusher account and app
- Setting up the ASP.NET project in Visual Studio
- Crafting our application
- Connecting to our database
- Creating our controller
- Creating our view files
- The index view
- The create view
- The details view and Vue.js bindings**
- Pusher bindings and Vue.js snippet
- Uploading comment code
- Subscribing for feed additions on server from other clients
- Conclusion
Introduction
Reloading pages to view new comments can bore and is also strenuous, given you don't even know if the reply to your comment has come in yet or not. You keep reloading and keep wasting your data. To cut a long story short, users may abandon sites where they have to reload pages to see a new comment.
Today, we will build a mini-blog engine with live commentary features using .NET and Pusher.
To follow through with this tutorial, we will use MSSQL as our database engine. Please ensure that it is up and running.
Setting up a Pusher account and app
Pusher is a hosted service that makes it super-easy to add realtime data and functionality to web and mobile applications.
Pusher acts as a realtime layer between your servers and clients. Pusher maintains persistent connections to the clients - over Web-socket if possible and falling back to HTTP-based connectivity - so that as soon as your servers have new data they want to push to the clients they can do, via Pusher.
If you do not already have one, head over to Pusher and create a free account.
We will register a new app on the dashboard. The only compulsory options are the app name and cluster. A cluster represents the physical location of the Pusher server that will handle your app’s requests. Also, copy out your App ID, Key, and Secret from the App Keys section, as we will need them later on.
Setting up the ASP.NET project in Visual Studio
The next thing we need to do is create a new Asp.Net MVC application.
To do so, let’s:
- Open
Visual Studioand selectN``ew Projectfrom the sidebar - Under templates, select
Visual C# - Next, select
Web - In the middle section, select
ASP.NET Web Application. - For this tutorial, I named the project:
Real-Time-Commenting. - Now we are almost ready. The next step will be to install the official
Pusherlibrary forASP.NETusing theNuGet Package.
To do this, we go to tools on the top bar, click on NuGet Package Manager, on the drop-down we select Package Manager Console.
We will see the Package Manager Console at the bottom of our Visual Studio. Next, let’s install the package by running:
Install-Package PusherServer
Crafting our application
Now that our environment is set up and ready, let’s dive into writing code.
By default, Visual Studio creates three controllers for us. However, we will use the HomeController for the application logic.
The first thing we want to do is to define a model that stores the list of articles we have in the database. Let's call this model BlogPost. So, let's create a file called BlogPost.cs in our models folder, and add:
1using System; 2 using System.Collections.Generic; 3 using System.ComponentModel.DataAnnotations.Schema; 4 using System.Linq; 5 using System.Web; 6 7 namespace Real_Time_Commenting.Models 8 { 9 public class BlogPost 10 { 11 public int BlogPostID { get; set; } 12 13 public string Title { get; set; } 14 15 [Column(TypeName = "ntext")] 16 public string Body { get; set; } 17 } 18 }
In this code block, we have defined the model that holds our blog posts. The properties which we have defined here include:
- The id of the post, called
BlogPostID(usually the primary key) - The title of our post, called
Title(Defined as a string) - The body of the post which we will be creating. Defined as a string
Next, let us create the model called Comment, which we had referenced earlier on. Let's create a file called Comment.cs in our models folder and add:
1using System; 2 using System.Collections.Generic; 3 using System.ComponentModel.DataAnnotations.Schema; 4 using System.Linq; 5 using System.Web; 6 7 namespace Real_Time_Commenting.Models 8 { 9 public class Comment 10 { 11 public int CommentID { get; set; } 12 13 public string Name { get; set; } 14 15 [Column(TypeName = "ntext")] 16 public string Body { get; set; } 17 18 public int BlogPostID { get; set; } 19 } 20 }
Looking at the code above, we notice that we have declared the following properties:
- The ID of our comment called
CommentID(Usually the primary key) - The name of the person commenting.
- The body of the comment.
- The ID of the post we are commenting on.
Now that we have defined our model, let’s reference it in our default database context called ApplicationDbContext. To do this, let’s open models\IdentityModels.cs file, then locate the class called ApplicationDbContext and add the following after the create function:
1public DbSet<BlogPost> BlogPost { get; set; } 2 public DbSet<Comment> Comment { get; set; }
In the code block above, the DbSet class represents an entity set used for read, update, and delete operations.
Here, we have defined two entities, our BlogPost and Comment models. We will now have access to them from an instance of the ApplicationDbContext .
Connecting to our database
Although our model is set up, we still need to attach a database to our application. To do so, select the Server Explorer on the left-hand side of our Visual Studio, right click on Data Connections and add a database. There are various databases that are lightweight and can fit into the application we are building, such as:
- Microsoft access database
- Sqlite Database
- MSSQL Server
For this tutorial, I used the MSSQL Server.
Creating our controller
Now both our model and database are setup, let’s go ahead creating our index route. Open the HomeController and replace it with:
1using PusherServer; 2 using Real_Time_Commenting.Models; 3 using System; 4 using System.Collections.Generic; 5 using System.Linq; 6 using System.Threading.Tasks; 7 using System.Web; 8 using System.Web.Mvc; 9 10 namespace Real_Time_Commenting.Controllers 11 { 12 public class HomeController : Controller 13 { 14 ApplicationDbContext db = new ApplicationDbContext(); 15 public ActionResult Index() 16 { 17 return View(db.BlogPost.AsQueryable()); 18 } 19 20 public ActionResult Create() 21 { 22 return View(); 23 } 24 25 [HttpPost] 26 public ActionResult Create(BlogPost post) 27 { 28 db.BlogPost.Add(post); 29 db.SaveChanges(); 30 return RedirectToAction("Index"); 31 } 32 33 public ActionResult Details(int? id) 34 { 35 return View(db.BlogPost.Find(id)); 36 } 37 38 public ActionResult Comments(int? id) 39 { 40 var comments = db.Comment.Where(x => x.BlogPostID == id).ToArray(); 41 return Json(comments, JsonRequestBehavior.AllowGet); 42 } 43 44 [HttpPost] 45 public async Task<ActionResult> Comment(Comment data) 46 { 47 db.Comment.Add(data); 48 db.SaveChanges(); 49 var options = new PusherOptions(); 50 options.Cluster = "XXX_APP_CLUSTER"; 51 var pusher = new Pusher("XXX_APP_ID", "XXX_APP_KEY", "XXX_APP_SECRET", options); 52 ITriggerResult result = await pusher.TriggerAsync("asp_channel", "asp_event", data); 53 return Content("ok"); 54 } 55 } 56 }
In the code block above, we have defined six different functions :
- The
Indexfunction, which shows a quick list of all our blog posts. - The
Createfunction, which handles the addition of new BlogPosts for bothGETandPOSTrequests. - The
D``etailsfunction, which returns the full view of our post. - The
Comment``sfunction, which returns a JSON data of all the comments for a particular post. - The
Commentfunction, which handles the addition of a new comment and emitting the data to Pusher.
Before looking at our controller functions, we notice that there is an import of our DB context into our class with the line that says:
ApplicationDbContext db = new ApplicationDbContext();
This makes it possible to access the database model which we have defined in our ApplicationDbContext class.
In the Index function we return our View, passing in a list of all the posts we have in our database, which will be looped.
Next, In the Create function that handles our GET request, we simply return the view for creating a new post.
We move to the Create function that handles our POST request, which receives an argument called post of type BlogPost . In this function we add a new post into the database, after which we return a redirect to our Index function.
In our Details function, we return an instance of a particular post to our view which will be displayed. This view will also display the form which allows us to add comments.
In our Comments function, we return all the comments that belong to a particular post, the ID of which was supplied as JSON. This method will be called via an AJAX POST.
Finally, our Comment function handles adding the comments to the database, and sending the data to Pusher. We notice here that this function is an async method. This is because the Pusher library sends the data asynchronously, and we have to await its response.
Also, we need to replace XXX_APP_CLUSTER, XXX_APP_ID, XXX_APP_KEY and XXX_APP_SECRET with our app cluster, ID, key and secret which we got from Pusher earlier on.
Creating our view files
To complete our application we will need 3 different view files, which we will discuss below.
The index view
Let us replace the default content in the Index.cshtml file at Views\Home\``Index``.cshtml with:
1@model IEnumerable<Real_Time_Commenting.Models.BlogPost> 2 3 @{ 4 ViewBag.Title = "Index"; 5 } 6 7 <h2>Index</h2> 8 9 <p> 10 @Html.ActionLink("Create New", "Create") 11 </p> 12 <table class="table"> 13 <tr> 14 <th> 15 @Html.DisplayNameFor(model => model.Title) 16 </th> 17 <th> 18 @Html.DisplayNameFor(model => model.Body) 19 </th> 20 <th></th> 21 </tr> 22 23 @foreach (var item in Model) { 24 <tr> 25 <td> 26 @Html.DisplayFor(modelItem => item.Title) 27 </td> 28 <td> 29 @Html.DisplayFor(modelItem => item.Body) 30 </td> 31 <td> 32 @Html.ActionLink("Details", "Details", new { id=item.BlogPostID }) | 33 </td> 34 </tr> 35 } 36 37 </table>
Looking at the HTML structure above, we notice we have defined a table which lists all our posts and links them to the details page.
The create view
Here, we need to create a new file called Create.cshtml in the View\Home folder and paste the following into it:
1@model Real_Time_Commenting.Models.BlogPost 2 3 @{ 4 ViewBag.Title = "Create"; 5 } 6 7 <h2>Create</h2> 8 9 10 @using (Html.BeginForm()) 11 { 12 @Html.AntiForgeryToken() 13 14 <div class="form-horizontal"> 15 <h4>BlogPost</h4> 16 <hr /> 17 @Html.ValidationSummary(true, "", new { @class = "text-danger" }) 18 <div class="form-group"> 19 @Html.LabelFor(model => model.Title, htmlAttributes: new { @class = "control-label col-md-2" }) 20 <div class="col-md-10"> 21 @Html.EditorFor(model => model.Title, new { htmlAttributes = new { @class = "form-control" } }) 22 @Html.ValidationMessageFor(model => model.Title, "", new { @class = "text-danger" }) 23 </div> 24 </div> 25 26 <div class="form-group"> 27 @Html.LabelFor(model => model.Body, htmlAttributes: new { @class = "control-label col-md-2" }) 28 <div class="col-md-10"> 29 @Html.EditorFor(model => model.Body, new { htmlAttributes = new { @class = "form-control" } }) 30 @Html.ValidationMessageFor(model => model.Body, "", new { @class = "text-danger" }) 31 </div> 32 </div> 33 34 <div class="form-group"> 35 <div class="col-md-offset-2 col-md-10"> 36 <input type="submit" value="Create" class="btn btn-default" /> 37 </div> 38 </div> 39 </div> 40 } 41 42 <div> 43 @Html.ActionLink("Back to List", "Index") 44 </div> 45 46 @section Scripts { 47 @Scripts.Render("~/bundles/jqueryval") 48 }
In the HTML structure above we have three main inputs:
- A text input element, which holds the title of the post.
- A text input element, which holds the content of the post.
- A button element, which is used to submit the new entry.
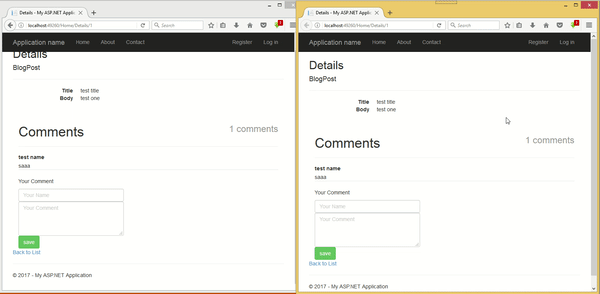
The details view and Vue.js bindings**
This is the final View file we will be needing. This file also handles binding to Pusher events and updating the comments in realtime using Pusher and Vue.
Let us create a new file called Details.cshtml in our Views\Home folder and add the following content into it:
1@model Real_Time_Commenting.Models.BlogPost 2 3 @{ 4 ViewBag.Title = "Details"; 5 } 6 7 <script src="https://cdnjs.cloudflare.com/ajax/libs/vue/2.3.4/vue.min.js"></script> 8 <script src="https://cdnjs.cloudflare.com/ajax/libs/axios/0.16.2/axios.min.js"></script> 9 <script src="//js.pusher.com/4.0/pusher.min.js"></script> 10 <style> 11 .user_name{ 12 font-size:14px; 13 font-weight: bold; 14 } 15 .comments-list .media{ 16 border-bottom: 1px dotted #ccc; 17 } 18 </style> 19 <h2>Details</h2> 20 <div id="app"> 21 <div> 22 <h4>BlogPost</h4> 23 <hr /> 24 <dl class="dl-horizontal"> 25 <dt> 26 @Html.DisplayNameFor(model => model.Title) 27 </dt> 28 29 <dd> 30 @Html.DisplayFor(model => model.Title) 31 </dd> 32 33 <dt> 34 @Html.DisplayNameFor(model => model.Body) 35 </dt> 36 37 <dd> 38 @Html.DisplayFor(model => model.Body) 39 </dd> 40 41 </dl> 42 </div> 43 <div class="container"> 44 <div class="row"> 45 <div class="col-md-8"> 46 <div class="page-header"> 47 <h1><small class="pull-right">{{comments.length}} comments</small> Comments </h1> 48 </div> 49 <div class="comments-list"> 50 <div class="media" v-for="com in comments"> 51 <div class="media-body"> 52 <h4 class="media-heading user_name">{{com.Name}}</h4> 53 {{com.Body}} 54 </div> 55 </div> 56 </div> 57 </div> 58 </div> 59 </div> 60 <div class="container"> 61 <br /> 62 <p>Your Comment</p> 63 <form onsubmit="return false;"> 64 <input type="text" id="Name" placeholder="Your Name" v-model="comment.Name" class="form-control" /> 65 <textarea rows="3" placeholder="Your Comment" id="Body" v-model="comment.Body" class="form-control"></textarea> 66 <button class="btn btn-success" v-on:click="submit_comment()">save</button> 67 </form> 68 </div> 69 </div> 70 <p> 71 72 @Html.ActionLink("Back to List", "Index") 73 </p>
In the above block of code, we have displayed the title and content of the current post, and the number of comments it has.
We have also created our comment form which comprises three main elements, which are:
- Text input for the name of the person making the comment.
- Textarea for the body of the comment.
- Button to save the new comment into the database.
Notice that we have used Vue’s v-for directive to iterate and display the comments which are available.
Also, note we have included some required libraries such as:
- axios JavaScript library
- Vue js JavaScript library
- Pusher JavaScript library
Pusher bindings and Vue.js snippet
Below is our example Vue snippet used to handle the comment submission and Pusher’s realtime updates.
1<script> 2 var pusher = new Pusher('XXX_APP_KEY', { 3 cluster: 'XXX_APP_CLUSTER' 4 }); 5 var my_channel = pusher.subscribe('asp_channel'); 6 var app = new Vue({ 7 el: '#app', 8 data: { 9 comments: [], 10 comment: { 11 Name: '', 12 Body: '', 13 BlogPostID: @Model.BlogPostID 14 } 15 }, 16 created: function() { 17 this.get_comments(); 18 this.listen(); 19 }, 20 methods: { 21 get_comments: function() { 22 axios.get('@Url.Action("Comments", "Home", new { id = @Model.BlogPostID }, protocol: Request.Url.Scheme)') 23 .then((response) => { 24 25 this.comments = response.data; 26 27 }); 28 29 }, 30 listen: function() { 31 my_channel.bind("asp_event", (data) => { 32 if (data.BlogPostID == this.comment.BlogPostID) { 33 this.comments.push(data); 34 } 35 36 }) 37 }, 38 submit_comment: function() { 39 axios.post('@Url.Action("Comment", "Home", new {}, protocol: Request.Url.Scheme)', this.comment) 40 .then((response) => { 41 this.comment.Name = ''; 42 this.comment.Body = ''; 43 alert("Comment Submitted"); 44 45 }); 46 } 47 } 48 }); 49 </script>
In the code block above, we have done two major activities, which are:
Uploading comment code
To process new comments from the client side to the server, the following steps were followed:
- We attached a Vue event listener
@clickto our submit button which fires a method calledsubmit_comment. - We defined a function called
submit_commentwhich usesaxiosto make a POST request to ourcommentfunction.
Subscribing for feed additions on server from other clients
After the comment has been sent to the server, a request is sent to Pusher to return an event with the new data we have broadcasted. To listen for these realtime events, we have:
- Initialized a Pusher object while passing our app key and cluster.
- Subscribed to our channel called
asp_channel. - In the listen method in our Vue code, we declared a binding to our event called
asp_event. In the callback function of this binding, we push the new data to our list of comments.
That’s it! Now, once a new comment is made, it also gets broadcast and we can listen using our channel to update the comments in realtime.
Conclusion
In this article, we have covered how to create a live commentary feature using .NET and Pusher, and creating a mini blog engine in .NET. You can download it for educational purposes. Have any reservations or comments, let us know your feedback in the comments.


© 2026 Pusher Ltd. All rights reserved.
Pusher Limited is a company registered in England and Wales (No. 07489873) whose registered office is at MessageBird UK Limited, 3 More London Riverside, 4th Floor, London, United Kingdom, SE1 2AQ.