- Products

- Developers
- User stories
- Blog
- Pricing

Create and publish a Laravel package on Packagist
Introduction
Introduction
A Laravel package is a set of reusable classes created to add extra functionality to a Laravel website. In clearer terms, a package is to Laravel, what plugins are to WordPress. The primary goal of Laravel packages is to reduce development time by making reusable features into a set of standalone classes that can be used within any Laravel project.
In this tutorial, we will build a contact form Laravel package and be publishing it on Packagist. Let's dive into it.
Perquisites
To follow this tutorial, you should have:
- Basic knowledge of Laravel v 5.5 upwards.
- Composer installed on your machine. If you don't have Composer installed on your system you can download it here.
Getting started
Since a package is created to add extra functionality to a Laravel website, the first thing we need to do is set up a Laravel website. We'll set it up using Composer.
For other methods of installation you can check the official Laravel documentation here.
$ composer create-project --prefer-dist laravel/laravel packagetestapp
When it's done you need to configure your env file and set your app key and other necessary details. In your terminal type:
$ cp .env.example .env
or manually copy the contents of .env.example and save it in a new file as .env. Then type:
$ php artisan key:generate
After generating your app key and configuring your database details, your .env should look this:
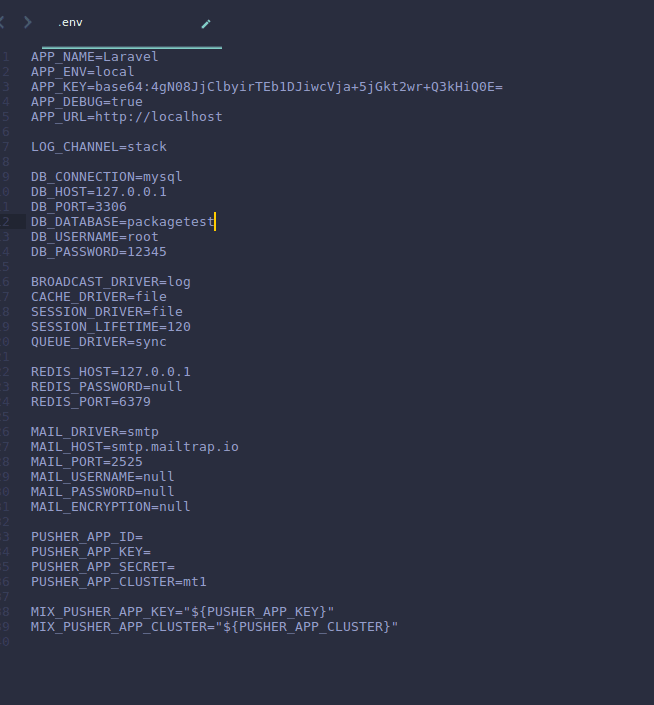
At this point, our basic Laravel app is set up and it's time to dive into developing our package.
Creating the bare bones of the package
We will install the bare bones of our package. There are primarily two ways of doing this either through the method of creating the individual files and folder or using a package like this CLI tool. We will manually create the files and folders so we can have a better understanding of how every piece fits together.
First, we need to create the folder structure for our package.
From your root directory create folders with this structure:
$ packages/MyVendor/MyPackage/
All our development will happen outside in our
packages/MyVendor/MyPackage/directory instead ofvendor/MyVendor/MyPackage/because it's not good practice to change the code in the vendor folder. When we are done publishing our package it will be downloadable to the vendor folder.
MyVendorstands for the vendor’s name, which can be your name or the name of your client or organization you are creating the package for.
MyPackagestands for the package name. In our case, it will becontactform
Now, let’s create the files and folders that will make up our package.
1MyVendor 2 └── contactform 3 └── src 4 ├── Database 5 │ └── migrations 6 ├── Http 7 │ └── controllers 8 ├── Models 9 ├── resources 10 │ └── views 11 └── routes
Now our folders are set up we need to initialize Composer, so our package can be downloaded into our vendor folder later. At the root of your package, open a terminal and run:
$ composer init
Since it's interactive, it will ask you a bunch of questions it will use to fill in your composer.json file. Follow composer instructions, if you don’t know how to answer, press enter to use the default answer or you can change it later directly from the generated composer.json.
Now your composer.json should look like this:
Please note that you can subtitute
MyVendorin the code below with your own vendor name. However, be sure to change the vendor name everywhere it is called.
1{ 2 "name": "MyVendor/Contactform", 3 "description": "A contact form package for laravel", 4 "authors": [{ 5 "name": "samuel ogundipe", 6 "email": "email@email.com" 7 }], 8 "require": {} 9 }
In our composer.json we need to tell it to autoload our files, add this code to your composer.json:
1"autoload": { 2 "psr-4": { 3 "MyVendor\\contactform\\": "src/" 4 } 5 }
At this point, our composer.json file should look like this:
1{ 2 "name": "MyVendor/Contactform", 3 "description": "A contact form package for laravel", 4 "authors": [{ 5 "name": "samuel ogundipe", 6 "email": "email@email.com" 7 }], 8 "require": {}, 9 "autoload": { 10 "psr-4": { 11 "MyVendor\\Contactform\\": "src/" 12 } 13 } 14 }
Once that is done, create an empty git repository to keep track of changes (we'll be adding the remote repo later). In your terminal type;
$ git init
Flesh out our package
Let’s add files to our package. First, we need to define a service provider for our package. A service provider is what Laravel uses to determine the files that will be loaded and accessed by your package.
In your src/ folder create a file called ContactFormServiceProvider.php. like this:
$ src/ContactFormServiceProvider.php
Inside our service provider we need to define a few things:
- The namespace (which we defined in our
composer.json autoload). - The extension (the
Laravelclass which our service provider extends) - The two compulsory methods every service provider must have (every
Laravelpackage service provider must have at least two methods:boot()andregister()).
Inside your service provider class add the following lines of code:
Please note that you can substitute
MyVendorin the code below with your own vendor name. However, be sure to change the vendor name everywhere it is called.
1<?php 2 // MyVendor\contactform\src\ContactFormServiceProvider.php 3 namespace MyVendor\contactform; 4 use Illuminate\Support\ServiceProvider; 5 class ContactFormServiceProvider extends ServiceProvider { 6 public function boot() 7 { 8 } 9 public function register() 10 { 11 } 12 } 13 ?>
Since we haven't deployed our package and it's not yet inside our vendor folder we need to tell Laravel how to load our package and use it's functions, so inside the root of your Laravel app in the composer.json add this code:
Please note that you can substitute
MyVendorin the code below with your own vendor name. However, be sure to change the vendor name everywhere it is called.
1"autoload": { 2 "classmap": [ 3 "database/seeds", 4 "database/factories" 5 ], 6 "psr-4": { 7 "MyVendor\\Contactform\\": "packages/MyVendor/contactform/src", 8 "App\\": "app/" 9 } 10 }, 11 "autoload-dev": { 12 "psr-4": { 13 "MyVendor\\Contactform\\": "packages/MyVendor/contactform/src", 14 "Tests\\": "tests/" 15 } 16 },
Depending on your Laravel version Laravel may automatically add it for you. Be sure to skip if it does.
After that on your terminal in the root of your app run:
$ composer dump-autoload
Now lets test and see if our package is being loaded correctly. Inside the boot method of your ContactFormServiceProvider.php, let’s add a route and load it:
1// MyVendor\contactform\src\ContactFormServiceProvider.php 2 $this->loadRoutesFrom(__DIR__.'/routes/web.php');
Please note that:
__DIR__refers to the current directory where the file is.routes/web.phprefers to the routes folder we are to create for our package, which will live in oursrcfolder, not the defaultLaravelroutes.
In our package routes folder add the web.php file and add the following code to it:
1<?php 2 // MyVendor\contactform\src\routes\web.php 3 Route::get('contact', function(){ 4 return 'Hello from the contact form package'; 5 }); 6 ?>
Next, we need to add our new service provider in our root config/app.php inside the providers array:
1// config/app.php 2 'providers' => [ 3 ..., 4 App\Providers\RouteServiceProvider::class, 5 // Our new package class 6 MyVendor\Contactform\ContactFormServiceProvider::class, 7 ],
Now start your Laravel app using:
php artisan serve
On your browser navigate to localhost:8000/contact and you should see this:

Now we know our package is loading properly we need to create our contact form. To do this we need to create a view and tell Laravel how to load that view. In your boot() method type in the following;
1// MyVendor\contactform\src\ContactFormServiceProvider.php 2 $this->loadViewsFrom(__DIR__.'/resources/views', 'contactform');
resources/viewsrefers to the resources folder we created for our package not the default Laravel resources folder.- To distinguish between the default Laravel views and package views, we have to add an extra parameter to our
loadviewsfrom()function and that extra parameter should be the name of your package. In our case, it'scontactform. So now whenever we want to load a view we reference it with thispackagename::viewsyntax convention.
Adding the HTML structure
Now let’s create our contact form and adding the functionality. In your resources/views folder create a file called contact.blade.php then add the following lines of code to it:
1<!-- MyVendor\contactform\src\resources\views\contact.blade.php --> 2 <!DOCTYPE html> 3 <html lang="en"> 4 <head> 5 <meta charset="UTF-8"> 6 <meta name="viewport" content="width=device-width, initial-scale=1.0"> 7 <link rel="stylesheet" href="https://maxcdn.bootstrapcdn.com/bootstrap/4.0.0/css/bootstrap.min.css" integrity="sha384-Gn5384xqQ1aoWXA+058RXPxPg6fy4IWvTNh0E263XmFcJlSAwiGgFAW/dAiS6JXm" crossorigin="anonymous"> 8 <script src="https://maxcdn.bootstrapcdn.com/bootstrap/4.0.0/js/bootstrap.min.js" integrity="sha384-JZR6Spejh4U02d8jOt6vLEHfe/JQGiRRSQQxSfFWpi1MquVdAyjUar5+76PVCmYl" crossorigin="anonymous"></script> 9 <title>Contact Us</title> 10 </head> 11 <body> 12 13 <div style="width: 500px; margin: 0 auto; margin-top: 90px;"> 14 @if(session('status')) 15 <div class="alert alert-success"> 16 {{ session('status') }} 17 </div> 18 @endif 19 20 <h3>Contact Us</h3> 21 22 <form action="{{route('contact')}}" method="POST"> 23 @csrf 24 <div class="form-group"> 25 <label for="exampleFormControlInput1">Your name</label> 26 <input type="text" class="form-control" name="name" id="exampleFormControlInput" placeholder="John Doe"> 27 </div> 28 <div class="form-group"> 29 <label for="exampleFormControlInput1">Email address</label> 30 <input type="email" class="form-control" name="email" id="exampleFormControlInput1" placeholder="name@example.com"> 31 </div> 32 33 <div class="form-group"> 34 <label for="exampleFormControlTextarea1">Enter Your Message</label> 35 <textarea class="form-control"name="message" id="exampleFormControlTextarea1" rows="3"></textarea> 36 </div> 37 38 <button type="submit" class="btn btn-primary">Submit</button> 39 </form> 40 </div> 41 </body> 42 </html>
In our form action we defined a contact route and gave the form a post method, we need to define it in our routes file else it will throw an error so in our routes/web.php and replace with:
1// MyVendor\contactform\src\routes\web.php 2 Route::get('contact', function(){ 3 return view('contactform::contact'); 4 }); 5 6 Route::post('contact', function(){ 7 // logic goes here 8 })->name('contact');
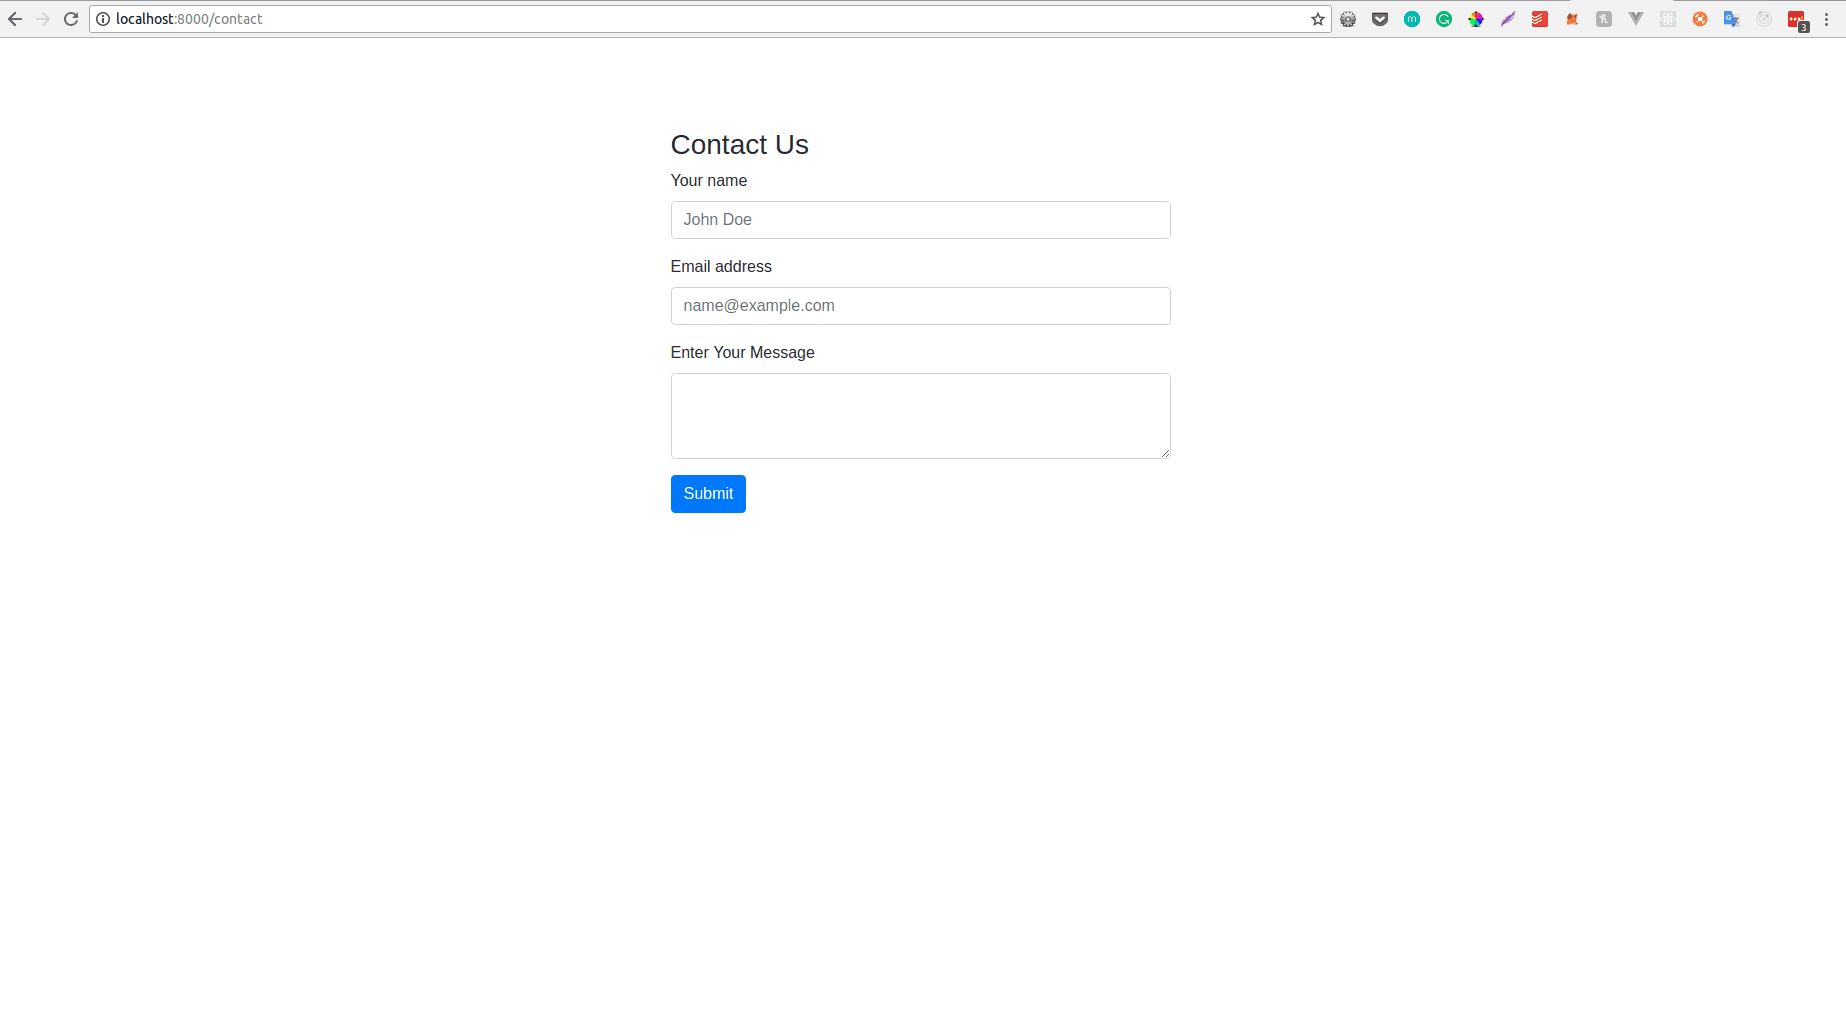
Now we can visit localhost:8000/contact and we'd see:
Now our routes/web.php is containing code that should be in a controller, so we need to take our logic and place them into our controller files. First, we need to create the file in a new Http/controllers/ folder. Create a file called ContactFormController.php.
Inside the ContactFormController.php we will create two methods. One to show the page and the other one to send the mail inside the file add the following code:
1<?php 2 // MyVendor\Contactform\src\Http\Controllers\ContactFormController.php 3 namespace MyVendor\Contactform\Http\Controllers; 4 use App\Http\Controllers\Controller; 5 use Illuminate\Http\Request; 6 use MyVendor\Contactform\Models\ContactForm; 7 8 class ContactFormController extends Controller { 9 10 public function index() 11 { 12 return view('contactform::contact'); 13 } 14 15 public function sendMail(Request $request) 16 { 17 ContactForm::create($request->all()); 18 19 return redirect(route('contact')); 20 } 21 22 23 }
Now change the code in your routes/web.php file to:
1<?php 2 // MyVendor\contactform\src\routes\web.php 3 Route::group(['namespace' => 'MyVendor\Contactform\Http\Controllers', 'middleware' => ['web']], function(){ 4 Route::get('contact', 'ContactFormController@index'); 5 Route::post('contact', 'ContactFormController@sendMail')->name('contact'); 6 });
If you try loading the route without the namespace Laravel will throw an error because by default it looks in the base folder's directory. So the namespace is added to tell it exactly where to load from.
Now let's create a model that will help us relate with the database and some migrations alongside.
Inside the Models folder, create a file named ContactForm.php and add the following code to it.
1<?php 2 // MyVendor\Contactform\src\Models\ContactForm.php 3 namespace MyVendor\Contactform\Models; 4 use Illuminate\Database\Eloquent\Model; 5 class ContactForm extends Model 6 { 7 protected $guarded = []; 8 protected $table = 'contact'; 9 }
Now let’s create our migration so we can save the users details.
First, create the folder path Database/migrations in your package’s src folder.
Inside your terminal from the base directory of your app run this command:
Please note that you can substitute
MyVendorin the code below with your own vendor name. However, be sure to change the vendor name everywhere it is called.
php artisan make:migration create_contact_table --path=packages/MyVendor/contactform/src/Database/migrations
Under your migrations folder you should now see the migration, add the following lines of code to it:
1<?php 2 // // MyVendor\Contactform\src\Database\migrations\*_create_contact_table.php 3 use Illuminate\Support\Facades\Schema; 4 use Illuminate\Database\Schema\Blueprint; 5 use Illuminate\Database\Migrations\Migration; 6 7 class CreateContactTable extends Migration 8 { 9 /** 10 * Run the migrations. 11 * 12 * @return void 13 */ 14 public function up() 15 { 16 Schema::create('contact', function (Blueprint $table) { 17 $table->increments('id'); 18 $table->string('name'); 19 $table->string('email'); 20 $table->text('message'); 21 $table->timestamps(); 22 }); 23 } 24 25 /** 26 * Reverse the migrations. 27 * 28 * @return void 29 */ 30 public function down() 31 { 32 Schema::dropIfExists('contact'); 33 } 34 }
Now we need to run our migration. By default Laravel loads migrations from the base directory so we have to load in the migrations from the package so Laravel can load it too, in your serviceprovider class add this code:
1// MyVendor\contactform\src\ContactFormServiceProvider.php 2 $this->loadMigrationsFrom(__DIR__.'/Database/migrations');
now you can run
php artisan migrate
and it will populate your database.
Saving the mail to the database
Now let’s send the mail and save it in the database. In your controller, the sendMail method already looks like this:
1// MyVendor\Contactform\src\Http\Controllers\ContactFormController.php 2 public function sendMail(Request $request) 3 { 4 ContactForm::create($request->all()); 5 return redirect(route('contact')); 6 }
Now go to your /contact view on your browser and send a mail, it will be inserted into your database.
Adding a flash message on success
While we are sure that our contact form saves successfully, it will be a nice gesture to show a little message to our users telling them their mail has been sent successfully.
In our sendMail method, let us replace the return statement with this:
return redirect(route('contact'))->with(['message' => 'Thank you, your mail has been sent successfully.']);
Next, in our view file, before the form declaration, let us print the message when we have one:
1<!-- MyVendor\contactform\src\resources\views\contact.blade.php --> 2 @if(Session::has('message')) 3 {{Session::get("message")}} 4 @endif
Now we have been able to successfully save the data let's upload it to Packagist.
Making the package available on Packagist
To make our package available on composer we need to upload it to Packagist. Before that, we need to update our remote repository. Head over to GitHub and create a new repository. Once done copy the clone link. In your terminal of your package folder enter:
git remote add origin [repository link]
After that, add everything to tracking and commit your code:
1# add everything 2 git add . 3 # commit to git 4 git commit -m "commit message here"
Finally, push to your remote repo by typing;
git push origin master
Now go to Packagist and sign up. Click Submit. Copy the URL of your repository and submit it.
Now it is done, we need to tell Packgist to watch our repository for changes and always serve the latest version.
Goto: https://packagist.org/profile/ and get your API Token.
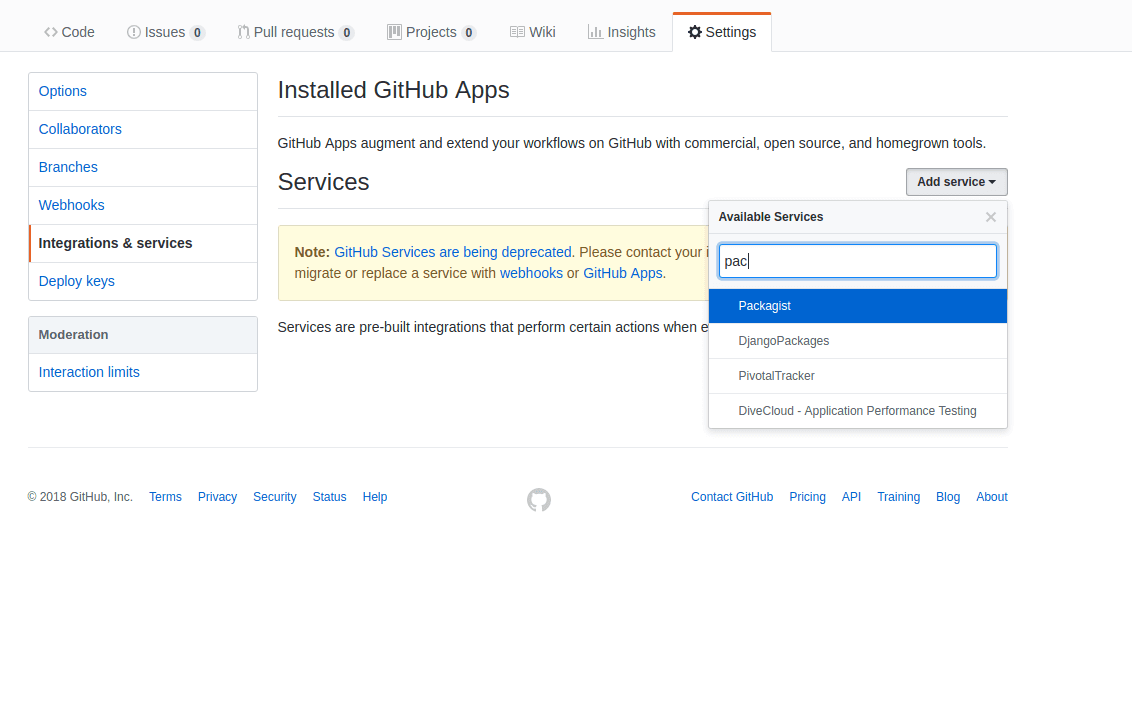
Now on your GitHub repository goto the settings tab. Under integration and services, click add a service and search for packagist.
Fill out the form with your name and token, skip URL and add the service.
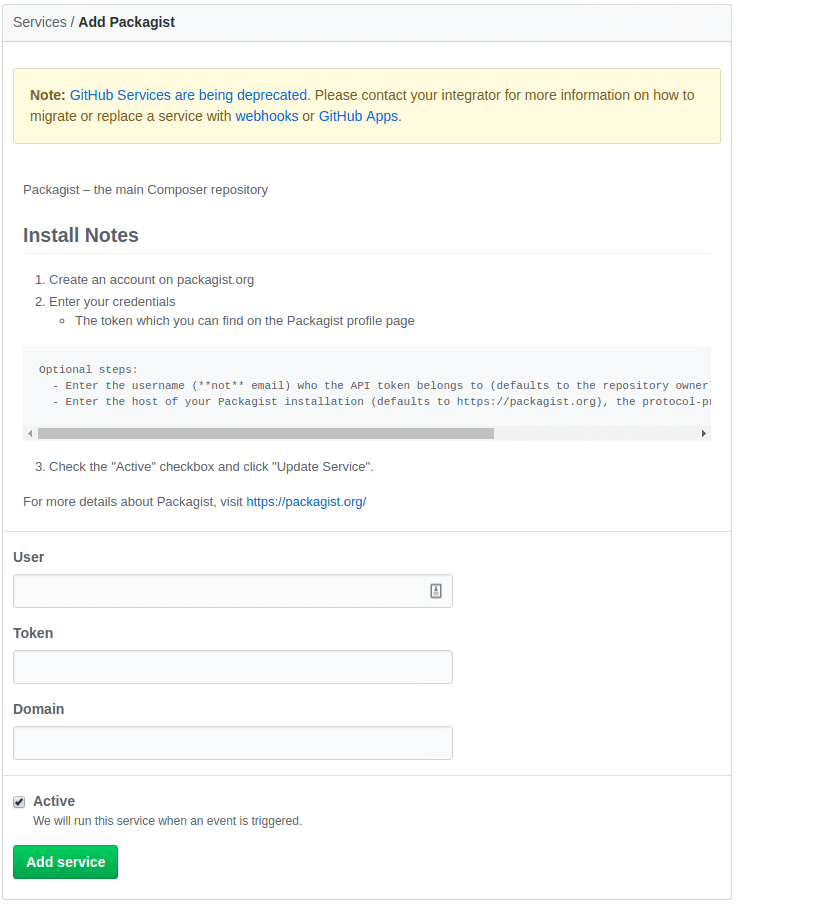
Once that is done, click on test service and that's it! Your package is now live.

Conclusion
In this tutorial, we’ve learnt how to create a Laravel package and publish it on Packagist. There are a lot more awesome things that can be built with this new knowledge.
The code base to this tutorial is available in this GitHub repository. Hack on!


© 2026 Pusher Ltd. All rights reserved.
Pusher Limited is a company registered in England and Wales (No. 07489873) whose registered office is at MessageBird UK Limited, 3 More London Riverside, 4th Floor, London, United Kingdom, SE1 2AQ.