- Products

- Developers
- User stories
- Blog
- Pricing

Implement online presence in a Laravel application
Introduction
When using certain applications, it is usually expected that the current user is able to see all other users currently using the service alongside them. For instance, Dropbox Paper shows all the users that are currently viewing a document. This is very useful and it helps stop users feeling like they are alone on your application.
In this tutorial, we are going to see how you can add online presence reporting to a Laravel application. To showcase this, we will be building an application where users can log in and leave quick updates on anything they want. Each online user will be able to see the list of logged in users.
Here is the finished application in action:
Prerequisites
Before we get started, you need to have the following prerequisites:
- Laravel CLI installed on your machine. Installation guide.
- Node.js installed on your machine. Download the latest stable version here.
- SQLite (v3.x or later) installed on your machine.
- A Pusher account. Create one here.
- Basic PHP/Laravel knowledge.
- Basic CLI knowledge.
If you have the listed requirements, we can continue.
Setting up your Laravel project
The first thing we want to do is create a new Laravel project. To create a new Laravel project, run the following command in your terminal:
$ laravel new updaytes # where "updaytes" is the name of the project
This will create a new Laravel project that we can start working with. When the installation is complete, we will start installing the JavaScript dependencies using NPM.
Installing JavaScript dependencies
Open the package.json file that comes with your Laravel installation and replace the contents with the following code:
1{ 2 "private": true, 3 "scripts": { 4 "dev": "npm run development", 5 "development": "cross-env NODE_ENV=development node_modules/webpack/bin/webpack.js --progress --hide-modules --config=node_modules/laravel-mix/setup/webpack.config.js", 6 "watch": "npm run development -- --watch", 7 "watch-poll": "npm run watch -- --watch-poll", 8 "hot": "cross-env NODE_ENV=development node_modules/webpack-dev-server/bin/webpack-dev-server.js --inline --hot --config=node_modules/laravel-mix/setup/webpack.config.js", 9 "prod": "npm run production", 10 "production": "cross-env NODE_ENV=production node_modules/webpack/bin/webpack.js --no-progress --hide-modules --config=node_modules/laravel-mix/setup/webpack.config.js" 11 }, 12 "devDependencies": { 13 "axios": "^0.18.0", 14 "bootstrap": "^4.0.0", 15 "cross-env": "^5.1", 16 "jquery": "^3.2", 17 "laravel-mix": "^2.0", 18 "lodash": "^4.17.5", 19 "popper.js": "^1.12", 20 "vue": "^2.5.7" 21 }, 22 "dependencies": { 23 "laravel-echo": "^1.4.0", 24 "pusher-js": "^4.3.1" 25 } 26 }
In your terminal, cd to the root of your project and run the following command to install the JavaScript dependencies:
$ npm install
After installation is complete, open the webpack.mix.js file and replace the contents with the following:
1const mix = require('laravel-mix'); 2 3 mix.js('resources/js/app.js', 'public/js') 4 .sass('resources/sass/signin.scss', 'public/css') 5 .sass('resources/sass/app.scss', 'public/css') 6 .sass('resources/sass/updates.scss', 'public/css');
Above, we have added two new Sass files, signin.scss and updates.scss. In these files, we will be adding specific CSS for the sign in page and the updates page. Create these files in the resources/sass directory and leave them empty.
Next, run the command below to build the assets:
$ npm run watch
The
watchscript keeps the command line occupied. It automatically watches for changes to your assets and builds automatically when it detects changes. This is better than running thebuildscript every time you make changes.
Setting up the database
For this tutorial, we will be using an SQLite database. It is easy to set up and is a good database engine for small projects. If you are building bigger projects though, you should use MySQL.
Create a new file named database.sqlite in the database directory and leave it empty. Next, open the .env file in the root of your project and replace the following keys:
1DB_CONNECTION=mysql 2 DB_HOST=127.0.0.1 3 DB_PORT=3306 4 DB_DATABASE=homestead 5 DB_USERNAME=homestead 6 DB_PASSWORD=secret
With
1DB_CONNECTION=sqlite 2 DB_DATABASE=/full/path/to/database.sqlite
Next, let’s add some classes that will help us manage our database and also seed the table with sample data. In your terminal, run the following command:
$ php artisan make:model Update -mc
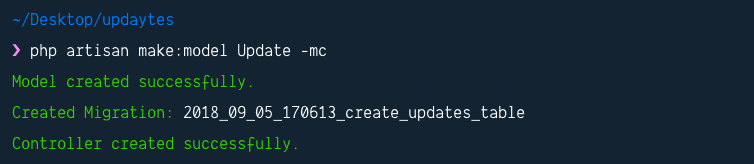
As seen from the screenshot, this command generates a model, migration, and a controller. Before we start updating any of those, let’s also generate a model factory. Run the command below to generate a model factory:
$ php artisan make:factory UpdateFactory
Finally, let’s generate a database seeder. Seeders are used to add dummy data to the database and should not be used in production. Run the command below to generate a database seeder:
$ php artisan make:seed UsersTableSeeder
Now, let’s start updating the classes generated by the commands above. First, we will start with the migrations. Open the *_create_users_table.php migration in the database/migrations directory and replace the up method with the following:
1// File: database/migrations/*_create_users_table.php 2 // [...] 3 4 public function up() 5 { 6 Schema::create('users', function (Blueprint $table) { 7 $table->increments('id'); 8 $table->string('name'); 9 $table->string('email')->unique(); 10 $table->timestamp('email_verified_at')->nullable(); 11 $table->string('password'); 12 $table->string('avatar')->nullable(); 13 $table->rememberToken(); 14 $table->timestamps(); 15 }); 16 } 17 18 // [...]
The actual change we have from the previous code is the introduction of the avatar field. We will use this field to store URL to the avatar of the user.
Next, open the *_create_updates_table.php file in the database/migrations directory and replace the up method with the following:
1// File: database/migrations/*_create_updates_table.php 2 // [...] 3 4 public function up() 5 { 6 Schema::create('updates', function (Blueprint $table) { 7 $table->increments('id'); 8 $table->unsignedInteger('user_id'); 9 $table->string('text', 280); 10 $table->timestamps(); 11 }); 12 } 13 14 // [...]
Above, we have the migration for the updates table. It has the user_id field which it’ll store the user ID of the user that made the update, and the text field that stores the update made.
Now that we have defined the table structure using our migration files, let’s update the model for our tables.
Open the User.php file in the app directory and replace the class definition with the following code:
1// File: ./app/User.php 2 // [...] 3 4 class User extends Authenticatable 5 { 6 use Notifiable; 7 8 /** 9 * The attributes that are mass assignable. 10 * 11 * @var array 12 */ 13 protected $fillable = [ 14 'name', 'email', 'password', 'avatar', 15 ]; 16 17 /** 18 * The attributes that should be hidden for arrays. 19 * 20 * @var array 21 */ 22 protected $hidden = [ 23 'password', 'remember_token', 24 ]; 25 26 /** 27 * Update model relationship 28 * 29 * @return \Illuminate\Database\Eloquent\Relations\HasMany 30 */ 31 public function updates() 32 { 33 return $this->hasMany(Update::class); 34 } 35 }
The changes above are:
- We added the
avatarfield to thefillablearray. - We added the
updatesmethod, which is for the relationship between theUserand theUpdate. In this case, a user can have many updates, but an update can only belong to a user.
Next, open the Update.php file in the app directory and replace the class definition with the following:
1// File: ./app/Update.php 2 // [...] 3 4 class Update extends Model 5 { 6 /** 7 * The attributes that are mass assignable. 8 * 9 * @var array 10 */ 11 protected $fillable = [ 12 'user_id', 'text' 13 ]; 14 15 /** 16 * User model relationship 17 * 18 * @return \Illuminate\Database\Eloquent\Relations\BelongsTo 19 */ 20 public function user() 21 { 22 return $this->belongsTo(User::class); 23 } 24 }
Above, we have a typical Laravel model. The user method is the relationship link from the Update model to the User model.
Now that we have the models, let’s update the model factories. Open the UserFactory.php file in the database/factories directory and replace it with the following code:
1// File: ./database/factories/UserFactory.php 2 <?php 3 4 use Faker\Generator as Faker; 5 6 $factory->define(App\User::class, function (Faker $faker) { 7 $number = rand(10, 46); 8 $gender = rand(0, 1) ? 'men' : 'women'; 9 10 return [ 11 'name' => $faker->name, 12 'email' => $faker->unique()->safeEmail, 13 'password' => '$2y$10$TKh8H1.PfQx37YgCzwiKb.KjNyWgaHb9cbcoQgdIVFlYg7B77UdFm', // secret 14 'avatar' => "https://randomuser.me/api/portraits/${gender}/{$number}.jpg", 15 'remember_token' => str_random(10), 16 ]; 17 });
Above, we have a model factory. When the factory is called to generate a user, the callback above is called and it returns a unique array of fields to be used when creating the sample user. The factory uses the Faker library for this. For the avatar, we are using a photo from the randomuser.me website.
Next, open the UpdateFactory.php file in the database/factories directory and replace the contents with the following code:
1// File: ./database/factories/UpdateFactory.php 2 <?php 3 4 use Faker\Generator as Faker; 5 6 $factory->define(App\Update::class, function (Faker $faker) { 7 return [ 8 'text' => $faker->sentence() 9 ]; 10 });
The factory essentially does the same as the previous factory, only for the Update model.
Next, open the UsersTableSeeder.php file in the database/seeds directory and replace the run method with the following:
1// File: ./database/seeds/UsersTableSeeder.php 2 // [...] 3 4 public function run() 5 { 6 factory(App\User::class, 10)->create()->each(function ($user) { 7 $user->updates()->save(factory(App\Update::class)->make()); 8 }); 9 } 10 11 // [...]
Above, we have added the logic for the seeder. It will generate ten users using the UserFactory, and for each of the users, it will generate an update using the UpdateFactory. So basically, when the seeder is run, we will have ten dummy users with ten dummy posts.
Open the DatabaseSeeder.php file in the database/seeds directory and uncomment the line below:
$this->call(UsersTableSeeder::class);
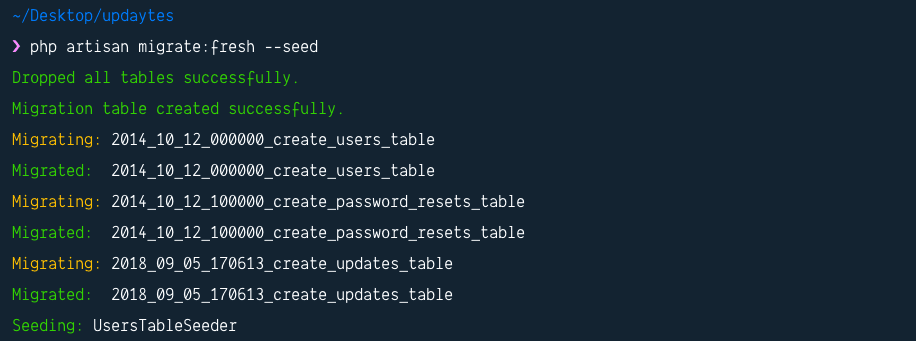
With this, we are ready to run our migration and seed the database with sample data. Run the command below to do this:
$ php artisan migrate:fresh --seed
You can always run the command above to clear changes to the database. It will delete all the tables and run the migration and seed command from scratch.
Building our application
Now we are done with the database set up. Let’s start building the application.
Creating the login page
First, let’s add a login page. We will be using the / route as the login page and we will not need the artisan make:auth command that comes default with Laravel.
First, open the web.php file in the routes directory and replace the contents with the following code:
1// File: ./routes/web.php 2 <?php 3 4 Route::post('logout', 'Auth\LoginController@logout')->name('logout'); 5 Route::post('/', 'Auth\LoginController@login'); 6 Route::view('/', 'signin')->middleware('guest')->name('login');
Above, we have defined three routes:
GET /logout- this will log a user out of the application. It uses theLoginControllerthat comes default with Laravel. We don’t need to do anything more.POST /- this will handle logging in. It also uses theLoginControllerand we do not need to do anything but send aPOSTrequest to it with theemailandpasswordfield.GET /- this will display the login page. It uses aguestmiddleware that comes with Laravel by default. This will redirect all logged in users away from the page to the dashboard.
Next, let’s create the signin page. In the resources/views directory, create a new file named signin.blade.php and paste the following code:
1<!-- File: ./resources/views/signin.blade.php --> 2 <!doctype html> 3 <html lang="en"> 4 5 <head> 6 <meta charset="utf-8"> 7 <meta name="viewport" content="width=device-width, initial-scale=1"> 8 <title>Updaytes | Sign in</title> 9 <meta content="{{ csrf_token() }}" name="csrf-token"> 10 <link href="{{ asset('css/app.css') }}" rel="stylesheet"> 11 <link rel="stylesheet" href="{{ asset('css/signin.css') }}"> 12 </head> 13 14 <body class="text-center"> 15 <form class="form-signin" method="POST" action="{{ route('login') }}"> 16 @csrf 17 <h3 class="h3 mb-3 font-weight-normal">Please sign in</h3> 18 <label for="inputEmail" class="sr-only">Email address</label> 19 <input type="email" name="email" class="form-control" placeholder="Email address" value="{{ old('email') }}" required> 20 <label for="inputPassword" class="sr-only">Password</label> 21 <input type="password" name="password" id="inputPassword" class="form-control" placeholder="Password" required> 22 <button class="btn btn-lg btn-primary btn-block signin-btn" type="submit"> 23 Sign in 24 </button> 25 </form> 26 </body> 27 28 </html>
Above, we have the HTML for the sign in page. In the head it is referencing the signin.css file, which at this point is empty. So let’s add the style for this page.
Open the resources/sass/signin.scss file and paste the following code:
1// File: ./resources/sass/signin.scss 2 html, body { 3 height: 100%; 4 } 5 body { 6 display: -ms-flexbox; 7 display: flex; 8 -ms-flex-align: center; 9 align-items: center; 10 padding-top: 40px; 11 padding-bottom: 40px; 12 background-color: #f5f5f5; 13 } 14 .form-signin { 15 width: 100%; 16 max-width: 330px; 17 padding: 15px; 18 margin: auto; 19 } 20 .form-signin .checkbox { 21 font-weight: 400; 22 } 23 .form-signin .form-control { 24 position: relative; 25 box-sizing: border-box; 26 height: auto; 27 padding: 10px; 28 font-size: 16px; 29 } 30 .form-signin .form-control:focus { 31 z-index: 2; 32 } 33 .form-signin input[type='email'] { 34 margin-bottom: -1px; 35 border-bottom-right-radius: 0; 36 border-bottom-left-radius: 0; 37 } 38 .form-signin input[type='password'] { 39 border-radius: 0; 40 } 41 .form-signin .signin-btn { 42 font-weight: bold; 43 font-size: 15px; 44 border-top-left-radius: 0; 45 border-top-right-radius: 0; 46 }
Above, we have the style for the sign in page. Because we have the npm run watch command still running, the Sass file will be automatically compiled.
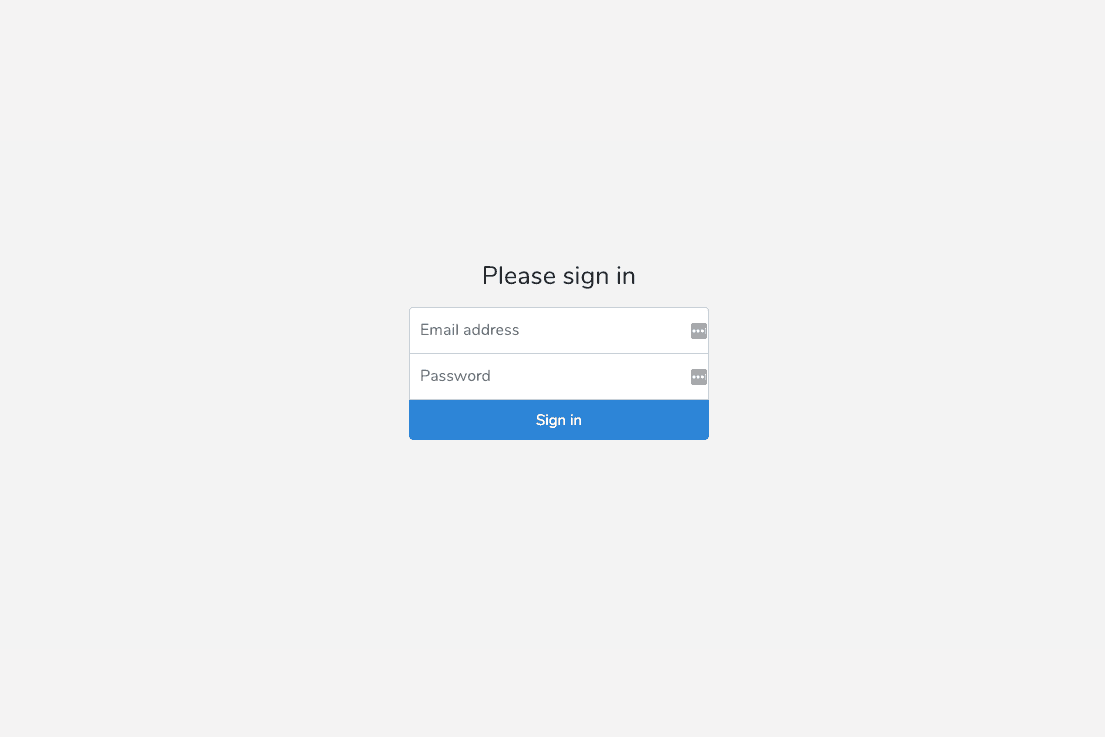
Run the command below in a terminal window to start the Artisan server:
$ php artisan serve
In your browser, visit the URL http://localhost:8000/ and you should see the login screen. Great.
Now quit the serve command by pressing ctrl + c on your keyboard. Let’s create the updates page.
Creating the updates page
Before we start creating the pages for the updates view, let’s add some routes. Open the web.php file in the routes directory and add the following code:
1// [...] 2 3 Route::get('home', 'UpdateController@index')->name('home'); 4 Route::get('/updates', 'UpdateController@list'); 5 Route::post('/updates', 'UpdateController@create'); 6 Route::get('/updates/suggestions', 'UpdateController@userSuggestions'); 7 8 // [...]
Above, we have four routes:
GET /home- this will be the page where all the updates will be displayed.GET /updates- this will be an API endpoint that we will load from the/homeroute. It will return a JSON response of all the updates.POST /updates- this will be an API endpoint that we will use to add new updates. It will return a JSON response of the new update.GET /updates/suggestions- this will be an API endpoint that will return a JSON response of random users. Not really important, it’s just for aesthetics.
Now that we have the routes, let’s update the UpdateController. Open the UpdateController.php file in the app/Http/Controllers directory and replace the contents with the following:
1<?php 2 namespace App\Http\Controllers; 3 4 use App\User; 5 use App\Update; 6 use Illuminate\Http\Request; 7 use App\Events\UpdateCreated; 8 9 class UpdateController extends Controller 10 { 11 public function __construct() 12 { 13 $this->middleware('auth'); 14 } 15 16 public function index() 17 { 18 return view('updates'); 19 } 20 21 public function create(Request $request) 22 { 23 $data = $request->validate(['text' => 'required|min:1|max:280|string']); 24 25 $update = auth()->user()->updates()->save(new Update($data))->load('user'); 26 27 broadcast(new UpdateCreated($update))->toOthers(); 28 29 return response()->json($update); 30 } 31 32 public function list() 33 { 34 return response()->json(Update::latest()->with('user')->limit(15)->get()); 35 } 36 37 public function userSuggestions() 38 { 39 $user = auth()->user(); 40 41 return response()->json( 42 User::where('id', '!=', $user->id)->inRandomOrder()->limit(5)->get() 43 ); 44 } 45 }
Above, we have a few methods defined:
__construct- in here we add theauthmiddleware so that only authenticated users can visit any of the pages in this controller.index- the updates page.create- creates a new update, sends a broadcast to Pusher, and returns a JSON response.list- returns a JSON response with the latest updates.userSuggestions- returns a JSON response with random users.
To create the event we are broadcasting in the create method, run the following command below:
$ php artisan make:event UpdateCreated
For now, we will leave the generated class and move on.
Let’s add the HTML and style for the updates page. Create a new updates.blade.php file in the resources/views directory and paste the following:
1<!-- File: ./resources/views/updates.blade.php --> 2 <!doctype html> 3 <html lang="en"> 4 5 <head> 6 <meta charset="utf-8"> 7 <meta name="viewport" content="width=device-width, initial-scale=1"> 8 <title>Updytes | Home</title> 9 <meta content="{{ csrf_token() }}" name="csrf-token"> 10 <link href="{{ asset('css/app.css') }}" rel="stylesheet"> 11 <link href="{{ asset('css/updates.css') }}" rel="stylesheet"> 12 </head> 13 14 <body class="bg-light updates"> 15 <nav class="navbar navbar-expand-lg navbar-dark bg-dark"> 16 <a class="navbar-brand mr-auto mr-lg-0" href="#">UPDAYTES</a> 17 <div class="navbar-collapse offcanvas-collapse" id="navbarsExampleDefault"> 18 <ul class="navbar-nav mr-auto"> 19 <li class="nav-item"> 20 <a class="nav-link" href="{{ route('logout') }}" onclick="event.preventDefault(); 21 document.getElementById('logout-form').submit();"> 22 {{ __('Logout') }} 23 </a> 24 <form id="logout-form" action="{{ route('logout') }}" method="POST" style="display: none;"> 25 @csrf 26 </form> 27 </li> 28 </ul> 29 <form class="form-inline my-2 my-lg-0"> 30 <input class="form-control mr-sm-2" type="text" placeholder="Search" aria-label="Search"> 31 <button class="btn btn-outline-success my-2 my-sm-0" type="submit">Search</button> 32 </form> 33 </div> 34 </nav> 35 36 <div id="app"> 37 <div class="nav-scroller bg-white shadow-sm clearfix"> 38 <OnlineList :me='@json(auth()->user()->toArray())'></OnlineList> 39 </div> 40 41 <main role="main" class="container"> 42 <div class="d-flex align-items-center p-3 my-3 text-white-50 bg-purple rounded shadow-sm"> 43 <div class="lh-100"> 44 <h6 class="mb-0 text-white lh-100">Bootstrap Forum</h6> 45 <small>Updates on the development of the community</small> 46 </div> 47 </div> 48 <Updates></Updates> 49 <Suggestions></Suggestions> 50 </main> 51 </div> 52 53 <script src="{{ asset('js/app.js') }}"></script> 54 </body> 55 </html>
Above, we have the HTML for the updates page. There are a few things to note in the markup above:
- It references the
updates.cssstyle, which we have not yet created. - It has three Vue components referenced,
OnlineList,Updates, andSuggestions, which we have not created. - It includes the
js/app.jsfile which will contain our bundled JavaScript.
Let’s add some styling to the page. Open the updates.scss file in the resources/sass directory and paste the following:
1// File: ./resources/sass/updates.scss 2 .updates { 3 .bg-purple { 4 background-color: #6f42c1; 5 } 6 .size-32 { 7 width: 32px; 8 height: 32px; 9 } 10 .nav-scroller .nav-link { 11 line-height: 32px; 12 display: inline-block; 13 margin-right: -9px; 14 float: right; 15 } 16 .squished { 17 padding-left: 0; 18 padding-right: 0; 19 &:first-child, 20 &:last-child { 21 margin-right: 15px; 22 } 23 } 24 .avatar { 25 border-radius: 50%; 26 text-indent: 1000px; 27 border-radius: 50%; 28 height: 34px; 29 line-height: 34px; 30 width: 34px; 31 border: 2px solid #fff; 32 } 33 }
Above, we have the style for the updates page. Because we have the npm run watch command still running, the Sass file will be automatically compiled.
Next, let’s create the Vue components referenced in the updates page. Create the following files in the resources/js/components directory:
Updates.vueSuggestions.vueOnlineList.vue
Next, open the resources/js/app.js file and replace the contents with the following:
1require('./bootstrap'); 2 require('axios'); 3 4 window.Vue = require('vue'); 5 6 Vue.component('updates', require('./components/Updates.vue')); 7 Vue.component('onlinelist', require('./components/OnlineList.vue')); 8 Vue.component('suggestions', require('./components/Suggestions.vue')); 9 10 const app = new Vue({ 11 el: '#app' 12 });
Above, we imported Axios, which we will use for HTTP requests, we also registered the Vue components we created earlier.
Let’s update the contents of the Vue components. Open the Updates.vue file and paste the following code into it:
1<!-- File: ./resources/js/components/Updates.vue --> 2 <template> 3 <div class="my-3 p-3 bg-white rounded shadow-sm"> 4 <h6 class="border-bottom border-gray pb-2 mb-0">Recent updates</h6> 5 <div class="media text-muted pt-3" v-if="updates.length == 0"> 6 Loading updates... 7 </div> 8 <div class="media text-muted pt-3 pb-3 border-bottom border-grey" v-else> 9 <form class="form-inline" v-on:submit.prevent="addUpdate"> 10 <div class="form-group mr-2"> 11 <input type="text" class="form-control" v-model="update" placeholder="What's happening?"> 12 </div> 13 <button type="submit" class="btn btn-primary">Update</button> 14 </form> 15 </div> 16 <div class="media text-muted pt-3" v-for="update in updates" :key="update.id"> 17 <img :src="update.user.avatar" class="size-32 mr-2 rounded"> 18 <p class="media-body pb-3 mb-0 small lh-125 border-bottom border-gray"> 19 <strong class="d-block text-gray-dark"> 20 {{ update.user.name }} 21 </strong> 22 {{ update.text }} 23 </p> 24 </div> 25 </div> 26 </template> 27 28 <script> 29 export default { 30 name: 'Updates', 31 data() { 32 return { 33 update: '', 34 updates: [], 35 } 36 }, 37 mounted () { 38 axios.get('/updates').then(res => (this.updates = res.data)) 39 }, 40 methods: { 41 addUpdate () { 42 if (this.update.trim() !== '') { 43 axios.post('/updates', {text: this.update}).then(res => { 44 this.update = '' 45 this.updates.unshift(res.data) 46 }) 47 } 48 } 49 } 50 } 51 </script>
Above, the component is divided into template and script. The template contains the HTML for the component and the script contains the JavaScript.
In the script we load the updates in the mounted method. In the template we loop through all the updates and display each. We also have a form that we can use to post a new update. When submitted, this form calls the addUpdate function in the methods property.
Next, open the resources/js/components/Suggestions.vue and paste the following code:
1<!-- File: ./resources/js/components/Suggestions.vue --> 2 <template> 3 <div class="my-3 p-3 bg-white rounded shadow-sm"> 4 <h6 class="border-bottom border-gray pb-2 mb-0">Suggestions</h6> 5 <div class="media text-muted pt-3" v-if="users.length == 0"> 6 Loading users... 7 </div> 8 <div class="media text-muted pt-3" v-for="user in users" :key="user.id"> 9 <img :src="user.avatar" :alt="user.name" class="size-32 mr-2 rounded"> 10 <div class="media-body pb-3 mb-0 small lh-125 border-bottom border-gray"> 11 <div class="d-flex justify-content-between align-items-center w-100"> 12 <strong class="text-gray-dark">{{ user.name }}</strong> 13 <a href="#">Follow</a> 14 </div> 15 <span class="d-block">Follow my updates</span> 16 </div> 17 </div> 18 </div> 19 </template> 20 21 <script> 22 export default { 23 name: 'Suggestions', 24 data() { 25 return { 26 users: [] 27 } 28 }, 29 mounted () { 30 axios.get('/updates/suggestions').then(res => (this.users = res.data)) 31 } 32 } 33 </script>
Just like the Updates component, we have the template and script tag. The script loads the suggested users and the template loops over the users and displays them.
Finally, open the file resources/js/components/OnlineList.vue and paste the following code:
1<!-- File: ./resources/js/components/OnlineList.vue --> 2 <template> 3 <ul class="nav float-right"> 4 <li class="nav-link squished">Online Users</li> 5 <li class="nav-link squished" href="#" v-for="user in users" :key="user.id"> 6 <img class="avatar" :src="user.avatar" :alt="user.name"> 7 </li> 8 </ul> 9 </template> 10 11 <script> 12 export default { 13 name: 'OnlineList', 14 props: ['me'], 15 data () { 16 return { 17 users: [] 18 } 19 }, 20 mounted () { 21 this.users.push(this.me) 22 } 23 } 24 </script>
Like the components before it, the OnlineList component has the template that loops through the data and the script that loads the data.
We have not yet implemented the who’s online feature so, in the mounted method, we just add the current user as the only online user. We will add the presence and realtime feature in the next section.
Adding the realtime and presence feature
Let’s start from the Laravel PHP side. We will first activate the broadcasting feature, then we will update the configuration in our .env file, after which we will update the event file we created earlier.
Open the config/app.php file and uncomment the BroadcastServiceProvider line:
App\Providers\BroadcastServiceProvider::class,
Next, open the .env file and change the BROADCAST_DRIVER from log to pusher. Finally, in the same file, update the keys below with the keys from your Pusher dashboard.
1PUSHER_APP_ID= 2 PUSHER_APP_KEY= 3 PUSHER_APP_SECRET= 4 PUSHER_APP_CLUSTER=
Next, open the app/Events/UpdateCreated.php file and replace the contents with the following:
1// File: app/Events/UpdateCreated.php 2 <?php 3 namespace App\Events; 4 5 use App\Update; 6 use Illuminate\Queue\SerializesModels; 7 use Illuminate\Broadcasting\PrivateChannel; 8 use Illuminate\Foundation\Events\Dispatchable; 9 use Illuminate\Broadcasting\InteractsWithSockets; 10 use Illuminate\Contracts\Broadcasting\ShouldBroadcast; 11 12 class UpdateCreated implements ShouldBroadcast 13 { 14 use Dispatchable, InteractsWithSockets, SerializesModels; 15 16 public $update; 17 18 /** 19 * Create a new event instance. 20 * 21 * @return void 22 */ 23 public function __construct(Update $update) 24 { 25 $this->update = $update; 26 } 27 28 /** 29 * Get the channels the event should broadcast on. 30 * 31 * @return \Illuminate\Broadcasting\Channel|array 32 */ 33 public function broadcastOn() 34 { 35 return new PrivateChannel('updates'); 36 } 37 }
Above, we have a Laravel event class. Notably, we have the broadcastsOn method which defines the channel we want to broadcast this event on. In this case, we are using a private channel called updates.
Note that we are implementing the
ShouldBroadcastinterface. If we don’t, the event will not be broadcasted to our Pusher instance.
Next, open the routes/channels.php file and replace the contents with the following code:
1// File: ./routes/channel.php 2 <?php 3 4 Broadcast::channel('updates', function ($user) { 5 return auth()->check(); 6 }); 7 8 Broadcast::channel('online', function ($user) { 9 if (auth()->check()) { 10 return $user->toArray(); 11 } 12 });
Because our channels are private, presence is private by default, we have to define the authentication logic. The first one checks if the current user is logged in. Only logged in users can listen in on the updates channel.
The second checks to see if the user can listen on the online presence channel. Unlike the first, the presence channel does not return a boolean. It returns details of the user if the user is authorized.
One last thing we need to do is pull in the Pusher PHP SDK. Run the following command in your terminal to do this:
$ composer require pusher/pusher-php-server
Now, let’s go over to the JavaScript side. Open the resources/js/bootstrap.js file and uncomment the following lines at the bottom of the file:
1import Echo from 'laravel-echo' 2 3 window.Pusher = require('pusher-js'); 4 5 window.Echo = new Echo({ 6 broadcaster: 'pusher', 7 key: process.env.MIX_PUSHER_APP_KEY, 8 cluster: process.env.MIX_PUSHER_APP_CLUSTER, 9 encrypted: true 10 });
This will make Laravel Echo available to us. We will use this library to interact with Pusher.
Next, open the Updates.vue file and update the mounted method as seen below:
1// [...] 2 3 mounted () { 4 axios.get('/updates').then(res => (this.updates = res.data)) 5 Echo.private('updates') 6 .listen('UpdateCreated', data => this.updates.unshift(data.update)) 7 } 8 9 // [...]
Above, we are using Laravel Echo to listen for the UpdateCreated event on the updates channel. Every time a new update is added, the event above will be triggered and the callback inside the listen method will be invoked.
In the callback, we add the update to the top of the updates array. Because Vue is reactive, the data will be updated instantly on the UI.
Next, open the OnlineList.vue file and update the mounted method as seen below:
1// [...] 2 3 mounted () { 4 // [...] 5 6 Echo.join('online') 7 .here(users => (this.users = users)) 8 .joining(user => this.users.push(user)) 9 .leaving(user => (this.users = this.users.filter(u => (u.id !== user.id)))) 10 } 11 12 // [...]
Above we have the magic that handles online presence. We use Echo to join the online presence channel. Then the methods chained are:
here- this returns all the users currently in this presence channel. In the callback, we set theusersarray to the response.joining- this is called when a new user comes online. In the callback, we simplypushthe new user to theusersarray.leaving- this is called when a user disconnects or goes offline. In the callback, we filter out the user that disconnected from theusersarray.
That’s all. Now let’s test our application to see it in action.
Testing the application
To test the application, we need two accounts that we can log into. You can check the users table in the SQLite database but there is an easier way to get the users.
In your terminal, run the command below:
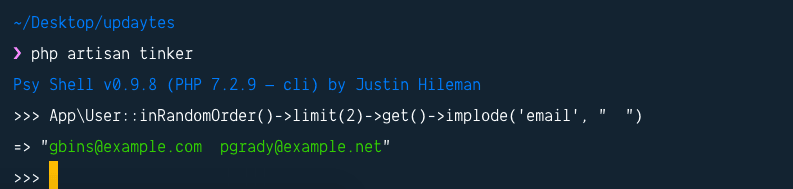
$ php artisan tinker
Laravel Artisan's tinker is a repl (read-eval-print loop). A repl translates to
read-eval-print-loop, and it is an interactive language shell. It takes in a single user input, evaluates it, and returns the result to the user. - Scotch.io
In the interactive shell, run the following command:
>>> App\User::inRandomOrder()->limit(2)->get()->implode('email', " ")
This will give us the emails of two random users.
We can use these email addresses to log in as the demo users. The password is secret for all the demo users.
Run the command below to exit tinker (you can also press ctrl + c on your keyboard):
>>> exit
Now run the command below to start your PHP server:
$ php artisan serve
Now, open two different browsers. In both, visit the URL http://localhost:8000 and log in as both users on the different browsers. You should see the application in action like this:
Conclusion
In this tutorial, we have seen how easy it is to work with presence channels on a Laravel application.
The source code is available on GitHub.


© 2025 Pusher Ltd. All rights reserved.
Pusher Limited is a company registered in England and Wales (No. 07489873) whose registered office is at MessageBird UK Limited, 3 More London Riverside, 4th Floor, London, United Kingdom, SE1 2AQ.