- Products

- Developers
- User stories
- Blog
- Pricing

Build a photo sharing app with Ruby on Rails and Cloudinary
- Introduction
- Prerequisites
- Getting started
- Creating a new Ruby project
- Configuring the database
- Creating the post model
- Accepting posts
- Uploading posts with Cloudinary
- Configuring Cloudinary
- Using the module
- Adding realtime functionality with Pusher
- Install Pusher via Ruby gems
- Import the Pusher package
- Triggering events from the controller
- Displaying posts on the client
- Conclusion
Introduction
Some say moments are best when captured so we can relive them and quite frankly, they kind of have a point. This is why applications like Instagram have a lot of users. In this article, we are going to look at how to build a simple photo sharing application with Pusher, Cloudinary and Ruby.

Prerequisites
For you to successfully follow through this article, you need to have the following set up:
- Ruby installed on your machine
- Rails installed on your machine
To confirm your installation, run the following :
1ruby -v // minimum version 2.4 2 rails --version // minimum version 4.2
If you get version numbers as result then it means you’re good to go!
Getting started
Creating a new Ruby project
Since you already have Ruby installed on your machine, go ahead to create a new Rails application by running the command:
rails new pusher-photofeeds
This creates a sample rails project with the following structure:
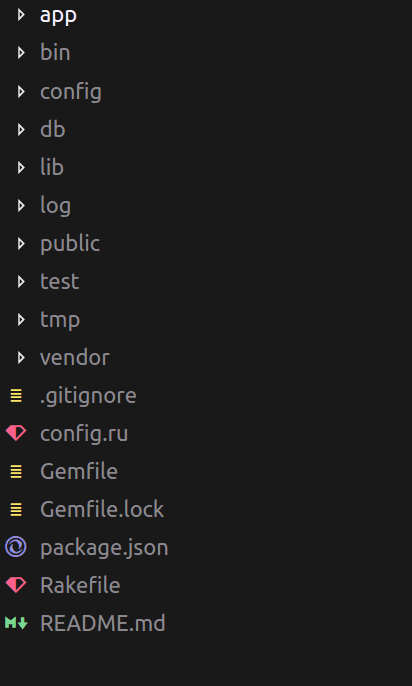
You can take the sample application for a spin by running the command:
rails server --binding=127.0.0.1
Configuring the database
To store posts in a database, a database driver is needed. With Ruby on Rails, SQLite is used as the default database driver, and for simplicity, we are going to continue with that.
To create your database, run the command:
rake db:create
This creates the database for the application in the db/ directory of your project.
Creating the post model
To represent a sample post in our application, we need to create a model. Our simple post with have the following properties:
- Link
- Caption
Create the model by running the command:
rails generate model Post link:text caption:text
This creates a migration file for your new model that can be found in db/migrate/{timestamp}_create_posts. The file will look like this:
1# db/migrate/{timestamp}_create_posts 2 class CreatePosts < ActiveRecord::Migration[5.2] 3 def change 4 create_table :posts do |t| 5 t.text :link 6 t.text :caption 7 8 t.timestamps 9 end 10 end 11 end
Now, to store the data in the database, run the command:
rails db:migrate
When you run that, you get the following output:
1➜ rails db:migrate 2 == 20180520070732 CreatePosts: migrating ====================================== 3 -- create_table(:posts) 4 -> 0.0016s 5 == 20180520070732 CreatePosts: migrated (0.0022s) =============================
At this point, we have our posts table created with the link and caption as fields we wanted.
Accepting posts
Rails is an MVC Framework and we need to create a controller that handles our route. Let’s create a Photo controller that perform the following actions:
- Displays the existing photos in the feed
- Stores a new photo
To do this, run the following command:
rails generate controller Photo index store
This creates the controller and the following files. Now, let’s edit the index view created by this command. Update your photo/index.html.erb file to look like this:
1<!-- app/views/photo/index.html.erb --> 2 <h1 style="text-align: center">Realtime PhotoFeeds!</h1> 3 <div class="wrapper"> 4 <form class="uploads" method="POST" action="/photo/store" enctype="multipart/form-data"> 5 <%= token_tag %> 6 <div class="form-group"> 7 <label for="caption">Caption</label> 8 <input type="text" name="caption"> 9 </div> 10 <div style="margin-left: 5px;"> 11 <input type="file" name="image"> 12 </div> 13 <div> 14 <input type="submit" value="Upload"> 15 </div> 16 </form> 17 <div class="images"> 18 <div class="post"> 19 <div> 20 <img class="post-image" src="https://pbs.twimg.com/media/DOXI0IEXkAAkokm.jpg"> 21 </div> 22 <p class="post-caption">Living my best life</p> 23 </div> 24 </div> 25 </div>
The view’s styling is controlled by photo.scss. Update the file to look like this:
1// app/assets/stylesheets/photo.scss 2 .wrapper{ 3 display: flex; 4 flex-direction: column; 5 align-items: center; 6 } 7 .uploads{ 8 margin-top: 20px; 9 margin-bottom: 20px; 10 align-items: center; 11 } 12 .images{ 13 .post{ 14 width: 500px; 15 border-radius: 10px; 16 border: 1px solid rgb(214, 210, 210); 17 margin-bottom: 20px; 18 } 19 } 20 .post-image{ 21 width: 100%; 22 } 23 .post-caption{ 24 padding-left: 20px; 25 } 26 .uploads{ 27 display: flex; 28 justify-content: space-between; 29 } 30 input[type="submit"]{ 31 background-color: #333333; 32 border: none; 33 color: white; 34 padding: 10px 32px; 35 text-align: center; 36 text-decoration: none; 37 display: inline-block; 38 font-size: 16px; 39 }
The top bar allows the user to upload pictures to the feed and that is fixed to the top to make it easy to perform the action. The other part part is responsible for displaying the images on the screen to the user.
Now let’s take a look at what happens when a submission is made for a new post to be created. When the Post button is clicked, a POST request is made to the ‘photo/store’ route.
In the config/routes.rb that houses the available routes for our application, we have the following:
/- To display the existing photos and upload form/photo/store- To create a new post
1# config/routes.rb 2 Rails.application.routes.draw do 3 post 'photo/store' 4 root 'photo#index' 5 end
Let’s take a look at the controller logic to save the post uploaded by the user. Edit your app/controllers/photo_controller.rb to look like this:
1# app/controllers/photo_controller.rb 2 class PhotoController < ApplicationController 3 def store 4 render plain: params[:caption].inspect 5 end 6 7 def index 8 @posts = Post.all 9 end 10 end
The
indexmethod in the controller is responsible for fetching all the existing posts in the database.
At the moment, the controller only renders the caption on a new page. This is not what we want. We are going to further edit this controller to do the following:
- Upload the image to Cloudinary and save the post in the database
- Use Pusher to display posts in realtime
Uploading posts with Cloudinary
Cloudinary is your one stop shop for all your image and video management needs when building applications. With Cloudinary, you no longer have to worry about writing the core code behind image and video manipulations, uploading images. You can read more about all Cloudinary features here.
Cloudinary has a Ruby gem and that is what will be used to handle the file uploads.
Add the Cloudinary as a dependency in your Gemfile:
1# adding cloudinary to gemfile 2 gem 'cloudinary'
Install it by running the command:
bundle install
Configuring Cloudinary
To use the Cloudinary gem, you need to have a Cloudinary developer account to use it in your applications. Head over here to create one if you don’t have one already.
Cloudinary automatically checks for a cloudinary.yml in the config directory that contains the configuration file for your Cloudinary account. You can download your own customized file for your account here. Once it’s downloaded, place the file in the config directory.
Using the module
We are going to use the module in the Photo controller. Update the app/controllers/photo_controller.rb file:
1# app/controllers/photo_controller.rb 2 class PhotoController < ApplicationController 3 4 def index 5 @posts = Post.all.order("created_at DESC") 6 end 7 8 def store 9 # upload image to cloudinary 10 @value = Cloudinary::Uploader.upload(params[:image]) 11 # create a new post object and save to db 12 @post = Post.new({:link => @value['secure_url'], :caption => params[:caption]}) 13 @post.save 14 # trigger an event with pusher 15 [...] 16 redirect_to('/') 17 end 18 end
Now, at this point, we’ve been able to upload a new image using Cloudinary and save the post in the database.
Adding realtime functionality with Pusher
Now that the post has been created, you need to let all the users online know that there’s a new post without needing to refresh their browsers. To do this, let’s use Pusher. Pusher allows you to seamlessly add realtime features to your applications without worrying about infrastructure. To get started, create a developer account. Once that is done, create your application and obtain your application keys.
To use Pusher with your Rails application, you need to do a couple of things.
Install Pusher via Ruby gems
Add pusher to your Gemfile
1# Gemfile 2 [...] 3 4 gem 'pusher' 5 6 [...]
And then install the new gem:
bundle install
To confirm your installation run:
bundle info pusher
You should get a result like this:
1$ bundle info pusher 2 * pusher (1.3.1) 3 Summary: Pusher API client 4 Homepage: http://github.com/pusher/pusher-http-ruby 5 Path: /home/captog/.rvm/gems/ruby-2.4.1/gems/pusher-1.3.1
Import the Pusher package
Create a config/initializers/pusher.rb file to look like this:
1# config/initializers/pusher.rb 2 require 'pusher' 3 4 Pusher.app_id = 'PUSHER_APP_ID' 5 Pusher.key = 'PUSHER_APP_KEY' 6 Pusher.secret = 'PUSHER_APP_SECRET' 7 Pusher.cluster = 'PUSHER_APP_CLUSTER' 8 Pusher.logger = Rails.logger 9 Pusher.encrypted = true 10 11The `PUSHER_APP_ID`, `PUSHER_APP_KEY`, `PUSHER_APP_SECRET` and `PUSHER_APP_CLUSTER` can all be obtained from the [dashboard](https://dashboard.pusher.com) of your application.
Triggering events from the controller
To trigger a new event, update the app/controlllers/photo_controller.rb file:
1# app/controllers/photo_controller.rb 2 class PhotoController < ApplicationController 3 def store 4 # upload image to cloudinary 5 @value = Cloudinary::Uploader.upload(params[:image]) 6 # render plain: @value['secure_url'] 7 # create a new post object and save to db 8 @post = Post.new({:link => @value['secure_url'], :caption => params[:caption]}) 9 if @post.save 10 # broadcasting posts using pusher 11 Pusher.trigger('posts-channel','new-post', { 12 link: @post.link, 13 caption: @post.caption 14 }) 15 end 16 redirect_to('/') 17 end 18 end
After the post is saved in the database, a new-post event is triggered in the posts-channel. The Pusher dashboard allows you to debug your application by seeing when events have been triggered.
Displaying posts on the client
To integrate Pusher to the frontend of your application, you’ll need to do the following:
First, include the Pusher script in the header of the application in the app/views/layouts/application.html.erb
1# app/views/layouts/application.html.erb 2 [...] 3 <head> 4 [...] 5 6 <script src="https://js.pusher.com/4.1/pusher.min.js"></script> 7 8 [...] 9 </head> 10 [...]
Next thing to do is to create a Pusher client in the application header:
1# app/views/layouts/application.html.erb 2 [...] 3 <head> 4 [...] 5 // add pusher script 6 <script> 7 var pusher = new Pusher('PUSHER_APP_KEY', { 8 cluster: 'eu', 9 encrypted: true 10 }); 11 </script> 12 13 [...] 14 </head> 15 [...]
Finally, subscribe to the posts-channel and listen for new-post events. You can do this in the photo#index view of the application. Update the app/views/photo/index.html.erb to look like this:
1# app/views/photo/index.html.erb 2 <h1 style="text-align: center">Realtime PhotoFeeds!</h1> 3 <div class="wrapper"> 4 [...] 5 6 <div class="images" id="post_section"> 7 <% @posts.each do |post| %> 8 <div class="post"> 9 <div> 10 <img class="post-image" src="<%= post.link %>"> 11 </div> 12 <p class="post-caption"><%= post.caption %></p> 13 </div> 14 <% end %> 15 </div> 16 </div> 17 <script> 18 var channel = pusher.subscribe('posts-channel'); 19 channel.bind('new-post', function(data) { 20 let post_link = data.link; 21 let post_caption = data.caption; 22 let div = document.getElementById('post_section'); 23 let new_content = document.createElement("div"); 24 new_content.innerHTML = ` 25 <div class="post"> 26 <div> 27 <img class="post-image" src="${post_link}"> 28 </div> 29 <p class="post-caption"> ${post_caption}</p> 30 </div>`; 31 div.insertBefore(new_content, div.firstChild); 32 }); 33 </script>
Here, on the client, we subscribe to the posts-channel and listen for a new-post event. When an event is broadcasted we then update the UI to show the new post.
To see the application at work, start the rails server using the command:
rails server --binding=127.0.0.1
This starts up a rails server with the port shown to you - in this case 127.0.0.1:3000 as specified with the --binding flag. When you visit the application, this is what you see:
Conclusion
In this article, we’ve seen how to use Ruby and Pusher to make a simple realtime photosharing application. Feel free to apply these concepts and explore the Pusher documentation for more exciting features.Lastly, the complete source code of this demo application is on GitHub.


© 2026 Pusher Ltd. All rights reserved.
Pusher Limited is a company registered in England and Wales (No. 07489873) whose registered office is at MessageBird UK Limited, 3 More London Riverside, 4th Floor, London, United Kingdom, SE1 2AQ.