- Products

- Developers
- User stories
- Blog
- Pricing

Build a photo feed in Android
Introduction
When I was a kid, my parents had a Kodak camera that they only used on vacations or special events. It used film rolls, and you had to take them to a specialty shop to have them developed so you could get your photos a few days later. Sometimes, we couldn't even fill a 100-pocket photo album in an entire year.
Nowadays, the number of the photos we take has exploded exponentially. With cameras in even the most basic mobile phones, you can easily take hundreds of photos in a day without any issues. And sites like Instagram, Flickr, and 500px, among others, made specifically to share, comment, and like photos are very popular.
So why not build a feed to track a stream of photos in our Android device in realtime?
In this tutorial, we're going to get the photos from Reddit (in particular, from the r/pics subreddit), taking advantage of the Pusher Realtime Reddit API.
To keep things simple, we'll implement the feed without any other feature. This is how the final app will look:
Let's get started!
Using the Pusher Realtime Reddit API
You can learn more about the Pusher Realtime Reddit API here, but basically the idea is that any subreddit has its own Pusher channel to which you can subscribe to get new listings events.
You can see an interactive code example of this on JSBin.
For our needs, we can try this simple Javascript snippet:
1// Open a Pusher connection to the Realtime Reddit API 2var pusher = new Pusher("50ed18dd967b455393ed"); 3 4// Subscribe to the pics subreddit (lowercase) 5var subredditChannel = pusher.subscribe("pics"); 6 7// Listen for new stories 8subredditChannel.bind("new-listing", function(listing) { 9 // Output listing to the browser console 10 console.log(listing); 11});
The Pusher app key you have to use is 50ed18dd967b455393ed. Here's a sample of the information that we can get from Reddit:
1{ 2 approved_by: null, 3 archived: false, 4 author: "PHIL-yes-PLZ", 5 author_flair_css_class: null, 6 author_flair_text: null, 7 banned_by: null, 8 brand_safe: true, 9 clicked: false, 10 contest_mode: false, 11 created: 1489494725, 12 created_utc: 1489465925, 13 distinguished: null, 14 domain: "i.redd.it", 15 downs: 0, 16 edited: false, 17 gilded: 0, 18 hidden: false, 19 hide_score: true, 20 id: "5za4q7", 21 is_self: false, 22 likes: null, 23 link_flair_css_class: null, 24 link_flair_text: null, 25 locked: false, 26 media: null, 27 media_embed: [object Object] { ... }, 28 mod_reports: [], 29 name: "t3_5za4q7", 30 num_comments: 0, 31 num_reports: null, 32 over_18: false, 33 permalink: "/r/pics/comments/5za4q7/the_beauty_of_budding_stained_glass/", 34 post_hint: "image", 35 preview: [object Object] { 36 enabled: true, 37 images: [[object Object] { 38 id: "rqR81Yj7Fud7Y8P94e8ZftEZyTEO4Q3ufVQ7f-9QNSM", 39 resolutions: [[object Object] { 40 height: 81, 41 url: "https://i.redditmedia.com/Lw666GULI7dJMKrB3IKn8G95A0MuP-ztXwsmvIdhlsE.jpg?fit=crop&crop=faces%2Centropy&arh=2&w=108&s=c174d33e47fa3e585c46622dfca12dd5", 42 width: 108 43}, [object Object] { 44 height: 162, 45 url: "https://i.redditmedia.com/Lw666GULI7dJMKrB3IKn8G95A0MuP-ztXwsmvIdhlsE.jpg?fit=crop&crop=faces%2Centropy&arh=2&w=216&s=22711bde5e57c38f93e99de27bb2f1ee", 46 width: 216 47}, [object Object] { 48 height: 240, 49 url: "https://i.redditmedia.com/Lw666GULI7dJMKrB3IKn8G95A0MuP-ztXwsmvIdhlsE.jpg?fit=crop&crop=faces%2Centropy&arh=2&w=320&s=a22e5a2857b40d0205e07724a89d4182", 50 width: 320 51}, [object Object] { 52 height: 480, 53 url: "https://i.redditmedia.com/Lw666GULI7dJMKrB3IKn8G95A0MuP-ztXwsmvIdhlsE.jpg?fit=crop&crop=faces%2Centropy&arh=2&w=640&s=7dc827127272f6aa530faa8b29a8298f", 54 width: 640 55}, [object Object] { 56 height: 720, 57 url: "https://i.redditmedia.com/Lw666GULI7dJMKrB3IKn8G95A0MuP-ztXwsmvIdhlsE.jpg?fit=crop&crop=faces%2Centropy&arh=2&w=960&s=8402002d064b3283742f8bc86163d552", 58 width: 960 59}, [object Object] { 60 height: 810, 61 url: "https://i.redditmedia.com/Lw666GULI7dJMKrB3IKn8G95A0MuP-ztXwsmvIdhlsE.jpg?fit=crop&crop=faces%2Centropy&arh=2&w=1080&s=ac9b66669198d0eb4bb8a47e1cc79e48", 62 width: 1080 63}], 64 source: [object Object] { 65 height: 2448, 66 url: "https://i.redditmedia.com/Lw666GULI7dJMKrB3IKn8G95A0MuP-ztXwsmvIdhlsE.jpg?s=50a1044924ba1e0aa39a7f5f5ab33d8e", 67 width: 3264 68 }, 69 variants: [object Object] { ... } 70}] 71 }, 72 quarantine: false, 73 removal_reason: null, 74 report_reasons: null, 75 saved: false, 76 score: 1, 77 secure_media: null, 78 secure_media_embed: [object Object] { ... }, 79 selftext: "", 80 selftext_html: null, 81 spoiler: false, 82 stickied: false, 83 subreddit: "pics", 84 subreddit_id: "t5_2qh0u", 85 subreddit_name_prefixed: "r/pics", 86 subreddit_type: "public", 87 suggested_sort: null, 88 thumbnail: "https://b.thumbs.redditmedia.com/JlIMJkuHQsCnp4Gn7h_OT2AedCJd_QQ-otJm1PUi1cc.jpg", 89 title: "The beauty of budding stained glass.", 90 ups: 1, 91 url: "https://i.redd.it/vo690nyiwaly.jpg", 92 user_reports: [], 93 visited: false 94}
With this in mind, let's create the Android app.
The Android app
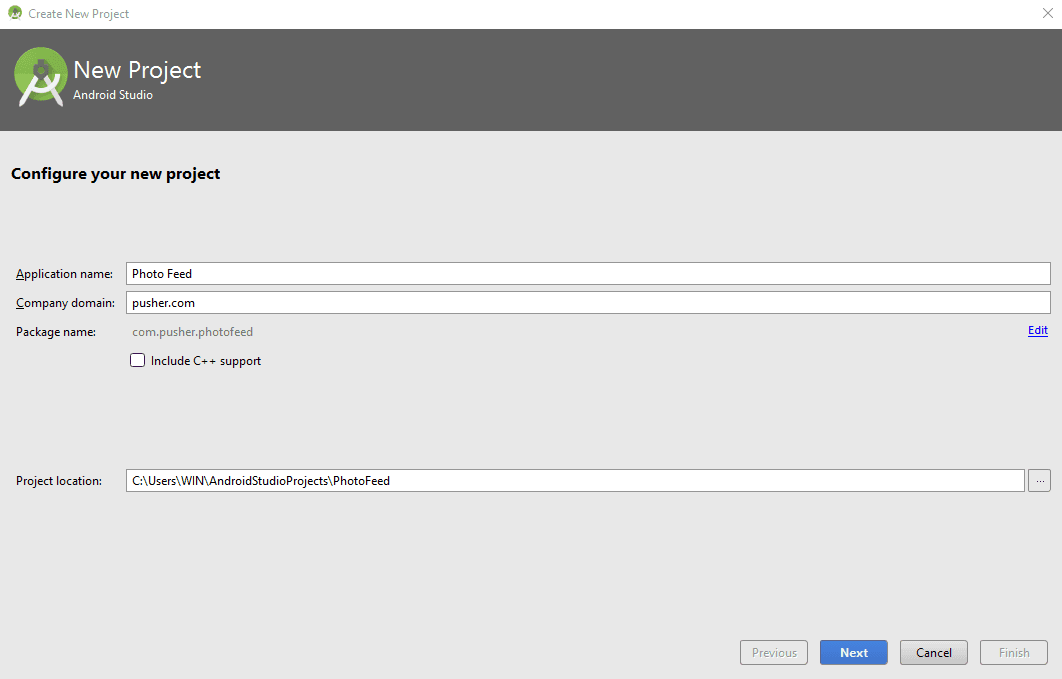
Open Android Studio and create a new project:
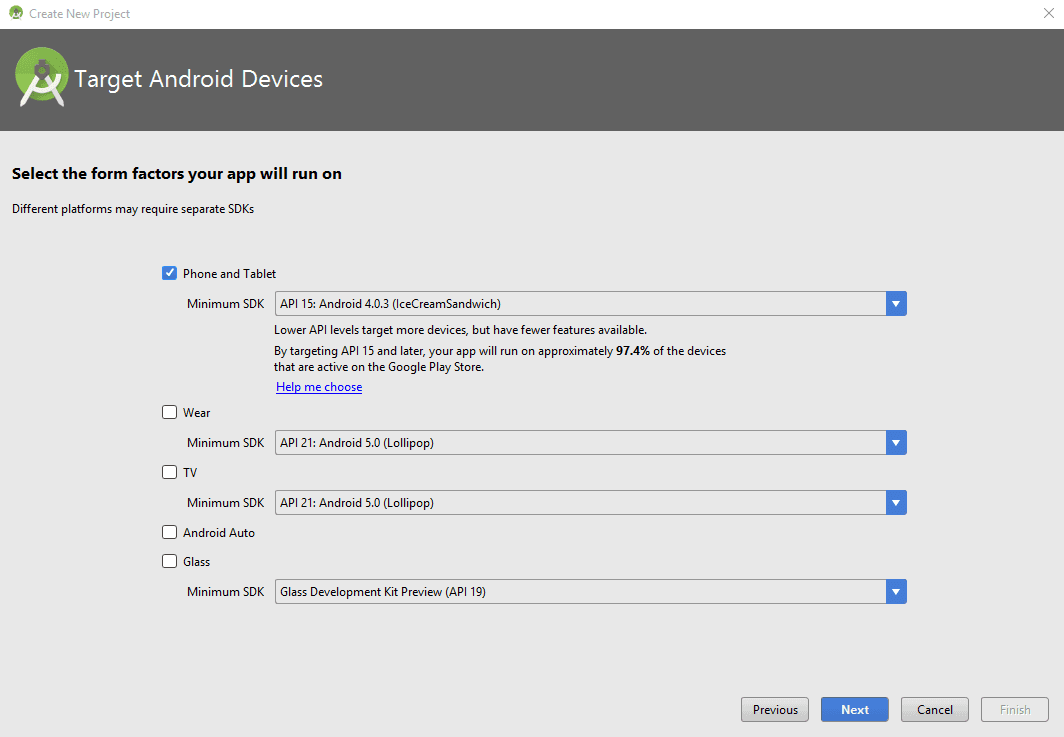
We're not going to use anything special, so we can safely support a low API level:
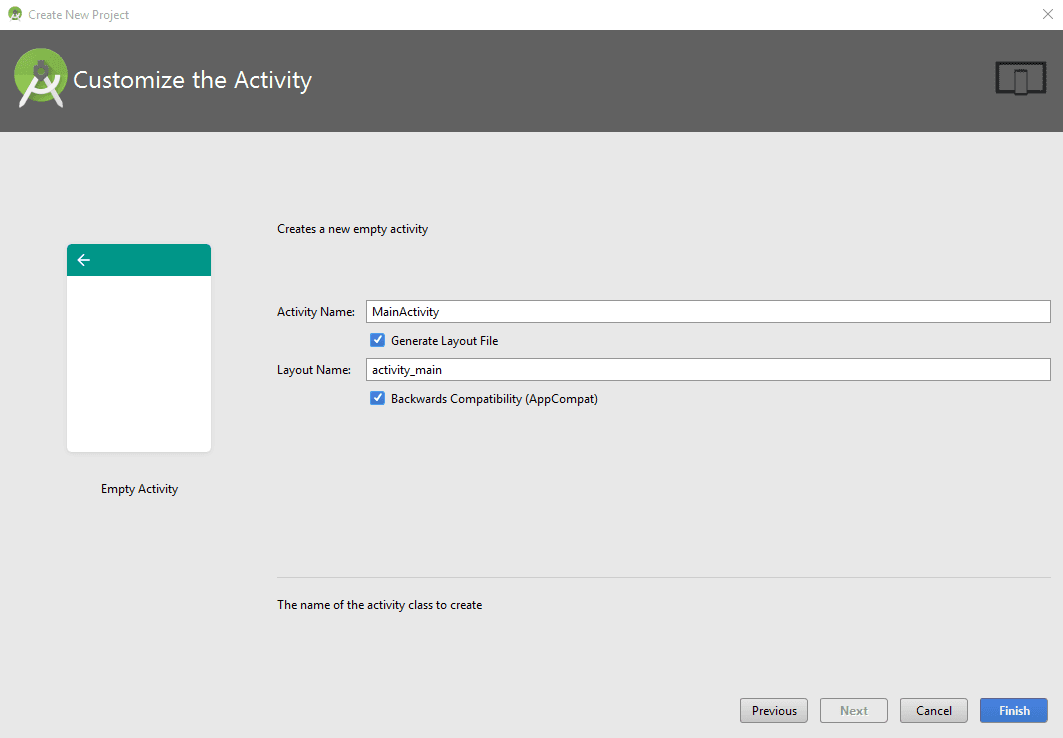
Next, create an initial empty activity:
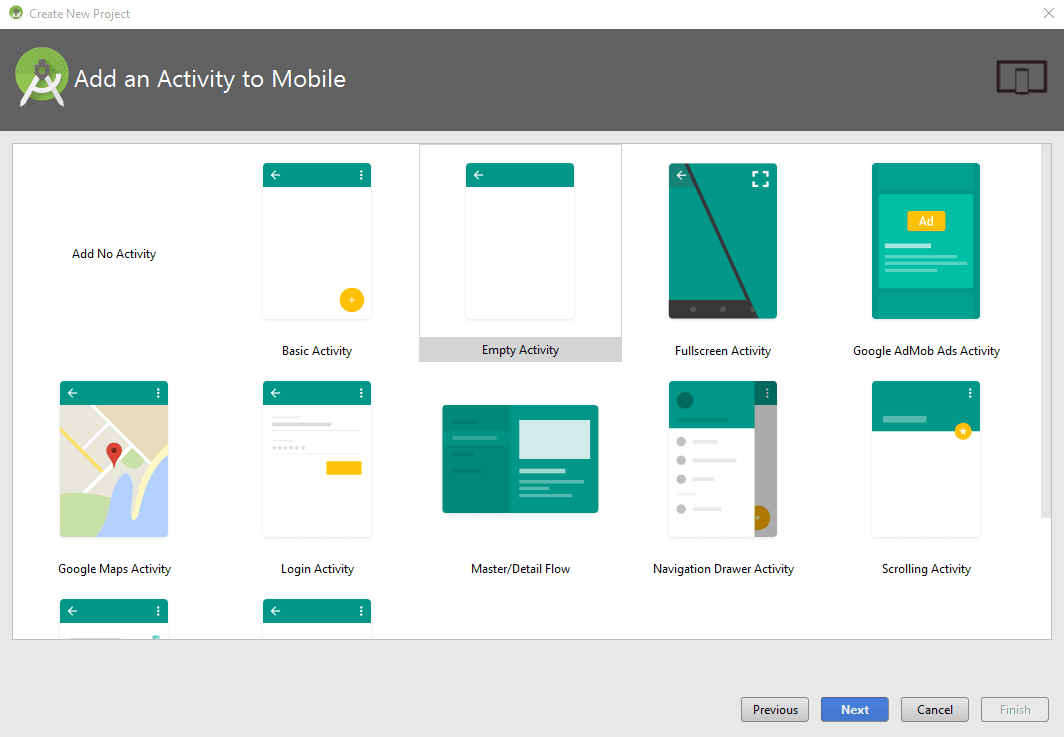
And use the default name of MainActivity with backward compatibility:
Once everything is set up, let's install the project dependencies. In the dependencies section of the build.gradle file of your application module add:
1dependencies { 2 ... 3 compile 'com.android.support:recyclerview-v7:25.1.1' 4 compile 'com.github.bumptech.glide:glide:3.7.0' 5 compile 'com.pusher:pusher-java-client:1.4.0' 6 compile 'com.google.code.gson:gson:2.4' 7 ... 8}
At the time of writing, the latest SDK version is 25, so that's my target SDK version.
We're going to use the RecyclerView component from the Support Library, so make sure you have it installed (in Tools -> Android -> SDK Manager -> SDK Tools tab the Android Support Repository must be installed).
To download the images we're going to use Glide, one of the most popular open-source Android libraries for loading images.
By default, Glide uses a custom implementation of HttpURLConnection to load images over the network. This is what we'll be using here. However, Glide also provides plugins to other popular networking libraries such as Volley or OkHttp, you just need to add the corresponding dependencies:
1dependencies { 2 ... 3 compile 'com.github.bumptech.glide:glide:3.7.0' 4 ... 5 // Volley 6 compile 'com.github.bumptech.glide:volley-integration:1.4.0@aar' 7 compile 'com.android.volley:volley:1.0.0' 8 9 // okhttp 3 10 compile 'com.github.bumptech.glide:okhttp3-integration:1.4.0@aar' 11 compile 'com.squareup.okhttp3:okhttp:3.6.0' 12 13 // okhttp 2 14 compile 'com.github.bumptech.glide:okhttp-integration:1.4.0@aar' 15 compile 'com.squareup.okhttp:okhttp:2.7.2' 16 ... 17}
Sync the Gradle project so the modules can be installed and the project built.
Also, don't forget to add the INTERNET permission to the AndroidManifest.xml file. This is required so we can connect to Pusher and get the events in realtime:
1<?xml version="1.0" encoding="utf-8"?> 2<manifest xmlns:android="http://schemas.android.com/apk/res/android" 3 package="com.pusher.photofeed"> 4 5 <uses-permission android:name="android.permission.INTERNET" /> 6 7 <application> 8 ... 9 </application> 10 11</manifest>
Now, modify the layout file activity_main.xml so it looks like this:
1<?xml version="1.0" encoding="utf-8"?> 2<RelativeLayout xmlns:android="http://schemas.android.com/apk/res/android" 3 xmlns:tools="http://schemas.android.com/tools" 4 android:id="@+id/activity_main" 5 android:layout_width="match_parent" 6 android:layout_height="match_parent" 7 tools:context="com.pusher.photofeed.MainActivity"> 8 9 <android.support.v7.widget.RecyclerView 10 android:layout_width="match_parent" 11 android:layout_height="match_parent" 12 android:id="@+id/recycler_view" /> 13</RelativeLayout>
We're going to use a RecyclerView to display the images, which we'll store in a list. Each item in this list is displayed in an identical manner, so let's define another layout file to inflate them.
Create the file item.xml with the following content:
1<LinearLayout xmlns:android="http://schemas.android.com/apk/res/android" 2 android:orientation="vertical" android:layout_width="match_parent" 3 android:layout_height="wrap_content"> 4 5 <ImageView 6 android:id="@+id/photo" 7 android:adjustViewBounds="true" 8 android:layout_height="200dp" 9 android:scaleType="centerCrop" 10 android:layout_margin="2dp" 11 android:layout_width="match_parent"/> 12 13</LinearLayout>
Here, we're just using an ImageView component to display the image, with a height of 200dp and a scaleType equal to centerCrop, to scale the image uniformly (maintain the image's aspect ratio) so both dimensions (width and height) will be equal to or larger than the corresponding dimension of the view (minus padding), among other properties.
Now, to store the information for each image, which right now is just its URL, let's create a class, com.pusher.photofeed.Photo:
1public class Photo { 2 3 private String url; 4 5 public Photo(String url) { 6 this.url = url; 7 } 8 9 public String getUrl() { 10 return url; 11 } 12}
RecyclerView works with an Adapter to manage the items of its data source (in this case a list of Photo instances), and a ViewHolder to hold a view representing a single list item, so first create the class com.pusher.photofeed.PhotoAdapter with the following code:
1public class PhotoAdapter extends RecyclerView.Adapter<PhotoAdapter.PhotoViewHolder> { 2 3 private List<Photo> photos; 4 private Context context; 5 6 public PhotoAdapter(Context context, List<Photo> photos) { 7 this.photos = photos; 8 this.context = context; 9 } 10 11 public void addPhoto(Photo photo) { 12 // Add the event at the beggining of the list 13 photos.add(0, photo); 14 // Notify the insertion so the view can be refreshed 15 notifyItemInserted(0); 16 } 17 18 @Override 19 public int getItemCount() { 20 return photos.size(); 21 } 22}
We initialize the class with a list of Photo instances and a Context (Glide will need it), provide a method to add Photo instances at the beginning of the list (addPhoto(Photo)) and then notify the insertion so the view can be refreshed, and implement getItemCount so it returns the size of the list.
Then, let's add the ViewHolder as an inner class. It references the ImageView component for each item in the list:
1public class PhotoAdapter extends RecyclerView.Adapter<PhotoAdapter.PhotoViewHolder> { 2 3 ... 4 5 public static class PhotoViewHolder extends RecyclerView.ViewHolder { 6 7 public ImageView photoImageView; 8 9 public PhotoViewHolder(View v) { 10 super(v); 11 photoImageView = (ImageView) v.findViewById(R.id.photo); 12 } 13 } 14}
And implement the methods onCreateViewHolder and onBindViewHolder:
1public class PhotoAdapter extends RecyclerView.Adapter<PhotoAdapter.PhotoViewHolder> { 2 ... 3 4 @Override 5 6 7 public PhotoViewHolder onCreateViewHolder(ViewGroup viewGroup, int i) { 8 View v = LayoutInflater.from(viewGroup.getContext()) 9 .inflate(R.layout.item, viewGroup, false); 10 return new PhotoViewHolder(v); 11 } 12 13 @Override 14 public void onBindViewHolder(PhotoViewHolder holder, int position) { 15 Photo photo = photos.get(position); 16 String url = photo.getUrl(); 17 18 Glide.with(context) 19 .load(url) 20 .asBitmap() 21 .error(R.drawable.logo) 22 .fitCenter() 23 .into(holder.photoImageView); 24 } 25}
In the onCreateViewHolder method, we inflate the layout with the content of the event_row.xml file we created earlier, and in onBindViewHolder, we use Glide to fetch the image and display it in the ImageView of the item with the following method calls:
with(Context)initializes the loading processing passing the context.load(String)loads the image from the specified URL.asBitmap()makes sure that Glide receives an image that can be converted to a bitmap, otherwise the load will fail (for example if the URL represents an HTML page) and theDrawablepassed to theerrormethod will be shown instead.error(Drawable)shows theDrawableif the load fails (in the GitHub version of this app, the Pusher logo, but you can add your own error image).fitCenter()scales the image uniformly (maintaining the image's aspect ratio) so the image will fit in the given area.into(ImageView)specifies the target image view into which the image will be placed.
In the class com.pusher.photofeed.MainActivity, let's start by defining the private fields we're going to need:
1public class MainActivity extends AppCompatActivity { 2 private RecyclerView.LayoutManager lManager; 3 private PhotoAdapter adapter; 4 private Pusher pusher = new Pusher("50ed18dd967b455393ed"); 5 private static final String CHANNEL_NAME = "pics"; 6 7 @Override 8 protected void onCreate(Bundle savedInstanceState) { 9 .... 10 } 11}
RecyclerView works with a LayoutManager to handle the layout and scroll direction of the list. We declare the PhotoAdapter, the Pusher object and the identifier for the Pusher channel.
Inside the onCreate method, let's assign a LinearLayoutManager to the RecyclerView and create the EventAdapter with an empty list:
1public class MainActivity extends AppCompatActivity { 2 ... 3 @Override 4 protected void onCreate(Bundle savedInstanceState) { 5 super.onCreate(savedInstanceState); 6 setContentView(R.layout.activity_main); 7 8 // Get the RecyclerView 9 RecyclerView recycler = (RecyclerView) findViewById(R.id.recycler_view); 10 11 // Use LinearLayout as the layout manager 12 lManager = new LinearLayoutManager(this); 13 recycler.setLayoutManager(lManager); 14 15 // Set the custom adapter 16 List<Photo> photoList = new ArrayList<>(); 17 adapter = new PhotoAdapter(this, photoList); 18 recycler.setAdapter(adapter); 19 } 20}
For the Pusher part, we first subscribe to the channel:
1public class MainActivity extends AppCompatActivity { 2 ... 3 @Override 4 protected void onCreate(Bundle savedInstanceState) { 5 ... 6 7 Channel channel = pusher.subscribe(CHANNEL_NAME); 8}
Then, we create the listener that will be executed when a photo arrives:
1public class MainActivity extends AppCompatActivity { 2 ... 3 @Override 4 protected void onCreate(Bundle savedInstanceState) { 5 ... 6 SubscriptionEventListener eventListener = new SubscriptionEventListener() { 7 @Override 8 public void onEvent(String channel, final String event, final String data) { 9 runOnUiThread(new Runnable() { 10 @Override 11 public void run() { 12 System.out.println("Received event with data: " + data); 13 Gson gson = new Gson(); 14 Photo photo = gson.fromJson(data, Photo.class); 15 adapter.addPhoto(photo); 16 ((LinearLayoutManager)lManager).scrollToPositionWithOffset(0, 0); 17 } 18 }); 19 } 20 }; 21 } 22}
Here, the JSON string that we receive is converted to a Photo object and is added to the adapter. Finally, we move to the top of the list.
Next, bind the events to this listener and call the connect method on the Pusher object:
1public class MainActivity extends AppCompatActivity { 2 ... 3 @Override 4 protected void onCreate(Bundle savedInstanceState) { 5 ... 6 channel.bind("new-listing", eventListener); 7 8 pusher.connect(); 9 } 10}
The connect method can take a listener that can be helpful to debug problems you might have:
1pusher.connect(new ConnectionEventListener() { 2 @Override 3 public void onConnectionStateChange(ConnectionStateChange change) { 4 System.out.println("State changed to " + change.getCurrentState() + 5 " from " + change.getPreviousState()); 6 } 7 8 @Override 9 public void onError(String message, String code, Exception e) { 10 System.out.println("There was a problem connecting!"); 11 e.printStackTrace(); 12 } 13});
Finally, MainActivity also needs to implement the onDestroy() method so we can have the opportunity to unsubscribe from Pusher when the activity is destroyed:
1public class MainActivity extends AppCompatActivity { 2 ... 3 4 @Override 5 public void onDestroy() { 6 super.onDestroy(); 7 pusher.disconnect(); 8 } 9}
And that's it. Let's test it.
Testing the app
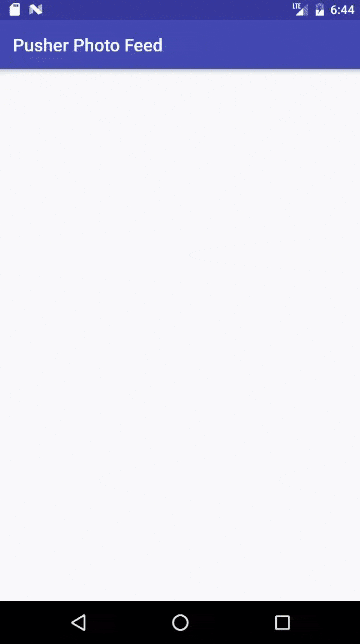
Execute the app, either on a real device or a virtual one:
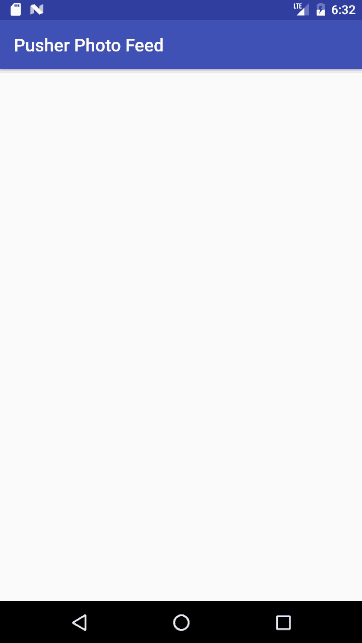
You'll be presented with an almost blank screen:
When a new image is uploaded to Reddit, it will show up in the app (it may take a while, depending on the amount of activity at the time):
Conclusion
Hopefully, this tutorial has shown you how simple it is to build a realtime photo feed in Android and Pusher. You can improve the app by changing the design, showing more information, or saving it to a database.
Further reading


© 2026 Pusher Ltd. All rights reserved.
Pusher Limited is a company registered in England and Wales (No. 07489873) whose registered office is at MessageBird UK Limited, 3 More London Riverside, 4th Floor, London, United Kingdom, SE1 2AQ.