- Products

- Developers
- User stories
- Blog
- Pricing

Build an onboarding experience for your mobile apps with Flutter - Part 1: Building the screens
Introduction
Introduction
In this tutorial series, we’ll be building a nice app intro with Flutter exploiting the onboarding technique. Onboarding is a great way to introduce your app to newcomers, to help them quickly adapt to the new conditions so that they can get the most out of your app. In UX design, onboarding is a set of techniques and interactions aimed at comforting users and giving the initial introduction of the product. The Material Design guide states:
Onboarding is one point in a longer journey that begins in the app store and ends with the user taking the first key retention-correlated action in your app.
We can consider onboarding to be a useful UX technique to present your product to potential users, it is defined as a way of making someone familiar with an app. Your apps may not be self-explanatory so they surely need to include onboarding. Now that you know what onboarding is, we’ll dive into this tutorial. I’ll show you how to build a nice onboarding experience for your mobile app using the Flutter framework.
Demo
This is the final result of the tutorial. Nice isn’t it ? 😎 You will be able to achieve that at the end of the tutorial.
Prerequisites
This tutorial assumes a little knowledge of Flutter or Dart. JavaScript knowledge will be helpful as well, especially ES6 features. You should have:
- Visual Studio Code editor installed on your machine if you haven’t yet. We’ll use it in our tutorial.
- Visual Studio Code Flutter plugin
- An emulator or physical device (for app testing/debugging purpose)
- Flutter and Dart installed on your machine. Kindly refer to this link for more information about their installation. It will guide you through the installation of Flutter SDK on your machine as well as the Dart language
Project setup
Open your code editor and hit ctrl+shift+p or cmd+shift+p to create a new project, and give it a name, or simply run flutter create your_project_name in your terminal to quickly create a new project. After that, you’ll end up with a fresh Flutter project.
Head over to the pubspec.yaml file and amend it like the following:
1//../pubspec.yaml 2 name: flutter_slides 3 description: A new Flutter project. 4 5 # The following defines the version and build number for your application. 6 # A version number is three numbers separated by dots, like 1.2.43 7 # followed by an optional build number separated by a +. 8 # Both the version and the builder number may be overridden in flutter 9 # build by specifying --build-name and --build-number, respectively. 10 # Read more about versioning at semver.org. 11 version: 1.0.0+1 12 13 environment: 14 sdk: ">=2.0.0-dev.68.0 <3.0.0" 15 16 dependencies: 17 flutter: 18 sdk: flutter 19 transformer_page_view: 20 21 # The following adds the Cupertino Icons font to your application. 22 # Use with the CupertinoIcons class for iOS style icons. 23 cupertino_icons: ^0.1.2 24 25 dev_dependencies: 26 flutter_test: 27 sdk: flutter 28 29 30 # For information on the generic Dart part of this file, see the 31 # following page: https://www.dartlang.org/tools/pub/pubspec 32 33 # The following section is specific to Flutter. 34 flutter: 35 36 # The following line ensures that the Material Icons font is 37 # included with your application, so that you can use the icons in 38 # the material Icons class. 39 uses-material-design: true 40 41 # To add assets to your application, add an assets section, like this: 42 assets: 43 - assets/slide_1.png 44 - assets/slide_2.png 45 - assets/slide_3.png 46 - assets/slide_4.png 47 # - images/a_dot_ham.jpeg 48 49 # An image asset can refer to one or more resolution-specific "variants", see 50 # https://flutter.io/assets-and-images/#resolution-aware. 51 52 # For details regarding adding assets from package dependencies, see 53 # https://flutter.io/assets-and-images/#from-packages 54 55 # To add custom fonts to your application, add a fonts section here, 56 # in this "flutter" section. Each entry in this list should have a 57 # "family" key with the font family name, and a "fonts" key with a 58 # list giving the asset and other descriptors for the font. For 59 # example: 60 fonts: 61 - family: Quicksand 62 fonts: 63 - asset: assets/Quicksand-Bold.ttf 64 weight: 700 65 # - asset: fonts/Schyler-Italic.ttf 66 # style: italic 67 # - family: Trajan Pro 68 # fonts: 69 # - asset: fonts/TrajanPro.ttf 70 # - asset: fonts/TrajanPro_Bold.ttf 71 # weight: 700 72 # 73 # For details regarding fonts from package dependencies, 74 # see https://flutter.io/custom-fonts/#from-packages
In the dependencies section of the file, we’ve added the transformer_page_view dependency, a page transformer plugin for Flutter. This will help us to build our onboarding screens with no hassle.
Create an assets directory into the root of your Flutter project. You can find the content of this folder at this link.
Don’t forget to run
flutter packages getin your terminal to install your dependencies.
Building the onboarding experience
As you may have noticed in the demo, we have four screens, each one has two text views, an image and carousel indicators. These screens present and describe our app to our users in order to make them feel comfortable with it, especially to not make them disoriented. We’ll focus first on building the screens in the first part of the series, as stated in the title
Building the screens
Here’s the code for the screens. Kindly paste it in your main.dart file.
1//..lib/main.dart 2 3 import 'package:flutter/material.dart'; 4 import 'package:transformer_page_view/transformer_page_view.dart'; 5 6 void main() => runApp(MyApp()); 7 class MyApp extends StatelessWidget { 8 // This widget is the root of your application. 9 @override 10 Widget build(BuildContext context) { 11 return MaterialApp( 12 debugShowCheckedModeBanner: false, 13 title: 'Flutter Demo', 14 theme: ThemeData( 15 // This is the theme of your application. 16 // 17 // Try running your application with "flutter run". You'll see the 18 // application has a blue toolbar. Then, without quitting the app, try 19 // changing the primarySwatch below to Colors.green and then invoke 20 // "hot reload" (press "r" in the console where you ran "flutter run", 21 // or simply save your changes to "hot reload" in a Flutter IDE). 22 // Notice that the counter didn't reset back to zero; the application 23 // is not restarted. 24 primarySwatch: Colors.blue, 25 ), 26 home: MyHomePage(title: 'Flutter Demo Home Page'), 27 ); 28 } 29 } 30 31 class MyHomePage extends StatefulWidget { 32 final String title; 33 MyHomePage({this.title}); 34 @override 35 MyHomePageState createState() { 36 return new MyHomePageState(); 37 } 38 } 39 40 class MyHomePageState extends State<MyHomePage> { 41 int _slideIndex = 0; 42 43 final List<String> images = [ 44 "assets/slide_1.png", 45 "assets/slide_2.png", 46 "assets/slide_3.png", 47 "assets/slide_4.png" 48 ]; 49 50 final List<String> text0 = [ 51 "Welcome in your app", 52 "Enjoy teaching...", 53 "Showcase your skills", 54 "Friendship is great" 55 ]; 56 57 final List<String> text1 = [ 58 "App for food lovers, satisfy your taste", 59 "Find best meals in your area, simply", 60 "Have fun while eating your relatives and more", 61 "Meet new friends from all over the world" 62 ]; 63 64 final IndexController controller = IndexController(); 65 66 @override 67 Widget build(BuildContext context) { 68 69 TransformerPageView transformerPageView = TransformerPageView( 70 pageSnapping: true, 71 onPageChanged: (index) { 72 setState(() { 73 this._slideIndex = index; 74 }); 75 }, 76 loop: false, 77 controller: controller, 78 transformer: new PageTransformerBuilder( 79 builder: (Widget child, TransformInfo info) { 80 return new Material( 81 color: Colors.white, 82 elevation: 8.0, 83 textStyle: new TextStyle(color: Colors.white), 84 borderRadius: new BorderRadius.circular(12.0), 85 child: new Container( 86 alignment: Alignment.center, 87 color: Colors.white, 88 child: Padding( 89 padding: const EdgeInsets.all(18.0), 90 child: Column( 91 mainAxisAlignment: MainAxisAlignment.center, 92 crossAxisAlignment: CrossAxisAlignment.center, 93 children: <Widget>[ 94 new ParallaxContainer( 95 child: new Text( 96 text0[info.index], 97 style: new TextStyle( 98 color: Colors.blueGrey, 99 fontSize: 34.0, 100 fontFamily: 'Quicksand', 101 fontWeight: FontWeight.bold), 102 ), 103 position: info.position, 104 opacityFactor: .8, 105 translationFactor: 400.0, 106 ), 107 SizedBox( 108 height: 45.0, 109 ), 110 new ParallaxContainer( 111 child: new Image.asset( 112 images[info.index], 113 fit: BoxFit.contain, 114 height: 350, 115 ), 116 position: info.position, 117 translationFactor: 400.0, 118 ), 119 SizedBox( 120 height: 45.0, 121 ), 122 new ParallaxContainer( 123 child: new Text( 124 text1[info.index], 125 textAlign: TextAlign.center, 126 style: new TextStyle( 127 color: Colors.blueGrey, 128 fontSize: 28.0, 129 fontFamily: 'Quicksand', 130 fontWeight: FontWeight.bold), 131 ), 132 position: info.position, 133 translationFactor: 300.0, 134 ), 135 SizedBox( 136 height: 55.0, 137 ), 138 ], 139 ), 140 ), 141 ), 142 ); 143 }), 144 itemCount: 4); 145 146 return Scaffold( 147 backgroundColor: Colors.white, 148 body: transformerPageView, 149 ); 150 151 } 152 }
First, we import the material library so that we can use the MaterialApp widget inside our app. We’ve also imported our transformer_page_view_dependency. Now inside our main function, we have our MyApp widget returning the MaterialApp widget defining our app title, our app theme, and our MyHomePage widget.
The MyHomePage widget is a stateful widget as it has to manage its own state through some data. MyHomePageState is intended to handle the state of MyHomePage as you can see. Then, we defined four variables:
-
_slideIndex: initialized to 0, this variable is used to keep track of the current index of our slide -
images: an array of images to use in our screens -
text0and text1: arrays of texts to describe our screens -
controller: an object ofIndexControllerto get some useful info about indexes of screens and to control them.
Next, we declared our transformerPageView object of type TransformerPageView to build our well said screens, and to control their behavior. This object has some useful properties to control our page view behavior. We’ll take a look at some of them:
-
onPageChanged: called with the new index when the user swiped, we overrided the_slideIndexwith the new current index each time the user swiped -
loop: whether to loop or not, we set it to false -
controller: the index controller -
transformer: the most important property of this widget, it returns atransformedwidget that based on the widget parameter. The returned widget as it happens is the current screen presented to the user, just aMaterialwidget wrapping two texts widget and an image asset. We wrapped each of these widgets inside aParallaxContainerto mimic a parallax effect on screens swiping. -
itemCount: number of total items/screens.
So here are the four screens you should have if you have followed along 🙃 .
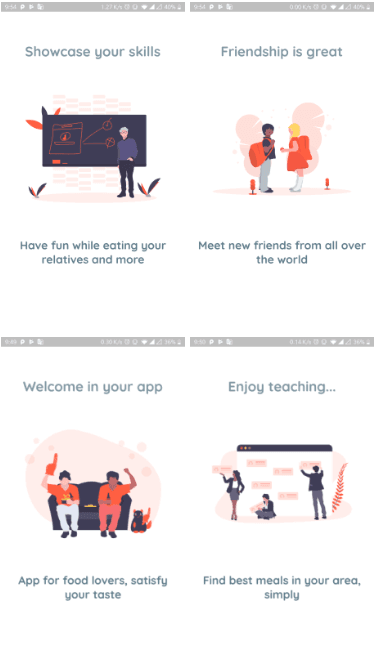
Just execute this command: flutter run in your terminal to run your app running with a smooth transition between screens 😎 .
In the next part of the tutorial, we’ll add carousel indicators to the slides to make it more user friendly.
Conclusion
In this first part of this tutorial series, you’ve learnt what onboarding is, then we’ve put this knowledge into practice by building the screens of our app intro. This is just the first steps of a beautiful journey 😉 . Follow me in the second part to see how we can polish the app with the carousel indicators and get more control over the app. Here is the code for the first part of the series.


© 2026 Pusher Ltd. All rights reserved.
Pusher Limited is a company registered in England and Wales (No. 07489873) whose registered office is at MessageBird UK Limited, 3 More London Riverside, 4th Floor, London, United Kingdom, SE1 2AQ.