Build a location sharing app with Ruby on Rails and the Google Maps API
- Introduction
- Introduction
- Prerequisites
- Pusher account setup
- Setting up the application
- Setting up the database
- Bootstrap the application
- Setting up a Google Maps project
- Building the homepage
- Displaying users location on a map
- Displaying the map via the share link
- Realtime location sharing with Pusher
- Updating the UI
- Bringing it all together
- Conclusion
Introduction
Introduction
Realtime maps have become very popular nowadays. The ability to track something or someone realtime has been incorporated into lots of apps, especially in the transportation and delivery industry. In this post, we’ll be building a realtime location sharing app using Ruby and Pusher.
Here’s a sneak-peak into what we’ll be building:

Prerequisites
A basic understanding of Ruby, CoffeeScript and PostgreSQL will help you get the best out of this tutorial. You can check the PostgreSQL, Ruby and Rails documentation for installation steps.
Before we start building our app, let’s ensure we have Ruby and Rails installed. Run the following command in your terminal to confirm you have both Ruby and Rails installed:
1$ ruby -v // 2.1 or above 2 $ rails -v // 4.2 or above
Pusher account setup
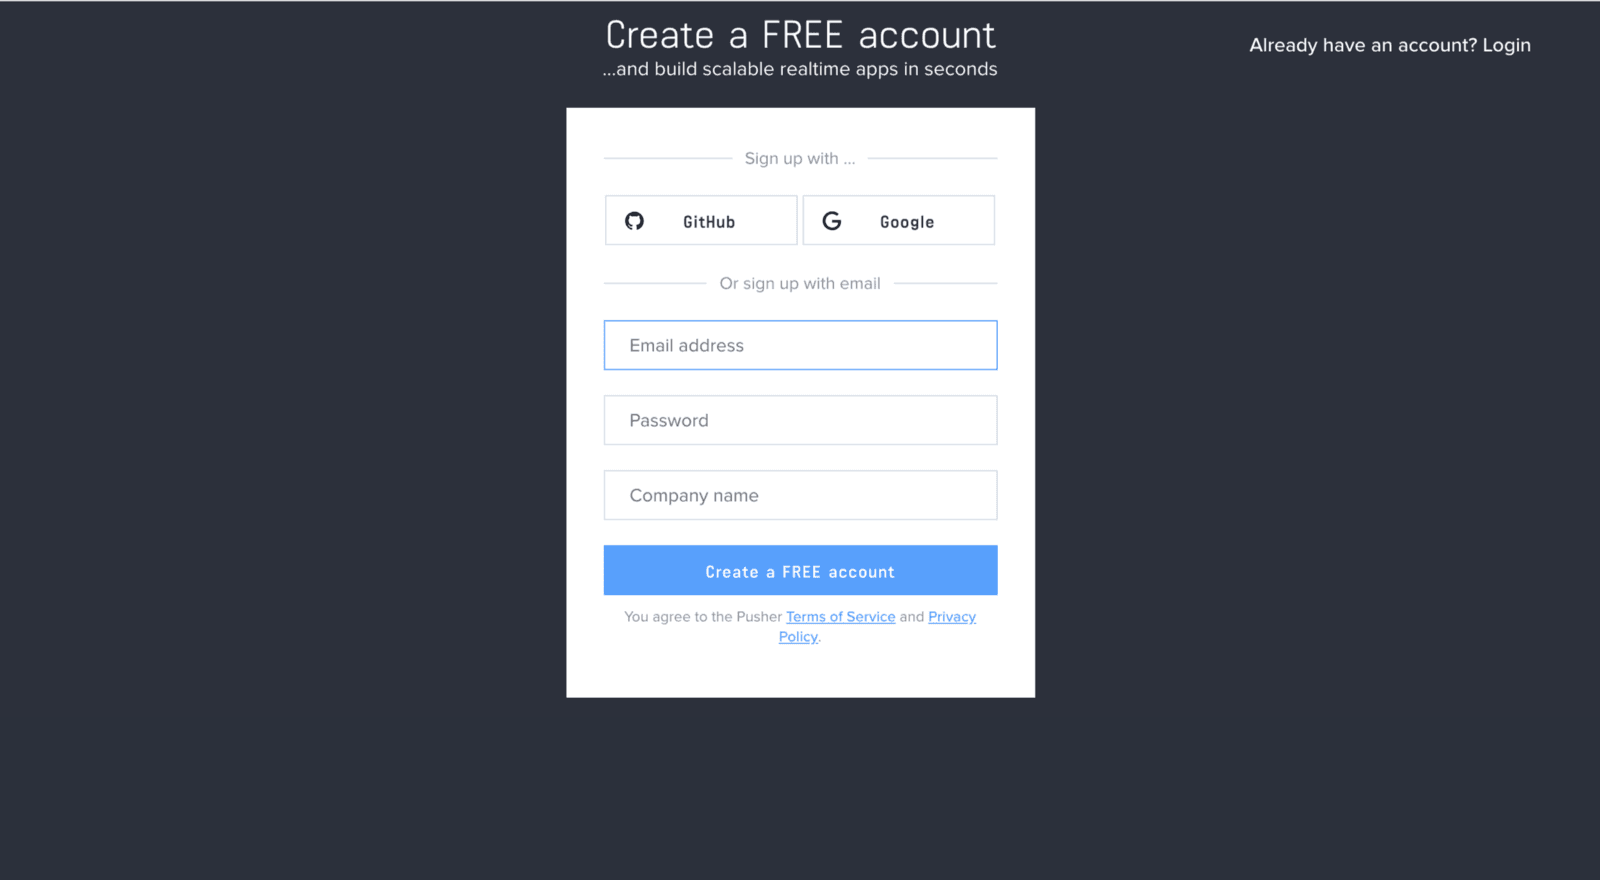
Since we’ll be relying on Pusher for realtime functionality, let’s head over to Pusher and create a free account.
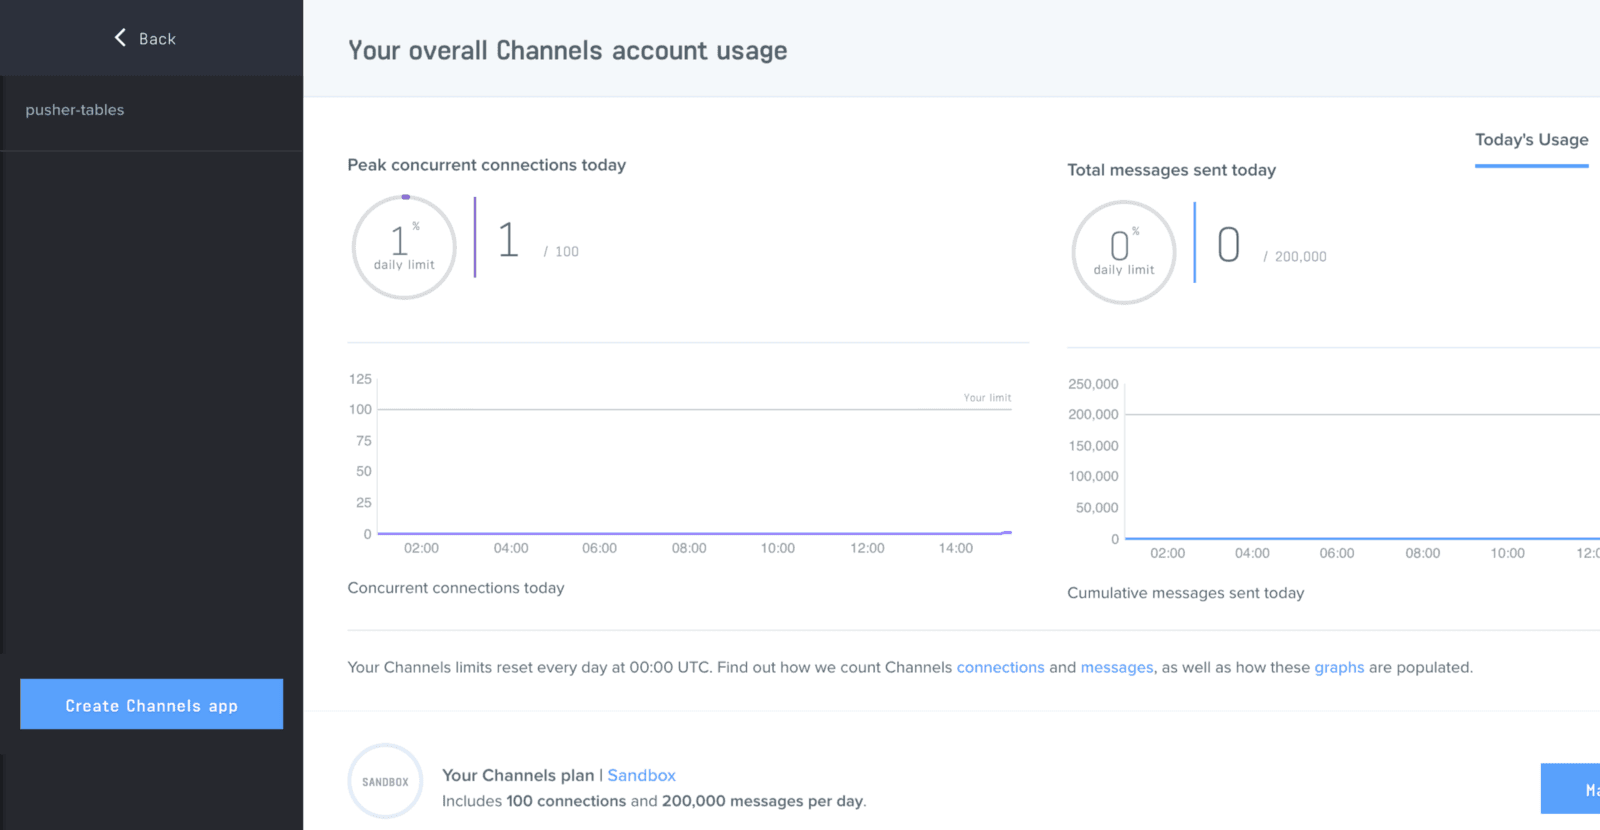
Create a new app by selecting Channels apps on the sidebar and clicking Create Channels app button on the bottom of the sidebar:
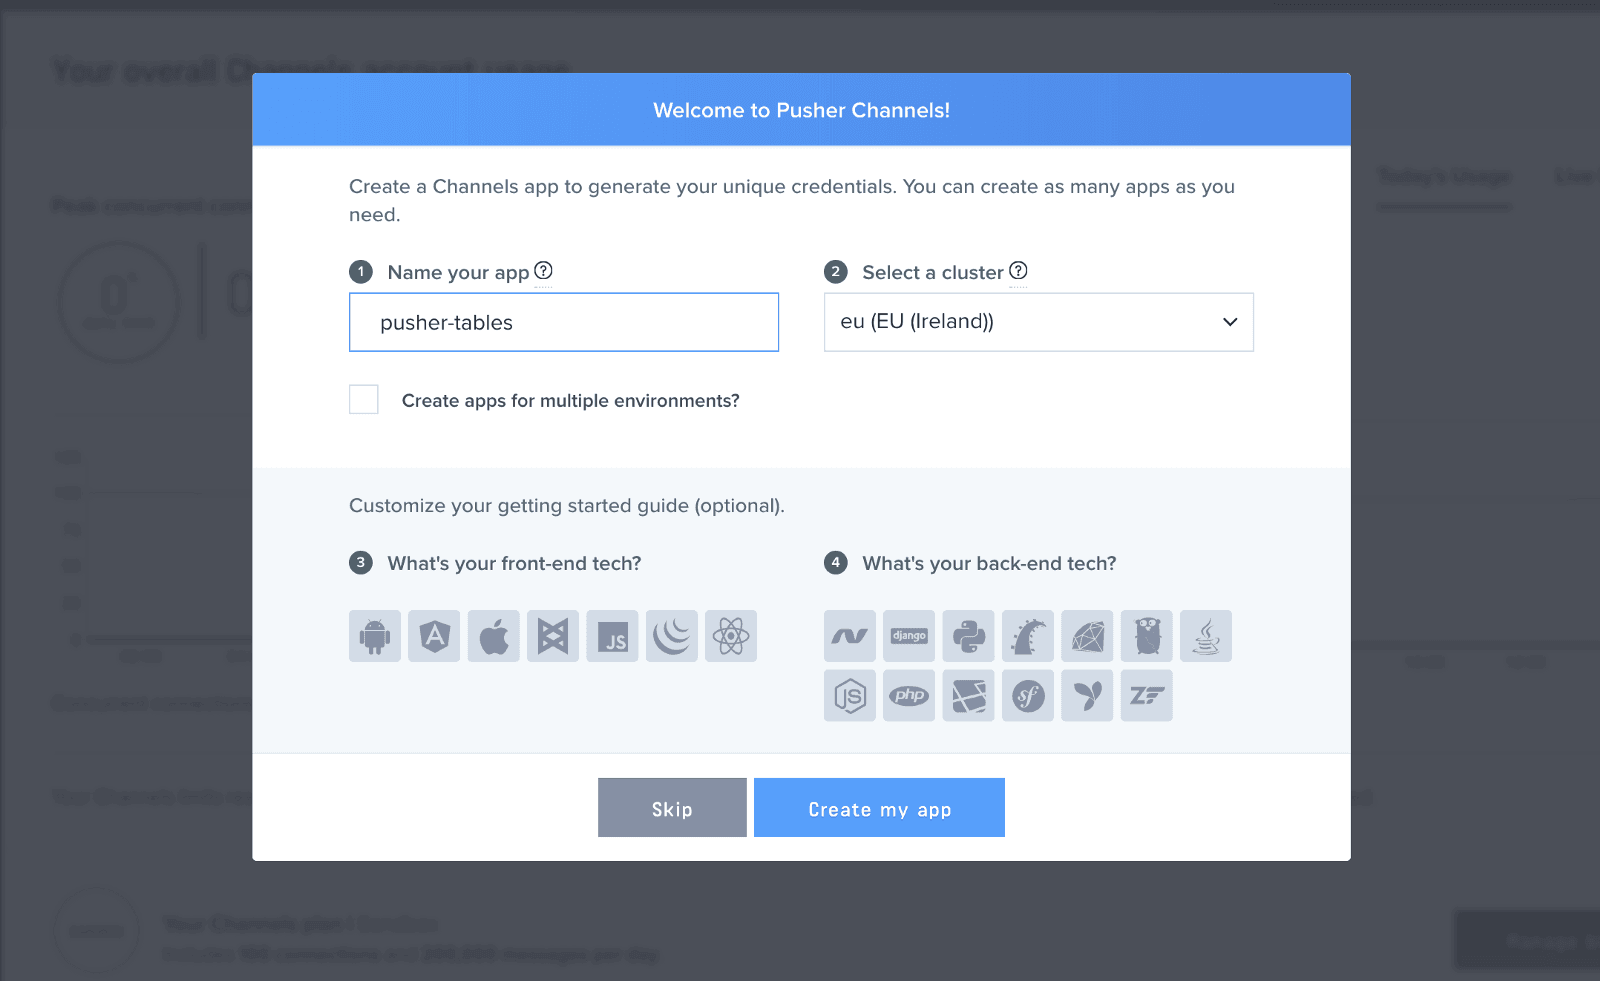
Configure an app by providing basic information requested in the form presented. You can also choose the environment you intend to integrate with Pusher, to be provided with some boilerplate setup code:
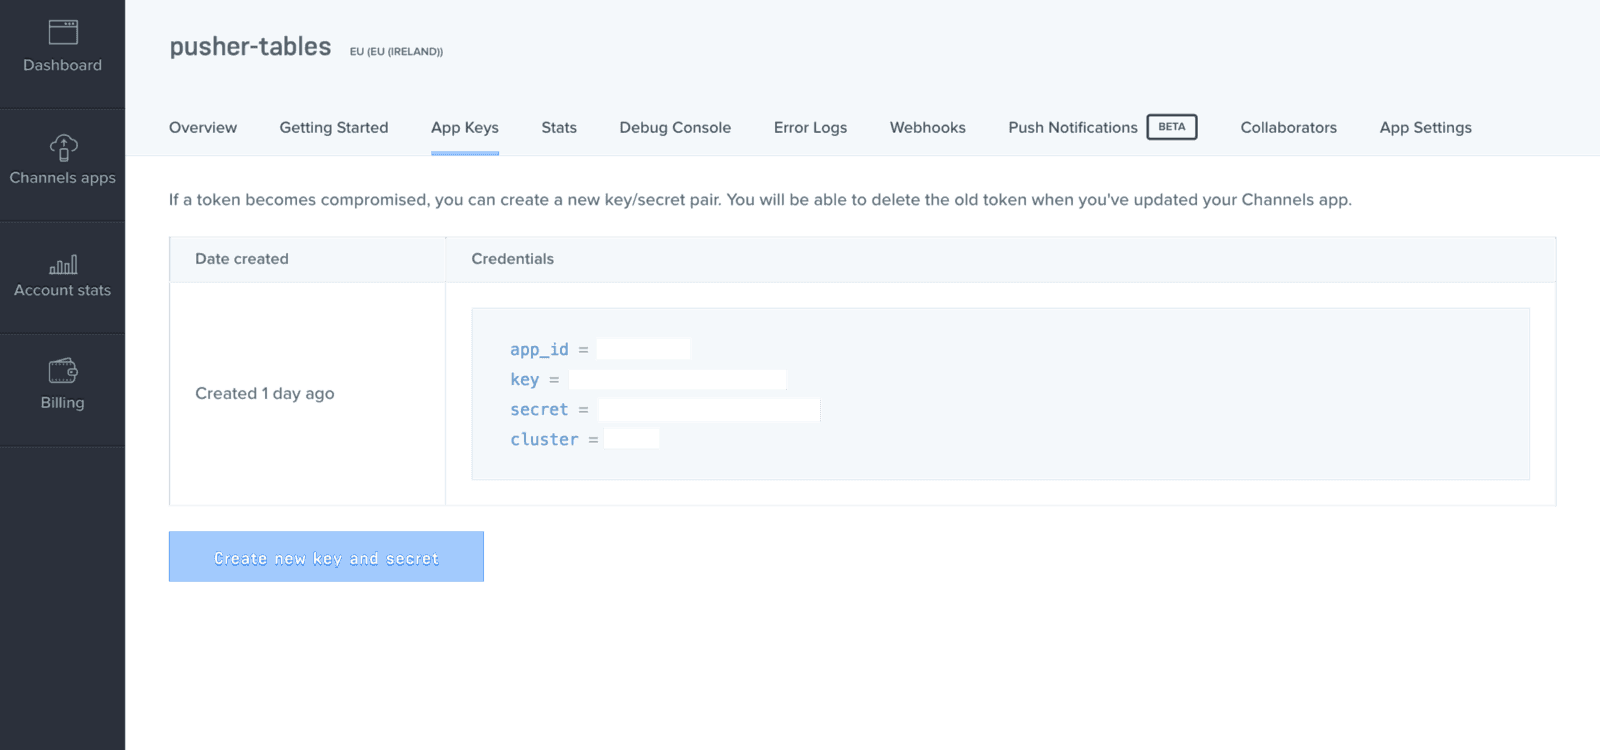
Click the App Keys tab to retrieve your keys
Now that we have our Pusher account, let’s setup our application.
Setting up the application
Open your terminal and run the following Rails commands to create our demo application:
1# create a new Rails application 2 $ rails new pusher-locations -T --database=postgresql
Go ahead and change directory into the newly created pusher-locations folder:
1# change directory 2 $ cd pusher-locations
In the root of your pusher-locations directory, open your Gemfile and add the following gems:
1# Gemfile 2 3 gem 'bootstrap', '~> 4.1.0' 4 gem 'jquery-rails' 5 gem 'pusher' 6 gem 'figaro'
In your terminal, ensure you are in the pusher-locations project directory and install the gems by running:
$ bundle install
Setting up the database
To get our app up and running, we’ll create a database for it to work with. You can check out this article on how to create a Postgres database and an associated user and password.
Once you have your database details, in your database.yml file, under the development key, add the following code:
1# config/database.yml 2 3 ... 4 development: 5 <<: *default 6 database: pusher-locations_development // add this line if it isn't already there 7 username: database_user // add this line 8 password: user_password // add this line 9 ...
Ensure that the username and password entered in the code above has access to the pusher-locations_development database. After that, run the following code to setup the database:
1# setup database 2 $ rails db:setup
Bootstrap the application
With our database all set up, we’ll go ahead and create our models and controllers. In your terminal, while in the project’s directory, run the following code:
1# generate a trip model 2 $ rails g model trip name:string uuid:string 3 4 # generate a checkin model 5 $ rails g model checkin trip:references lat:decimal lng:decimal 6 7 # generate a trips controller with index, create and show views and actions 8 $ rails g controller trips index create show 9 10 # generate a checkins controller with a create action and view 11 $ rails g controller checkins create
Next, we’ll update our trip model with its association and some methods. In your trip model file, add the following:
1# app/models/trip.rb 2 3 class Trip < ApplicationRecord 4 before_create :set_uuid 5 has_many :checkins # trip model's association with the checkins model 6 7 # a method that creates a random uuid for each trip before its created 8 def set_uuid 9 self.uuid = SecureRandom.uuid 10 end 11 12 # a method that generates a custom JSON output for our trip objects 13 def as_json(options={}) 14 super( 15 only: [:id, :name, :uuid], 16 include: { checkins: { only: [:lat, :lng, :trip_id] } } 17 ) 18 end 19 end
We’re now ready to run our database migrations and see our new app. In your terminal, run the following code:
1# run database migrations 2 $ rails db:migrate
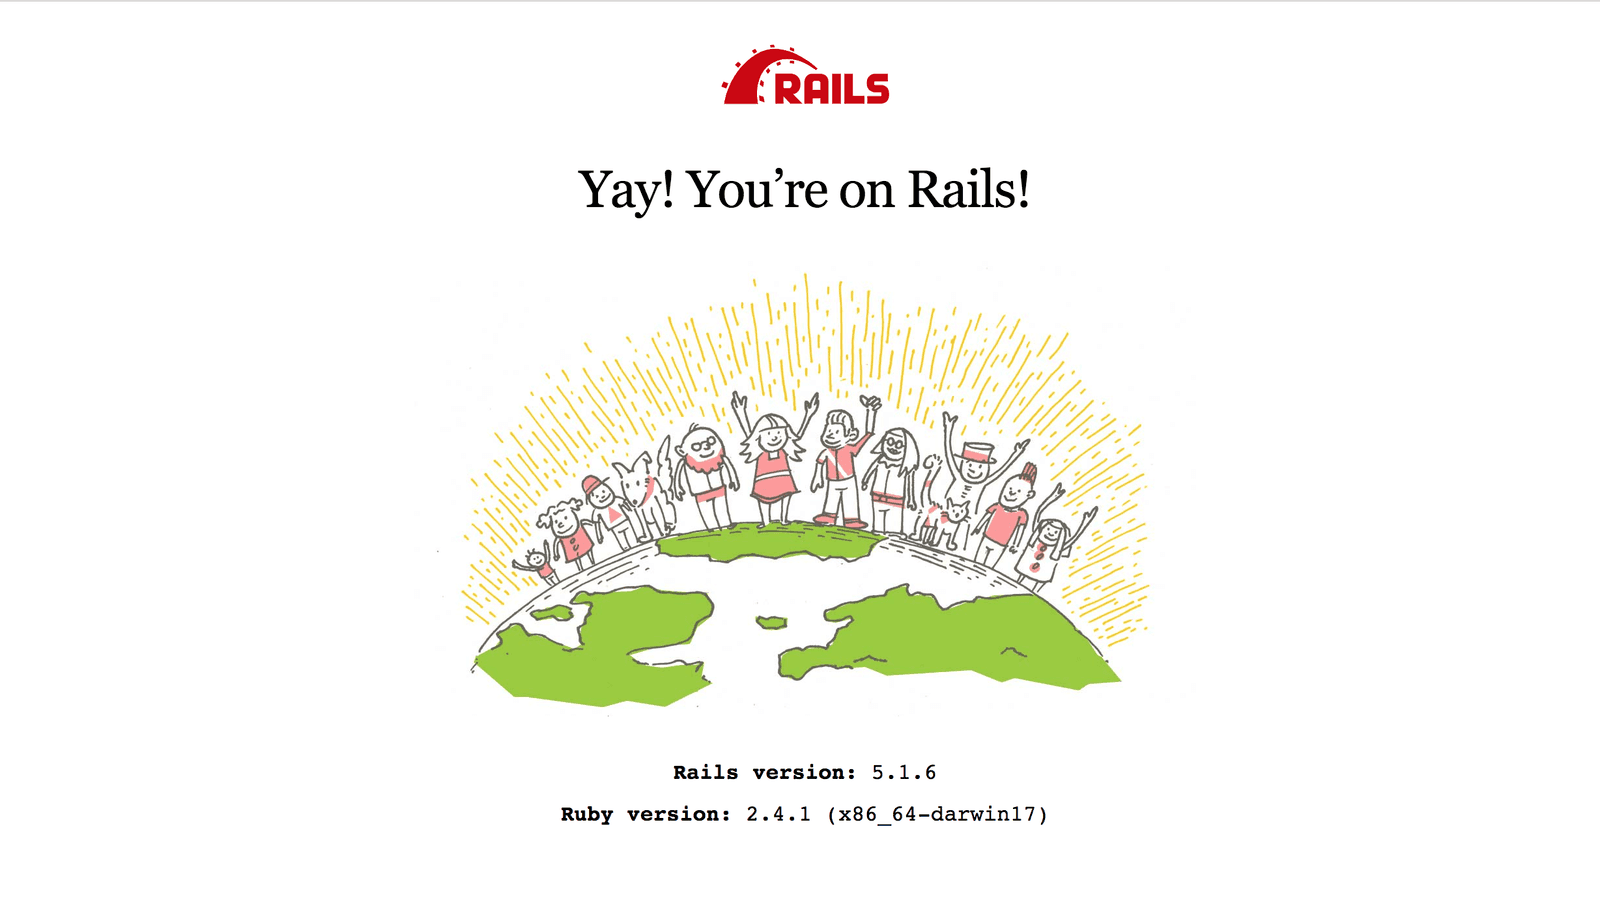
After running migrations, start the development server on your terminal by running rails s. Visit http://localhost:3000 in your browser to see your brand new application:
Setting up a Google Maps project
We’ll be using Google Maps to render our map. This documentation will guide you through registering a project in the Google API Console and activating the Google Maps JavaScript API. Remember to grab the API key that will be generated for you after registering.
Building the homepage
Now that we have everything we need to build our app, let’s build out our homepage. We’ll set our root page to the trips controller index page and add some resource routes. In your routes file, add the following code:
1# config/routes.rb 2 3 Rails.application.routes.draw do 4 resources :trips do 5 resources :checkins, only: :create 6 end 7 root 'trips#index' 8 end
Next, we’ll require Bootstrap and add some styling. Add the following code to your application.js file, all before the last line:
1# app/assets/javascripts/application.js 2 3 ..... 4 //= require jquery3 # add this line 5 //= require popper # add this line 6 //= require bootstrap # add this line 7 //= require_tree .
Rename your application.css file to application.scss and add the following code:
1# app/assets/stylesheets/application.scss 2 3 @import "bootstrap"; 4 @import url('https://fonts.googleapis.com/css?family=Dosis'); 5 body { 6 font-family: 'Dosis', sans-serif; 7 } 8 #map { 9 width: 100%; 10 height: 42rem; 11 }
In our app, we’ll be interacting with our users via a form in the header. Let’s create a partial where our header will live. We’ll render this partial on the homepage.
In our layouts folder, create a _header.html.erb file and add the following markup:
1# app/views/layouts/_header.html.erb 2 3 <header class="bg-warning"> 4 <nav class="navbar navbar-expand-sm navbar-light sticky-top"> 5 <a class="navbar-brand" href="/">Pusher Location</a> 6 <button class="navbar-toggler" type="button" data-toggle="collapse" data-target="#mobile-menu" aria-controls="mobile-menu" aria-expanded="false" aria-label="Toggle navigation"> 7 <span class="navbar-toggler-icon"></span> 8 </button> 9 <div class="collapse navbar-collapse" id="mobile-menu"> 10 <form class="form-inline name-form"> 11 <input class="form-control mr-sm-2" type="name" name="name" required placeholder="Enter your name" aria-label="name"> 12 <button class="btn btn-outline-success my-2 my-sm-0" type="submit">Share Location</button> 13 </form> 14 <div class="share-url"></div> 15 </div> 16 </nav> 17 </header>
Now, we’ll render our header partial and add the HTML markup for our homepage:
1# app/views/trips/index.html.erb 2 3 <%= render 'layouts/header' %> 4 <div id="map"></div>
With this, we should have a homepage that looks like this:

If you encounter any error related to application.html.erb, in config/boot.rb, change the ExecJS runtime from Duktape to Node.
1# config/boot.rb 2 ENV['EXECJS_RUNTIME'] ='Node'
Displaying users location on a map
Once our users submit a name, we request their location, save it to the database and then render a map showing that location. We’ll check their current location every five seconds and update the map with it.
To make use of the Google Maps API, we need to add the Google Maps script to the head of our application.html.erb file. We’ll also add the Pusher library script.
1# app/views/layouts/application.html.erb 2 3 ... 4 <head> 5 <title>PusherLocations</title> 6 <%= csrf_meta_tags %> 7 <meta name="viewport" content="width=device-width, initial-scale=1, maximum-scale=1"> 8 <script async defer src="https://maps.googleapis.com/maps/api/js?key=YOUR_API_KEY"></script> # add Google Maps script 9 <%= stylesheet_link_tag 'application', media: 'all', 'data-turbolinks-track': 'reload' %> 10 <script src="https://js.pusher.com/4.1/pusher.min.js"></script> # add Pusher script 11 <%= javascript_include_tag 'application', 'data-turbolinks-track': 'reload' %> 12 </head> 13 ...
Ensure you add your API key to the Google Maps script.
Now, in your trips.coffee file, add the following code:
1# app/assets/javascripts/trips.coffee 2 3 $(document).ready => 4 tripId = '' 5 startingPoint = {} 6 # function for converting coordinates from strings to numbers 7 makeNum = (arr) -> 8 arr.forEach (arr) -> 9 arr.lat = Number(arr.lat) 10 arr.lng = Number(arr.lng) 11 return 12 arr 13 14 # function for creating a new trip 15 saveTrip = (positionData) -> 16 token = $('meta[name="csrf-token"]').attr('content') 17 $.ajax 18 url: '/trips' 19 type: 'post' 20 beforeSend: (xhr) -> 21 xhr.setRequestHeader 'X-CSRF-Token', token 22 return 23 data: positionData 24 success: (response) -> 25 tripId = response.id 26 url = """#{window.location.protocol}//#{window.location.host}/trips/#{response.uuid}""" 27 initMap() 28 $('.name-form').addClass('collapse') 29 $('.share-url').append """ 30 <h6 class="m-0 text-center">Hello <strong>#{response.name}</strong>, here's your location sharing link: <a href="#{url}">#{url}</a></h6> 31 """ 32 getCurrentLocation() 33 return 34 return 35 36 # function for getting the user's location at the begining of the trip 37 getLocation = (name) -> 38 if navigator.geolocation 39 navigator.geolocation.getCurrentPosition (position) -> 40 coord = position.coords 41 timestamp = position.timestamp 42 data = 43 lat: coord.latitude, 44 lng: coord.longitude, 45 name: name 46 startingPoint = data 47 saveTrip data 48 return 49 50 # function for rendering the map 51 initMap = -> 52 center = 53 lat: startingPoint.lat 54 lng: startingPoint.lng 55 map = new (google.maps.Map)(document.getElementById('map'), 56 zoom: 18 57 center: center) 58 marker = new (google.maps.Marker)( 59 position: center 60 map: map) 61 return 62 63 # function for updating the map with the user's current location 64 updateMap = (checkin) -> 65 lastCheckin = checkin[checkin.length - 1] 66 center = 67 lat: startingPoint.lat 68 lng: startingPoint.lng 69 map = new (google.maps.Map)(document.getElementById('map'), 70 zoom: 18 71 center: center) 72 marker = new (google.maps.Marker)( 73 position: lastCheckin 74 map: map) 75 flightPath = new (google.maps.Polyline)( 76 path: checkin 77 strokeColor: '#FF0000' 78 strokeOpacity: 1.0 79 strokeWeight: 2) 80 flightPath.setMap map 81 setTimeout(getCurrentLocation, 5000) 82 return 83 84 # function for updating the database with the user's current location 85 updateCurrentLocation = (tripData, id) -> 86 token = $('meta[name="csrf-token"]').attr('content') 87 $.ajax 88 url: "/trips/#{id}/checkins" 89 type: 'post' 90 beforeSend: (xhr) -> 91 xhr.setRequestHeader 'X-CSRF-Token', token 92 return 93 data: tripData 94 success: (response) -> 95 return 96 return 97 98 # function for finding the user's current location 99 getCurrentLocation = -> 100 navigator.geolocation.getCurrentPosition (position) -> 101 data = 102 lat: position.coords.latitude, 103 lng: position.coords.longitude 104 updateCurrentLocation(data, tripId) 105 return 106 107 # run this block of code if we're on the homepage 108 unless location.pathname.startsWith('/trips') 109 # when a user submits their name, get their name and call the function to get their location 110 $('.name-form').on 'submit', (event) -> 111 event.preventDefault() 112 formData = $(this).serialize() 113 name = formData.split('=')[1] 114 data = getLocation(name) 115 return
In the code above, we get our user’s name and call the getLocation function. The getLocation function gets the user’s location and saves it to the database.
If the user’s location is saved successfully, we render the link for sharing their location on the header, render the map on the page by calling the initMap function and then call the getCurrentLocation function to monitor their current location and update the map.
Also, add the following code to your trips and checkins controllers respectively:
1# app/controllers/trips_controller.rb 2 3 class TripsController < ApplicationController 4 def index 5 end 6 7 # function for creating a new trip 8 def create 9 @trip = Trip.new(trip_params) 10 @trip.checkins.build(lat: params[:lat], lng: params[:lng]) 11 render json: @trip.as_json if @trip.save 12 end 13 14 # function for showing a trip 15 def show 16 @trip = Trip.find_by(uuid: params[:id]) 17 end 18 19 private 20 def trip_params 21 params.permit(:name) 22 end 23 end
1# app/controllers/checkins_controller.rb 2 3 class CheckinsController < ApplicationController 4 def create 5 @checkin = Checkin.new(checkin_params) 6 render json: @checkin.as_json(only: [:lat, :lng, :trip_id]) if @checkin.save 7 end 8 9 private 10 def checkin_params 11 params.permit(:trip_id, :lat, :lng) 12 end 13 end
If you have followed the tutorial up to this point, if you refresh the homepage, you should be able to enter your name and see your location in a map on the page. Remember to allow the page to access your location.
Displaying the map via the share link
When we share the link with other users, we want them to see the user’s current location on a map. The share link contains the UUID for that current trip. When the page loads, we attach the longitude and latitude data to a hidden field and use it to render the user’s location on a page.
Add the following code to the show.html.erb file:
1# app/views/trips/show.html.erb 2 3 <div id="map"></div> 4 <%= hidden_field_tag 'lat', @trip.checkins[0][:lat] %> # hidden field holding the latitude information 5 <%= hidden_field_tag 'lng', @trip.checkins[0][:lng] %># hidden field holding the longitude information
Add the following code to the trips.coffee file:
1# app/assets/javascripts/trips.coffee 2 3 ...... 4 # run this code if we're on the trips page 5 if location.pathname.startsWith('/trips') 6 showLat = $('#lat').val() # get the user's latitude from the hidden field 7 showLng = $('#lng').val() # get the user's longitude from the hidden field 8 data = 9 lat: Number(showLat), 10 lng: Number(showLng) 11 startingPoint = data 12 initMap()
In the code above, when we’re on the trips page, we get the longitude and latitude from the hidden input field. We then call the initMap function to render the map on the page.
With this, we should be able to view the user’s location via the share link.
Realtime location sharing with Pusher
Now that other users can view user’s location on the map, it’s time for us to update the user’s location in realtime. To achieve this, every time a user’s current location is updated, we publish it and on the frontend of our app, we update the map with the new coordinates.
First, let’s initialize our Pusher client. In the config/initializers folder, create a pusher.rb file and add the following code:
1# config/initializers/pusher.rb 2 3 require 'pusher' 4 Pusher.app_id = ENV["PUSHER_APP_ID"] 5 Pusher.key = ENV["PUSHER_KEY"] 6 Pusher.secret = ENV["PUSHER_SECRET"] 7 Pusher.cluster = ENV["PUSHER_CLUSTER"] 8 Pusher.logger = Rails.logger 9 Pusher.encrypted = true
Next, run figaro install in your terminal. It will generate an application.yml file. In the application.yml file add your Pusher keys:
1# config/application.yml 2 3 PUSHER_APP_ID: 'xxxxxx' 4 PUSHER_KEY: 'xxxxxxxxxxxxxxxxx' 5 PUSHER_SECRET: 'xxxxxxxxxxxxxx' 6 PUSHER_CLUSTER: 'xx'
With our Pusher client set up, in our checkin model, we’ll add an after create callback to publish a user’s coordinates after they’re saved. Add the following code in the checkin model:
1# app/models/checkin.rb 2 3 class Checkin < ApplicationRecord 4 belongs_to :trip 5 after_create :notify_pusher 6 7 # method to publish a user's current location 8 def notify_pusher 9 Pusher.trigger('location', 'new', self.trip.as_json) 10 end 11 end
Updating the UI
Now that our server is publishing coordinate updates, we’ll grab them on the client side and update the map with it.
Lets rename our trips.coffee file to trips.coffee.erb and replace the code there with the following:
1# app/assets/javascripts/trips.coffee.erb 2 3 $(document).ready => 4 tripId = '' 5 startingPoint = {} 6 isOwner = false 7 map = null 8 9 <%# function for converting coordinates to numbers %> 10 makeNum = (arr) -> 11 arr.forEach (arr) -> 12 arr.lat = Number(arr.lat) 13 arr.lng = Number(arr.lng) 14 return 15 arr 16 17 <%# function for creating a new trip %> 18 saveTrip = (positionData) -> 19 isOwner = true 20 token = $('meta[name="csrf-token"]').attr('content') 21 $.ajax 22 url: '/trips' 23 type: 'post' 24 beforeSend: (xhr) -> 25 xhr.setRequestHeader 'X-CSRF-Token', token 26 return 27 data: positionData 28 success: (response) -> 29 tripId = response.id 30 url = """#{window.location.protocol}//#{window.location.host}/trips/#{response.uuid}""" 31 initMap() 32 $('.name-form').addClass('collapse') 33 $('.share-url').append """ 34 <h6 class="m-0 text-center">Hello <strong>#{response.name}</strong>, here's your location sharing link: <a href="#{url}">#{url}</a></h6> 35 """ 36 getCurrentLocation() 37 return 38 return 39 40 <%# function for getting the user's location at the begining of the trip %> 41 getLocation = (name) -> 42 if navigator.geolocation 43 navigator.geolocation.getCurrentPosition (position) -> 44 coord = position.coords 45 timestamp = position.timestamp 46 data = 47 lat: coord.latitude, 48 lng: coord.longitude, 49 name: name 50 startingPoint = data 51 saveTrip data 52 return 53 54 <%# function for rendering the map %> 55 initMap = -> 56 center = 57 lat: startingPoint.lat 58 lng: startingPoint.lng 59 map = new (google.maps.Map)(document.getElementById('map'), 60 zoom: 18 61 center: center) 62 marker = new (google.maps.Marker)( 63 position: center 64 map: map) 65 return 66 67 <%# function for updating the map with the user's current location %> 68 updateMap = (checkin) -> 69 console.log checkin 70 lastCheckin = checkin[checkin.length - 1] 71 center = 72 lat: startingPoint.lat 73 lng: startingPoint.lng 74 map = new (google.maps.Map)(document.getElementById('map'), 75 zoom: 18 76 center: center) 77 marker = new (google.maps.Marker)( 78 position: lastCheckin 79 map: map) 80 flightPath = new (google.maps.Polyline)( 81 path: checkin 82 strokeColor: '#FF0000' 83 strokeOpacity: 1.0 84 strokeWeight: 2) 85 flightPath.setMap map 86 if isOwner 87 setTimeout(getCurrentLocation, 5000) 88 return 89 90 <%# function for updating the database with the user's current location %> 91 updateCurrentLocation = (tripData, id) -> 92 token = $('meta[name="csrf-token"]').attr('content') 93 $.ajax 94 url: "/trips/#{id}/checkins" 95 type: 'post' 96 beforeSend: (xhr) -> 97 xhr.setRequestHeader 'X-CSRF-Token', token 98 return 99 data: tripData 100 success: (response) -> 101 return 102 return 103 104 <%# function for finding the user's current location %> 105 getCurrentLocation = -> 106 navigator.geolocation.getCurrentPosition (position) -> 107 data = 108 lat: position.coords.latitude, 109 lng: position.coords.longitude 110 updateCurrentLocation(data, tripId) 111 return 112 113 <%# run this block of code if we're on the homepage %> 114 unless location.pathname.startsWith('/trips') 115 <%# when a user submits their name, get their name and call the function to get their location %> 116 $('.name-form').on 'submit', (event) -> 117 event.preventDefault() 118 formData = $(this).serialize() 119 name = formData.split('=')[1] 120 data = getLocation(name) 121 return 122 123 <%# run this code if we're on the trips page %> 124 if location.pathname.startsWith('/trips') 125 showLat = $('#lat').val() 126 showLng = $('#lng').val() 127 data = 128 lat: Number(showLat), 129 lng: Number(showLng) 130 startingPoint = data 131 initMap() 132 133 <%# subscribe Pusher client %> 134 pusher = new Pusher('<%= ENV["PUSHER_KEY"] %>', 135 cluster: '<%= ENV["PUSHER_CLUSTER"] %>' 136 encrypted: true) 137 channel = pusher.subscribe('location') 138 channel.bind 'new', (data) -> 139 updateMap makeNum(data.checkins) 140 return 141 return
In the code above, we subscribed our Pusher client to the location channel and listened for the new event. Once those events are emitted, we get the coordinates and update the map with it.
Bringing it all together
Restart the development server if it is currently running. Visit http://localhost:3000 in two separate browser tabs to test the realtime location sharing app.
In order to see the marker move realtime(without going for a walk), you’ll have to send events to the location channel. The easiest way to do this is by using the event creator on the Pusher Debug Console. Here is a sample data format that can be used to trigger an update:
1{ 2 "id": "1", 3 "name": "John", 4 "checkins": [ 5 { "lat": "6.5542937", "lng": "3.3665464999999997" }, 6 { "lat": "6.5545393", "lng": "3.3667686" }, 7 { "lat": "6.5550349", "lng": "3.3667605" }, 8 { "lat": "6.5554759", "lng": "3.3667485" } 9 ] 10 }
Here is an image of how the event would look like on the Pusher event creator:

Conclusion
In this post, we have successfully created a realtime location sharing app. I hope you found this tutorial helpful and would love to apply the knowledge gained here to easily set up your own application using Pusher.
You can find the source code for the demo app on GitHub.