- Products

- Developers
- User stories
- Blog
- Pricing

Build a live dashboard with Python
Introduction
Introduction
In the past, if we needed to build a web platform that keeps track of user actions and displays updates accordingly, say on the admin dashboard, we will have to refresh the dashboard from time to time, usually intuitively, to check for new updates.
Today, however, we can build a fully interactive web application and have the updates served to us in realtime. In this tutorial, we will build an interactive website with a dashboard that displays updates on user actions in realtime. Here is what the final application will look like:
The image above shows two browser windows, the window on the left shows a user performing three actions:
- The user places a new order.
- The user sends a new message.
- The user adds a new customer.
The window on the right shows an admin dashboard that updates in realtime based on the user’s interaction. The realtime update in this application is powered by Pusher Channels.
For the sake of this article, we will build the backend server using a Python framework called Flask. For the frontend, we will use JavaScript to send HTTP requests and communicate with the backend API.
The source code for this tutorial is available here on GitHub.
Prerequisites
To follow along with this tutorial, a basic knowledge of Python, Flask, and JavaScript (ES6 syntax) is required. You will also need the following installed:
- Python (>= v3.x)
- virtualenv
- Flask
- Pusher Channels (Sign up for a free Pusher account.)
Virtualenv is great for creating isolated Python environments, so we can install dependencies in an isolated environment, and not pollute our global packages directory.
Let’s install virtualenv with this command:
$ pip install virtualenv
Setting up the app environment
Let’s create our project folder, and activate a virtual environment within it:
1$ mkdir pusher-python-realtime-dashboard 2 $ cd pusher-python-realtime-dashboard 3 $ virtualenv .venv 4 $ source .venv/bin/activate # Linux based systems 5 $ \path\to\env\Scripts\activate # Windows users
Now that we have the virtual environment setup, we can install Flask with this command:
$ pip install flask
We need to install the Pusher library as we will need that for realtime updates.
Setting up Pusher Channels
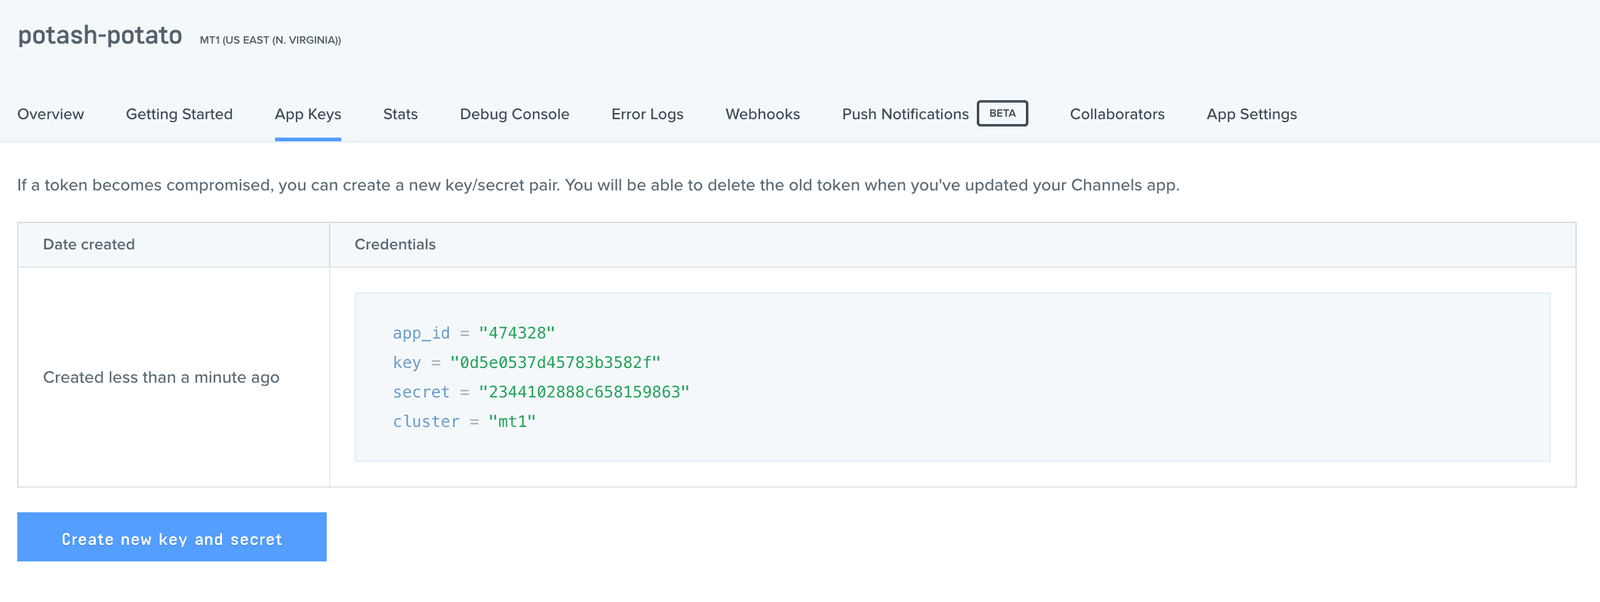
To get started with Pusher Channels, sign up for a free Pusher account. Then go to the dashboard and create a new Channels app. Follow the application creation wizard and then you should be given your application credentials, we will use this later in the article.
We also need to install the Python library to send events to Pusher Channels. Install this using the command below:
$ pip install pusher
File and folder structure
We don’t need to create so many files and folders for this application since it’s a simple one. Here’s the file/folder structure:
1├── pusher-python-realtime-dashboard 2 ├── app.py 3 ├── static 4 └── templates
The static folder will contain the static files to be used as is defined by Flask standards. The templates folder will contain the HTML templates. In our application, app.py is the main entry point and will contain our server-side code.
We will go ahead and create the app.py and then the static and templates folders.
Building the backend
Let’s open the app.py file and start writing the backend code that will handle the incoming HTTP requests. In this file, we are going to register five routes and their respective handler functions. The / and /dashboard routes will render the website and admin dashboard pages respectively. We will create these pages shortly.
We will define three more routes: /orders, /message and /customer. These will serve as API endpoints. These endpoints will be responsible for processing the POST requests that will be coming from our frontend and receiving user data.
We will also create a fresh Pusher instance and use it to broadcast data through three channels, one for each of the three possible user operations:
- Place an order
- Send a message
- Register a new customer
Open the app.py file and paste the following code:
1from flask import Flask, render_template, request 2 from pusher import Pusher 3 4 app = Flask(__name__) 5 6 # configure pusher object 7 pusher = Pusher( 8 app_id='PUSHER_APP_ID', 9 key='PUSHER_APP_KEY', 10 secret='PUSHER_APP_SECRET', 11 cluster='PUSHER_APP_CLUSTER', 12 ssl=True) 13 14 @app.route('/') 15 def index(): 16 return render_template('index.html') 17 18 @app.route('/dashboard') 19 def dashboard(): 20 return render_template('dashboard.html') 21 22 @app.route('/orders', methods=['POST']) 23 def order(): 24 data = request.form 25 pusher.trigger(u'order', u'place', { 26 u'units': data['units'] 27 }) 28 return "units logged" 29 30 @app.route('/message', methods=['POST']) 31 def message(): 32 data = request.form 33 pusher.trigger(u'message', u'send', { 34 u'name': data['name'], 35 u'message': data['message'] 36 }) 37 return "message sent" 38 39 @app.route('/customer', methods=['POST']) 40 def customer(): 41 data = request.form 42 pusher.trigger(u'customer', u'add', { 43 u'name': data['name'], 44 u'position': data['position'], 45 u'office': data['office'], 46 u'age': data['age'], 47 u'salary': data['salary'], 48 }) 49 return "customer added" 50 51 if __name__ == '__main__': 52 app.run(debug=True)
In the code above, we imported the required modules and objects, then initialized a Flask app. Next, we initialized and configure Pusher and also registered the routes and their associated handler functions.
NOTE: Replace the
PUSHER_APP_*keys with the values on your Pusher dashboard.
With the pusher object instantiated, we can trigger events on whatever channels we define.
In the handler functions of the /orders, /message and /customer routes, we trigger events on three channels. The trigger method has the following syntax:
pusher.trigger("a_channel", "an_event", {key: "data to pass with event"})
You can find the docs for the Python library here, to get more information on configuring and using Pusher Channels in Python.
As we already discussed, the / and /dashboard routes will render the index.html and dashboard.html templates so we need to create these files and write the code to define the frontend layout. In the next step, we will create the app view and use the frontend to communicate with the Python backend.
Setting up the app view
We need to create two files in the templates directory. These files will be named index.html and dashboard.html, this is where the view for our code will live. When we visit our application’s root address, the index.html page will be rendered as the homepage. When we visit the [/dashboard](http://127.0.0.1:5000/dashboard) address, the dashboard.html file will be rendered on the browser.
In the ./templates/index.html file, you can paste this code:
1<!DOCTYPE html> 2 <html> 3 <head> 4 <title>Pusher Python Realtime Dashboard</title> 5 </head> 6 <body> 7 <form method="post" action="/orders"> 8 <h3>Place a new order</h3> 9 <input type="number" name="units" placeholder="units"><br> 10 <input type="submit" name="Submit"> 11 </form> 12 <form method="post" action="/message"> 13 <h3>Send a new message</h3> 14 <input type="text" name="name" placeholder="name here"><br> 15 <textarea name="message" placeholder="message here"></textarea><br> 16 <input type="submit" name="Submit"> 17 </form> 18 <form method="post" action="/customer"> 19 <h3>Add new customer</h3> 20 <input type="text" name="name" placeholder="name here"><br> 21 <input type="text" name="position" placeholder="position here"><br> 22 <input type="text" name="office" placeholder="office here"><br> 23 <input type="number" name="age" placeholder="age here"><br> 24 <input type="text" name="salary" placeholder="salary here"><br> 25 <input type="submit" name="Submit"> 26 </form> 27 </body> 28 </html>
In the markup above, we created three forms with the POST method and defined their actions. Whenever each of these forms is submitted, user data is sent to the Python backend server that we defined in the previous step.
Before we write the code for dashboard-single.html and dashboard files, we will pull in some CSS and JS from https://startbootstrap.com. Go to the URL and click Download. Unzip the file and copy the css and js directories into the static directory of our project. Now, let’s continue building the frontend of our application.
Open the ./templates/dashboard.html file and paste the following:
1<!DOCTYPE html> 2 <html lang="en"> 3 <head> 4 <meta charset="utf-8"> 5 <meta http-equiv="X-UA-Compatible" content="IE=edge"> 6 <meta name="viewport" content="width=device-width, initial-scale=1, shrink-to-fit=no"> 7 <meta name="description" content=""> 8 <meta name="author" content=""> 9 <title>SB Admin - Start Bootstrap Template</title> 10 <link rel="stylesheet" href="https://maxcdn.bootstrapcdn.com/bootstrap/4.0.0/css/bootstrap.min.css" integrity="sha384-Gn5384xqQ1aoWXA+058RXPxPg6fy4IWvTNh0E263XmFcJlSAwiGgFAW/dAiS6JXm" crossorigin="anonymous"> 11 <link href="https://cdnjs.cloudflare.com/ajax/libs/font-awesome/4.7.0/css/font-awesome.min.css" rel="stylesheet" type="text/css"> 12 <link href="https://cdn.datatables.net/1.10.16/css/dataTables.bootstrap4.min.css" rel="stylesheet"> 13 <link href="{{ url_for('static', filename='css/sb-admin.css') }}" rel="stylesheet"> 14 </head> 15 <body class="fixed-nav sticky-footer bg-dark" id="page-top"> 16 <nav class="navbar navbar-expand-lg navbar-dark bg-dark fixed-top" id="mainNav"> 17 <a class="navbar-brand" href="index.html">Start Bootstrap</a> 18 <button class="navbar-toggler navbar-toggler-right" type="button" data-toggle="collapse" data-target="#navbarResponsive" aria-controls="navbarResponsive" aria-expanded="false" aria-label="Toggle navigation"> 19 <span class="navbar-toggler-icon"></span> 20 </button> 21 <div class="collapse navbar-collapse" id="navbarResponsive"> 22 <ul class="navbar-nav navbar-sidenav" id="exampleAccordion"> 23 <li class="nav-item" data-toggle="tooltip" data-placement="right" title="Dashboard"> 24 <a class="nav-link" href="/dashboard"> 25 <i class="fa fa-fw fa-dashboard"></i> 26 <span class="nav-link-text">Dashboard</span> 27 </a> 28 </li> 29 </ul> 30 </div> 31 </nav> 32 <div class="content-wrapper"> 33 <div class="container-fluid"> 34 <ol class="breadcrumb"> 35 <li class="breadcrumb-item"> 36 <a href="#">Dashboard</a> 37 </li> 38 <li class="breadcrumb-item active">My Dashboard</li> 39 </ol> 40 <div class="row"> 41 <div class="col-xl-3 col-sm-6 mb-3"> 42 <div class="card text-white bg-primary o-hidden h-100"> 43 <div class="card-body"> 44 <div class="card-body-icon"> 45 <i class="fa fa-fw fa-comments"></i> 46 </div> 47 <div class="mr-5"><span id="message-count">26</span> New Messages!</div> 48 </div> 49 <a class="card-footer text-white clearfix small z-1" href="#"> 50 <span class="float-left">View Details</span> 51 <span class="float-right"> 52 <i class="fa fa-angle-right"></i> 53 </span> 54 </a> 55 </div> 56 </div> 57 <div class="col-xl-3 col-sm-6 mb-3"> 58 <div class="card text-white bg-warning o-hidden h-100"> 59 <div class="card-body"> 60 <div class="card-body-icon"> 61 <i class="fa fa-fw fa-list"></i> 62 </div> 63 <div class="mr-5">11 New Tasks!</div> 64 </div> 65 <a class="card-footer text-white clearfix small z-1" href="#"> 66 <span class="float-left">View Details</span> 67 <span class="float-right"> 68 <i class="fa fa-angle-right"></i> 69 </span> 70 </a> 71 </div> 72 </div> 73 <div class="col-xl-3 col-sm-6 mb-3"> 74 <div class="card text-white bg-success o-hidden h-100"> 75 <div class="card-body"> 76 <div class="card-body-icon"> 77 <i class="fa fa-fw fa-shopping-cart"></i> 78 </div> 79 <div class="mr-5"><span id="order-count">123</span> New Orders!</div> 80 </div> 81 <a class="card-footer text-white clearfix small z-1" href="#"> 82 <span class="float-left">View Details</span> 83 <span class="float-right"> 84 <i class="fa fa-angle-right"></i> 85 </span> 86 </a> 87 </div> 88 </div> 89 <div class="col-xl-3 col-sm-6 mb-3"> 90 <div class="card text-white bg-danger o-hidden h-100"> 91 <div class="card-body"> 92 <div class="card-body-icon"> 93 <i class="fa fa-fw fa-support"></i> 94 </div> 95 <div class="mr-5">13 New Tickets!</div> 96 </div> 97 <a class="card-footer text-white clearfix small z-1" href="#"> 98 <span class="float-left">View Details</span> 99 <span class="float-right"> 100 <i class="fa fa-angle-right"></i> 101 </span> 102 </a> 103 </div> 104 </div> 105 </div> 106 <div class="row"> 107 <div class="col-lg-8"> 108 <div class="card mb-3"> 109 <div class="card-header"> 110 <i class="fa fa-bar-chart"></i> Revenue Chart</div> 111 <div class="card-body"> 112 <div class="row"> 113 <div class="col-sm-8 my-auto"> 114 <canvas id="myBarChart" width="100" height="50"></canvas> 115 </div> 116 <div class="col-sm-4 text-center my-auto"> 117 <div class="h4 mb-0 text-primary">$34,693</div> 118 <div class="small text-muted">YTD Revenue</div> 119 <hr> 120 <div class="h4 mb-0 text-warning">$18,474</div> 121 <div class="small text-muted">YTD Expenses</div> 122 <hr> 123 <div class="h4 mb-0 text-success">$16,219</div> 124 <div class="small text-muted">YTD Margin</div> 125 </div> 126 </div> 127 </div> 128 <div class="card-footer small text-muted">Updated yesterday at 11:59 PM</div> 129 </div> 130 </div> 131 <div class="col-lg-4"> 132 <!-- Example Notifications Card--> 133 <div class="card mb-3"> 134 <div class="card-header"> 135 <i class="fa fa-bell-o"></i> Message Feed</div> 136 <div class="list-group list-group-flush small"> 137 <div id="message-box"> 138 <a class="list-group-item list-group-item-action" href="#"> 139 <div class="media"> 140 <img class="d-flex mr-3 rounded-circle" src="http://placehold.it/45x45" alt=""> 141 <div class="media-body"> 142 <strong>Jeffery Wellings</strong>added a new photo to the album 143 <strong>Beach</strong>. 144 <div class="text-muted smaller">Today at 4:31 PM - 1hr ago</div> 145 </div> 146 </div> 147 </a> 148 <a class="list-group-item list-group-item-action" href="#"> 149 <div class="media"> 150 <img class="d-flex mr-3 rounded-circle" src="http://placehold.it/45x45" alt=""> 151 <div class="media-body"> 152 <i class="fa fa-code-fork"></i> 153 <strong>Monica Dennis</strong>forked the 154 <strong>startbootstrap-sb-admin</strong>repository on 155 <strong>GitHub</strong>. 156 <div class="text-muted smaller">Today at 3:54 PM - 2hrs ago</div> 157 </div> 158 </div> 159 </a> 160 </div> 161 <a class="list-group-item list-group-item-action" href="#">View all activity...</a> 162 </div> 163 <div class="card-footer small text-muted">Updated yesterday at 11:59 PM</div> 164 </div> 165 </div> 166 </div> 167 <!-- Example DataTables Card--> 168 <div class="card mb-3"> 169 <div class="card-header"> 170 <i class="fa fa-table"></i> Customer Order Record</div> 171 <div class="card-body"> 172 <div class="table-responsive"> 173 <table class="table table-bordered" id="dataTable" width="100%" cellspacing="0"> 174 <thead> 175 <tr> 176 <th>Name</th> 177 <th>Position</th> 178 <th>Office</th> 179 <th>Age</th> 180 <th>Start date</th> 181 <th>Salary</th> 182 </tr> 183 </thead> 184 <tfoot> 185 <tr> 186 <th>Name</th> 187 <th>Position</th> 188 <th>Office</th> 189 <th>Age</th> 190 <th>Start date</th> 191 <th>Salary</th> 192 </tr> 193 </tfoot> 194 <tbody id="customer-table"> 195 <tr> 196 <td>Cedric Kelly</td> 197 <td>Senior Javascript Developer</td> 198 <td>Edinburgh</td> 199 <td>22</td> 200 <td>2012/03/29</td> 201 <td>$433,060</td> 202 </tr> 203 <tr> 204 <td>Airi Satou</td> 205 <td>Accountant</td> 206 <td>Tokyo</td> 207 <td>33</td> 208 <td>2008/11/28</td> 209 <td>$162,700</td> 210 </tr> 211 </tbody> 212 </table> 213 </div> 214 </div> 215 <div class="card-footer small text-muted">Updated yesterday at 11:59 PM</div> 216 </div> 217 </div> 218 <footer class="sticky-footer"> 219 <div class="container"> 220 <div class="text-center"> 221 <small>Copyright © Your Website 2018</small> 222 </div> 223 </div> 224 </footer> 225 <script src="https://code.jquery.com/jquery-3.3.1.min.js" integrity="sha256-FgpCb/KJQlLNfOu91ta32o/NMZxltwRo8QtmkMRdAu8=" 226 crossorigin="anonymous"></script> 227 <script src="https://cdnjs.cloudflare.com/ajax/libs/popper.js/1.12.9/umd/popper.min.js" integrity="sha384-ApNbgh9B+Y1QKtv3Rn7W3mgPxhU9K/ScQsAP7hUibX39j7fakFPskvXusvfa0b4Q" crossorigin="anonymous"></script> 228 <script src="https://maxcdn.bootstrapcdn.com/bootstrap/4.0.0/js/bootstrap.min.js" integrity="sha384-JZR6Spejh4U02d8jOt6vLEHfe/JQGiRRSQQxSfFWpi1MquVdAyjUar5+76PVCmYl" crossorigin="anonymous"></script> 229 <!-- Page level plugin JavaScript--> 230 <script src="https://cdnjs.cloudflare.com/ajax/libs/Chart.js/2.7.1/Chart.min.js"></script> 231 <script src="https://cdn.datatables.net/1.10.16/js/jquery.dataTables.min.js"></script> 232 <script src="https://cdn.datatables.net/1.10.16/js/dataTables.bootstrap4.min.js"></script> 233 <script src="https://js.pusher.com/4.0/pusher.min.js"></script> 234 <script src="{{ url_for('static', filename='js/customer.js') }}"></script> 235 <script src="{{ url_for('static', filename='js/order.js') }}"></script> 236 <script src="{{ url_for('static', filename='js/message.js') }}"></script> 237 </div> 238 </body> 239 </html>
In the code above, we imported the JQuery and the JavaScript Pusher library and written the markup to define the layout for the home and dashboard pages, In the next step, we will create the JavaScript files that will handle the realtime updates.
Communicating with the backend
Create a new folder called js in the static directory and populate it with three new files:
order.js— in this file, we will subscribe to theorderchannel and update the admin dashboard in realtime whenever a new order is placed.message.js— in this file, we will subscribe to themessagechannel and update the admin dashboard in realtime whenever a new message is sent.customer.js— in this file, we will subscribe to thecustomerchannel and update the admin dashboard in realtime whenever a new customer is registered.
In the ./static/js/order.js file, we can paste the following:
1Chart.defaults.global.defaultFontFamily = '-apple-system,system-ui,BlinkMacSystemFont,"Segoe UI",Roboto,"Helvetica Neue",Arial,sans-serif'; 2 3 Chart.defaults.global.defaultFontColor = '#292b2c'; 4 5 var ctx = document.getElementById("myBarChart"); 6 var myLineChart = new Chart(ctx, { 7 type: 'bar', 8 data: { 9 labels: ["February", "March", "April", "May", "June", "July"], 10 datasets: [{ 11 label: "Revenue", 12 backgroundColor: "rgba(2,117,216,1)", 13 borderColor: "rgba(2,117,216,1)", 14 data: [5312, 6251, 7841, 9821, 14984, 0], 15 }], 16 }, 17 options: { 18 scales: { 19 xAxes: [{ 20 time: { 21 unit: 'month' 22 }, 23 gridLines: { 24 display: false 25 }, 26 ticks: { 27 maxTicksLimit: 6 28 } 29 }], 30 }, 31 legend: { 32 display: false 33 } 34 } 35 }); 36 37 // Configure Pusher instance 38 const pusher = new Pusher('PUSHER_APP_KEY', { 39 cluster: 'PUSHER_APP_CLUSTER', 40 encrypted: true 41 }); 42 43 // Subscribe to poll trigger 44 var orderChannel = pusher.subscribe('order'); 45 46 // Listen to 'order placed' event 47 var order = document.getElementById('order-count') 48 orderChannel.bind('place', function(data) { 49 myLineChart.data.datasets.forEach((dataset) => { 50 dataset.data.fill(parseInt(data.units),-1); 51 }); 52 myLineChart.update(); 53 order.innerText = parseInt(order.innerText)+1 54 });
Replace the
PUSHER_APP_*keys with the keys on your Pusher dashboard.
In the code above, first, we targeted the bar chart on the dashboard page using the ID myBarChart, then we initialized its data object. Next, we configured a Pusher instance to communicate with the Pusher service. We register a listener, on the place event, and listen to the events Pusher sends.
Next, open the ./static/js/message.js file and paste in this code:
1$(document).ready(function () { 2 $('.navbar-sidenav [data-toggle="tooltip"]').tooltip({ 3 template: '<div class="tooltip navbar-sidenav-tooltip" role="tooltip" style="pointer-events: none;"><div class="arrow"></div><div class="tooltip-inner"></div></div>' 4 }) 5 6 $('[data-toggle="tooltip"]').tooltip() 7 8 var messageChannel = pusher.subscribe('message'); 9 messageChannel.bind('send', function(data) { 10 var message = document.getElementById('message-count') 11 var date = new Date(); 12 var toAppend = document.createElement('a') 13 toAppend.classList.add('list-group-item', 'list-group-item-action') 14 toAppend.href = '#' 15 document.getElementById('message-box').appendChild(toAppend) 16 toAppend.innerHTML ='<div class="media">'+ 17 '<img class="d-flex mr-3 rounded-circle" src="http://placehold.it/45x45" alt="">'+ 18 '<div class="media-body">'+ 19 `<strong>${data.name}</strong> posted a new message `+ 20 `<em>${data.message}</em>.`+ 21 `<div class="text-muted smaller">Today at ${date.getHours()} : ${date.getMinutes()}</div>`+ 22 '</div>'+ 23 '</div>' 24 25 message.innerText = parseInt(message.innerText)+1 26 }); 27 });
As we did before, here bind to the sent event and listen for updates from Pusher, whenever there is an update, we display it on the admin dashboard.
Lastly, open the ./static/js/customer.js file and paste in this code:
1$(document).ready(function(){ 2 var dataTable = $("#dataTable").DataTable() 3 var customerChannel = pusher.subscribe('customer'); 4 customerChannel.bind('add', function(data) { 5 var date = new Date(); 6 dataTable.row.add([ 7 data.name, 8 data.position, 9 data.office, 10 data.age, 11 `${date.getFullYear()}/${date.getMonth()}/${date.getDay()}`, 12 data.salary 13 ]).draw( false ); 14 }); 15 });
In the above code, we subscribe to the customer channel and bind to the add event so that we can update the dashboard in realtime whenever a new customer is registered.
We are done building! We can run the application using this command:
$ flask run
Now if we visit 127.0.0.1:5000 and 127.0.0.1:5000/dashboard we should see our app:
Conclusion
In this tutorial, we have learned how to build a Python Flask project from the scratch and inplement realtime functionality using Pusher Channels and JavaScript. The entire code for this tutorial is available on GitHub.


© 2025 Pusher Ltd. All rights reserved.
Pusher Limited is a company registered in England and Wales (No. 07489873) whose registered office is at MessageBird UK Limited, 3 More London Riverside, 4th Floor, London, United Kingdom, SE1 2AQ.