- Products

- Developers
- User stories
- Blog
- Pricing

Build an Instagram clone with Ionic: Part 1 - Creating the interface
Introduction
In this tutorial series, we are going to do a deep dive into how to make a simple Instagram clone with Ionic and add realtime functionalities with Pusher.
You are likely a part of the billion monthly active users that use Instagram! If you are as curious as I am, you will have given some thought about how it was built. Well, you don’t have to ponder anymore.
What we’ll build
By the end of this chapter, you will have created a simple interface for your Instagram clone and have a running demo with Ionic. What you have should look like this:
Prerequisites
To follow through this series adequately, you’ll need the following:
- Basic knowledge of JavaScript
- Node installed on your machine (v10.13.0)
- Node Package Manager installed on your machine (v 6.4.1)
- Cordova installed on your machine (v 8.1.2)
Getting started
Ionic is a framework that allows you to build native and progressive web applications using web technologies you’re already familiar with. The best part is that you have one code base for your native applications and the applications are written in Angular a framework that has a very low learning curve. So, you no longer need to know how to write Swift and Kotlin before you can build native applications anymore. To get started, you first need to install the Ionic CLI on your machine.
npm install -g ionic@3.9.2
Ensure you have the specified version installed
After your installation is complete, go ahead and create a new starter project using the command:
ionic start instagram-ionic tabs
When asked to integrate the application with Cordova select
yes.
This creates a starter project with a simple tabbed interface. Now, run your application, using the command:
ionic serve
Navigate to localhost:8100 on your browser and you get the following view:
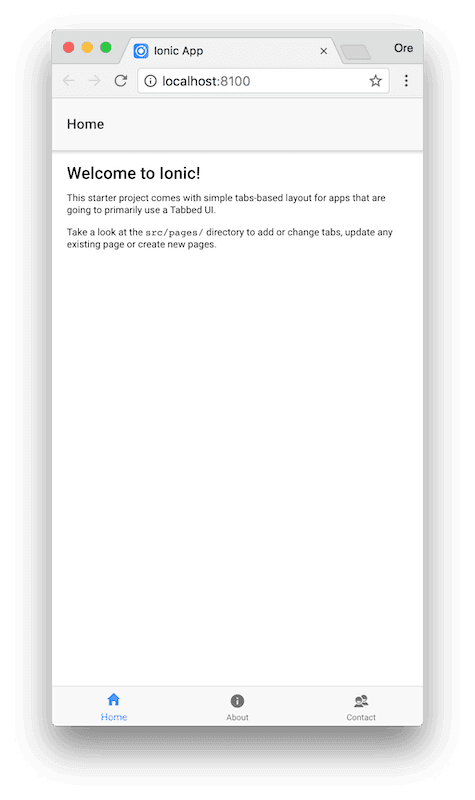
This means that Ionic generates the sample tabs when creating the starter application. Modify your tabs.html and tabs.ts to look as follows:
1<!-- src/pages/tabs/tabs.html --> 2 3 <ion-tabs> 4 <ion-tab [root]="tab1Root" tabTitle="Home" tabIcon="home"></ion-tab> 5 </ion-tabs> 6 7 8 9 // src/pages/tabs/tab.ts 10 11 import { Component } from '@angular/core'; 12 import { HomePage } from '../home/home'; 13 @Component({ 14 templateUrl: 'tabs.html' 15 }) 16 export class TabsPage { 17 tab1Root = HomePage; 18 constructor() { 19 } 20 }
This makes sure there is only one tab in our application which is the homepage and that will be the first page.
We will look at how to create the homepage later on in this tutorial
Splitting the application into pages
With Ionic, your application is split into pages. You can create as many pages as you like and these are the views your user interacts with. You can display different pages to users when they interact with your application.
For this demo, we will have the following pages:
- Home page - displays recent posts for the user to view.
- Profile page - displays more details about a particular user.
- Comment page - displays comments made by different users on a particular page.
To create a new page in Ionic, you run the command:
1ionic generate page <name-of-page>
Home page
The homepage will be responsible for displaying users posts when the application launches. Ionic automatically creates a home page by default so you can skip this command:
ionic generate page Home
This command stores the new page in the src/pages directory. Ideally, after you create a page, you declare the page and add it as an entry component in the app.module.ts. Since the homepage is created by default by Ionic, you don’t need to do it for the homepage.
1// src/app/app.module.ts 2 // other imports 3 import { HomePage } from '../pages/home/home'; 4 @NgModule({ 5 declarations: [ 6 MyApp, 7 HomePage, 8 TabsPage, 9 ], 10 imports: [...], 11 bootstrap: [IonicApp], 12 entryComponents: [ 13 MyApp, 14 HomePage, 15 TabsPage, 16 ], 17 providers: [ 18 ... 19 ] 20 }) 21 export class AppModule {}
You will realize that the
HomePagehas already been added because Ionic created the page by default when generating the starter application.
Now, we want the homepage to display posts. Ionic comes built in with some wonderful UI components with some preset styling and to display posts, let’s use Ionic Cards. Update your home.html to look like this:
1<!-- src/pages/home.html --> 2 <ion-header> 3 <ion-navbar> 4 <ion-title>Instagram Clone</ion-title> 5 </ion-navbar> 6 </ion-header> 7 <ion-content> 8 <!-- this is where the posts will be --> 9 <ion-card class="single-post-home"> 10 <ion-item> 11 <ion-avatar item-start> 12 <img src="https://res.cloudinary.com/og-tech/image/upload/s--Ivs1sp-J--/c_scale,w_100/v1529311900/og_icon.jpg"> 13 </ion-avatar> 14 <h2>capt.og</h2> 15 </ion-item> 16 <img src="https://res.cloudinary.com/og-tech/image/upload/q_40/v1506850322/blog_g3mexb.jpg"> 17 <ion-card-content> 18 <p>Zoned Out 💥</p> 19 </ion-card-content> 20 <ion-row> 21 <ion-col> 22 <button ion-button icon-start clear small> 23 <ion-icon name="heart"></ion-icon> 24 <div>12 Likes</div> 25 </button> 26 </ion-col> 27 <ion-col> 28 <button ion-button icon-start clear small> 29 <ion-icon name="text"></ion-icon> 30 <div>4 Comments</div> 31 </button> 32 </ion-col> 33 </ion-row> 34 </ion-card> 35 36 <ion-fab bottom right> 37 <button ion-fab mini><ion-icon name="add"></ion-icon></button> 38 </ion-fab> 39 </ion-content>
The page also has the following styling:
1# src/pages/home.scss 2 3 .single-post-home{ 4 margin-left: 0px; 5 margin-right: 0px; 6 margin-bottom: 10px; 7 padding-top: 10px; 8 width:100%; 9 box-shadow: 1px 1px rgba(160, 160, 160, 0.453); 10 }
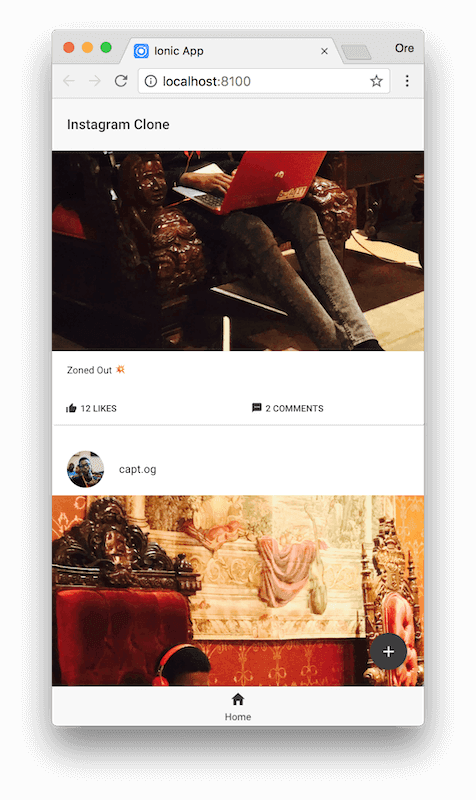
Now, when you test your application, using ionic serve, you have the following:
Right now, none of the action buttons in the application are functional, but as we go through the series, we will see how to bring it all together.
If this was a very bare bones demo application, this could pass for your complete application but, we need to add some extra pages to the demo before we call it a day. To do this, we will add the upcoming pages.
Profile page
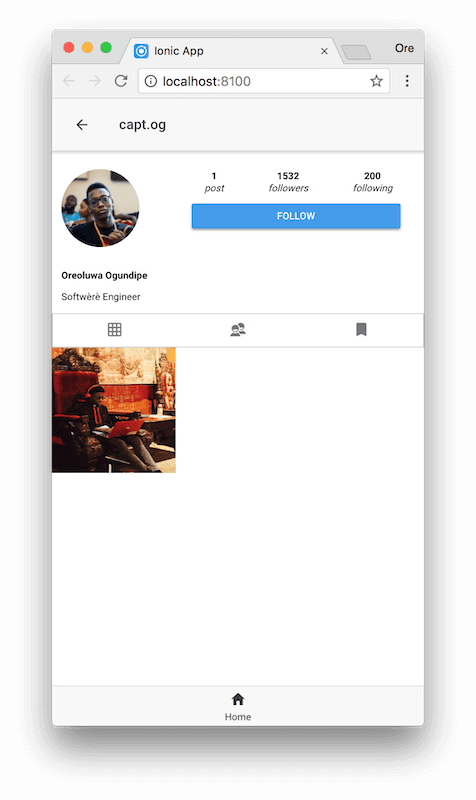
When interacting with the application and a user’s name or avatar is clicked, the application redirects to the profile page of the user. The profile page will show a short bio of the user, users follower count, and posts made by the user. To create the profile page, run the command:
ionic generate page Profile

Then, register the profile page:
1// src/app/app.module.ts 2 // other imports 3 import { ProfilePage } from '../pages/profile/profile'; 4 @NgModule({ 5 declarations: [ 6 MyApp, 7 HomePage, 8 TabsPage, 9 ProfilePage 10 ], 11 imports: [...], 12 bootstrap: [IonicApp], 13 entryComponents: [ 14 MyApp, 15 HomePage, 16 TabsPage, 17 ProfilePage 18 ], 19 providers: [ 20 ... 21 ] 22 }) 23 export class AppModule {}
After this is done, update the HTML for the profile page to look like this:
1<!-- src/pages/profile/profile.html --> 2 <ion-header> 3 <ion-navbar> 4 <ion-title>capt.og</ion-title> 5 </ion-navbar> 6 </ion-header> 7 8 <ion-content> 9 <ion-grid class="profile-intro"> 10 <ion-row> 11 <ion-col col-4> 12 <img class="profile-photo" src="https://res.cloudinary.com/og-tech/image/upload/s--Ivs1sp-J--/c_scale,w_100/v1529311900/og_icon.jpg"> 13 </ion-col> 14 <ion-col col-8> 15 <div class="profile-info"> 16 <div class="post-count info-square"> 17 <p> 18 <strong>1</strong><br> 19 <em>post</em> 20 </p> 21 </div> 22 <div class="follower-count info-square"> 23 <p> 24 <strong>1532</strong><br> 25 <em>followers</em> 26 </p> 27 </div> 28 <div class="following-count info-square"> 29 <p> 30 <strong>200</strong><br> 31 <em>following</em> 32 </p> 33 </div> 34 </div> 35 <div> 36 <button ion-button class="follow-button">Follow</button> 37 </div> 38 </ion-col> 39 </ion-row> 40 </ion-grid> 41 42 <div class="more-details"> 43 <p class="user-name"><strong>Oreoluwa Ogundipe</strong></p> 44 <p class="user-bio">Softwèrè Engineer</p> 45 </div> 46 47 <ion-segment color="primary"> 48 <ion-segment-button value="posts" selected> 49 <ion-icon name="grid"></ion-icon> 50 </ion-segment-button> 51 <ion-segment-button value="tagged"> 52 <ion-icon name="contacts"></ion-icon> 53 </ion-segment-button> 54 <ion-segment-button value="bookmark"> 55 <ion-icon name="bookmark"></ion-icon> 56 </ion-segment-button> 57 </ion-segment> 58 59 <ion-grid class="image-grid"> 60 <ion-row class="single-row"> 61 <ion-col col-4 class="single-image"> 62 <img height="100%" width="100%" src="https://res.cloudinary.com/og-tech/image/upload/q_40/v1506850322/blog_g3mexb.jpg"> 63 </ion-col> 64 </ion-row> 65 </ion-grid> 66 </ion-content>
Also edit the styling for the page as follows:
1# src/pages/profile/profile.scss 2 .profile-photo{ 3 border-radius:50%; 4 margin-top: 10px; 5 width: 8em !important; 6 height: 8em !important; 7 } 8 9 .profile-info{ 10 display: flex; 11 flex-direction: row; 12 justify-content: space-around; 13 align-items: center; 14 text-align: center; 15 } 16 17 .info-square{ 18 text-align: center; 19 } 20 21 .follow-button{ 22 width:90%; 23 margin: 0px 10px; 24 background-color: #3E99ED; 25 } 26 27 .more-details{ 28 padding-left: 10px; 29 } 30 31 $segment-button-ios-border-radius: 0px; 32 $segment-button-ios-toolbar-icon-size: 3rem; 33 $segment-button-ios-toolbar-icon-width: 3rem; 34 35 ion-segment{ 36 height: 5rem; 37 border: 1px solid rgba(160, 160, 160, 0.453); 38 } 39 40 ion-segment-button{ 41 border: 0px !important; 42 } 43 44 .image-grid{ 45 padding: 0px; 46 margin: 0px; 47 } 48 49 .single-row{ 50 height: 18rem; 51 } 52 53 .single-image{ 54 padding:0px; 55 }
Now, you may be wondering “wait we haven’t implemented the logic to move from the home page to the profile page”. To do this, we need to trigger the navigation to the next page when the user’s name/avatar is clicked. To do this, update your home.html as follows:
1<!-- src/pages/home/home.html --> 2 3 <ion-content> 4 <!-- this is where the posts will be --> 5 <ion-card class="single-post-home"> 6 <ion-item (click)="toProfilePage()"> 7 <ion-avatar item-start> 8 <img src="https://res.cloudinary.com/og-tech/image/upload/s--Ivs1sp-J--/c_scale,w_100/v1529311900/og_icon.jpg"> 9 </ion-avatar> 10 <h2>capt.og</h2> 11 </ion-item> 12 13 <!-- other card information --> 14 </ion-card> 15 [...] 16 </ion-content>
A new toProfilePage() function is set to execute when the item is clicked. Let’s take a look at the implementation of the function. Update your home.ts file to look like this:
1# src/pages/home/home.ts 2 3 import { Component } from '@angular/core'; 4 import { NavController } from 'ionic-angular'; 5 import { ProfilePage } from '../profile/profile'; 6 7 @Component({ 8 selector: 'page-home', 9 templateUrl: 'home.html' 10 }) 11 export class HomePage { 12 constructor(public navCtrl: NavController) { 13 } 14 15 public toProfilePage(){ 16 this.navCtrl.push(ProfilePage); 17 } 18 }
Comment page
Finally, to allow for some interactivity among users within our application, let’s create a comment page to allow users to comment on existing posts when the comment button is clicked. To do this, create a new comment page using the command:
ionic generate page Comment
After this is created, you’ll want to add the comment page as an entry module in your app.module.ts like this:
1// src/app/app.module.ts 2 // other imports 3 import { CommentPage } from '../pages/comment/comment'; 4 @NgModule({ 5 declarations: [ 6 MyApp, 7 HomePage, 8 TabsPage, 9 ProfilePage, 10 CommentPage, 11 ], 12 imports: [...], 13 bootstrap: [IonicApp], 14 entryComponents: [ 15 MyApp, 16 HomePage, 17 TabsPage, 18 ProfilePage, 19 CommentPage 20 ], 21 providers: [ 22 ... 23 ] 24 }) 25 export class AppModule {}
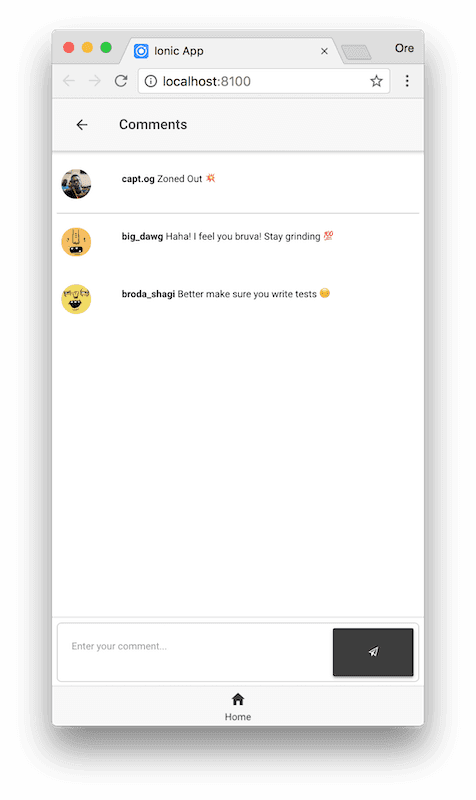
Afterwards, we update the HTML markup of the comment page as follows:
1<!-- src/pages/comment/comment.html --> 2 <ion-header> 3 4 <ion-navbar> 5 <ion-title>Comments</ion-title> 6 </ion-navbar> 7 8 </ion-header> 9 10 11 <ion-content> 12 <ion-grid> 13 <!-- first comment grid --> 14 <ion-row class="post-content"> 15 <ion-col col-2> 16 <ion-avatar item-start> 17 <img class="icon-photo" src="https://res.cloudinary.com/og-tech/image/upload/s--Ivs1sp-J--/c_scale,w_100/v1529311900/og_icon.jpg"> 18 </ion-avatar> 19 </ion-col> 20 <ion-col col-10> 21 <div> 22 <!-- this will contain the main post content --> 23 <p><strong>capt.og</strong> Zoned Out 💥</p> 24 </div> 25 </ion-col> 26 </ion-row> 27 28 <!-- this rows will represent sample comments --> 29 <ion-row class="user-comments"> 30 <ion-col col-2> 31 <ion-avatar item-start> 32 <img class="icon-photo" src="https://api.adorable.io/avatars/100/big_dawg@adorable.png"> 33 </ion-avatar> 34 </ion-col> 35 <ion-col col-10> 36 <div> 37 <!-- this will contain the main post content --> 38 <p><strong>big_dawg</strong> Haha! I feel you bruva! Stay grinding 💯</p> 39 </div> 40 </ion-col> 41 </ion-row> 42 43 <ion-row class="user-comments"> 44 <ion-col col-2> 45 <ion-avatar item-start> 46 <img class="icon-photo" src="https://api.adorable.io/avatars/100/broda_shagi@adorable.png"> 47 </ion-avatar> 48 </ion-col> 49 <ion-col col-10> 50 <div> 51 <!-- this will contain the main post content --> 52 <p><strong>broda_shagi</strong> Better make sure you write tests 😏</p> 53 </div> 54 </ion-col> 55 </ion-row> 56 </ion-grid> 57 </ion-content> 58 59 <ion-footer> 60 <!-- add the input field fixed to the bottom of the screen --> 61 <ion-grid> 62 <ion-row class="comment-area"> 63 <ion-col col-9> 64 <ion-textarea placeholder="Enter your comment..."></ion-textarea> 65 </ion-col> 66 <ion-col col-3 > 67 <button ion-button class="comment-button"> 68 <ion-icon name="paper-plane"></ion-icon> 69 </button> 70 </ion-col> 71 </ion-row> 72 </ion-grid> 73 </ion-footer>
The view also has the following styling:
1# src/pages/commment/comment.scss 2 3 .icon-photo{ 4 border-radius:50% !important; 5 margin-top: 10px; 6 height: 3em !important; 7 width: 3em !important; 8 } 9 10 .post-content{ 11 border-bottom: 1px solid rgba(160, 160, 160, 0.453); 12 padding-bottom: 10px; 13 } 14 15 .user-comments{ 16 padding-bottom: 10px; 17 } 18 19 .comment-area{ 20 border: 1px solid rgba(160, 160, 160, 0.453); 21 margin: 0px; 22 padding: 0px; 23 border-radius: 5px; 24 width: 100%; 25 } 26 27 .comment-button{ 28 width: 100%; 29 margin: 0px; 30 padding: 0px; 31 height:100%; 32 }
After this, you will need to link the comment page from the home page and you can do this by updating the comment button on the home page like this:
1<!-- src/pages/home/home.html --> 2 3 <ion-header> 4 <ion-navbar> 5 <ion-title>Instagram Clone</ion-title> 6 </ion-navbar> 7 </ion-header> 8 9 <ion-content> 10 <ion-card class="single-post-home"> 11 [...] 12 13 <ion-row> 14 <ion-col> 15 <button ion-button icon-start clear small > 16 <ion-icon name="thumbs-up"></ion-icon> 17 <div>12 likes</div> 18 </button> 19 </ion-col> 20 <ion-col> 21 <button ion-button icon-start clear small (click)="toCommentSection()"> 22 <ion-icon name="text"></ion-icon> 23 <div>2 Comments</div> 24 </button> 25 </ion-col> 26 </ion-row> 27 28 </ion-card> 29 30 [...] 31 </ion-content>
The toCommentSection function is called when the comment button is clicked. Update your home.ts file to look like this:
1# src/pages/home/home.ts 2 3 import { Component } from '@angular/core'; 4 import { NavController } from 'ionic-angular'; 5 import { ProfilePage } from '../profile/profile'; 6 import { CommentPage } from '../comment/comment'; 7 8 @Component({ 9 selector: 'page-home', 10 templateUrl: 'home.html' 11 }) 12 export class HomePage { 13 post_num_likes = 12; 14 constructor(public navCtrl: NavController) { 15 16 } 17 18 public toProfilePage(){ 19 this.navCtrl.push(ProfilePage); 20 } 21 22 public toCommentSection(){ 23 this.navCtrl.push(CommentPage); 24 } 25 26 }
Conclusion
In this first part of the series, we have created a simple interface for our Instagram clone which we will build upon in future parts of this series. When you run ionic serve and navigate to localhost:8100 on your browser, you will have an application that looks like this:
Notice that all the data rendered in this chapter was hard-coded into the application. In the next part, we will take a look at how to serve dynamic content by connecting our application to GraphQL servers using Apollo, and Prisma. Here’s a link to the full GitHub repository.


© 2025 Pusher Ltd. All rights reserved.
Pusher Limited is a company registered in England and Wales (No. 07489873) whose registered office is at MessageBird UK Limited, 3 More London Riverside, 4th Floor, London, United Kingdom, SE1 2AQ.