- Products

- Developers
- User stories
- Blog
- Pricing

Use the HTML5 Notification API to provide realtime alerts
Introduction
This tutorial will describe how you can add realtime notifications to your own web app using Pusher Channels. I’ll demo this concept by building a small app that sends a notification whenever someone pushes code to a GitHub repository.
Realtime notifications are a feature of many modern web applications. When utilized properly, they can be a great way to inform users about new activity in your web app so that they don’t miss it.
Prerequisites
- Make sure you have Node.js (v6 or later), and npm installed on your machine.
- Have a GitHub account
- Create a fee sandbox Pusher account or sign in
- Prior experience with the command line and with building Node.js applications is required.
Set up the server
Let’s start by setting up the server for the application. Before we start writing any code, create a new folder for this project in your filesystem and cd into it in your terminal application.
Run the following command in your project directory to set up a new Node project:
npm init -y
This creates a package.json file in the current directory while skipping the questionnaire that would normally follow if you run the command without the -y flag.
We’ll be using Express to spin up a Node server along with a few other packages. Let’s install them all in one step:
npm install express body-parser dotenv cors pusher --save
Once the installation is complete, create a new server.js file at the root of your project directory and paste in the following code:
1// server.js 2 3 require('dotenv').config({ path: 'variables.env' }); 4 5 const express = require('express'); 6 const bodyParser = require('body-parser'); 7 8 const app = express(); 9 10 app.use(bodyParser.json()); 11 app.use(bodyParser.urlencoded({ extended: true })); 12 13 app.set('port', process.env.PORT || 5000); 14 const server = app.listen(app.get('port'), () => { 15 console.log(`Express running → PORT ${server.address().port}`); 16 });
Next, create a variables.env file at the root of your project directory and add in the following:
1// variables.env 2 3 PORT=5000
The dotenv package loads environmental variables from this file into process.env so that they can easily be accessed in our code.
Set up Pusher Channels
We’ve already installed the Node SDK for Pusher Channels along with the other server dependencies, but we need to grab our application keys and use them in our code before anything can work.
Visit the Pusher dashboard, select Channels apps on the sidebar and hit Create Channels app to create a new app. Then retrieve your credentials from the API Keys tab and add them to variables.env like this:
1// variables.env 2 3 PORT=5000 4 PUSHER_APP_ID=<your app id> 5 PUSHER_APP_KEY=<your app key> 6 PUSHER_APP_SECRET=<your app secret> 7 PUSHER_APP_CLUSTER=<your app cluster>
Next, import the pusher package in server.js like this:
1// server.js 2 3 ... 4 const bodyParser = require('body-parser'); 5 const Pusher = require('pusher'); 6 7 const pusher = new Pusher({ 8 appId: process.env.PUSHER_APP_ID, 9 key: process.env.PUSHER_APP_KEY, 10 secret: process.env.PUSHER_APP_SECRET, 11 cluster: process.env.PUSHER_APP_CLUSTER, 12 encrypted: true, 13 }); 14 15 const app = express(); 16 ...
Finally, let’s set up a new route that’ll receive webhook events from GitHub, then we’ll trigger an event with Pusher so that our app frontend can send a new notification each time a new push event is triggered.
Add the following route in server.js:
1// server.js 2 3 app.post('/events', (req, res) => { 4 pusher.trigger('github', 'push', { 5 payload: req.body, 6 }); 7 8 res.status(200).end(); 9 });
When a POST request is received on the /event route, a new push event is triggered on the github channel and the data from GitHub is included in the event payload.
Save the code in server.js and run node server.js in your terminal to start the server.
Expose your local server to the world with ngrok
Your server is currently running locally which means that it’s only accessible on your machine. However, GitHub needs a publicly available URL otherwise it is unable to send webhook events.
We can use ngrok to expose a local server to the world, which means anyone will be able to access it even though its running locally on your machine.
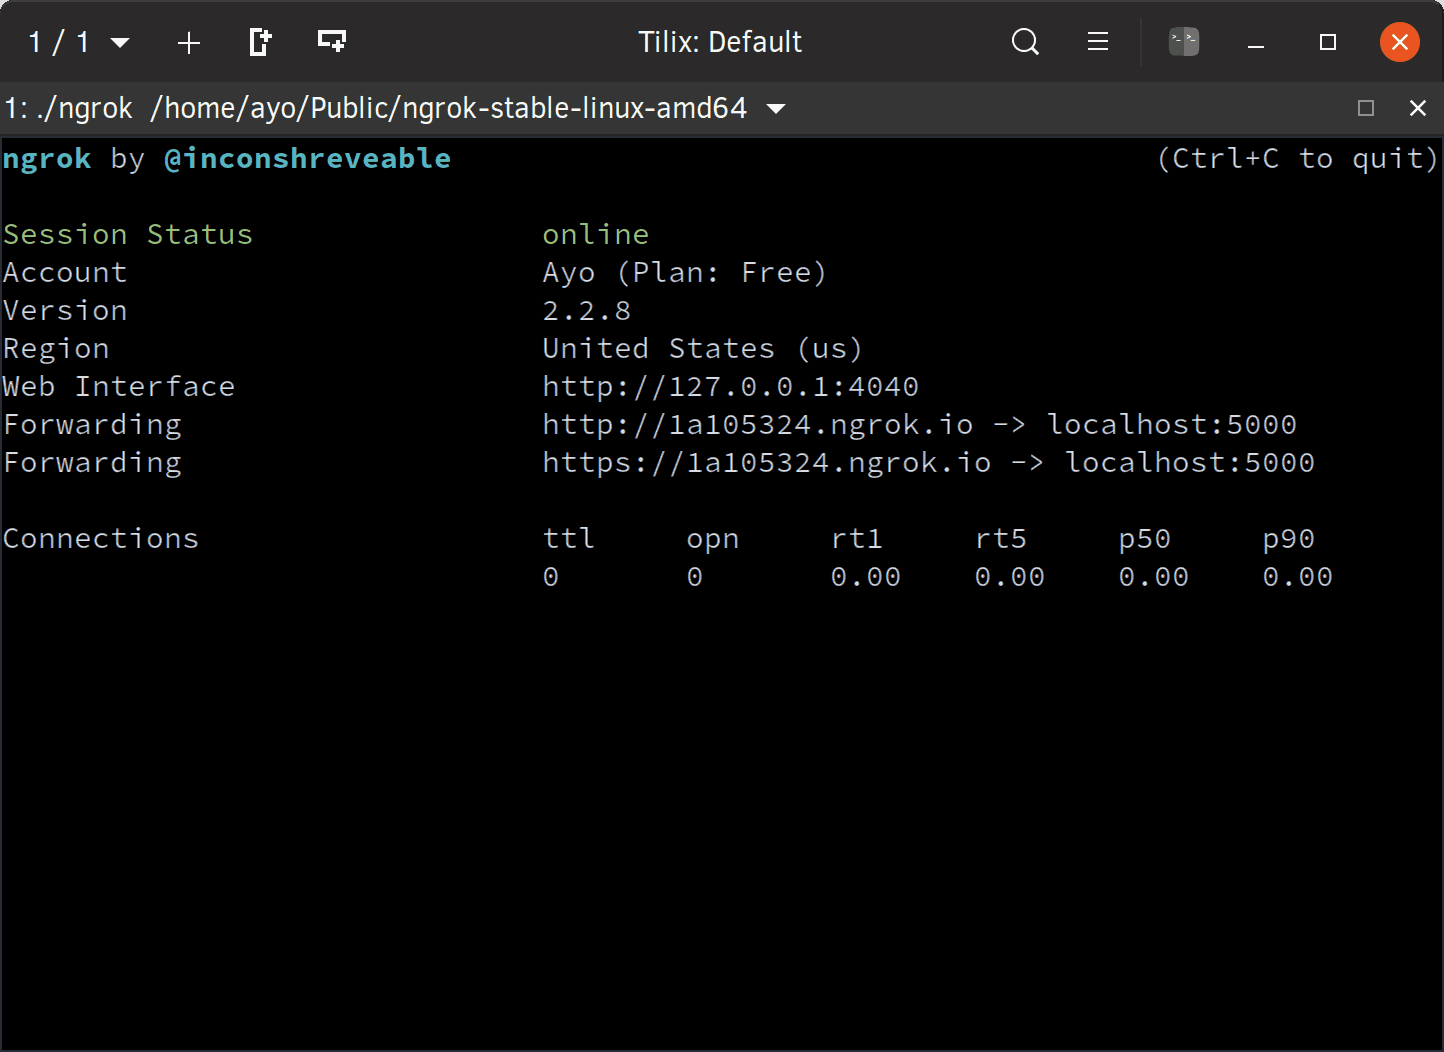
Visit the ngrok website to find out how to install and set up ngrok on your computer. Once you have it installed, start an HTTP tunnel on port 5000 by running the following command in a new terminal window:
./ngrok http 5000
If your webhook server is listening on another port, make sure to provide the correct port when starting the HTTP tunnel. You will be given a couple of URLs but you only need the last one which is on the secure (HTTPS) protocol.
Set up a webhook on a GitHub repo
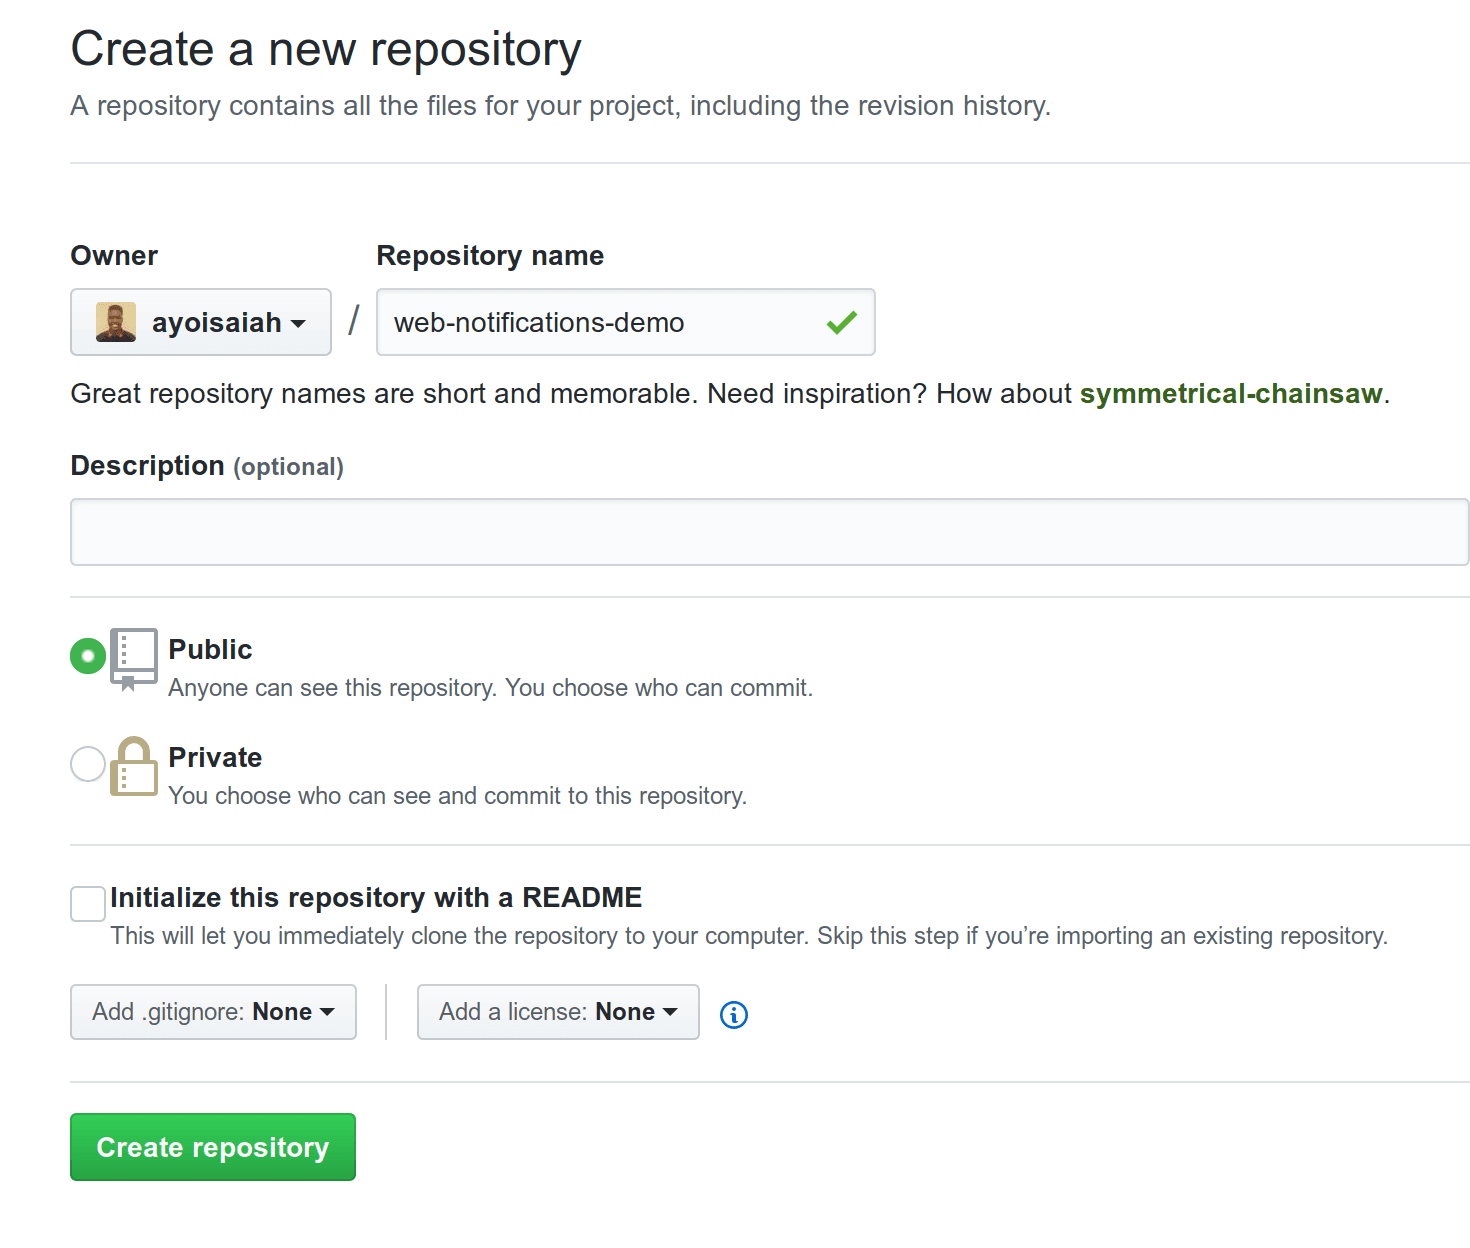
Create a new GitHub repository. Give it a name and click the green Create repository button at the bottom. I called mine web-notifications-demo.
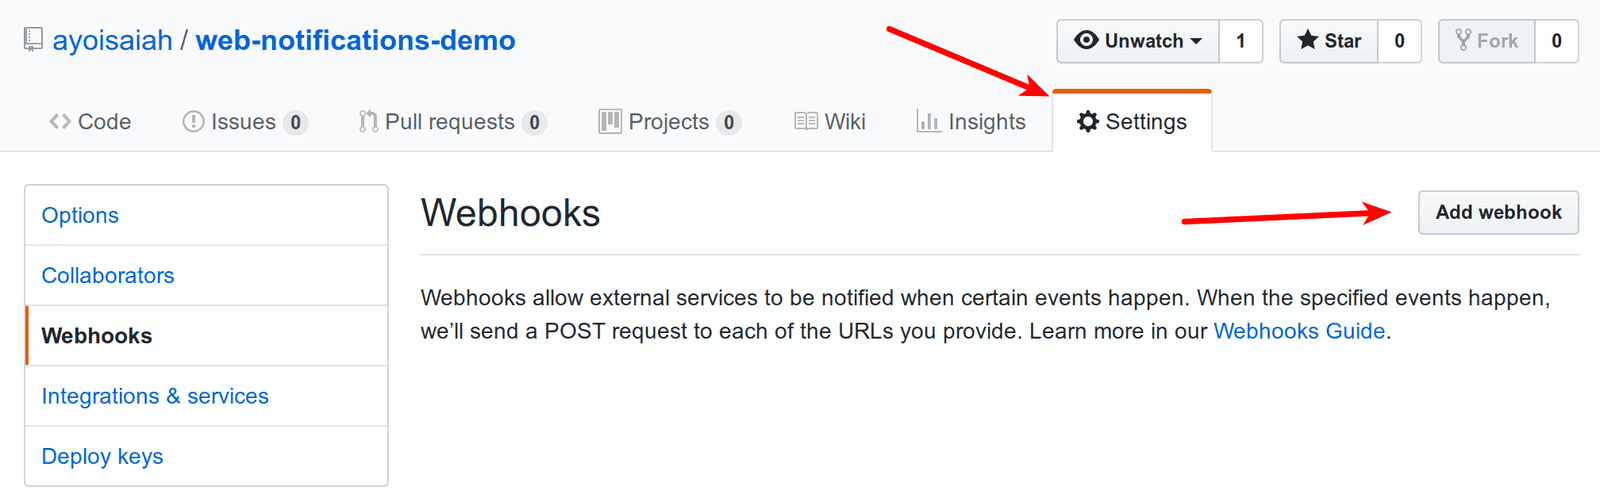
Once the repository has been created, head to the Settings tab and click the Webhooks link on the left. Then click the Add webhook button on the far right.
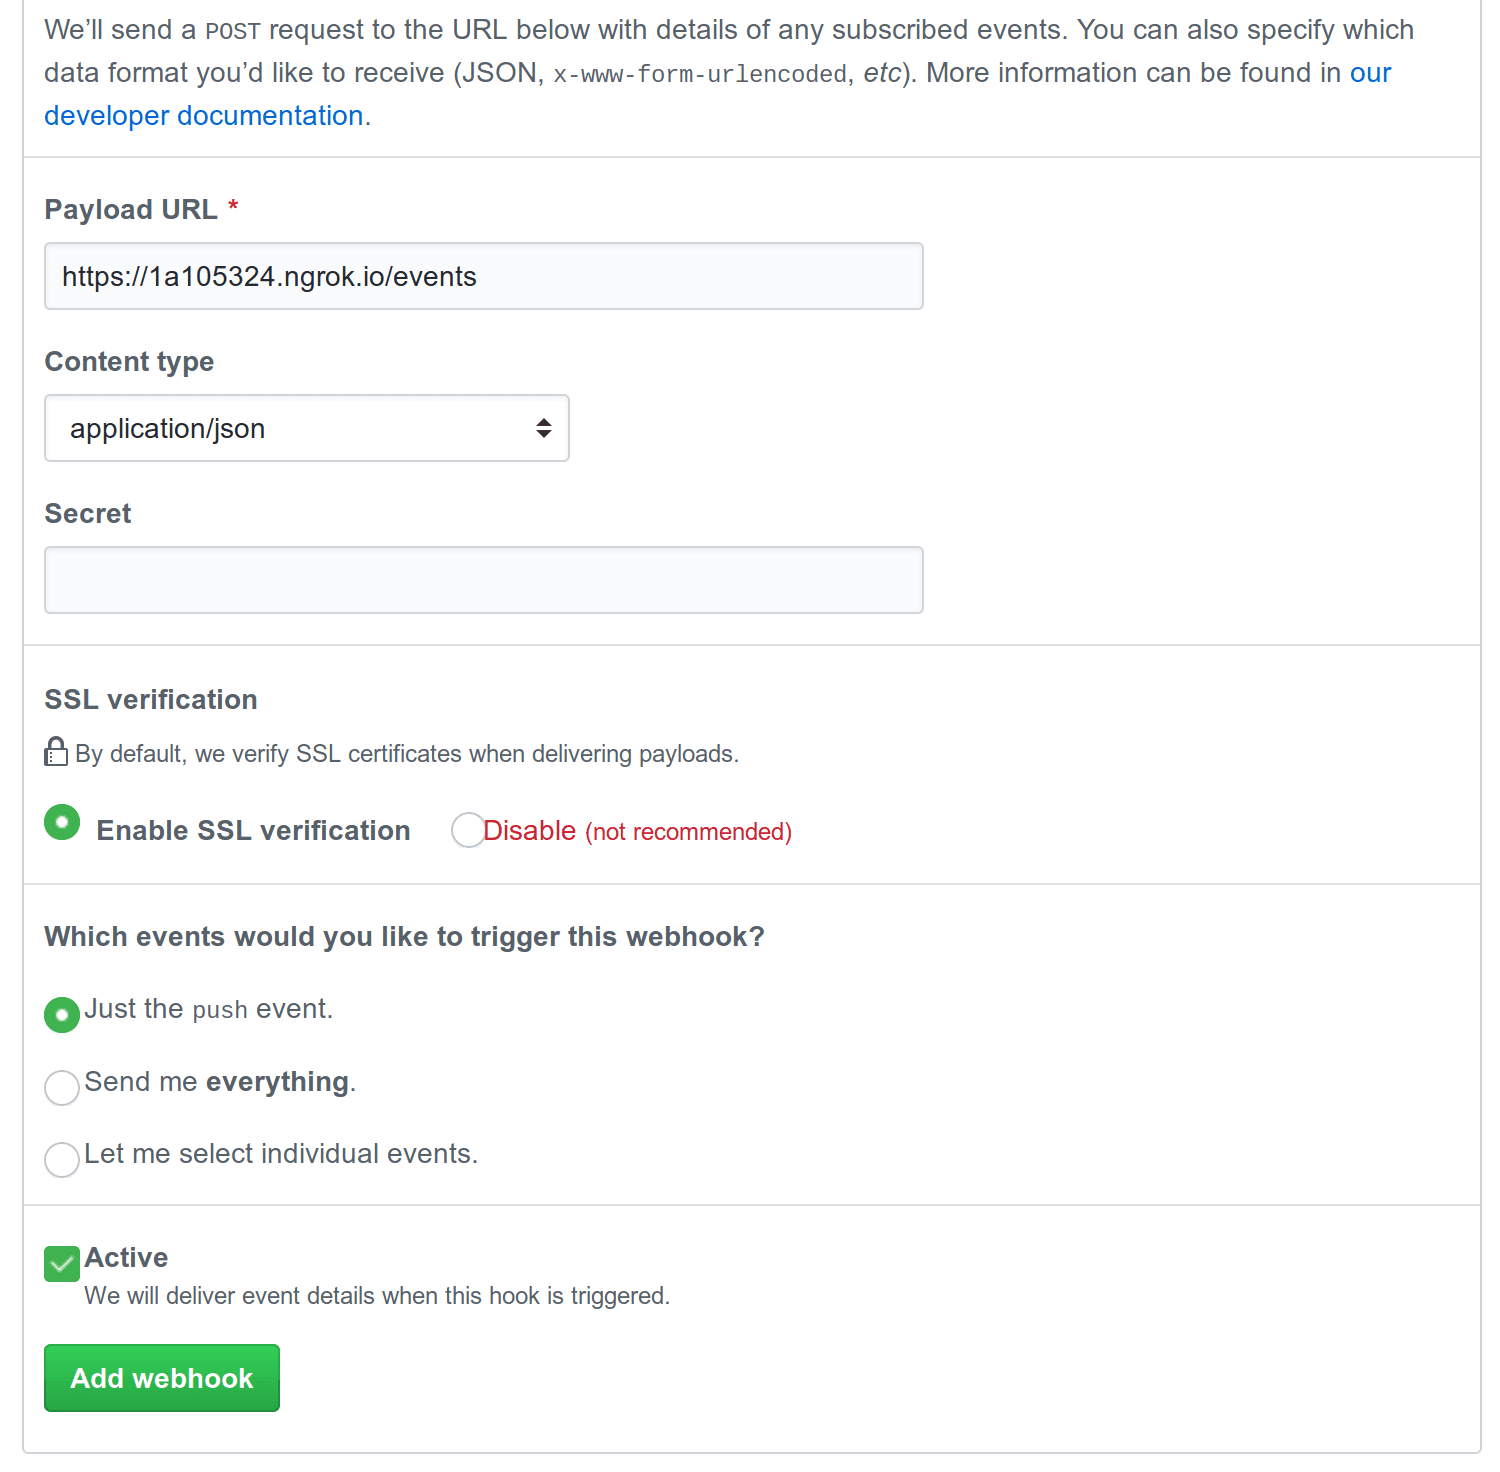
Under the Payload URL field, tack /events to the URL you received from Ngrok and change the value of the Content type field to application/json. You can leave the rest of the form as is and click the green Add webhook button at the bottom.
Set up application frontend
Within your project directory, create the following files by running the command below:
touch index.html style.css main.js
Open up index.html in your text editor and paste in the following code:
1// index.html 2 3 <!DOCTYPE html> 4 <html lang="en"> 5 <head> 6 <meta charset="UTF-8"> 7 <meta name="viewport" content="width=device-width, initial-scale=1.0"> 8 <meta http-equiv="X-UA-Compatible" content="ie=edge"> 9 <title>Realtime Github Notifications</title> 10 <link rel="stylesheet" href="style.css" type="text/css"> 11 </head> 12 <body> 13 <main class="app"> 14 <header class="header"> 15 <h1>Realtime Github Notifications</h1> 16 </header> 17 <div class="container"> 18 <button class="subscribe" id="subscribe">Enable notifications</button> 19 </div> 20 </main> 21 22 <script src="https://js.pusher.com/4.2/pusher.min.js"></script> 23 <script src="main.js"></script> 24 </body> 25 </html>
Next, add the styles for the application by change the contents of style.css to look like this:
1// style.css 2 3 html { 4 box-sizing: border-box; 5 } 6 7 *, *::before, *::after { 8 box-sizing: inherit; 9 margin: 0; 10 padding: 0; 11 } 12 13 body { 14 font-family: -apple-system, BlinkMacSystemFont, 'San Francisco', 'Helvetica Neue', Helvetica, Ubuntu, Roboto, Noto, 'Segoe UI', Arial, sans-serif; 15 } 16 17 .header { 18 width: 100%; 19 height: 200px; 20 display: flex; 21 align-items: center; 22 justify-content: center; 23 background-color: #4051B4; 24 padding: 50px; 25 } 26 27 h1 { 28 color: #fbf7f1; 29 font-size: 50px; 30 } 31 32 .container { 33 width: 100%; 34 max-width: 700px; 35 margin: 30px auto; 36 text-align: center; 37 } 38 39 button { 40 padding: 15px; 41 border: 1px solid #a00f3f; 42 color: #fbf7f1; 43 background-color: #a00f3f; 44 box-shadow: rgba(13, 13, 13, 0.14) 0px 2px 2px 0px, rgba(13, 13, 13, 0.2) 0px 3px 1px -2px, rgba(13, 13, 13, 0.12) 0px 1px 5px 0px; 45 text-transform: uppercase; 46 font-weight: 700; 47 font-size: 20px; 48 }
Finally, add the following code to main.js:
1// main.js 2 3 const grantPermission = () => { 4 if (!('Notification' in window)) { 5 alert('This browser does not support system notifications'); 6 return; 7 } 8 9 if (Notification.permission === 'granted') { 10 new Notification('You are already subscribed to web notifications'); 11 return; 12 } 13 14 if ( 15 Notification.permission !== 'denied' || 16 Notification.permission === 'default' 17 ) { 18 Notification.requestPermission().then(result => { 19 if (result === 'granted') { 20 const notification = new Notification( 21 'Awesome! You will start receiving notifications shortly' 22 ); 23 } 24 }); 25 } 26 }; 27 28 const showNotification = data => { 29 const title = `${data.pusher.name} pushed to the ${ 30 data.repository.name 31 } repo`; 32 33 new Notification(title); 34 }; 35 36 const pusher = new Pusher('<your app key>', { 37 cluster: '<your app cluster>', 38 encrypted: true, 39 }); 40 41 const channel = pusher.subscribe('github'); 42 channel.bind('push', data => { 43 showNotification(data.payload); 44 }); 45 46 const subscribe = document.getElementById('subscribe'); 47 subscribe.addEventListener('click', event => { 48 grantPermission(); 49 subscribe.parentNode.removeChild(subscribe); 50 });
Don’t forget to replace the <your app key> and <your app cluster> placeholders with the appropriate values from your Pusher account dashboard.
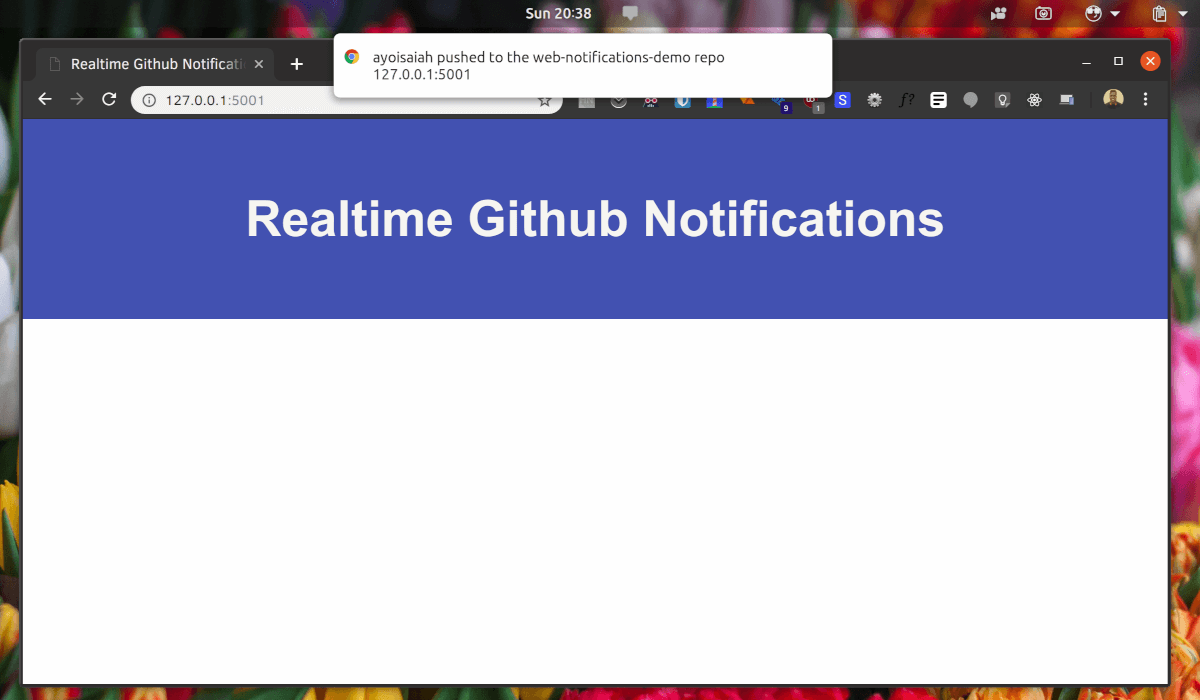
To serve the app, install http-server globally on your machine (npm install -g http-server) then run the command below from the root of your project directory to server the app on port 5001. Once done, open up http://localhost:5001 in your browser to view the application.
http-server -p 5001
Once the ENABLE NOTIFICATIONS button is clicked, you’ll get a prompt asking you to grant permission to show notifications. Make sure to grant that permission, otherwise you won’t get any notifications.
If you look at the code in main.js you will see that we are subscribed to the github channel so we will receive any push events once they are triggered. In the callback function, showNotification() is invoked which displays a realtime notification to the user whenever someone pushes code to the GitHub repo.
Finally, make some changes to the GitHub repository you created earlier, commit the changes and push to GitHub. You should get a notification informing you of the new push activity.
Conclusion
We’ve demonstrated how Pusher makes sending realtime web notifications much easier and how you can get started with it. All the code written in this tutorial is available on GitHub for you to check out and run locally.


© 2026 Pusher Ltd. All rights reserved.
Pusher Limited is a company registered in England and Wales (No. 07489873) whose registered office is at MessageBird UK Limited, 3 More London Riverside, 4th Floor, London, United Kingdom, SE1 2AQ.