- Products

- Developers
- User stories
- Blog
- Pricing

How to build a multiplayer game with online friends list and live chat | Pusher Channels and Unity
- Introduction
- Features
- Implementation steps
- Step 1: Set up Channels
- Create an app
- Step 2: Enable Watchlist events
- Step 3: Get App Keys
- Step 4: Create player characters
- Step 4: Create the backend API
- Step 5: Create the game controllers
- Step 6: See who is online with Watchlist events
- Step 7: Add a chat function
- Conclusion
Introduction
If you’re looking to build multiplayer game apps with realtime features, Pusher has got you covered.
Pusher Channels is a WebSocket-based service which enables seamless realtime communication, allowing developers to create engaging and interactive multiplayer experiences. The low-latency data transmission ensures that players experience minimal delay during gameplay, which is critical for responsive and immersive gaming experiences. Channels' flexible infrastructure can handle a varying number of users and data loads and is the leading realtime service for scalability.
In this tutorial, you’ll learn how to build a simple multiplayer game using Unity and C# at the frontend and Node.js at the backend. Pusher Channels will provide user-specific presence functionality and a realtime chat feature, so players can keep track of friends who are online and active in gameplay. This demo can be used as a base for more complex, player-centric, realtime experience.
We’ll end up with an app that looks like the following:
Features
Explore the docs for Watchlist online status - The Pusher Watchlist allows your end users to create a list of friends or followers and stay up to date with their presence status or view notifications when they come online.
Implementation steps
The game character control will trigger events from your backend server which correspond to the action a character should do (walking left or right). Your backend will trigger this event when the user clicks a button on a webpage. This scenario is based on the single player version, but in this tutorial we will add another three players to make a multiplayer game with four controllable characters.
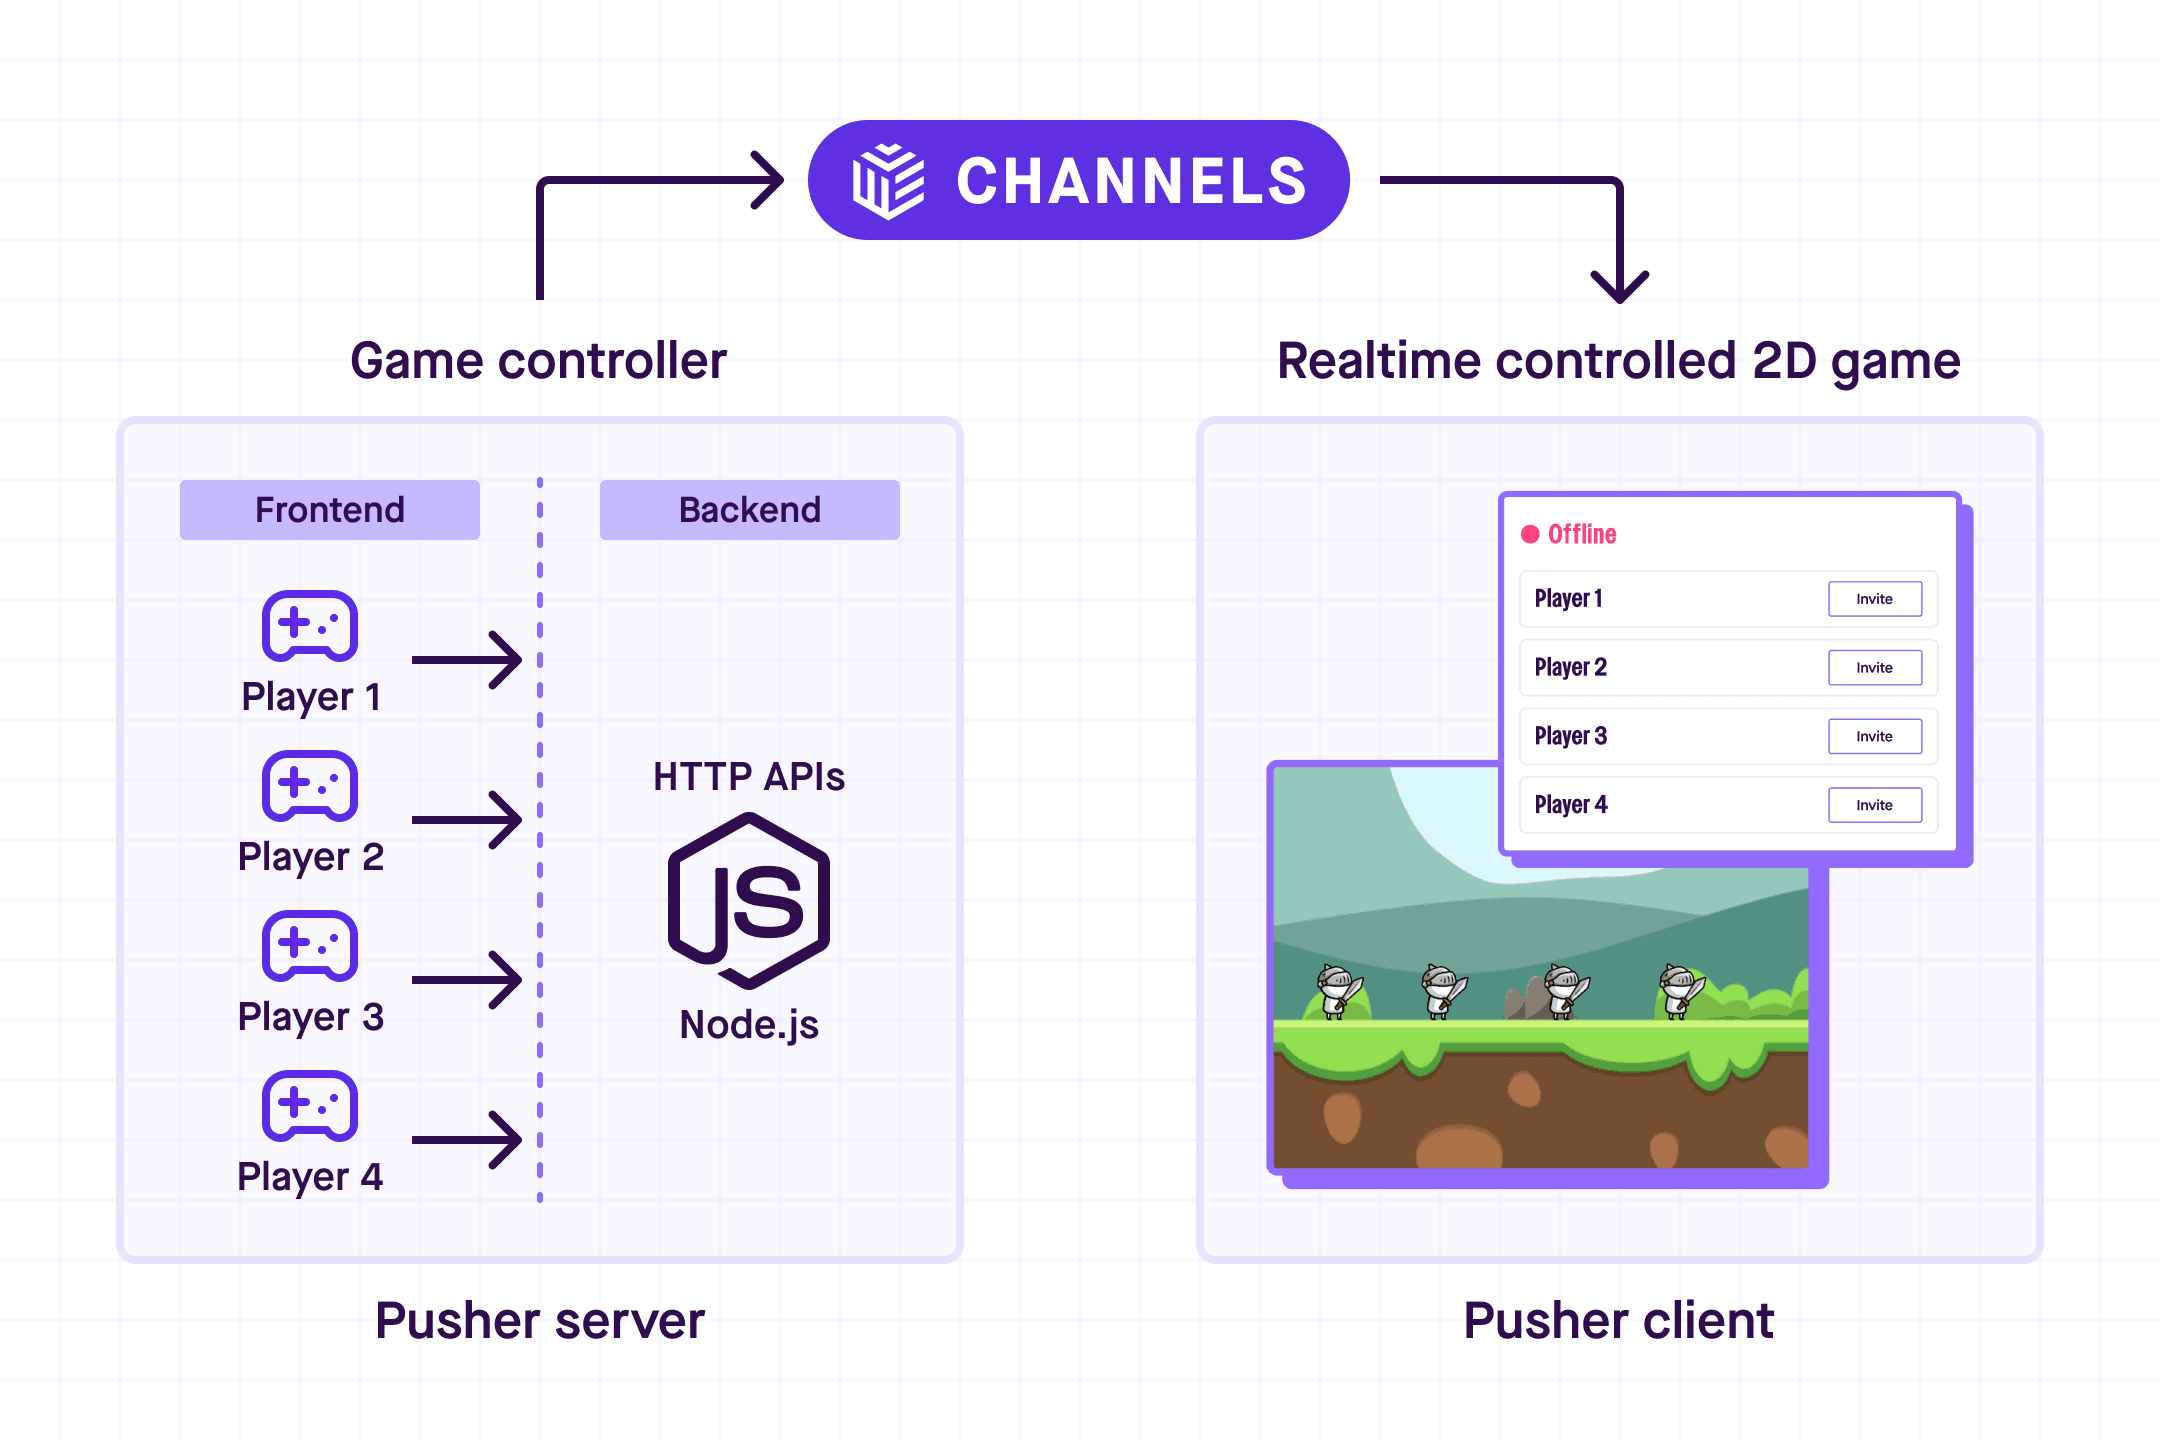
When a user loads a game controller webpage, the Channels client will authenticate with your auth backend, assigning it a game controller number (from 1-4). Pusher will then send your Unity game client a Watchlist online event, so you can display in the UI that the player has come online.
Step 1: Set up Channels
This section explains how to set up Pusher Channels.
Create an app
If you don’t have a Pusher account you can sign up for free. If you are already familiar with Channels and have an account, skip this step and sign in.
NOTE:
The Pusher sandbox plan is free and fully featured. It comes with 200,000 messages per day and 100 concurrent connections. This plan is more than sufficient for this tutorial app.
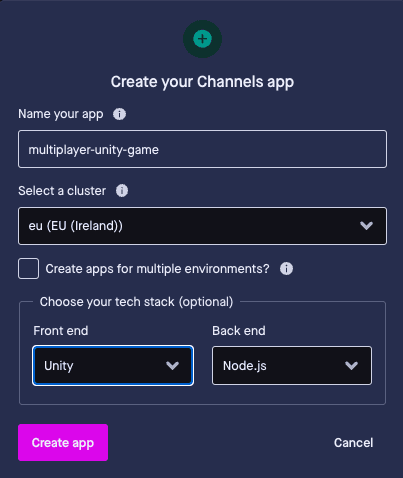
Navigate to Channels > Create app.
Configure your app by proving the following information:
App name - Name your app. This is just for your reference and you can change this name later.
Cluster - The physical location of the servers that handle requests from your Channels app. You cannot change the cluster afterward. Read more about Cluster configuration.
Step 2: Enable Watchlist events
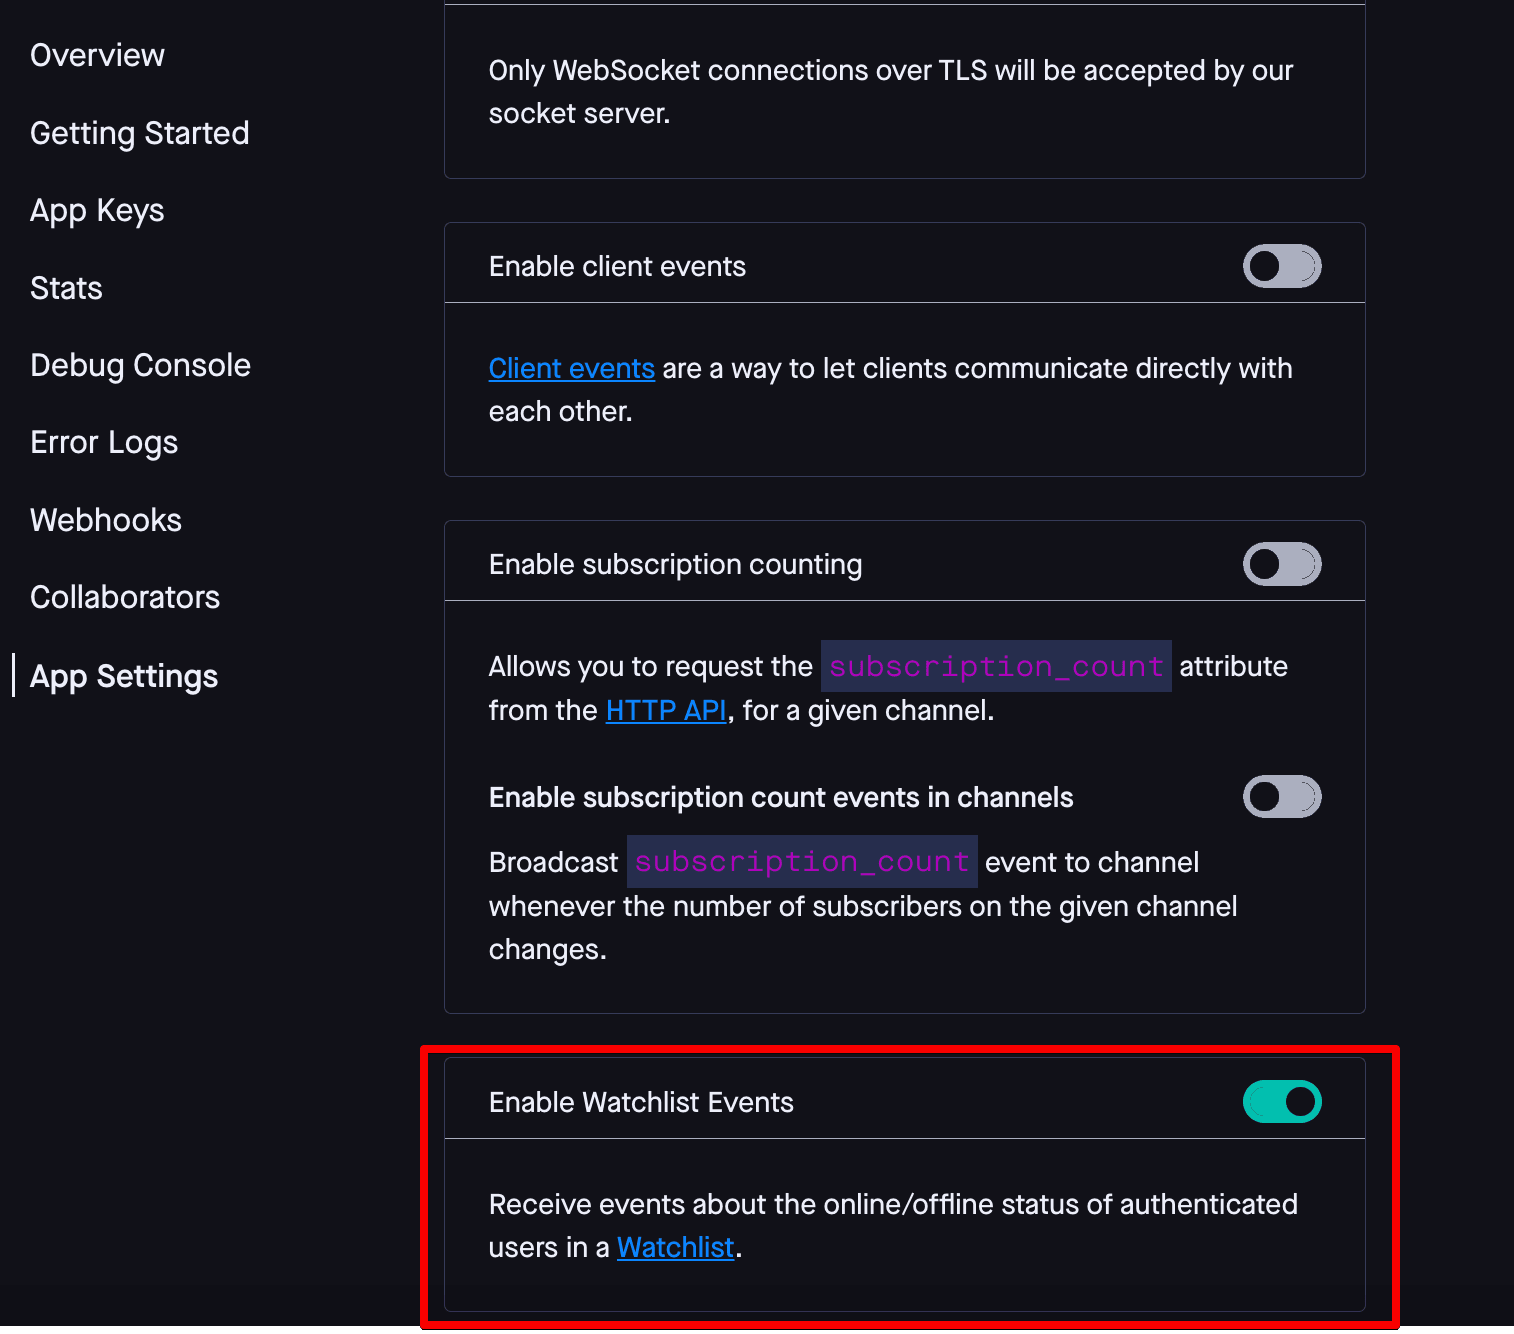
To build the presence feature, we’re going to take advantage of Watchlist events. Beforehand, make sure the feature is enabled it in the Pusher dashboard.
Navigate to the channel app you are currently building, go to App Settings, and Enable Watchlist Events option.
Step 3: Get App Keys
To use Channels, you need app keys for your application. Go to App Keys and copy and save these keys for later.

Step 4: Create player characters
1. Import the example single player Unity project from here into your Unity Editor. Ensure that the project’s Editor version is upgraded to match the version you have installed on your machine.
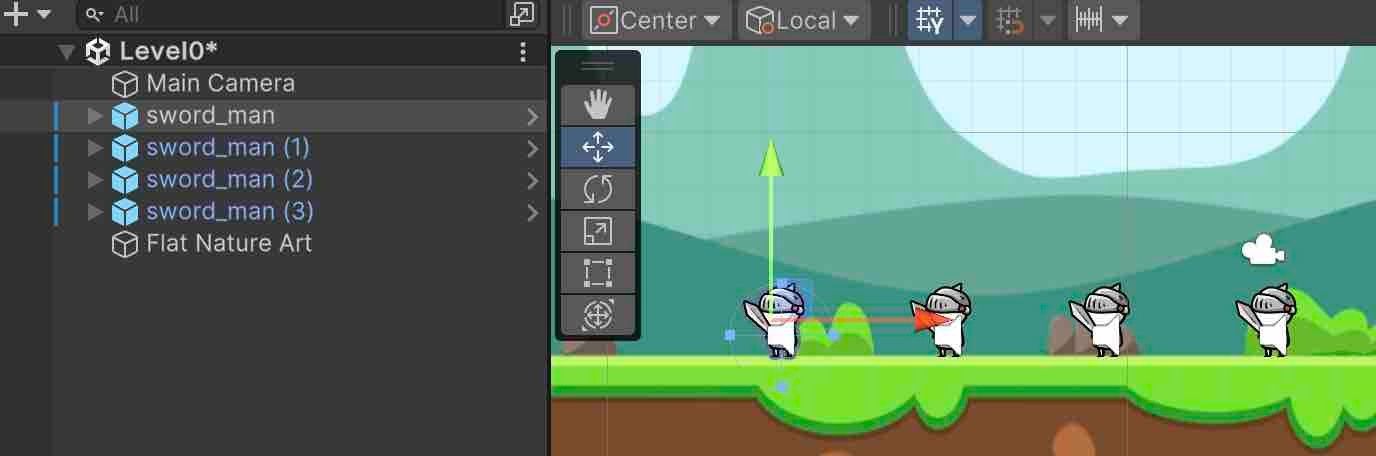
2. In the Scene folder, open Level0. You will see your single game character. If you haven’t already, we recommend getting this single player example working by following the instructions in the README so you understand how the game controller controls the character.
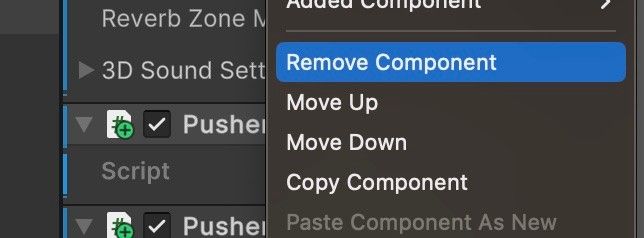
To transform this into a multiplayer game, we need the PusherManager component to control all the characters instead of just one. Remove the PusherManager component from the sword_man game component. Click the Pusher Manager menu button on the right and click Remove Component.
4. Duplicate the sword_man three times and re-position them so they are not on top of each-other.
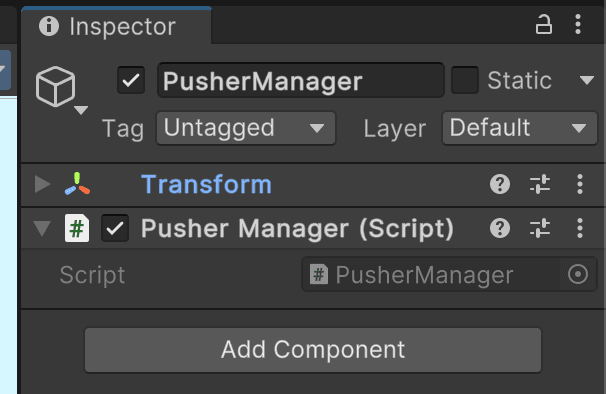
5. Right-click the Hierarchy window, and create an empty GameObject called Pusher Manager, and attach the Pusher Manager script to it. Check out the Unity introduction to components if you haven't added Unity GameObject components before. This “global” GameObject and its PusherManager will create the Channels WebSocket connection to our cluster. It will receive messages from our cluster to move one of the characters left or right, depending on which controller made the request.
6. Open the PusherManager.cs file in your IDE and add this array: public State[] _moveStateArray = new State[4]; to the public class PusherManager. This array is going to contain the movement state of each character (IDLE, RUN LEFT and RUN RIGHT), which will be updated when the Pusher Manager client receives a WebSocket message to update one of these from our cluster.
1public class PusherManager : MonoBehaviour 2{ 3 ... 4 public State[] _moveStateArray = new State[4]; 5 ... 6}
7. Delete the private State _state = State.IDLE; variable.
8. In the async Task Start() method, initialise the array to IDLE:
1async Task Start() 2{ 3 _moveStateArray[0] = State.IDLE; 4 _moveStateArray[1] = State.IDLE; 5 _moveStateArray[2] = State.IDLE; 6 _moveStateArray[3] = State.IDLE; 7 ... 8}
9. Replace private void PusherOnConnected so that the .bind() calls will change a specific element in the array:
1private void PusherOnConnected(object sender) 2 { 3 Character character; 4 5 _channel.Bind("run-left", (PusherEvent eventData) => 6 { 7 character = JsonUtility.FromJson<Character>(eventData.Data); 8 _moveStateArray[character.playerNumber - 1] = State.RUNLEFT; 9 }); 10 11 _channel.Bind("run-right", (PusherEvent eventData) => 12 { 13 character = JsonConvert.DeserializeObject<Character>(eventData.Data); 14 _moveStateArray[character.playerNumber - 1] = State.RUNRIGHT; 15 }); 16 17 _channel.Bind("idle", (PusherEvent eventData) => 18 { 19 character = JsonConvert.DeserializeObject<Character>(eventData.Data); 20 _moveStateArray[character.playerNumber - 1] = State.IDLE; 21 }); 22 23 _channel.Bind("attack", (PusherEvent eventData) => 24 { 25 character = JsonConvert.DeserializeObject<Character>(eventData.Data); 26 _moveStateArray[character.playerNumber - 1] = State.ATTACK; 27 }); 28 Debug.Log("Connected"); 29 }
We do character.playerNumber - 1 because the array _moveStateArray[] starts from 0.
10. As you can see in the above code snippet, we’ve deserialized the Data key in the incoming PusherEvent eventData into a Character, so let's define a Character class in the PusherManager.cs file. It only contains one property playerNumber:
1public class Character 2{ 3 public int playerNumber; 4}
11. Finally we have to make the individual elements of the _moveStateArray[] accessible from the character GameObjects, as they will each fetch their own move state on each frame update. Modify CurrentState() method so that it takes an additional playerNumber parameter:
1public State CurrentState(int playerNumber) 2{ 3 return _moveStateArray[playerNumber - 1]; 4}
12. We’ve updated the PusherManager GameObject to receive input for 4 separate characters. Now we need to translate that input into movement events. Open the PusherMover.cs file in your IDE. This script is responsible for fetching its character's move state from the global PusherManager GameObject, then moving the character in the game if needed. Each of your four characters already have the Pusher Mover script added to it, so they will have their own instance of this script. If you did not import this project from our repository, and you're making this game from scratch, then add it to each of your characters.
13. Get a reference to the global PusherManager GameObject by changing the Start() method's if (_pusherManager == null) block. We use the .Find() method because the PusherManager component is no longer attached to the character component. We made it game-wide back in step 5.
1if (_pusherManager == null) 2{ 3 var go = GameObject.Find("PusherManager"); 4 _pusherManager = go.GetComponent<PusherManager>(); 5}
14. Change the declaration for static Animator anim; to private Animator anim; then in the Start() method, change the assignment of anim = GetComponent<Animator>(); to anim = this.gameObject.GetComponent<Animator>();. Now each player character has its own Animator instance.
15. In the Update() method, change the declaration of State currentState = _pusherManager.CurrentState(); to State currentState = _pusherManager.CurrentState(playerNumber);. Each player character will fetch its current move state from the global PusherManager GameObject once per frame update.
16. Declare a new public int playerNumber; property for the PusherMover class. Each character will need its own playerNumber, but we're going to define this in Unity Editor, not in the script. In the Editor, for each sword_man, assign each of them numbers 1-4 in their PusherMover component inspector:


Step 4: Create the backend API
The Node Express server in the GameController folder of the demo repository serves the webpage containing the game controller. Clicking on one of the controller buttons sends a http get request to the Express server, which in turn calls the .trigger() method from our Node http api SDK.
This request will send a message to the Unity game client. However, for the purposes of this multiplayer demo, we will have to make significant changes to allow for four webpages, so we’re going to create a new Node project. This will have a template engine running on top of Express because we will have to tell the javascript game controller page which player number has loaded that page (the alternative is to have four web page files, but that’s not scalable). The project files will also be better organised than before with routing.
1. At the top level of your project, run this command to create a separate Node Express project with Handlebars templating npx express-generator --view=hbs GameController2 .
2. Add the following to the newly created views/index.hbs file under the existing content so that it contains four links for four game controllers:
1<h1><a href="/controller/1">Player 1</a></h1> 2 3<h1><a href="/controller/2">Player 2</a></h1> 4 5<h1><a href="/controller/3">Player 3</a></h1> 6 7<h1><a href="/controller/4">Player 4</a></h1>
3. Open app.js in the newly created GameController2 in your IDE, and add the line var controllerRouter = require('./routes/controller'); underneath the var usersRouter = require('./routes/users'); that is already there.
1var indexRouter = require('./routes/index'); 2var usersRouter = require('./routes/users'); 3var controllerRouter = require('./routes/controller');
4. Then add app.use('/controller', controllerRouter); under the app.use('/users', usersRouter); . This will pass http requests to the /controller path to the above controller.js route, which we're going to make next.
1app.use('/', indexRouter); 2app.use('/users', usersRouter); 3app.use('/controller', controllerRouter);
5. Create a controller.js file in the routes folder. Responses for requests to /controller will be defined in this file. Paste the following into this file, and fill in your app credentials for your Pusher Channels app:
1var express = require('express'); 2var router = express.Router(); 3 4var Pusher = require('pusher'); 5 6var pusher = new Pusher({ 7 appId: 'APP_ID', 8 key: 'APP_KEY', 9 secret: 'APP_SECRET', 10 cluster: 'APP_CLUSTER', 11}); 12 13/* GET controller page. */ 14router.get('/1', function (req, res, next) { 15 res.render('controller', { player: '1' }); 16}); 17 18router.get('/2', function (req, res, next) { 19 res.render('controller', { player: '2' }); 20}); 21 22router.get('/3', function (req, res, next) { 23 res.render('controller', { player: '3' }); 24}); 25 26router.get('/4', function (req, res, next) { 27 res.render('controller', { player: '4' }); 28}); 29 30/* GET button presses. */ 31router.get('/game/:character/run-left', function (req, res) { 32 pusher.trigger('my-channel', 'run-left', { 33 "playerNumber": req.params.character, 34 }); 35 res.send(); 36}); 37 38router.get('/game/:character/run-right', function (req, res) { 39 pusher.trigger('my-channel', 'run-right', { 40 "playerNumber": req.params.character, 41 }); 42 res.send(); 43}); 44 45router.get('/game/:character/attack', function (req, res) { 46 pusher.trigger('my-channel', 'attack', { 47 "playerNumber": req.params.character, 48 }); 49 res.send(); 50}); 51 52router.get('/game/:character/idle', function (req, res) { 53 pusher.trigger('my-channel', 'idle', { 54 "playerNumber": req.params.character, 55 }); 56 res.send(); 57}); 58 59module.exports = router;
Notice the :character in the /game route. This is Express’ route parameter feature, and will tell us which game controller is sending a button press. The above code will send an event trigger request to Pusher’s API, containing the player number of the game controller that made the request.
Step 5: Create the game controllers
1. Copy the existing index.html file from the original GameController to your project’s views folder. Rename the file controller.hbs. This is going to be our game controller webpage, but it is a .hbs file instead of .html as we are going to use templating to modify the page when it is requested.
2. In the <head> block of the controller.hbs file, add the CDN for our pusher-js client library <script src="https://js.pusher.com/8.0/pusher.min.js"></script> and modify <script src="controller.js"></script> to <script src="/javascripts/controller.js"></script> so that it looks like the following:
1<head> 2 <meta name="viewport" content="width=device-width, initial-scale=1.0, maximum-scale=1.0, user-scalable=0" /> 3 <script src="/javascripts/controller.js"></script> 4 <script src="https://js.pusher.com/8.0/pusher.min.js"></script> 5</head>
3. Add a <script> block at the bottom of the <body>, and add the line var url = "game/{{ player }}/" . We’re making the value of this variable to be defined at request time with templating instead of hard coded:
1<script> 2 var url = "game/{{ player }}/" 3</script>
4. Copy the existing controller.js file from the original GameController’s public folder to your project’s public/javascripts folder (don’t confuse this with the /routes/controller.js, which handles the webpage request, whereas public/javascripts/controller.js is part of the webpage content itself).
5. Delete the var url = "game/character/" on the first line. This is now dynamically defined in the above step 3.
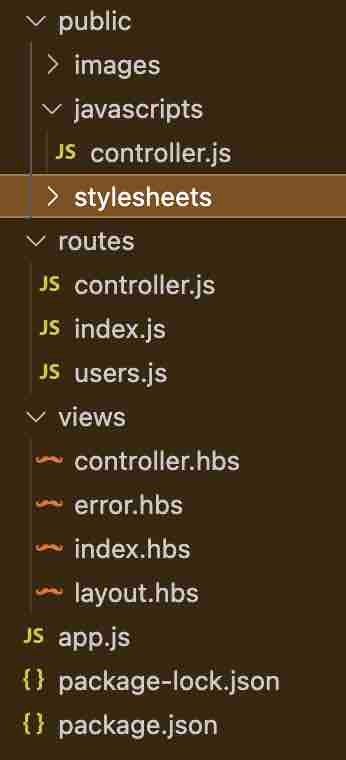
6. Your GameController2 directory should look like this:
7. Try running the Express server in your GameController2 by first running npm install pusher to install the project dependencies (as well our Node HTTP library), then npm start. Navigate to http://localhost:3000/ in your browser, where you should see 4 links to choose a player. Clicking on a link will request the controller.hbs page, modified with {{ player }} number. You should see requests to your Express server that look like the following:
GET /controller/2 200 64.595 ms - 4028
GET /stylesheets/style.css 304 1.549 ms - -
GET /javascripts/controller.js 200 2.853 ms - 2217
GET /controller/game/2/idle 200 17.134 ms - -
GET /controller/game/2/idle 200 3.971 ms - -
The /controller/game/[number] endpoint is the specific (in this case, '2') game controller's request to our backend to make that player character do a specific action.
8. Click the left or right button of the game controller. You should see a GET requests to the run-right endpoint:
GET /controller/game/2/run-right 200 2.794 ms - -
9. Start the game client in the Unity Editor. Load up one of the game controllers, and you should just see the corresponding character move.
Step 6: See who is online with Watchlist events
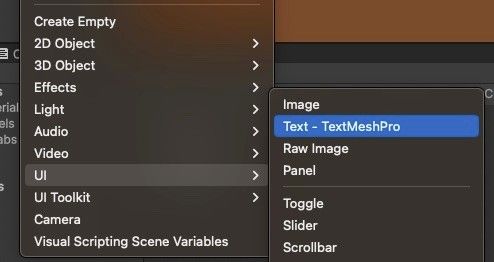
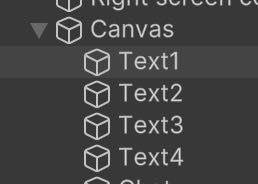
1. In your Unity Editor, go to Window > Package > Manager to install the TextMeshPro package from the Unity Package Manager. In the Packages drop-down select Unity Registry. Search for TextMeshPro, and install it. Then right-click the project hierarchy explorer, and add a Text - TextMeshPro GameObject four times. Rename them to Text1, Text2, Text3, etc. It will ask you if you want to create a canvas first. Click Yes.
2. Position these Text GameObjects near the top right of the canvas, and widen them so that there’s enough space for the text.
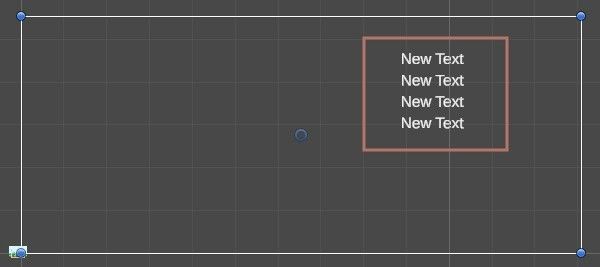
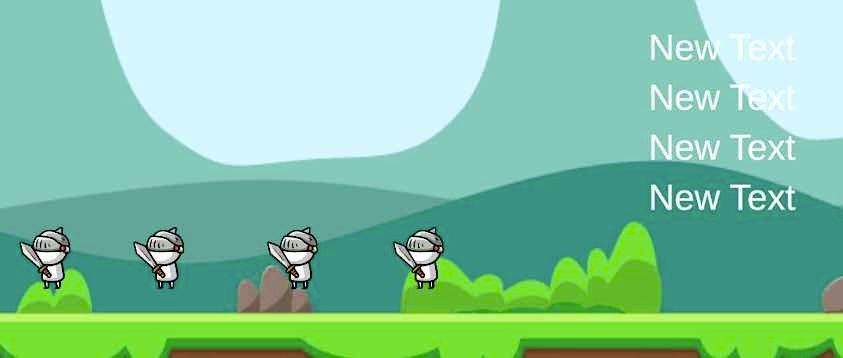
3. Go to the game tab of your Unity Editor, and you should see the final position like this:
4. In your PusherManager.cs file, import the TMPro library then modify the public class PusherManager : MonoBehaviour to add 4 TMP_Text properties and a String array property to the class:
1using TMPro; 2 3... 4 5public class PusherManager : MonoBehaviour 6{ 7 ... 8 public TMP_Text _player1UI; 9 public TMP_Text _player2UI; 10 public TMP_Text _player3UI; 11 public TMP_Text _player4UI; 12 private String[] _playerStatus = { "P1 OFFLINE", "P2 OFFLINE", "P3 OFFLINE", "P4 OFFLINE" }; 13 ... 14}
5. Save the above file, and go back to your Unity Editor. Drag the 4 Text gameobjects from the project hierarchy to their respective PusherManager GameObjects's Player UI property (this is another way of referencing an Unity GameObject in the script without using the GameObject.Find() method)

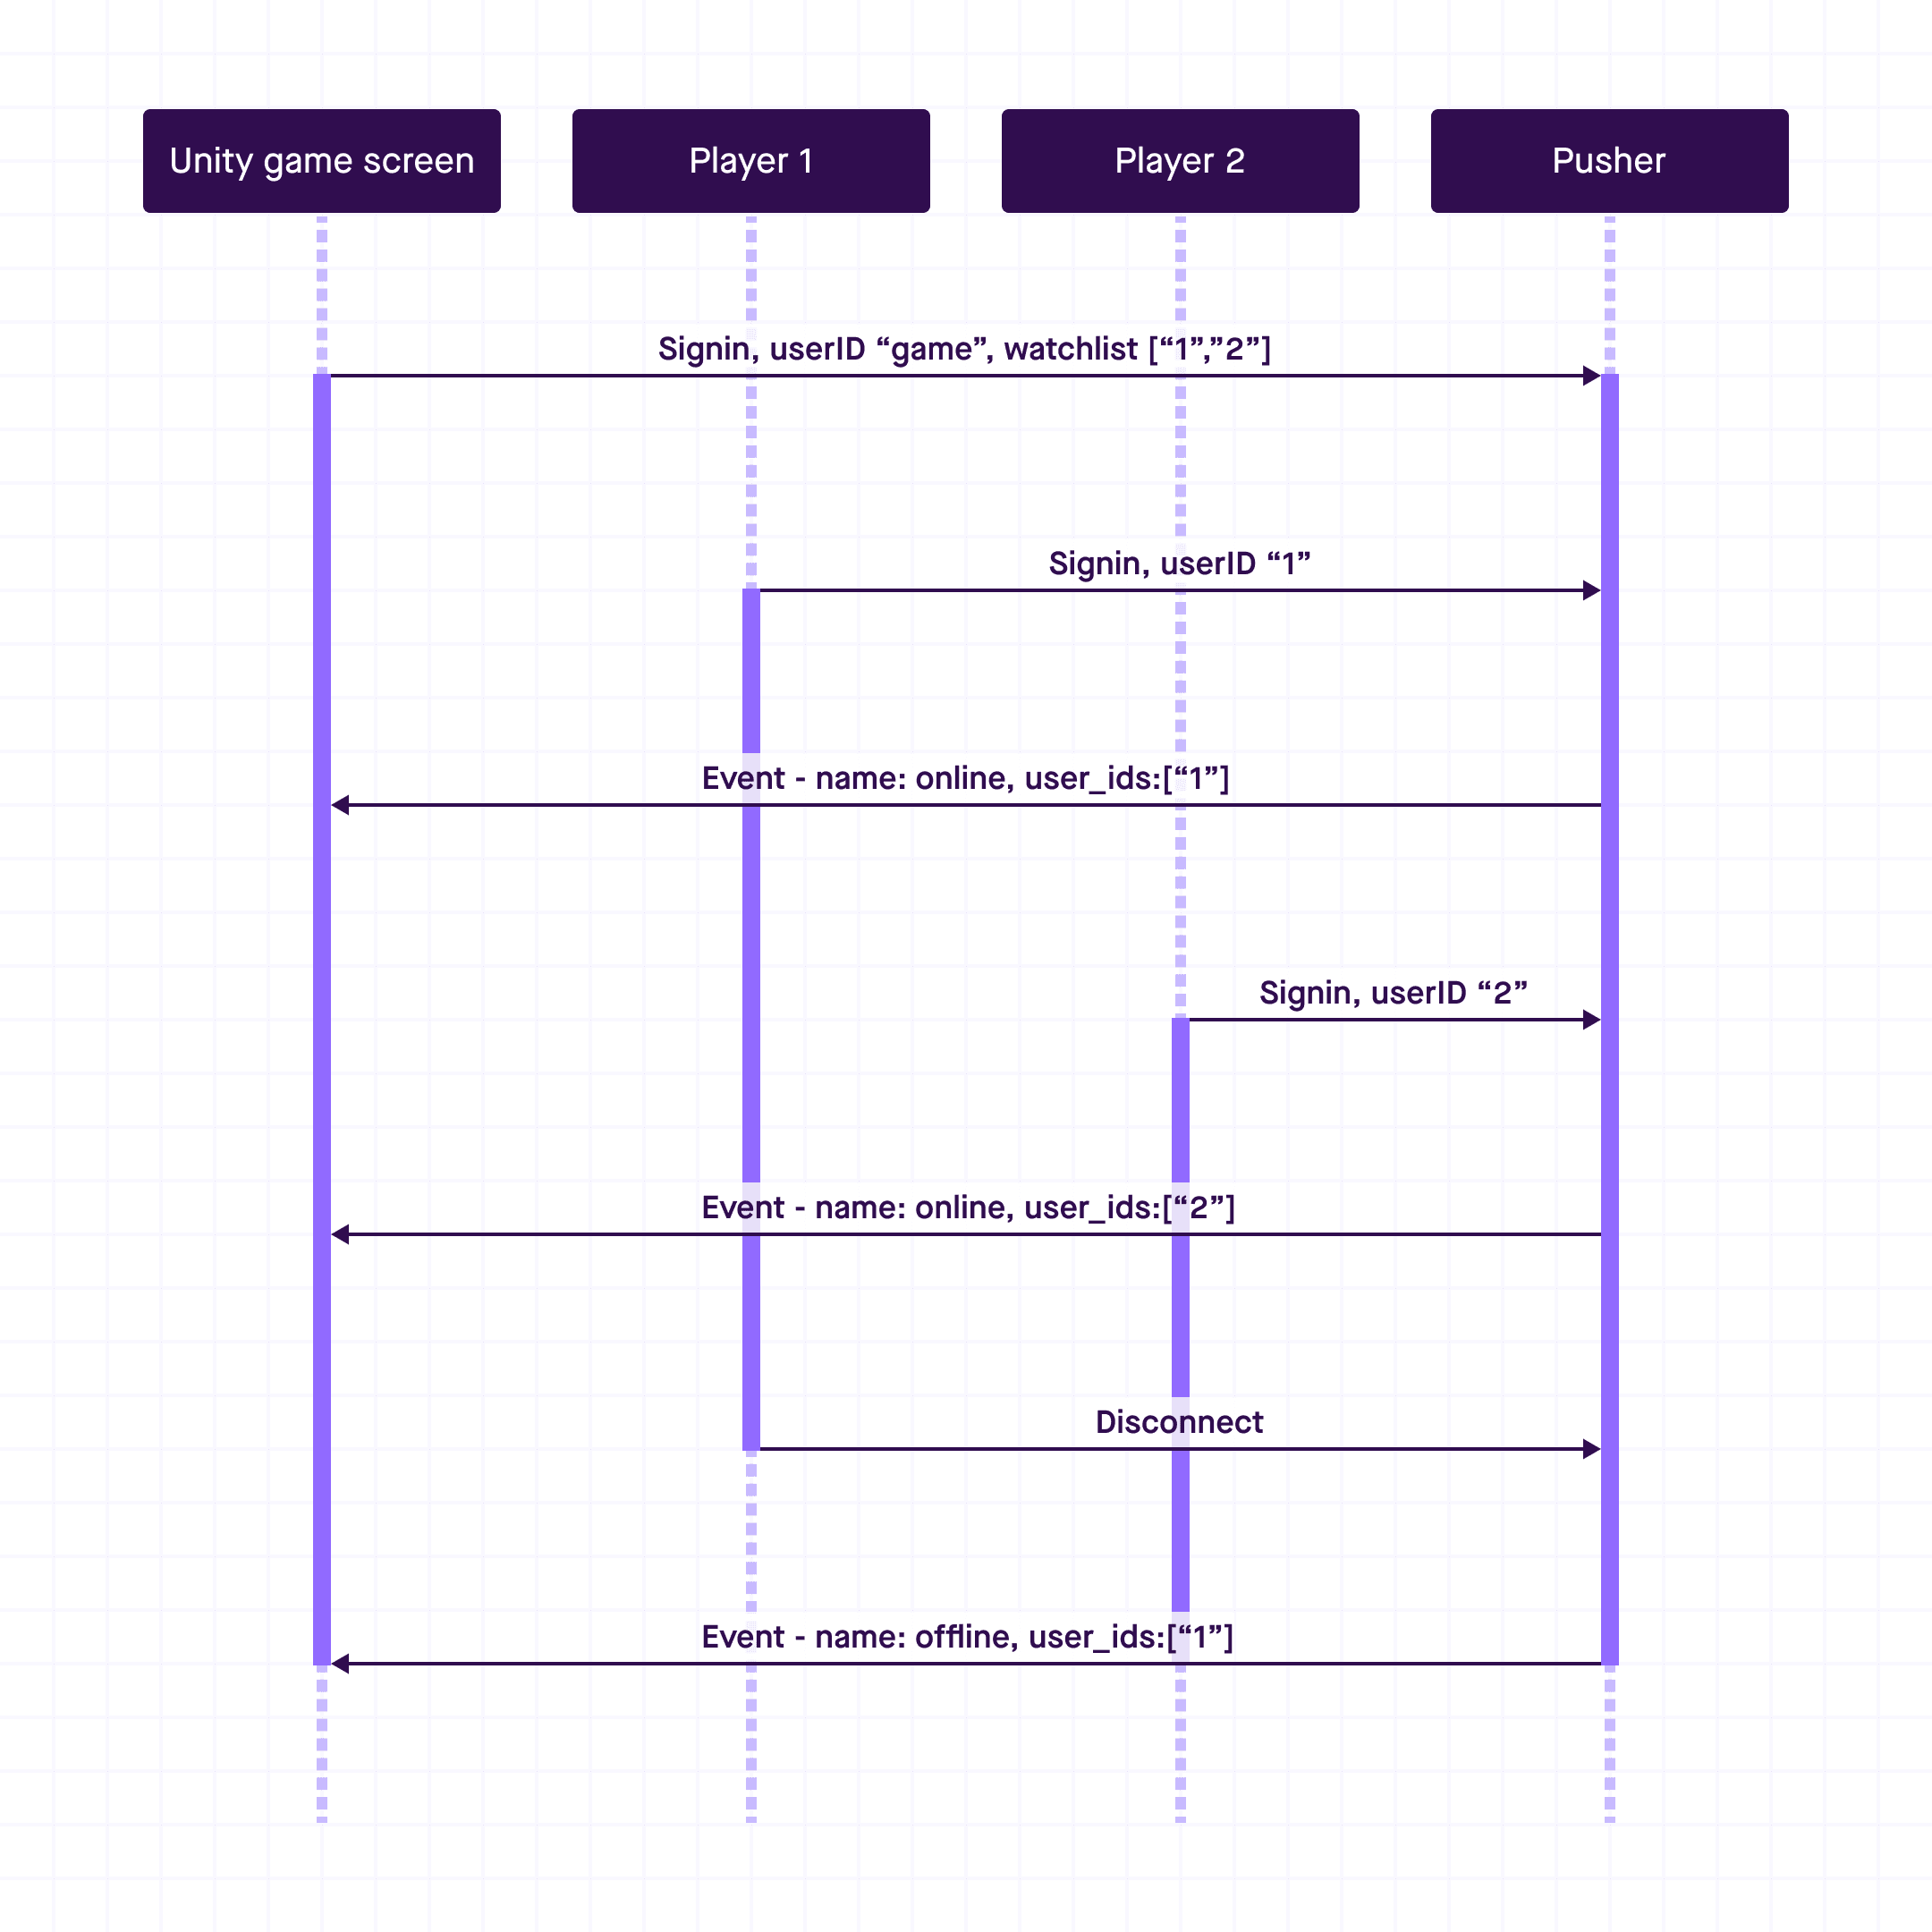
6. Watchlists require User Authentication. The Unity game client will be a user, as well as each of the 4 game controllers. The game client user is going to be watching the other four game controller users. When someone loads a controller page, the Unity client is going to receive a watchlist event for this.
7. Staying with PusherManager.cs, in private async Task InitialisePusher() add a HttpUserAuthenticator() to the Pusher initializer options so that it uses User Authentication. Add the _pusher.User.Watchlist.Bind() handlers for both the “online” and “offline” as implement new callbacks to handle receiving watchlist events with _pusher.User.Watchlist.Bind():
1private async Task InitialisePusher() 2{ 3 if (_pusher == null && (APP_KEY != "APP_KEY") && (APP_CLUSTER != "APP_CLUSTER")) 4 { 5 _pusher = new Pusher(APP_KEY, new PusherOptions() 6 { 7 Cluster = APP_CLUSTER, 8 Encrypted = true, 9 //Add this HttpUserAuthenticator option. 10 UserAuthenticator = new HttpUserAuthenticator("http://127.0.0.1:3000/users/game-auth") 11 }); 12 13 _pusher.Error += OnPusherOnError; 14 _pusher.ConnectionStateChanged += PusherOnConnectionStateChanged; 15 _pusher.Connected += PusherOnConnected; 16 _channel = await _pusher.SubscribeAsync("my-channel"); 17 _pusher.Subscribed += OnChannelOnSubscribed; 18 //Initiate the User authentication request 19 _pusher.User.Signin(); 20 //Add these "online" and "offline" handlers. 21 _pusher.User.Watchlist.Bind("online", OnWatchlistOnlineEvent); 22 _pusher.User.Watchlist.Bind("offline", OnWatchlistOfflineEvent); 23 await _pusher.ConnectAsync(); 24 await _pusher.User.SigninDoneAsync(); 25 } 26 else 27 { 28 Debug.LogError("APP_KEY and APP_CLUSTER must be correctly set. Find how to set it at https://dashboard.pusher.com"); 29 } 30}
The important parts are the UserAuthenticator = new HttpUserAuthenticator("http://127.0.0.1:3000/users/game-auth") which is the endpoint the client will use to obtain its userId as well as a list of other users to watch. The _pusher.User.Signin(); method call will execute the above User Authentication request. The _pusher.User.Watchlist.Bind(); calls defines the handlers when it receives the online/offline event.
8. We now are going to define the OnWatchlistOnlineEvent and OnWatchlistOfflineEvent. Add these two methods to the PusherManager class.
1void OnWatchlistOnlineEvent(WatchlistEvent watchlistEvent) 2 { 3 Debug.Log($"{Environment.NewLine} OnWatchlistOnlineEvent {watchlistEvent}"); 4 foreach (string userId in watchlistEvent.UserIDs) 5 { 6 int x = Int32.Parse(userId); 7 _playerStatus[x - 1] = ($"P{x} ONLINE"); 8 } 9 } 10void OnWatchlistOfflineEvent(WatchlistEvent watchlistEvent) 11{ 12 Debug.Log($"{Environment.NewLine} OnWatchlistOfflineEvent {watchlistEvent}"); 13 foreach (string userId in watchlistEvent.UserIDs) 14 { 15 int x = Int32.Parse(userId); 16 _playerStatus[x - 1] = ($"P{x} OFFLINE"); 17 } 18}
The above snippet converts the String UserID contained in the watchlist event to Integer, before updating the respective element in the _playerStatus[] array with "Online" or "Offline". We will implement the User Authentication endpoint that returns this UserID in a later section.
9. Add an Update() method to the the PusherManager class as follows:
1void Update() 2{ 3 _player1UI.text = _playerStatus[0]; 4 _player2UI.text = _playerStatus[1]; 5 _player3UI.text = _playerStatus[2]; 6 _player4UI.text = _playerStatus[3]; 7}
The MonoBehaviour.Update() method runs every frame, and it will update the UI Text component with the String contents of its respective _playerStatus[] array.
10. In your backend GameController2 project, open the routes/users.js file. We're going to implement the response to the User Authentication request from the Unity game client.
11. Import the Pusher SDK library and update the credentials:
1var Pusher = require('pusher'); 2 3var pusher = new Pusher({ 4 appId: 'APP_ID', 5 key: 'APP_KEY', 6 secret: 'APP_SECRET', 7 cluster: 'APP_CLUSTER', 8 useTLS: true 9});
12. Create a route called game-auth (above the module.exports = router;):
1router.post("/game-auth", (req, res) => { 2 const socketId = req.body.socket_id; 3 4 const user = { 5 id: "game", 6 user_info: { 7 name: "John Smith", 8 }, 9 watchlist: ['1', '2', '3', '4'] 10 }; 11 const authResponse = pusher.authenticateUser(socketId, user); 12 res.send(authResponse); 13});
Here our auth server is going to assign the Unity game client with the UserID "game". Its will make the “game” user watch users '1', '2', '3', '4', which are the UserIDs of the game controllers so that when a game controller comes online, our server will send the Unity game client an “online” event for the specific game controller.
13. We’re going to implement User Authentication for the game controller pages as well. In the views/controller.hbs file, add the following to the <script> block at the end of the <body> (the var url = "game/{{ player }}/" should already be there). Update the APP_KEY and APP_CLUSTER to your Channels app.
1<script> 2 var url = "game/{{ player }}/" 3 4 const pusher = new Pusher('APP_KEY', { 5 cluster: 'APP_CLUSTER', 6 userAuthentication: { 7 endpoint: "/users/auth", 8 transport: "ajax", 9 params: { player: {{ player }} }, 10 headers: { }, 11 paramsProvider: null, 12 headersProvider: null, 13 customHandler: null, 14 }, 15 }); 16 17 pusher.signin(); 18</script>
This similar to the User Authentication for the Unity game client back in step 5.7, except now it is for the game controller webpage. It passes the player number of the game controller to the auth endpoint as a parameter with params: { player: {{ player }} },
14. Let’s implement the users/auth path, which is different from the users/game-auth path that the Unity game client uses. In routes/users.js, add the following route just after the /game-auth route from before (and again before the module.exports = router;).
1router.post("/auth", (req, res) => { 2 const socketId = req.body.socket_id; 3 4 // Replace this with code to retrieve the actual user id and info 5 const user = { 6 id: req.body.player, 7 user_info: { 8 name: "John Smith", 9 }, 10 }; 11 const authResponse = pusher.authenticateUser(socketId, user); 12 res.send(authResponse); 13});
Here the auth server is retrieving the player number from the request body (remember previously the webpage client passed it as parameter with params: { player: {{ player }} }.) The auth server will assign this client a UserID thats the same as the player number. Now whenever a game controller page calls the .signin() method, our server will send the Unity game client a watchlist online event.
15. Start both the Unity game client and the backend server. Load one of the game controller pages, and you should see the Unity game client change the text to “ONLINE”.
Step 7: Add a chat function
The final function we are going to add is the chat function. We’re going to add a text input box under the game controller. When the user clicks the send message button, it will trigger a message to the Unity game client, which will print this on the screen.
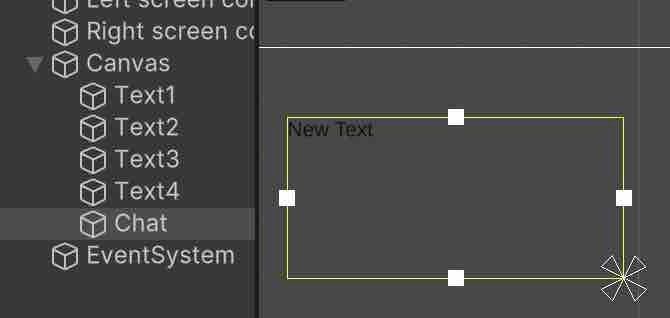
1. In the Unity Editor, add another Text - TextMeshPro gameobject to the hierarchy. Rename it to “Chat” in the inspector. Position it to the top left of the canvas.
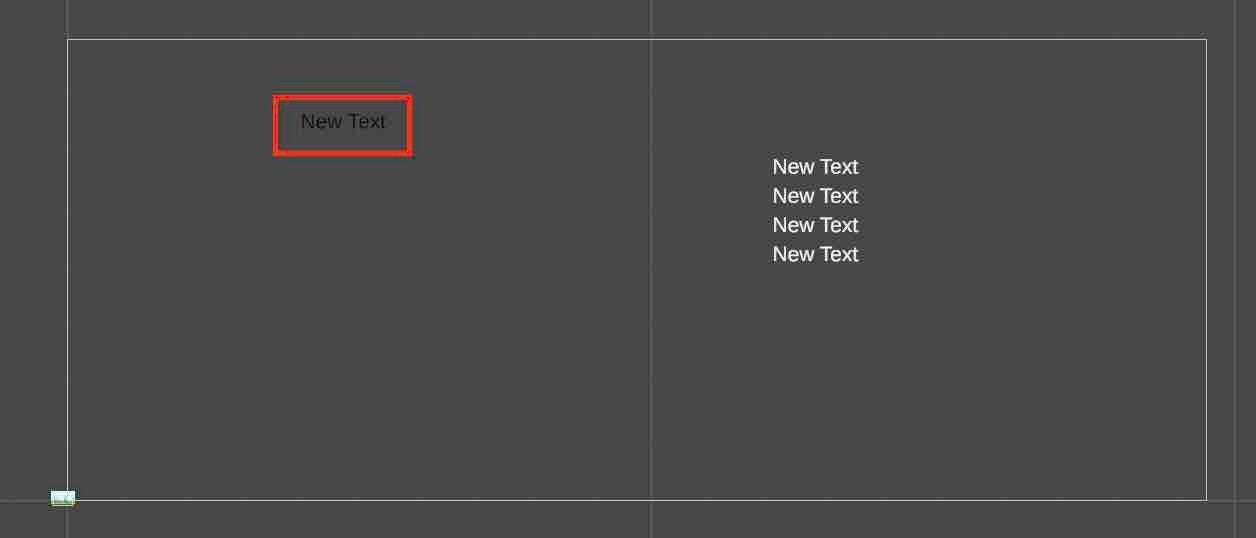
2. Select the GameObject in your Hierarchy, and expand the size like following screenshot:
3. Create a class for the incoming chat message called ChatMessage (like the Character class, we're going to deserialise this from the received event data).
1public class ChatMessage 2{ 3 public int playerNumber; 4 public string chatMessage; 5}
4. Declare the following 2 variables in your PusherManager class. _chatWindow is going to be our reference to the chat window in the Unity game, which we're going to modify the text property of. The _chatHistory is the String content. The <br> tag will force a line break so each chat message is on its own line.
1public TMP_Text _chatWindow; 2private String _chatHistory = "Chat <br>";
5. Create a new callback for the “chat” event in private void PusherOnConnected .
1_channel.Bind("chat", (PusherEvent eventData) => 2{ 3 ChatMessage incomingMessage = JsonUtility.FromJson<ChatMessage>(eventData.Data); 4 _chatHistory = _chatHistory + incomingMessage.playerNumber + ":" + incomingMessage.chatMessage + "<br>"; 5});
6. In the void Update() method , add the following to update the _chatwindow.text property to the current value of _chatHistory that may have just been updated by the above chat event.
1void Update() 2{ 3 ... 4 _chatWindow.text = _chatHistory; 5 ... 6}
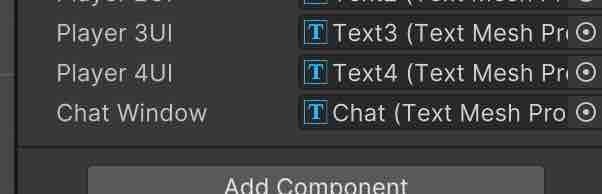
7. Go back to your Unity Editor, and drag the “Chat” GameObject to your PusherManager GameObject's Chat Window property.
8. Finally we have to add an input text box and and a button to the controller page. In your GameController2 backend server, open the controller.hbs, and add this section to the <body>.
1<section> 2 <div> 3 <label for="chatInput">Send chat message</label> 4 <input type="text" id="chatInput" name="chatMessage"> 5 </div> 6 <div> 7 <button onclick="sendChatMessage(document.getElementById('chatInput').value);" />Send message</button> 8 </div> 9 </form> 10</section>
9. In public/javascripts/controller.js, add this function that gets called when the user clicks on the above button.
1function sendChatMessage(message) { 2 const xhr = new XMLHttpRequest(); 3 xhr.open("POST", url + "chat", true); 4 5 // Send the proper header information along with the request 6 xhr.setRequestHeader("Content-Type", "application/x-www-form-urlencoded"); 7 8 xhr.onreadystatechange = () => { // Call a function when the state changes. 9 if (xhr.readyState === XMLHttpRequest.DONE && xhr.status === 200) { 10 // Request finished. Do processing here. 11 } 12 } 13 xhr.send("chatMessage=" + message); 14}
10. Finally create a chat route in routes/controller.js. This will handle the request sent by the above snippet to trigger a chat event, which the Unity game client will display.
1router.post('/game/:character/chat', function (req, res) { 2 pusher.trigger('my-channel', 'chat', { 3 "playerNumber": req.params.character, 4 "chatMessage": req.body.chatMessage 5 }); 6 res.send(); 7});
11. Start the Unity game client and the game controller web server. Send a chat message from the game controller, and it will appear in the Unity game.
Conclusion
In this tutorial, we have learned how to leverage Pusher to build a realtime application where multiple users can control their own character in the game client, see which game controller is active and communicate with other users online.
Using the basic skills from this demo you can go on to implement more complex live engagement tools into your game app. Check out our guide on enhancing player experience with realtime features, or take a look at the Pusher Channels docs to explore more features.
The source code for this tutorial is available on GitHub.


© 2026 Pusher Ltd. All rights reserved.
Pusher Limited is a company registered in England and Wales (No. 07489873) whose registered office is at MessageBird UK Limited, 3 More London Riverside, 4th Floor, London, United Kingdom, SE1 2AQ.