- Products

- Developers
- User stories
- Blog
- Pricing

Getting started with Laravel Mix for frontend development
Introduction
In this tutorial, we will look at how to set up Laravel Mix to compile SCSS, LESS or plain CSS for your application.
Laravel Mix is a tool for compiling and optimizing assets in a Laravel app. It's similar to a build tool like gulp, Grunt and such like. it's specific to Laravel but can also be used externally as an npm package. Laravel Mix covered 80% of Webpack's use case to make compiling assets easier. In a nutshell, Laravel Mix compiles, minifies and stores your assets in your application's public folder for easy reference.
Prerequisites
This tutorial assumes you have a basic understanding of Laravel v 5.6+ and since Laravel Mix is an npm package a little familiarity with npm will help. However, it is not required.
You will need to have Node v 8.10 + and npm v 5+ installed on your system. If you don't you can install it by following this guide.
Getting started
To use Laravel Mix, we need to have a Laravel app installed. If you don't already have one setup, you can set up one by following this installation guide. After installation your directory should look like this:
1├── app 2 │ ├── Console 3 │ │ └── Kernel.php 4 │ ├── Exceptions 5 │ │ └── Handler.php 6 │ ├── Http 7 │ │ ├── Controllers 8 │ │ │ ├── Auth 9 │ │ │ │ ├── ForgotPasswordController.php 10 │ │ │ │ ├── LoginController.php 11 │ │ │ │ ├── RegisterController.php 12 │ │ │ │ ├── ResetPasswordController.php 13 │ │ │ │ └── VerificationController.php 14 │ │ │ └── Controller.php 15 │ │ ├── Kernel.php 16 │ │ └── Middleware 17 │ │ ├── Authenticate.php 18 │ │ ├── CheckForMaintenanceMode.php 19 │ │ ├── EncryptCookies.php 20 │ │ ├── RedirectIfAuthenticated.php 21 │ │ ├── TrimStrings.php 22 │ │ ├── TrustProxies.php 23 │ │ └── VerifyCsrfToken.php 24 │ ├── Providers 25 │ │ ├── AppServiceProvider.php 26 │ │ ├── AuthServiceProvider.php 27 │ │ ├── BroadcastServiceProvider.php 28 │ │ ├── EventServiceProvider.php 29 │ │ └── RouteServiceProvider.php 30 │ └── User.php 31 ├── artisan 32 ├── bootstrap 33 │ ├── app.php 34 │ └── cache 35 │ ├── packages.php 36 │ └── services.php 37 ├── composer.json 38 ├── composer.lock 39 ├── config 40 │ ├── app.php 41 │ ├── auth.php 42 │ ├── broadcasting.php 43 │ ├── cache.php 44 │ ├── database.php 45 │ ├── filesystems.php 46 │ ├── hashing.php 47 │ ├── logging.php 48 │ ├── mail.php 49 │ ├── queue.php 50 │ ├── services.php 51 │ ├── session.php 52 │ └── view.php 53 ├── database 54 │ ├── factories 55 │ │ └── UserFactory.php 56 │ ├── migrations 57 │ │ ├── 2014_10_12_000000_create_users_table.php 58 │ │ └── 2014_10_12_100000_create_password_resets_table.php 59 │ └── seeds 60 │ └── DatabaseSeeder.php 61 ├── package.json 62 ├── phpunit.xml 63 ├── public 64 │ ├── css 65 │ │ └── app.css 66 │ ├── favicon.ico 67 │ ├── index.php 68 │ ├── js 69 │ │ └── app.js 70 │ ├── robots.txt 71 │ └── svg 72 │ ├── 403.svg 73 │ ├── 404.svg 74 │ ├── 500.svg 75 │ └── 503.svg 76 ├── resources 77 │ ├── js 78 │ │ ├── app.js 79 │ │ ├── bootstrap.js 80 │ │ └── components 81 │ │ └── ExampleComponent.vue 82 │ ├── lang 83 │ │ └── en 84 │ │ ├── auth.php 85 │ │ ├── pagination.php 86 │ │ ├── passwords.php 87 │ │ └── validation.php 88 │ ├── sass 89 │ │ ├── app.scss 90 │ │ └── _variables.scss 91 │ └── views 92 │ └── welcome.blade.php 93 ├── routes 94 │ ├── api.php 95 │ ├── channels.php 96 │ ├── console.php 97 │ └── web.php 98 ├── server.php 99 ├── storage 100 │ ├── app 101 │ │ └── public 102 │ ├── framework 103 │ │ ├── cache 104 │ │ │ └── data 105 │ │ ├── sessions 106 │ │ ├── testing 107 │ │ └── views 108 │ └── logs 109 ├── tests 110 │ ├── CreatesApplication.php 111 │ ├── Feature 112 │ │ └── ExampleTest.php 113 │ ├── TestCase.php 114 │ └── Unit 115 │ └── ExampleTest.php 116 ├── webpack.mix.js 117 └── yarn-error.log
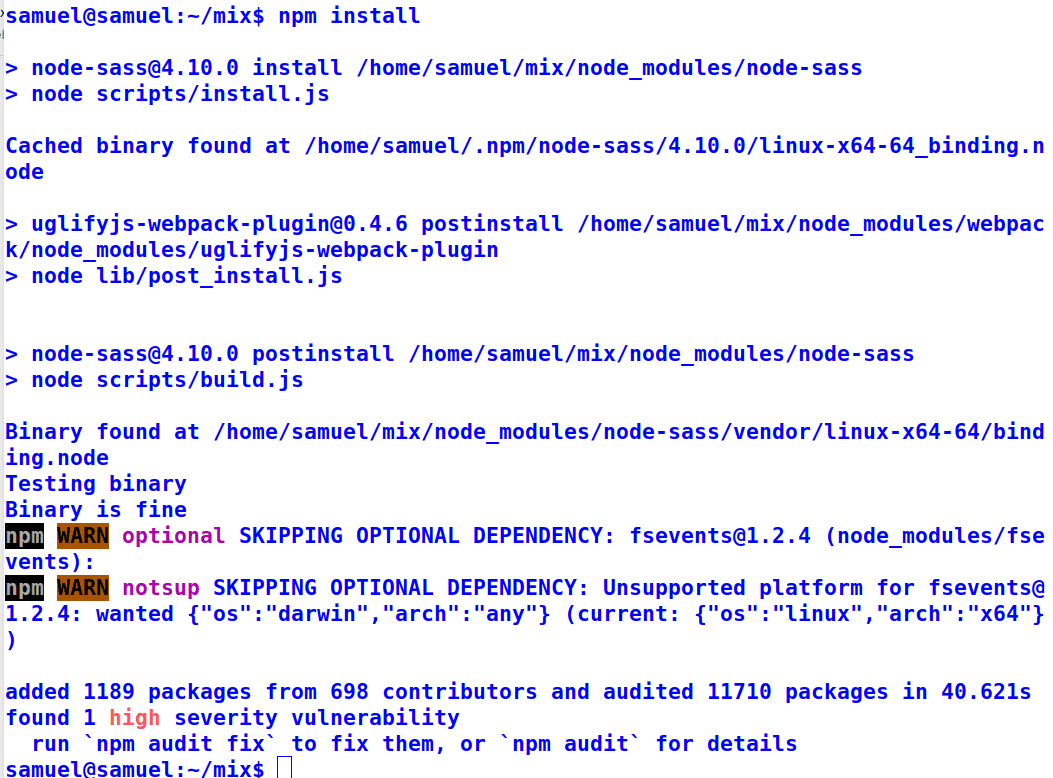
After installing Laravel you need to install your Node dependencies (because Laravel Mix comes pre-packed as a node dependency). In your terminal type:
npm install
Now see this in your terminal:
Exploring the directory
After installation, a node_modules folder will be added to your project's directory. But for our purposes, we'll be concerned with the resources folder and the webpack.mix.js file in the project root which is where Laravel Mix does all its magic.
Under the resources folder you will see the following folders:
1├── js 2 │ ├── app.js 3 │ ├── bootstrap.js 4 │ └── components 5 │ └── ExampleComponent.vue 6 ├── lang 7 │ └── en 8 │ ├── auth.php 9 │ ├── pagination.php 10 │ ├── passwords.php 11 │ └── validation.php 12 ├── sass 13 │ ├── app.scss 14 │ └── _variables.scss 15 └── views 16 └── welcome.blade.php
The job of Laravel Mix is to compile all these assets and save them in the public directory to be used and accessed by the world. To see that in action, in your terminal type:
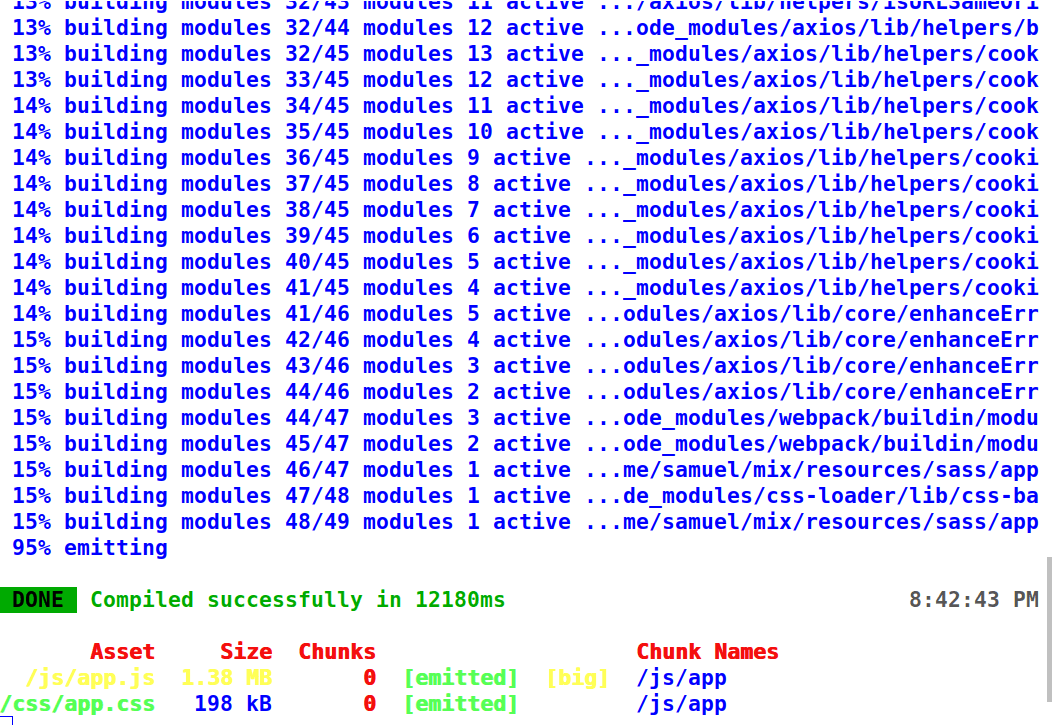
npm run dev
When it's finished, you will see this in your terminal:
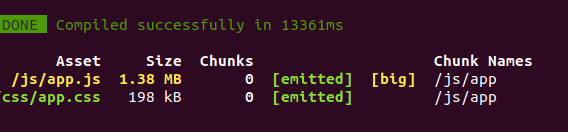
Now if you look in the css and js folder in your public directory, you'd see it has been updated with the compiled code below:
1// app.css 2 /* Copyright 2011-2018 Twitter, Inc. 3 * Licensed under MIT (https://github.com/twbs/bootstrap/blob/master/LICENSE) 4 */ 5 6 :root { 7 --blue: #3490dc; 8 --indigo: #6574cd; 9 --purple: #9561e2; 10 --pink: #f66D9b; 11 --red: #e3342f; 12 --orange: #f6993f; 13 --yellow: #ffed4a; 14 --green: #38c172; 15 --teal: #4dc0b5; 16 --cyan: #6cb2eb; 17 --white: #fff; 18 --gray: #6c757d; 19 --gray-dark: #343a40; 20 --primary: #3490dc; 21 --secondary: #6c757d; 22 --success: #38c172; 23 --info: #6cb2eb; 24 --warning: #ffed4a; 25 --danger: #e3342f; 26 --light: #f8f9fa; 27 --dark: #343a40; 28 --breakpoint-xs: 0; 29 --breakpoint-sm: 576px; 30 --breakpoint-md: 768px; 31 --breakpoint-lg: 992px;
1//app.js 2 /******/ (function(modules) { // webpackBootstrap 3 /******/ // The module cache 4 /******/ var installedModules = {}; 5 /******/ 6 /******/ // The require function 7 /******/ function __webpack_require__(moduleId) { 8 /******/ 9 /******/ // Check if module is in cache 10 /******/ if(installedModules[moduleId]) { 11 /******/ return installedModules[moduleId].exports; 12 /******/ } 13 /******/ // Create a new module (and put it into the cache) 14 /******/ var module = installedModules[moduleId] = { 15 /******/ i: moduleId, 16 /******/ l: false, 17 /******/ exports: {} 18 /******/ }; 19 /******/ 20 /******/ // Execute the module function 21 /******/ modules[moduleId].call(module.exports, module, module.exports, __webpack_require__); 22 /******/ 23 /******/ // Flag the module as loaded 24 /******/ module.l = true; 25 /******/ 26 /******/ // Return the exports of the module 27 /******/ return module.exports; 28 /******/ }
One of the good things about Laravel Mix is the ability to compress or minify files and make the production ready. To see a list of commands possible, we can run this code on your terminal:
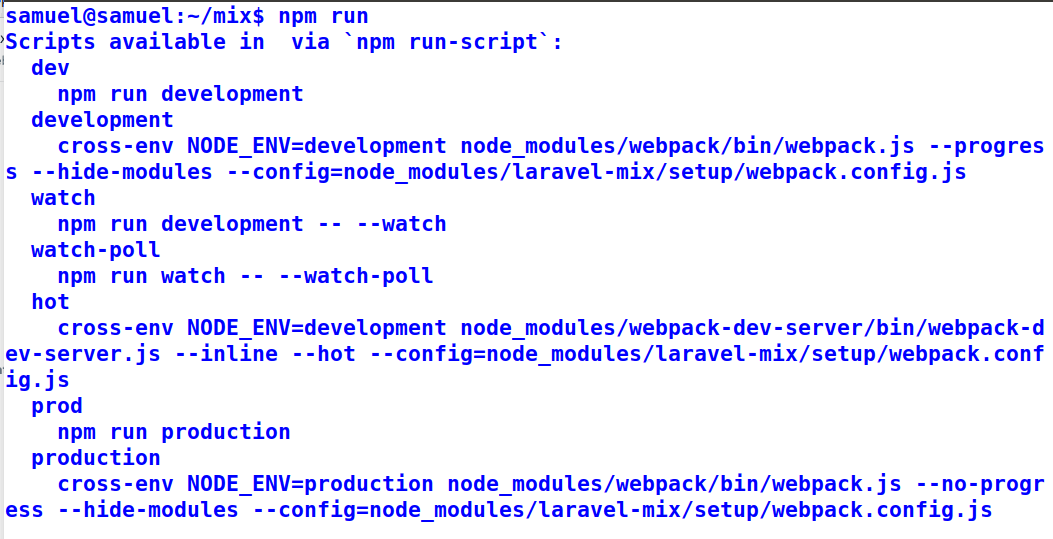
npm run dev: this compiles the assets down to the public directory
npm run watch: this compiles the assets to the public directory but also watches for new changes and auto updates.
npm run prod: this compiles and minifies the assets to the public directory.
Let's see how these various commands work.
First, let's minify the code using npm run prod. In your terminal type npm run prod.
Once that's done in your terminal you should see this:
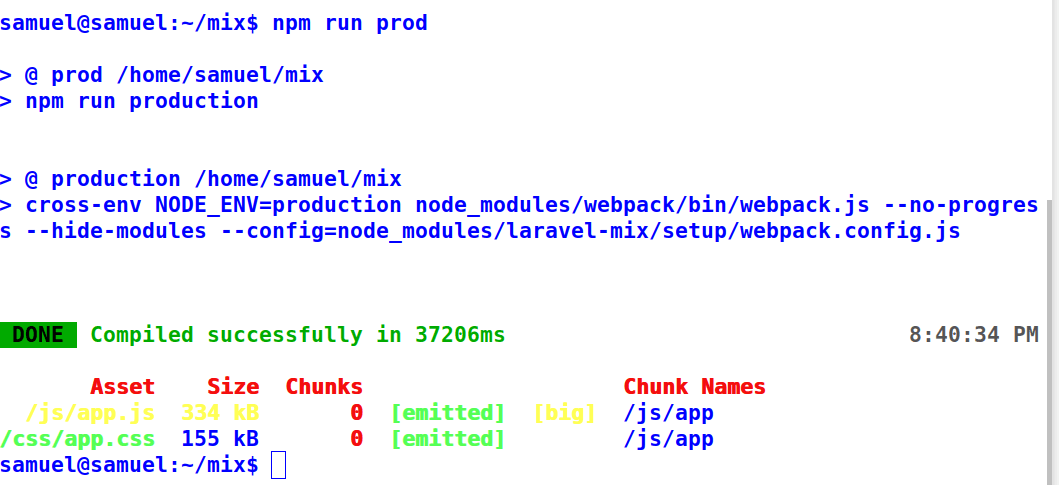
Now check your CSS js folder in the public directory you'd see the code has been minified to one line like:
1// app.css 2 @import url(https://fonts.googleapis.com/css?family=Nunito);/*! 3 * Bootstrap v4.1.3 (https://getbootstrap.com/) 4 * Copyright 2011-2018 The Bootstrap Authors 5 * Copyright 2011-2018 Twitter, Inc. 6 * Licensed under MIT (https://github.com/twbs/bootstrap/blob/master/LICENSE) 7 */:root{--blue:#3490dc;--indigo:#6574cd;--purple:#9561e2;--pink:#f66d9b;--red:#e3342f;--orange:#f6993f;--yellow:#ffed4a;
1// app.js 2 !function(e){var t={};function n(r){if(t[r])return t[r].exports;var i=t[r]={i:r,l:!1,exports:{}};
Next lets auto update the code using npm run watch. In your terminal type npm run watch.
Once that's done in your terminal you should see this:
To see this in action let's add code to our scss file in our resources/sass directory. Open the app.scss file and add the following lines of code to it.
1.content { 2 width: 600px; 3 margin: 0 auto; 4 font-size: 20px; 5 margin-top: 50px; 6 p { 7 color: yellow; 8 } 9 }
Once you save if you check your terminal you'd notice it auto-compiled with you typing any npm commands.
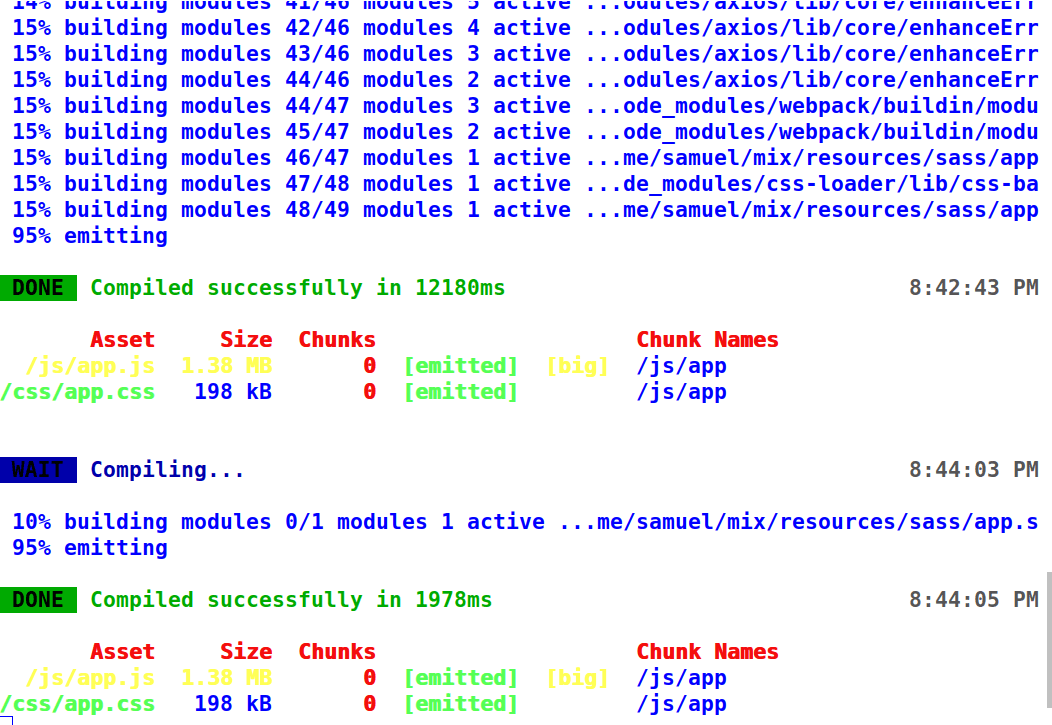
Although it happens quick, you can always confirm by looking at the time difference of the last compilation.
To see the result of our code live in action we need to reference the CSS file in our Laravel homepage in resources/views/welcome.blade.php
In the file’s head let's link to out css by adding this line of code to it.
<link rel="stylesheet" href="{{ asset('css/app.css') }}">
Now update the HTML on the page to the following lines:
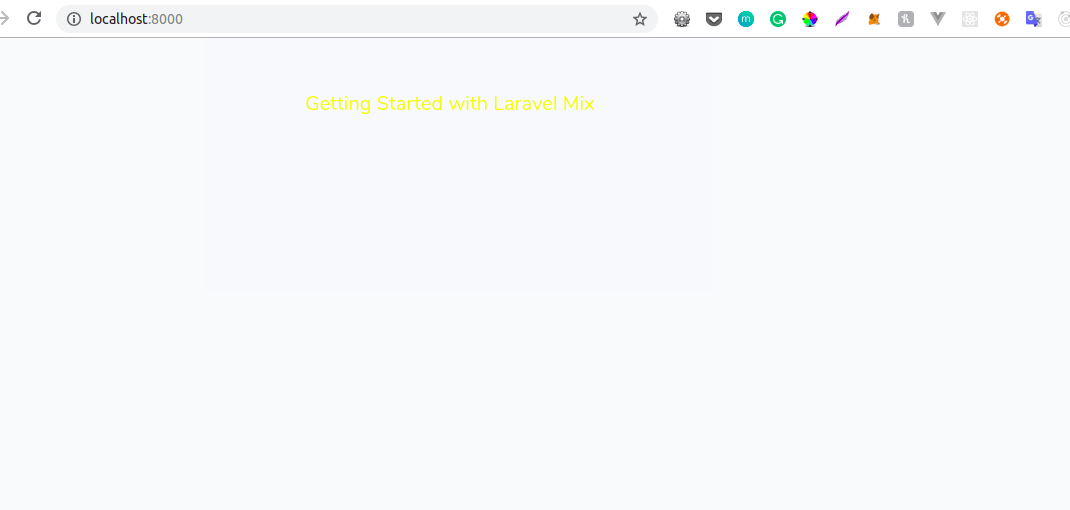
1<!doctype html> 2 <html lang="{{ str_replace('_', '-', app()->getLocale()) }}"> 3 <head> 4 <meta charset="utf-8"> 5 <meta name="viewport" content="width=device-width, initial-scale=1"> 6 <title>Laravel</title> 7 <link rel="stylesheet" href="{{ asset('css/app.css') }}"> 8 </head> 9 <body> 10 <div class="content"> 11 <p> Getting Started with Laravel Mix </p> 12 </div> 13 </body> 14 </html>
Now start your server by typing: php artisan serve in your terminal. In your browser you should see this:
Finally, let's explore the Laravel Mix config file. In your root directory open the webpack.mix.js file. You will see the following lines of code:
1const mix = require('laravel-mix'); 2 3 /* 4 |-------------------------------------------------------------------------- 5 | Mix Asset Management 6 |-------------------------------------------------------------------------- 7 | 8 | Mix provides a clean, fluent API for defining some Webpack build steps 9 | for your Laravel application. By default, we are compiling the Sass 10 | file for the application as well as bundling up all the JS files. 11 | 12 */ 13 14 mix.js('resources/js/app.js', 'public/js') 15 .sass('resources/sass/app.scss', 'public/css')
As you can see in the comment it says By default, we are compiling the Sass
| file for the application and bundling up all the JS files.
By default, Laravel assumes you will use sass for your development. However, other methods exist depending on your choice of language.
For less Laravel Mix has a less function you can use to compile your less assets. The syntax looks like:
mix.less('resources/less/app.less', 'public/css');
Basically, this means compile all the assets in the app.less in that directory and save it under the public/css directory. Less also supports method chaining to compile multiple files assuming you had over one file like so:
1mix.less('resources/less/app.less', 'public/css') 2 .less('resources/less/admin.less', 'public/css');
You can also use mix with to compile all your plain CSS files into one huge file to reduce the number of calls your browser makes to fetch the files from the server:
1mix.styles([ 2 'public/css/vendor/normalize.css', 3 'public/css/vendor/videojs.css' 4 ], 'public/css/all.css');
Conclusion
In this tutorial, we have seen how to work with Laravel Mix in our applications to make asset compilation a breeze. This tutorial is merely an introduction, to learn more about Laravel Mix visit the official docs page or the visit the Laravel Mix website. If you would like to play around with the code for this tutorial, it is hosted in this public GitHub repository. Thanks for reading! Happy Development!


© 2026 Pusher Ltd. All rights reserved.
Pusher Limited is a company registered in England and Wales (No. 07489873) whose registered office is at MessageBird UK Limited, 3 More London Riverside, 4th Floor, London, United Kingdom, SE1 2AQ.