- Products

- Developers
- User stories
- Blog
- Pricing

Build a geofencing web app using Nest.js and the Google Maps API
- Introduction
- Introduction
- Prerequisites
- Setting up the application
- Running application
- Installing server dependencies
- Google Maps application
- Setting up a Pusher application
- Configure the entry point of the application
- Building the homepage
- Styling
- Building the home route
- Creating a Vue instance
- Create the users controller
- Set up the users service
- Register the component and the controller
- Displaying random users
- Getting the location of a user and initializing map
- Load more users
- Final result
- Conclusion
Introduction
Introduction
This tutorial will walk you through the process of implementing a basic realtime location-aware application with geofencing updates. Once we are done, you will have gathered enough knowledge to try out more creative ways on how to make use of virtual boundaries.
Geofencing as a technique, is a virtual perimeter (also referred to as geofences) around a physical location. This can allow you to provide useful experiences or carry out specific actions when users are within or outside the specified vicinity.
To keep our application simple, we will have a list of users with random locations. In a real-world application, you would need to get the current location of a user. Fortunately a tool like Geolocation API is available for use on most browsers.
A quick look at what we will be building in the tutorial:
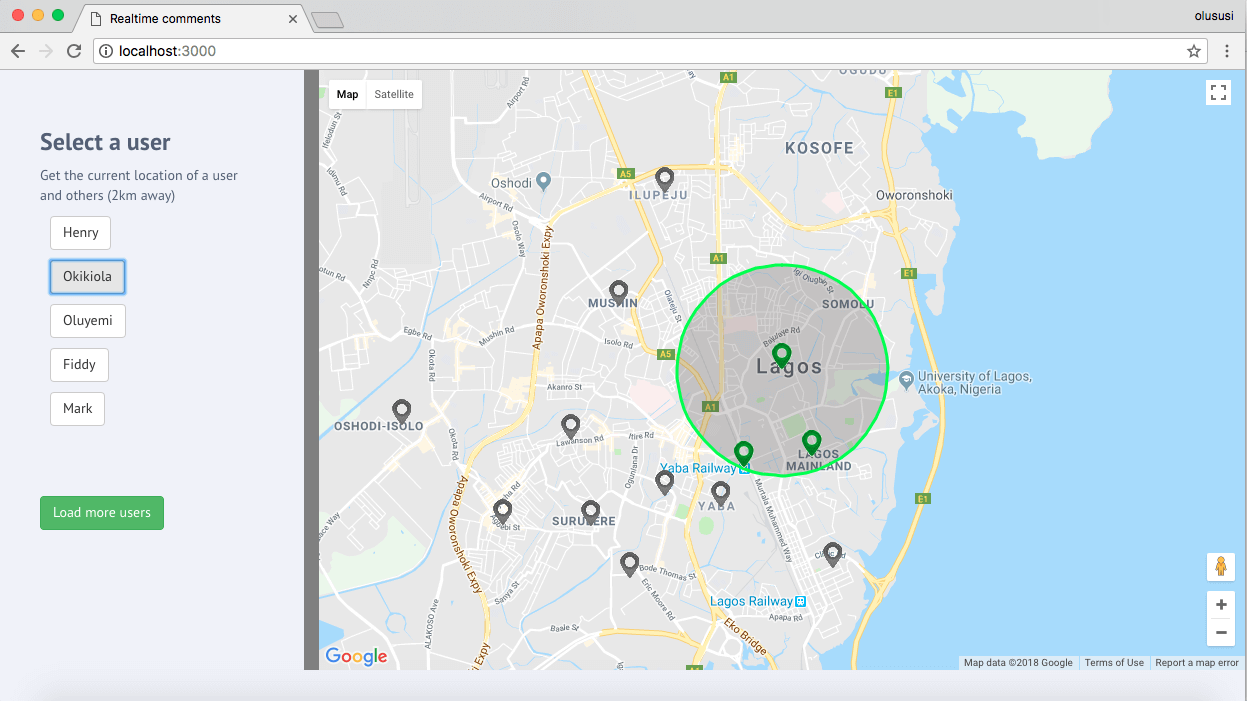
In this application, we will randomly display a few people from our users list. Once a user is selected, we will set the location of the user as the center of the map and then show the locations of other users with markers.
Prerequisites
A basic understanding of TypeScript and Node.js will help you get the best out of this tutorial. I assume that you already have Node and npm installed, if otherwise quickly check Node.js and npm for further instructions and installation steps.
Here is a quick overview of the core technologies that we will be using in this post.
Nest.js: a progressive framework for building efficient and scalable server-side applications; built to take the advantage of modern JavaScript but still preserves compatibility with pure JavaScript.
Pusher: a Node.js client to interact with the Pusher REST API
GoogleMaps API: GoogleMaps JavaScript API provides utilities that make it possible to add interactive and customizable maps to web apps.
Axios: a promise-based HTTP client that works both in the browser and Node.js environment.
Vue.js: Vue is a progressive JavaScript frontend framework for building web applications.
Setting up the application
The simplest way to set up a Nest.js application is to install the starter project on GitHub using Git. To do this, let’s run a command that will clone the starter repository into a new project folder named nest-geofencing on your machine. Open up your terminal or command prompt and run the command below:
$ git clone https://github.com/nestjs/typescript-starter.git nest-geofencing
Go ahead and change directory into the newly created folder and install all the dependencies for the project.
1// change directory 2 cd nest-geofencing 3 4 // install dependencies 5 npm install
Running application
Start the application with:
npm start
The command above will start the application on the default port used by Nest.js. Open your browser and navigate to localhost:3000. You should see a page with a welcome message.
Installing server dependencies
Run the command below to install the server dependencies required for this project.
npm install ejs body-parser pusher
ejs: this is a simple templating language for generating HTML markup with plain JavaScript.
Body-parser: a middleware used for extracting the entire body portion of an incoming request stream and exposing it on req.body.
Pusher: a Node.js client to interact with the Pusher REST API
Google Maps application
To use the Maps JavaScript API, you must register your app project on the Google API Console and get a Google API key which you can add to your app. Follow this quick guide to register your Maps app and get your API credentials.
Setting up a Pusher application
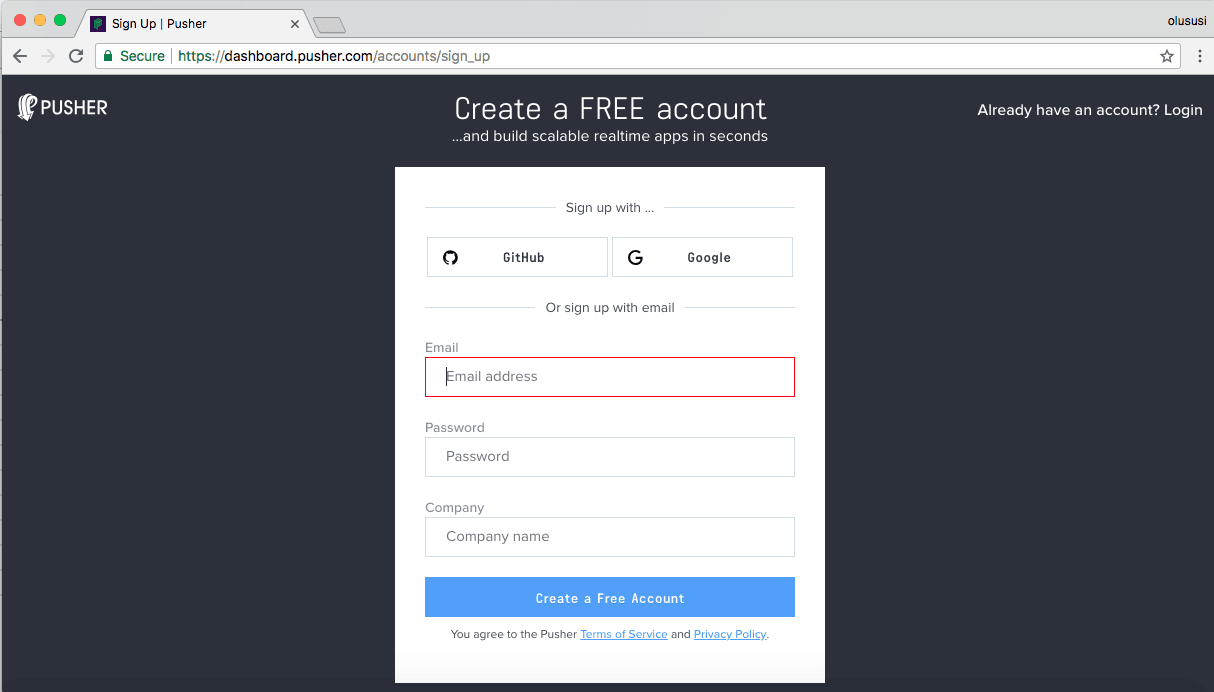
Head over to Pusher and sign up for a free account.
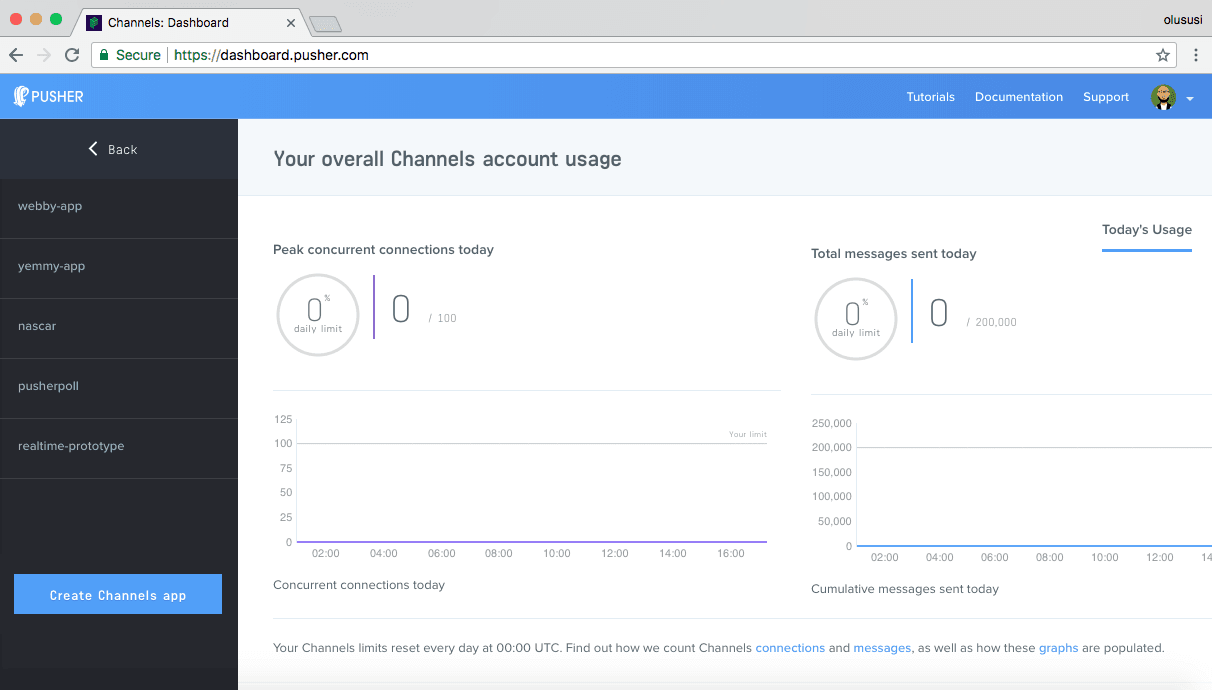
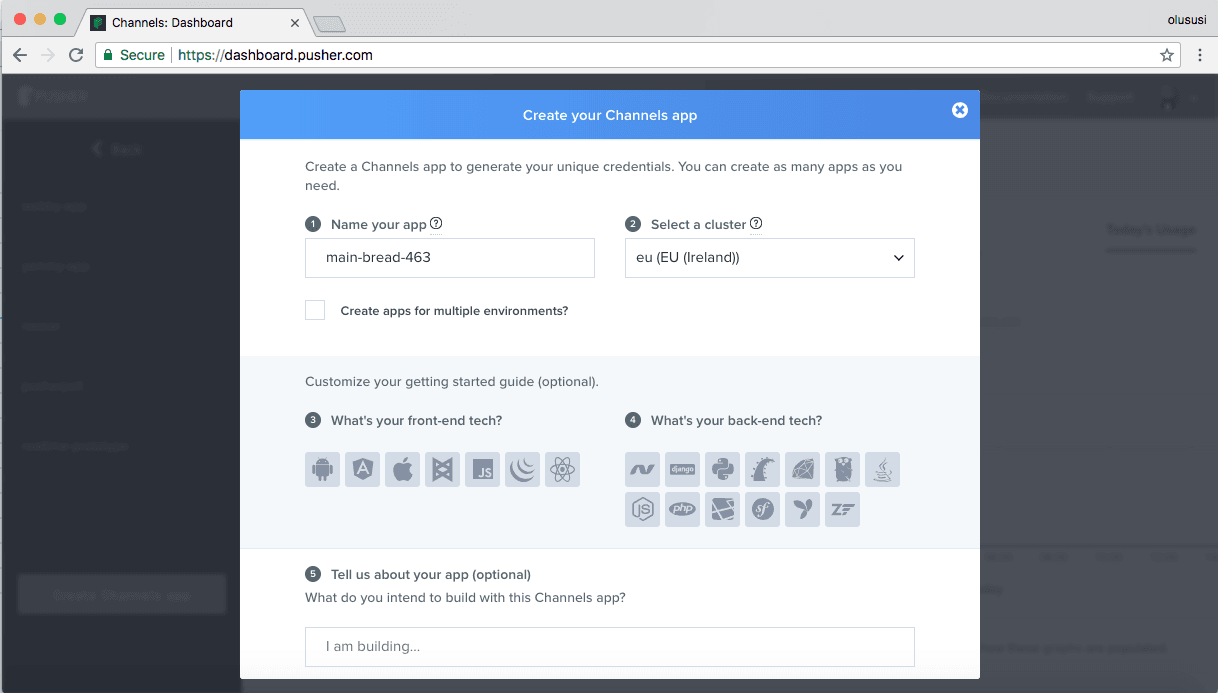
Create a new app by selecting Channels apps on the sidebar and clicking Create Channels app button on the bottom of the sidebar:
Configure an app by providing basic information requested in the form presented. You can also choose the environment you intend to integrate Pusher with, for a better setup experience:
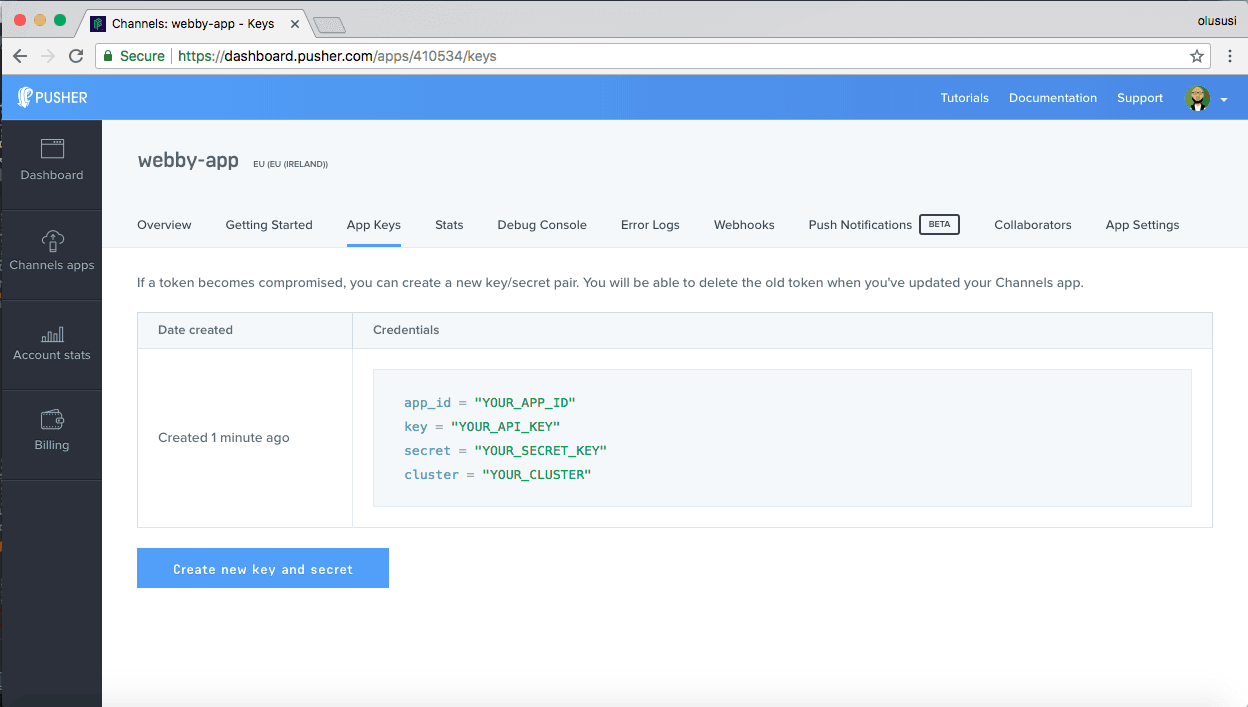
You can retrieve your keys from the App Keys tab:
Configure the entry point of the application
Nest.js uses the Express library and therefore, favors the popular MVC pattern.
To set this up, open up the main.ts file and update it with the content below:
1// ./src/main.ts 2 3 import { NestFactory } from '@nestjs/core'; 4 import { AppModule } from './app.module'; 5 6 import * as bodyParser from 'body-parser'; 7 import * as express from 'express'; 8 import * as path from 'path'; 9 10 async function bootstrap() { 11 const app = await NestFactory.create(AppModule); 12 app.use(express.static(path.join(__dirname, 'public'))); 13 app.set('views', __dirname + '/views'); 14 // set ejs as the view engine 15 app.set('view engine', 'ejs'); 16 await app.listen(3000); 17 } 18 bootstrap();
This is the entry point of the application and necessary for bootstrapping Nest.js apps. I have included the Express module, path and set up ejs as the view engine for the application.
Building the homepage
As configured within main.ts file, the views folder will hold all the templates for this application. Now let’s go ahead and create it within the src folder. Once you are done, create a new file named index.ejs right inside the newly created views folder and update the content with:
1// ./src/views/index.ejs 2 3 <!DOCTYPE html> 4 <html lang="en"> 5 <head> 6 <meta charset="UTF-8"> 7 <meta name="viewport" content="width=device-width, initial-scale=1.0"> 8 <meta http-equiv="X-UA-Compatible" content="ie=edge"> 9 <link rel="stylesheet" href="https://maxcdn.bootstrapcdn.com/bootstrap/3.3.7/css/bootstrap.min.css"> 10 <link rel="stylesheet" href="/style.css"> 11 <script src="https://cdnjs.cloudflare.com/ajax/libs/vue/2.5.13/vue.js"></script> 12 <title>Geofencing Nest.js Demo</title> 13 </head> 14 <body> 15 16 <div id="app"> 17 18 <div class="row"> 19 <div class="col-md-3"> 20 <div class="user-wrapper"> 21 <h3> <b>Select a user</b> </h3> 22 <p>Get the current location of a user and others (2km away)</p> 23 <div v-for="user in users" style="margin: 10px;"> 24 <button class="btn btn-default" v-on:click="getUserLocation(user.position)">{{ user.name}}</button> 25 </div> 26 </div> 27 <div class="load-more"> 28 <button class="btn btn-success" v-on:click="loadMoreUsers"> Load more users </button> 29 </div> 30 </div> 31 32 <div class="col-md-9" style="background: grey"> 33 <div id="map"></div> 34 </div> 35 36 </div> 37 38 </div> 39 40 <script src="https://cdnjs.cloudflare.com/ajax/libs/axios/0.16.2/axios.js"></script> 41 <script src="https://js.pusher.com/4.1/pusher.min.js"></script> 42 <script src="https://maps.googleapis.com/maps/api/js?key=YOUR_GOOGLE_MAP_KEY&libraries=geometry"> 43 </script> 44 <script src="/main.js"></script> 45 46 </body> 47 </html>
Here, we are simply building a layout for the geofencing application.
First, we included a link to the Bootstrap CDN file to add some default styling and layout to our application. We also added a custom stylesheet for further styling. We will create this stylesheet later in this tutorial. Also included in a <script> tag just before the page title is a CDN file for Vue.js. This is to ensure that Vue.js is loaded immediately the index.ejs file is rendered.
Furthermore, we included a button with the caption Load more users. Once this button is clicked we will call a method named loadMoreUsers() to fetch more random users. This method will be created later in the tutorial.
We included a CDN file each for Axios and Pusher. To load the Maps JavaScript API, we included a script tag and added a URL which links to the location of a JavaScript file that loads all of the symbols and definitions required as the src.
💡 Note: ensure you replace the
YOUR_GOOGLE_MAP_KEYstring with your actual GoogleMaps API key
Finally, we then proceeded to add a custom script file named main.js. To set up this file, go ahead and create a public folder within the src folder in the application and create the main.js file within it.
Styling
To set up this stylesheet, locate the public folder and create a new file named style.css within it. Next, open the file and paste the code below:
1// ./src/public/style.css 2 3 html, body { 4 background-color: #f0f2fa; 5 font-family: "PT Sans", "Helvetica Neue", "Helvetica", "Roboto", "Arial", sans-serif; 6 color: #555f77; 7 -webkit-font-smoothing: antialiased; 8 } 9 #map { 10 height: 600px; 11 width: 100% 12 } 13 .user-wrapper { 14 padding: 20px; 15 margin: 20px; 16 } 17 .load-more { 18 padding: 20px; 19 margin: 20px; 20 }
Building the home route
Nest uses a controller metadata @Controller to map routes to a specific controller. The starter project already contains a controller by default. We will make use of this in order to render the homepage for this app. Open ./src/app.controller.ts and edit as shown below:
1// ./src/app.controller.ts 2 3 import { Get, Controller, Res } from '@nestjs/common'; 4 @Controller() 5 export class AppController { 6 @Get() 7 root(@Res() res) { 8 res.render('index'); 9 } 10 }
This controller will ensure that Nest.js maps every / route to the index.ejs file.
Creating a Vue instance
Earlier, we created main.js file within the public folder and included it on our homepage. We will create Vue instance within this file and bind it to a div element with an id of #app. We will also declare an initial value for users as an empty array inside the data options:
1// ./src/public/main.js 2 3 new Vue({ 4 el: '#app', 5 data: { 6 users: [] 7 }, 8 ... 9 })
This will get Vue registered to manipulate the DOM in our application.
Create the users controller
To further organize items, we will create a new folder named users in the src folder and create a new file called users.controller.ts within it. Paste following code in the newly created file:
1// ./src/users/users.controller.ts 2 3 import { Get, Controller, Res, HttpStatus, Body, Post } from '@nestjs/common'; 4 import { UsersService } from 'users/users.service'; 5 6 @Controller('users') 7 export class UsersController { 8 constructor( private userService: UsersService) {} 9 10 @Get() 11 getUser(@Res() res) { 12 let users = this.userService.getAllUsers(); 13 res.send(users); 14 } 15 @Post() 16 getUsersLocation(@Res() res, @Body() user) { 17 this.userService.postLocation(user); 18 res.status(HttpStatus.OK).send("User's location fetched successfully"); 19 } 20 }
This controller contains two methods:
getUser(): this method will fetch the list of users and send it to the view.
getUsersLocation(): this method receives the user object as a form parameter and returns a successful HttpStatus with a success message.
As shown above, we imported UsersService and injected it into the controller through the constructor. As recommended by Nest, a controller should handle only HTTP requests and abstract any complex logic to a service. We’ll create this service in the next section.
Set up the users service
Within the UsersController, we imported the UsersService and used it to fetch all users and also post the location of the selected user. Let’s create this service. Go to the users folder and create a new file named users.service.ts within it and then paste the code below into the newly created file:
1// ./src/users/users.service.ts 2 3 import { Component } from '@nestjs/common'; 4 const people = require('./users'); 5 6 @Component() 7 export class UsersService { 8 9 getAllUsers(){ 10 return people.map( (person, index) => ({ 11 name: person.name, 12 position: person.position, 13 })); 14 } 15 16 intializePusher() { 17 const Pusher = require('pusher'); 18 const pusher = new Pusher({ 19 appId: 'YOUR_APP_ID', 20 key: 'YOUR_API_KEY', 21 secret: 'YOUR_SECRET_KEY', 22 cluster: 'CLUSTER', 23 encrypted: true 24 }); 25 26 return pusher; 27 } 28 29 postLocation(user) { 30 const Pusher = require('pusher'); 31 const {lat, lng} = user.position 32 33 people.forEach( (person, index) => { 34 if (person.position.lat === user.position.lat) { 35 people[index] = { ...person, position: { lat, lng } }; 36 return this.intializePusher().trigger('map-geofencing', 'location', {person: people[index], people}) 37 } 38 }) 39 } 40 }
Let’s understand what is happening in this file:
First, we imported the list of users as people from a file named users.js. This file holds the list of fake users with a specified location for our application. You can download this list here on GitHub. Once you are done, locate the users folder and save this file within it as users.js.
Next, we created a getAllUsers() method that returns the name and specified positions of users by using the JavaScript map() method.
We also proceeded to initialize Pusher with the credentials from the dashboard. Don’t forget to replace YOUR_APP_ID, YOUR_API_KEY, YOUR_SECRET_KEY and CLUSTER with the right credentials obtained from your dashboard.
The postLocation() method accepts the user object posted from the frontend of the application as a parameter. In addition, it was also used to trigger an event named location with the selected user and people as a payload on a map-geofencing channel.
Register the component and the controller
At the moment, our application doesn’t recognize the newly created controller and service. Let’s change this by editing our module file app.module.ts; putting the controller into the controller array and service into components array of the @Module() decorator respectively.
1// ./src/app.module.ts 2 3 import { Module } from '@nestjs/common'; 4 import { AppController } from './app.controller'; 5 import { UsersService } from 'users/users.service'; 6 import { UsersController } from 'users/users.controller'; 7 @Module({ 8 imports: [], 9 controllers: [AppController, UsersController], 10 providers: [UsersService], 11 }) 12 export class AppModule {}
Displaying random users
As mentioned earlier, we will be displaying users from the mock data in our application. Open ./src/public/main.js file and update it with the code below:
1// ./src/public/main.js 2 3 new Vue({ 4 el: '#app', 5 data: { 6 users: [], 7 }, 8 mounted() { 9 this.getUser(); 10 }, 11 methods: { 12 getUser() { 13 axios.get('/users').then(response => { 14 this.users = this.getRandomUsers(response.data, 6) 15 }); 16 17 }, 18 getRandomUsers(people, number) { 19 const selected = []; 20 for ( var i = 0; i < number; i++) { 21 const index = Math.floor(Math.random() * people.length); 22 if (selected.includes(index)) continue; 23 selected.push(index); 24 } 25 const selectedUsers = selected.map(index => { 26 const users = { name, position } = people[index]; 27 return users; 28 }); 29 return selectedUsers; 30 } 31 } 32 })
Here, we created a method named getUser() with the purpose of fetching all users from the backend of our application. Immediately after this, we then proceeded to create a new method called getRandomUsers(), for getting random users from the response. This method takes in two arguments which are the total number of users returned and the maximum random number of users we wish to display on the homepage of our application.
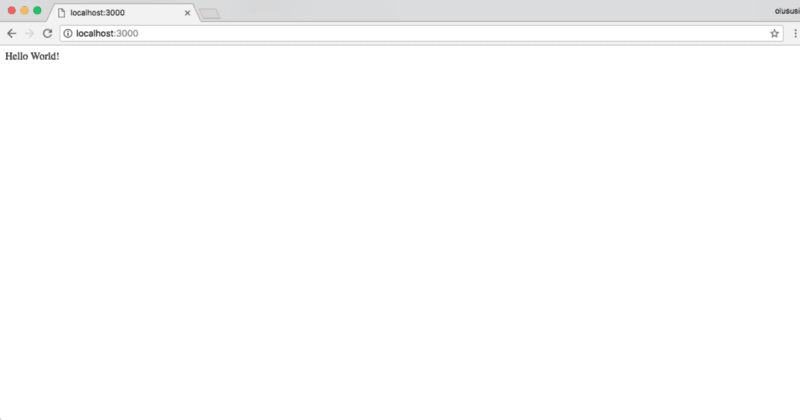
Restart the development server if it is currently running. Check your page on localhost:3000. You should see:
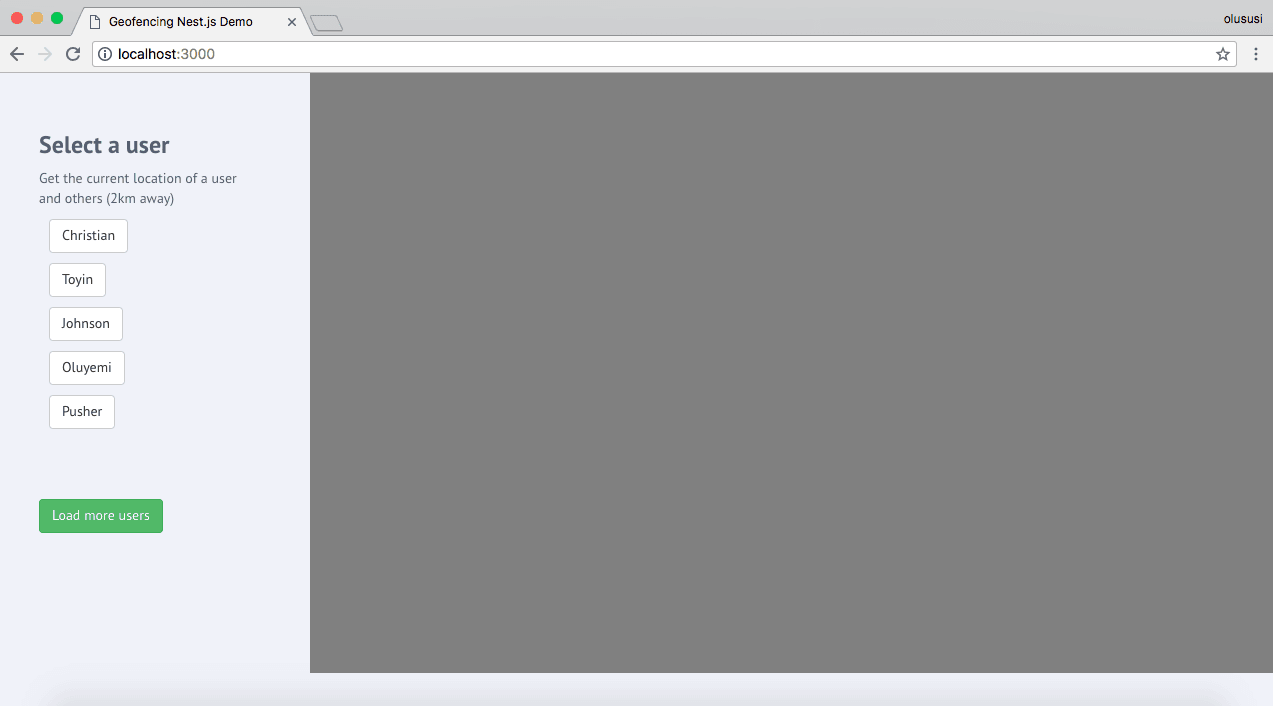
This is what the page will look like at the moment. On page mount, we displayed the list of random users and an empty map. Let’s add functionality to display map.
Getting the location of a user and initializing map
Next, we will display the location of a selected user on the GoogleMap using the coordinate specified for each of the users in ./src/users/users.js file. Go ahead and open main.js file and update it with:
1// ./src/public/main.js 2 3 const USER_MARKER = 'http://res.cloudinary.com/yemiwebby-com-ng/image/upload/v1526555652/user_my7yzc.png'; 4 const OFFLINE_MARKER = 'http://res.cloudinary.com/yemiwebby-com-ng/image/upload/v1526555651/offline_elrlvi.png'; 5 const ONLINE_MARKER = 'http://res.cloudinary.com/yemiwebby-com-ng/image/upload/v1526555651/online_bpf5ch.png' 6 const RADIUS = 2000; 7 new Vue({ 8 el: '#app', 9 data: { 10 users: [], 11 }, 12 created() { 13 let pusher = new Pusher('YOUR_API_KEY', { 14 cluster: 'CLUSTER', 15 encrypted: true 16 }); 17 18 const channel = pusher.subscribe('map-geofencing'); 19 channel.bind('location', data => { 20 this.initializeMap(data.person.position, data.people); 21 }); 22 }, 23 mounted() { 24 this.getUser(); 25 }, 26 methods: { 27 getUser() { 28 ... 29 }, 30 getRandomUsers(people, number) { 31 ... 32 }, 33 getUserLocation(position) { 34 const user = { position } 35 axios.post('/users', user).then(response => { 36 console.log(response); 37 }) 38 }, 39 initializeMap(position, people) { 40 const referencePoint = {lat:position.lat, lng:position.lng}; 41 this.map = new google.maps.Map(document.getElementById('map'), { 42 center: referencePoint, 43 zoom: 13 44 }) 45 for ( var i = 0; i < people.length; i++) { 46 if (this.withinRegion(referencePoint, people[i], RADIUS)){ 47 48 this.addMarker(people[i], ONLINE_MARKER); 49 } else { 50 this.addMarker(people[i], OFFLINE_MARKER); 51 } 52 } 53 this.addCircle(position); 54 }, 55 addMarker(props, marker) { 56 this.marker = new google.maps.Marker({ 57 position: props.position, 58 map: this.map, 59 animation: google.maps.Animation.DROP, 60 icon: marker 61 }) 62 }, 63 addCircle(position) { 64 this.circle = new google.maps.Circle({ 65 map: this.map, 66 center: new google.maps.LatLng(position.lat, position.lng), 67 radius: 2000, 68 strokeColor: '#00ff00', 69 fillColor: "#484040bf", 70 }); 71 }, 72 withinRegion(position, user, radius) { 73 const to = new google.maps.LatLng(user.position.lat, user.position.lng); 74 const from = new google.maps.LatLng(position.lat, position.lng); 75 const distance = google.maps.geometry.spherical.computeDistanceBetween(from, to); 76 return distance <= radius; 77 } 78 } 79 })
We added constants for USER_MARKER, OFFLINE_MARKER, ONLINE_MARKER, these markers will be used to indicate the location of a user on the map. The position of a user within a 2km radius from the center of the map will be indicated with ONLINE_MARKER while others will be indicated with OFFLINE_MARKER. Also included is a constant for RADIUS, which represents the distance from the center of the map.
Next, we established a connection to Pusher Channels using the Key and cluster obtained from our dashboard. We then proceeded to subscribe to the map-geofencing channel we created earlier and listened for an event location. We then passed the payload from the map-geofencing channel to initializeMap() method. This is the method responsible for initializing the map. It accepts the position of the selected user and the list of other users named people as an argument.
Once any of the random users is selected, we used the method getUserLocation() to make an HTTP POST request to the /users endpoint, passing in a user object which contains the location of the user.
In the initializeMap() method, we created a variable referencePoint, which represents the location of the selected user and set it as the center of the map. We then went ahead to instantiate GoogleMaps and attach it to a <div> HTML element with an id of map. This is where our map indicating the locations of users will be mounted. Next, we looped through the list of other users and added markers based on the condition used to check if they are within the region 2km away from the location of the selected user at the center of the map.
Finally, we also created three different methods, which are:
addMarker(): this method was used to add markers to the map based on the location of a user.
addCirlce(): used to add a circle indicating a 2km radius from the center of the map.
withinRegion(): created to check if a user is within the region from the center of the map.
Load more users
Lastly, to load more random users, we will create the loadMoreUsers() method:
1// ./src/public/main.js 2 3 ... 4 new Vue({ 5 el: '#app', 6 data: { 7 users: [], 8 }, 9 created() { 10 ... 11 }, 12 mounted() { 13 this.getUser(); 14 }, 15 methods: { 16 // other methods 17 ... 18 // load more users 19 loadMoreUsers() { 20 this.getUser(); 21 } 22 } 23 })
This method will call on the getUser() method and fetch random users.
Final result
Restart the development server if it is currently running. Go ahead and navigate to [http://localhost:3000](http://localhost:3000.) in your browser to test the application.
Conclusion
We have successfully built a basic realtime application with geofencing updates. We used GoogleMaps API for geolocation and Pusher for the realtime functionality.
With access to the right technology such as the ones used in this tutorial, there is no limit to what you can build. I hope you found this tutorial helpful. Feel free to download the source code here on GitHub.


© 2026 Pusher Ltd. All rights reserved.
Pusher Limited is a company registered in England and Wales (No. 07489873) whose registered office is at MessageBird UK Limited, 3 More London Riverside, 4th Floor, London, United Kingdom, SE1 2AQ.