- Products

- Developers
- User stories
- Blog
- Pricing

Build a collaborative text editor with Gatsby and Draft.js
Introduction
Introduction
Gatsby is a static site generator for React that uses latest frontend technologies like Webpack and GraphQL. It can generate optimized and blazing-fast sites from Markdown, APIs, Databases, YAML, JSON, CSV and even CMSs like Contentful, Drupal and Wordpress.
Draft.js is an open source framework from Facebook for building rich text editors in React. It is powered by an immutable model and abstracts over cross-browser differences.
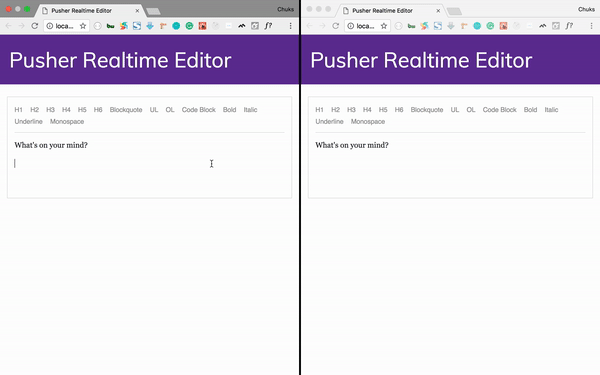
In this post we’ll be combining the power of Gatsby, Draft.js and Pusher Channels to build a realtime editor. Here’s a sneak-peak into what we’ll be building:
Prerequisites
To follow this tutorial, you need Node and NPM installed on your machine. A basic understanding of React will help you get the most out of this tutorial. You'll also need a free Pusher account.
Install Gatsby
Gatsby supports versions of Node.js back to v6 and NPM to v3. If you don’t have Node.js installed, go to https://nodejs.org/ and install the recommended version for your operating system. To start a Gatsby app, we need to first install the Gatsby command line by running the following in the terminal:
$ npm install --global gatsby-cli
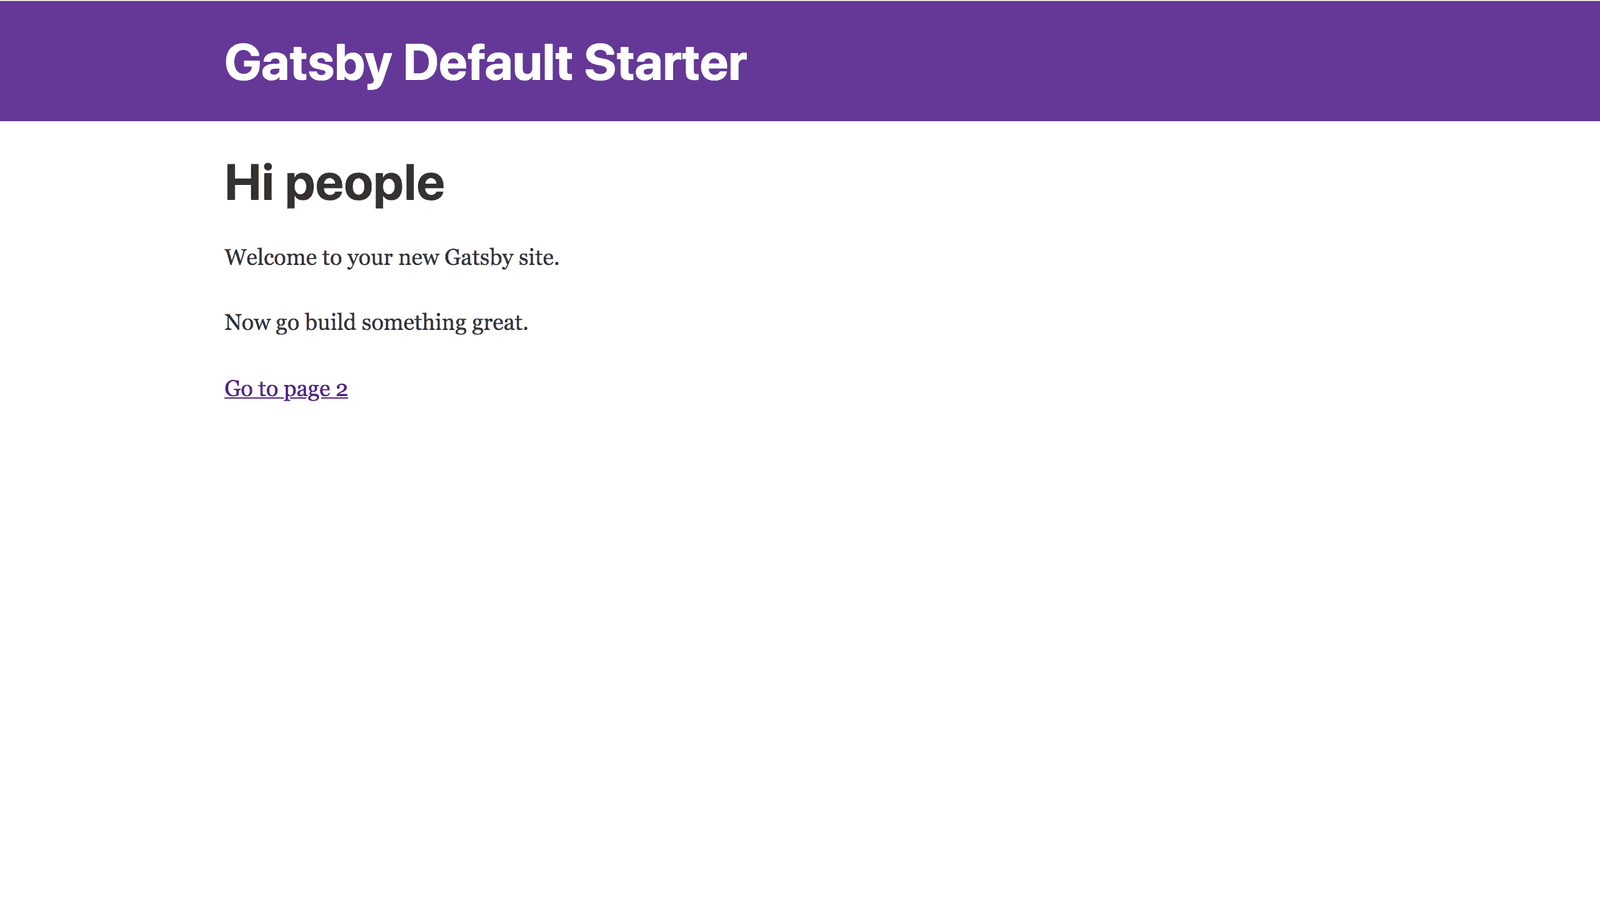
Once that is installed, still in your terminal, run the following command to create a new Gatsby site in a directory called pusher-editor and then move to this new directory:
1$ gatsby new pusher-editor 2 $ cd pusher-editor
Once in the pusher-editor directory, you can run Gatsby’s built-in development server by running the following command:
$ gatsby develop
This starts up the development server which you can access at http://localhost:8000 from your browser. The Gatsby built in development server uses “hot reloading” which means changes made are instantly visible in the browser without reloading.
Create a Pusher app
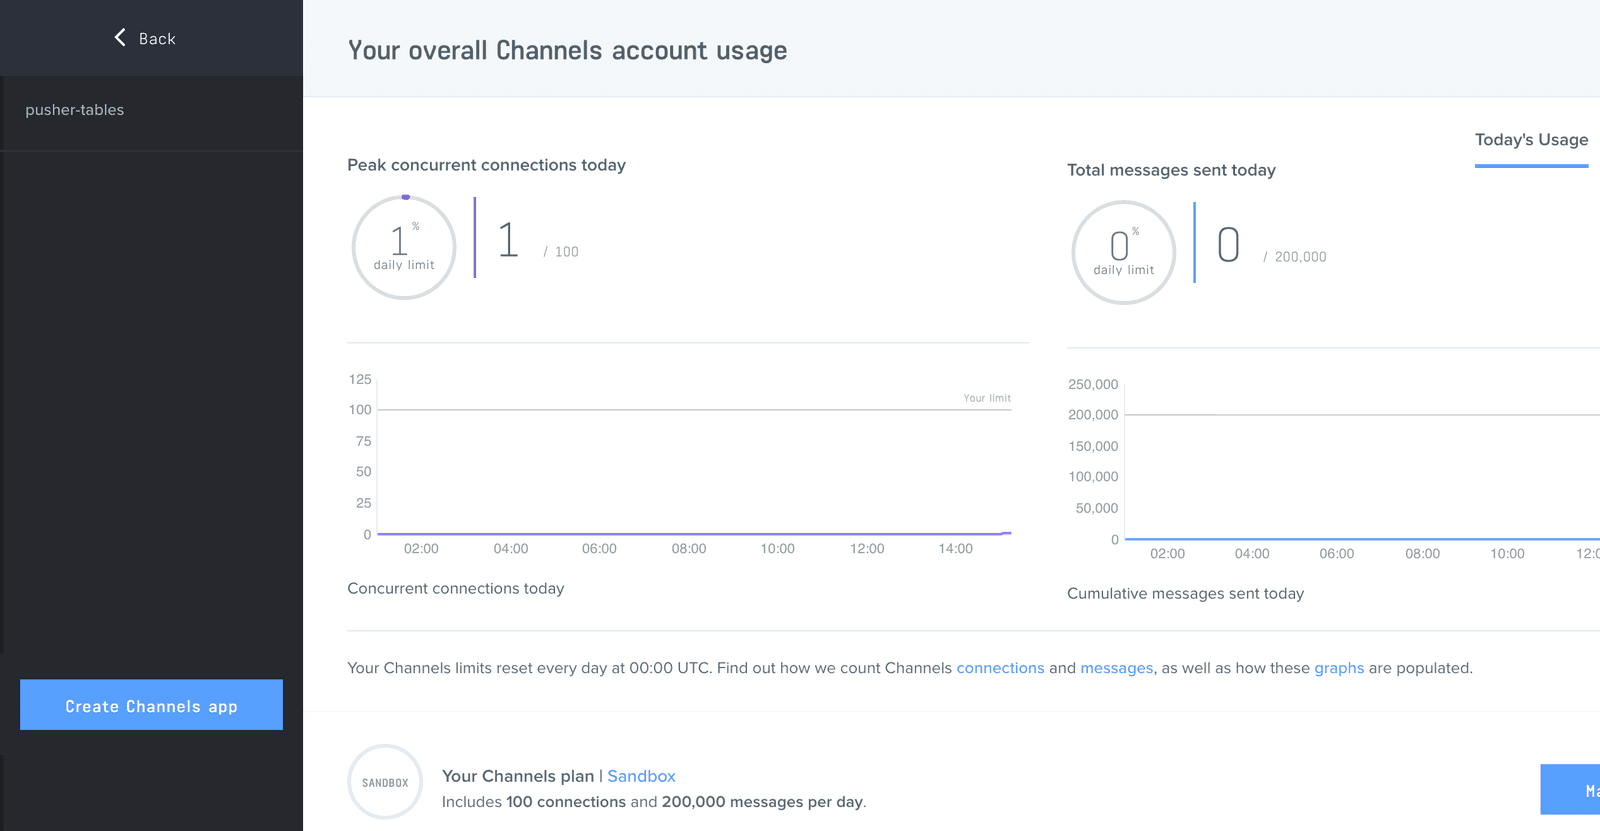
To get started with Pusher Channels, sign up for a free Pusher account. Then go to the dashboard and create a new Channels app.
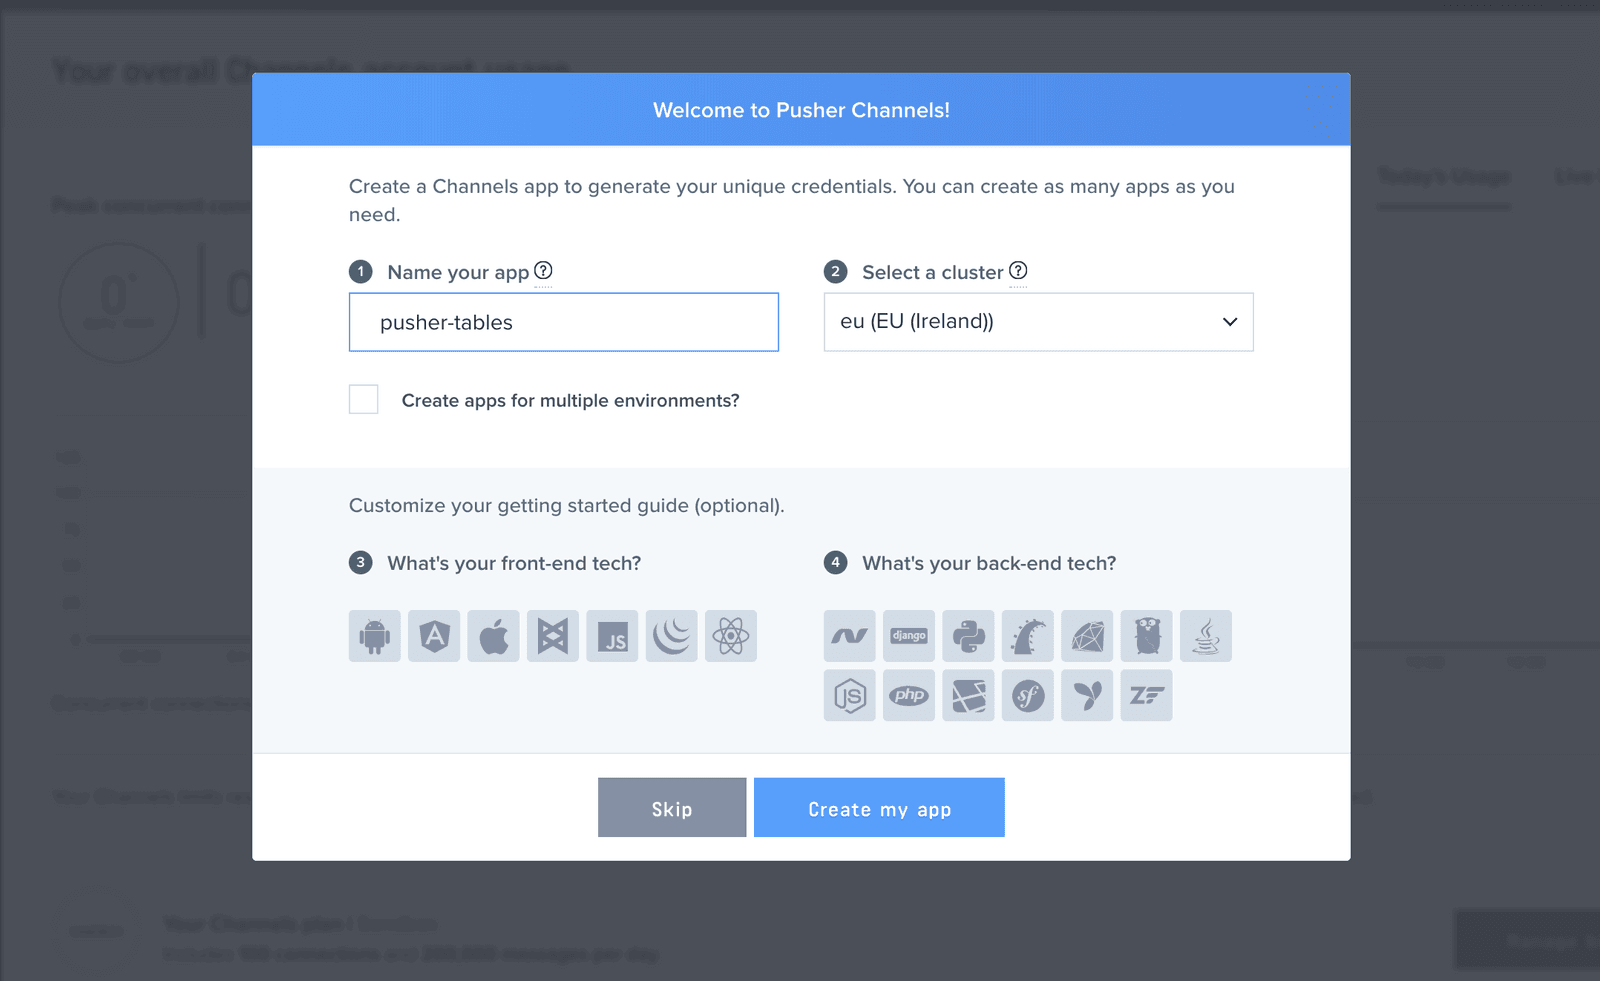
Configure an app by providing basic information requested in the form presented. You can also choose the environment you intend to integrate with Pusher Channels, to be provided with some boilerplate setup code:
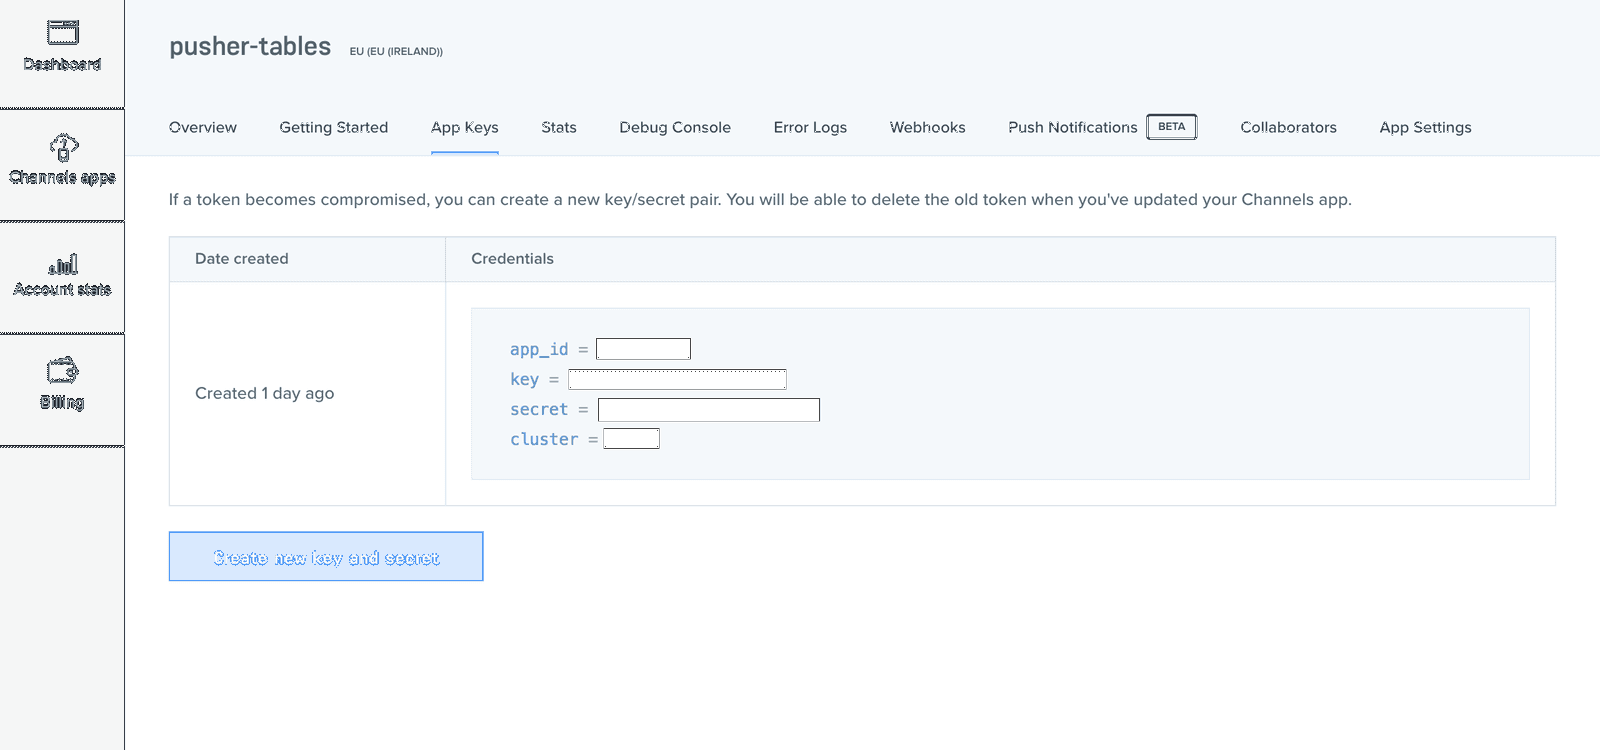
Click the App Keys tab to retrieve your keys
Setup the application
Now that we have our Pusher Channels app, let’s make some minor changes to our new Gatsby site. Draft.js supports unicode, and as a result, we need to add the charset meta tag in the head block of our app.
In the index.js file which can be found in src/layouts/index.js, there is a Layout functional component. Replace its contents with the following code:
1// src/layouts/index.js 2 3 const Layout = ({ children, data }) => ( 4 <div> 5 <Helmet 6 title={data.site.siteMetadata.title} 7 meta={[ 8 { name: 'description', content: 'Sample' }, 9 { name: 'keywords', content: 'sample, something' }, 10 { name: 'charset', content: 'utf-8' } # add the 'charset' meta tag 11 ]} 12 /> 13 <Header siteTitle={data.site.siteMetadata.title} /> 14 <div className="container-fluid"> # apply bootstrap class to this div 15 {children()} 16 </div> 17 </div> 18 )
Next, we’ll change the name in the header of our app. In the root directory lives a gatsby-config.js file. Change the site meta data title property:
1# gatsby-config.js 2 3 module.exports = { 4 siteMetadata: { 5 title: 'Pusher Realtime Editor', # change this line to any title of your choice 6 }, 7 plugins: ['gatsby-plugin-react-helmet'], 8 }
Lastly, let’s add some styles to our editor. In the index.css file, add the following code:
1/* src/layouts/index.css */ 2 3 /* top of the file */ 4 @import url('https://fonts.googleapis.com/css?family=Muli'); 5 6 body { 7 margin: 0; 8 font-family: 'Muli', sans-serif !important; /* add this line to the body tag */ 9 } 10 11 .RichEditor-root { 12 background: #fff; 13 border: 1px solid #ddd; 14 font-family: 'Georgia', serif; 15 font-size: 14px; 16 padding: 15px; 17 } 18 .RichEditor-editor { 19 border-top: 1px solid #ddd; 20 cursor: text; 21 font-size: 16px; 22 margin-top: 10px; 23 } 24 .RichEditor-editor .public-DraftEditorPlaceholder-root, 25 .RichEditor-editor .public-DraftEditor-content { 26 margin: 0 -15px -15px; 27 padding: 15px; 28 } 29 .RichEditor-editor .public-DraftEditor-content { 30 min-height: 100px; 31 } 32 .RichEditor-hidePlaceholder .public-DraftEditorPlaceholder-root { 33 display: none; 34 } 35 .RichEditor-editor .RichEditor-blockquote { 36 border-left: 5px solid #eee; 37 color: #666; 38 font-family: 'Hoefler Text', 'Georgia', serif; 39 font-style: italic; 40 margin: 16px 0; 41 padding: 10px 20px; 42 } 43 .RichEditor-editor .public-DraftStyleDefault-pre { 44 background-color: rgba(0, 0, 0, 0.05); 45 font-family: 'Inconsolata', 'Menlo', 'Consolas', monospace; 46 font-size: 16px; 47 padding: 20px; 48 } 49 .RichEditor-controls { 50 font-family: 'Helvetica', sans-serif; 51 font-size: 14px; 52 margin-bottom: 5px; 53 user-select: none; 54 display: inline; 55 } 56 .RichEditor-styleButton { 57 color: #999; 58 cursor: pointer; 59 margin-right: 16px; 60 padding: 2px 0; 61 display: inline-block; 62 } 63 .RichEditor-activeButton { 64 color: #5890ff; 65 } 66 blockquote { 67 background: #f9f9f9; 68 border-left: 0.3rem solid #ccc; 69 margin: 1.5em 10px; 70 padding: 0.2em 0.5rem; 71 font-family: 'Hoefler Text', 'Georgia', serif; 72 font-style: italic; 73 border-top-left-radius: 0.2rem; 74 border-bottom-left-radius: 0.2rem; 75 }
Create a simple server
With our Gatsby app set up, we need a simple server from where we’ll notify Pusher of updates to our editor. Let’s install some packages we need for our realtime editor. In your terminal, run the following command:
$ yarn add draft-js draft-js-export-html pusher-js axios dotenv express body-parser pusher bootstrap
In the command above, we added some dependencies for our app. Here’s what each package does:
draft-js- for creating our rich text editor.draft-js-export-html- for converting our editor state to HTML.pusher-jsandpusher- for communicating with Pusher.axios- for making HTTP requests from Node.js.dotenv- for storing environmental variables.express- for creating a web application server framework for Node.js.body-parser- a Node.js body parsing middleware for parsing incoming request bodies.bootstrap- for designing and styling HTML/CSS.
Now we’ll create a simple Express server. In your code editor, open the pusher-editor directory and create a server.js and .env file in the root directory of your app. Add the following code to both files respectively:
1// server.js 2 3 require('dotenv').config() 4 let express = require('express'); 5 let bodyParser = require('body-parser'); 6 let Pusher = require('pusher'); 7 let app = express(); 8 app.use(bodyParser.json()); 9 app.use(bodyParser.urlencoded({ extended: false })); 10 11 // enable cross-origin resource sharing 12 app.use(function (req, res, next) { 13 res.header("Access-Control-Allow-Origin", "*"); 14 res.header("Access-Control-Allow-Headers", "Origin, X-Requested-With, Content-Type, Accept"); 15 next(); 16 }); 17 18 // create a Pusher client 19 let pusher = new Pusher({ 20 appId: process.env.PUSHER_APP_ID, 21 key: process.env.PUSHER_APP_KEY, 22 secret: process.env.PUSHER_APP_SECRET, 23 cluster: process.env.PUSHER_APP_CLUSTER, 24 }); 25 26 // create a home route to test if the server works 27 app.get('/', function (req, res) { 28 res.send('all green'); 29 }); 30 31 // create a "save-text" route to update Pusher when a new text is added to the editor 32 app.post('/save-text', function (req, res) { 33 if (req.body.text && req.body.text.trim() !== '') { 34 // send a 'text-update' event on the 'editor' channel with the editor text 35 pusher.trigger('editor', 'text-update', { text: req.body.text }); 36 res.status(200).send({ success: true, message: 'text broadcasted' }) 37 } else { 38 res.status(400).send({ success: false, message: 'text not broadcasted' }) 39 } 40 }) 41 42 // create a "editor-text" route to update Pusher the latest state of our editor 43 app.post('/editor-text', function (req, res) { 44 if (req.body.text) { 45 // send a 'editor-update' event on the 'editor' channel with the editor current state 46 pusher.trigger('editor', 'editor-update', { text: req.body.text, selection: req.body.selection }); 47 res.status(200).send({ success: true, message: 'editor update broadcasted' }) 48 } else { 49 res.status(400).send({ success: false, message: 'editor update not broadcasted' }) 50 } 51 }) 52 53 let port = process.env.PORT || 5000; 54 console.log(`server running on port ${port}`) 55 // run the server on our specified port 56 app.listen(port); 57 58 59 // .env 60 // add your Pusher keys here 61 PUSHER_APP_ID="YOUR APP ID" 62 PUSHER_APP_KEY="YOUR APP KEY" 63 PUSHER_APP_SECRET="YOUR APP SECRET" 64 PUSHER_APP_CLUSTER="YOUR APP CLUSTER"
In the server.js file, we created a simple server with two routes for updating Pusher with the editor state and the editor’s HTML content. With this, Pusher is aware our editor text and current state.
To run this server, open the pusher-editor directory in another terminal window and run the following command:
$ node server.js
Create the editor component
In your code editor, open the pusher-editor directory and locate the index.js file in src/pages/index.js. Clear out all the code in the file and let’s import our packages and some components:
1// src/pages/index.js 2 3 import React, { Component } from 'react' 4 import { Editor, EditorState, RichUtils, getDefaultKeyBinding, convertToRaw, convertFromRaw, SelectionState } from 'draft-js'; 5 import { stateToHTML } from 'draft-js-export-html' 6 import Pusher from 'pusher-js'; 7 import axios from 'axios' 8 import BlockStyleControls from '../components/blockStyleControls' 9 import InlineStyleControls from '../components/inlineStylesControls' 10 import 'bootstrap/dist/css/bootstrap.css' 11 12 const styleMap = { 13 CODE: { 14 backgroundColor: 'rgba(0, 0, 0, 0.05)', 15 fontFamily: '"Inconsolata", "Menlo", "Consolas", monospace', 16 fontSize: 16, 17 padding: 2, 18 }, 19 };
Next let’s create our rich editor component:
1// src/pages/index.js 2 3 ... 4 class RichEditor extends Component { 5 constructor(props) { 6 super(props); 7 this.state = { editorState: EditorState.createEmpty(), text: '', }; 8 this.focus = () => this.refs.editor.focus(); 9 this.onChange = (editorState) => { 10 this.setState({ editorState }) 11 }; 12 this.handleKeyCommand = this._handleKeyCommand.bind(this); 13 this.mapKeyToEditorCommand = this._mapKeyToEditorCommand.bind(this); 14 this.toggleBlockType = this._toggleBlockType.bind(this); 15 this.toggleInlineStyle = this._toggleInlineStyle.bind(this); 16 this.getBlockStyle = this._getBlockStyle.bind(this); 17 } 18 } 19 export default RichEditor
In the code snippet above, we created a class component with a constructor that contains our component’s state and methods.
Just before our component mounts, we want to connect to Pusher and subscribe to the editor channel. To achieve this, we’ll use React’s componentWillMount life cycle method. Add the following code inside the RichEditor component:
1// src/pages/index.js 2 3 ... 4 class RichEditor extends Component { 5 6 ... 7 componentWillMount() { 8 this.pusher = new Pusher('YOUR PUSHER KEY', { 9 cluster: 'eu', 10 encrypted: true 11 }); 12 this.channel = this.pusher.subscribe('editor'); 13 } 14 } 15 export default RichEditor
Remember to add your Pusher key in the code above.
Now that our Pusher client is subscribed to the editor channel, we want to listen for the text-update and editor-update events, so we can update our component state with new data.
To achieve this, we’ll use React’s componentDidMount life cycle method. Add the following code inside the RichEditor component:
1// src/pages/index.js 2 3 ... 4 class RichEditor extends Component { 5 6 ... 7 componentDidMount() { 8 let self = this; 9 // listen to 'text-update' events 10 this.channel.bind('text-update', function (data) { 11 // update the text state with new data 12 self.setState({ text: data.text }) 13 }); 14 // listen to 'editor-update' events 15 this.channel.bind('editor-update', function (data) { 16 // create a new selection state from new data 17 let newSelection = new SelectionState({ 18 anchorKey: data.selection.anchorKey, 19 anchorOffset: data.selection.anchorOffset, 20 focusKey: data.selection.focusKey, 21 focusOffset: data.selection.focusOffset, 22 }); 23 // create new editor state 24 let editorState = EditorState.createWithContent(convertFromRaw(data.text)) 25 const newEditorState = EditorState.forceSelection( 26 editorState, 27 newSelection 28 ); 29 // update the RichEditor's state with the newEditorState 30 self.setState({ editorState: newEditorState }) 31 }); 32 } 33 } 34 export default RichEditor
Draft.js only provides the building blocks for a text editor, this means we have to write out all the functionality of our text editor ourselves. In our RichEditor component, we’ll add some methods for simple editor functions like handling key commands, adding inline and block styles to text.
Add the following code inside your RichEditor component:
1# src/pages/index.js 2 3 ... 4 class RichEditor extends Component { 5 6 ... 7 // handle blockquote 8 _getBlockStyle(block) { 9 switch (block.getType()) { 10 case 'blockquote': return 'RichEditor-blockquote'; 11 default: return null; 12 } 13 } 14 // handle key commands 15 _handleKeyCommand(command, editorState) { 16 const newState = RichUtils.handleKeyCommand(editorState, command); 17 if (newState) { 18 this.onChange(newState); 19 return true; 20 } 21 return false; 22 } 23 // map the TAB key to the editor 24 _mapKeyToEditorCommand(e) { 25 if (e.keyCode === 9 /* TAB */) { 26 const newEditorState = RichUtils.onTab( 27 e, 28 this.state.editorState, 29 4, /* maxDepth */ 30 ); 31 if (newEditorState !== this.state.editorState) { 32 this.onChange(newEditorState); 33 } 34 return; 35 } 36 return getDefaultKeyBinding(e); 37 } 38 // toggle block styles 39 _toggleBlockType(blockType) { 40 this.onChange( 41 RichUtils.toggleBlockType( 42 this.state.editorState, 43 blockType 44 ) 45 ); 46 } 47 // toggle inline styles 48 _toggleInlineStyle(inlineStyle) { 49 this.onChange( 50 RichUtils.toggleInlineStyle( 51 this.state.editorState, 52 inlineStyle 53 ) 54 ); 55 } 56 } 57 export default RichEditor
Next, let’s render the actual component:
1// src/pages/index.js 2 3 ... 4 class RichEditor extends Component { 5 6 ... 7 render() { 8 const { editorState } = this.state; 9 // If the user changes block type before entering any text, hide the placeholder. 10 let className = 'RichEditor-editor'; 11 var contentState = editorState.getCurrentContent(); 12 if (!contentState.hasText()) { 13 if (contentState.getBlockMap().first().getType() !== 'unstyled') { 14 className += ' RichEditor-hidePlaceholder'; 15 } 16 } 17 return ( 18 <div className="container-fluid"> 19 <div className="row"> 20 <div className="RichEditor-root col-12 col-md-6"> 21 {/* render our editor block style controls components */} 22 <BlockStyleControls 23 editorState={editorState} 24 onToggle={this.toggleBlockType} 25 /> 26 {/* render our editor's inline style controls components */} 27 <InlineStyleControls 28 editorState={editorState} 29 onToggle={this.toggleInlineStyle} 30 /> 31 <div className={className} onClick={this.focus}> 32 {/* render the Editor exposed by Draft.js */} 33 <Editor 34 blockStyleFn={this.getBlockStyle} 35 customStyleMap={styleMap} 36 editorState={editorState} 37 handleKeyCommand={this.handleKeyCommand} 38 keyBindingFn={this.mapKeyToEditorCommand} 39 onChange={this.onChange} 40 placeholder="What's on your mind?" 41 ref="editor" 42 spellCheck={true} 43 /> 44 </div> 45 </div> 46 <div className="col-12 col-md-6"> 47 {/* render a preview for the text in the editor */} 48 <div dangerouslySetInnerHTML={{ __html: this.state.text }} /> 49 </div> 50 </div> 51 </div> 52 ); 53 } 54 } 55 export default RichEditor
Lastly, let’s create the two components which we earlier imported into our RichEditor component. In the src/components directory, create three files; inlineStylesControls.js, blockStyleControls.js and styleButton.js and add the following code respectively:
1// src/components/inlineStylesControls.js 2 3 import React from 'react' 4 import StyleButton from './styleButton' 5 6 // define our inline styles 7 let INLINE_STYLES = [ 8 { label: 'Bold', style: 'BOLD' }, 9 { label: 'Italic', style: 'ITALIC' }, 10 { label: 'Underline', style: 'UNDERLINE' }, 11 { label: 'Monospace', style: 'CODE' }, 12 ]; 13 const InlineStyleControls = (props) => { 14 const currentStyle = props.editorState.getCurrentInlineStyle(); 15 return ( 16 <div className="RichEditor-controls"> 17 {/* map through our inline styles and display a style button for each /*} 18 {INLINE_STYLES.map((type) => 19 <StyleButton 20 key={type.label} 21 active={currentStyle.has(type.style)} 22 label={type.label} 23 onToggle={props.onToggle} 24 style={type.style} 25 /> 26 )} 27 </div> 28 ); 29 }; 30 export default InlineStyleControls
1// src/components/blockStyleControls.js 2 3 import React, { Component } from 'react' 4 import StyleButton from './styleButton' 5 6 // define our block styles 7 const BLOCK_TYPES = [ 8 { label: 'H1', style: 'header-one' }, 9 { label: 'H2', style: 'header-two' }, 10 { label: 'H3', style: 'header-three' }, 11 { label: 'H4', style: 'header-four' }, 12 { label: 'H5', style: 'header-five' }, 13 { label: 'H6', style: 'header-six' }, 14 { label: 'Blockquote', style: 'blockquote' }, 15 { label: 'UL', style: 'unordered-list-item' }, 16 { label: 'OL', style: 'ordered-list-item' }, 17 { label: 'Code Block', style: 'code-block' }, 18 ]; 19 const BlockStyleControls = (props) => { 20 const { editorState } = props; 21 const selection = editorState.getSelection(); 22 const blockType = editorState 23 .getCurrentContent() 24 .getBlockForKey(selection.getStartKey()) 25 .getType(); 26 return ( 27 <div className="RichEditor-controls"> 28 {/* map through our block styles and display a style button for each */} 29 {BLOCK_TYPES.map((type) => 30 <StyleButton 31 key={type.label} 32 active={type.style === blockType} 33 label={type.label} 34 onToggle={props.onToggle} 35 style={type.style} 36 /> 37 )} 38 </div> 39 ); 40 }; 41 export default BlockStyleControls
1// src/components/styleButton.js 2 3 import React, { Component } from 'react' 4 5 class StyleButton extends React.Component { 6 constructor() { 7 super(); 8 this.onToggle = (e) => { 9 e.preventDefault(); 10 this.props.onToggle(this.props.style); 11 }; 12 } 13 render() { 14 let className = 'RichEditor-styleButton'; 15 if (this.props.active) { 16 className += ' RichEditor-activeButton'; 17 } 18 return ( 19 <span className={className} onMouseDown={this.onToggle}> 20 {this.props.label} 21 </span> 22 ); 23 } 24 } 25 export default StyleButton;
In the code snippets above, we have a StyleButton component in src/components/styleButton.js, which basically receives a text style and renders it in a span tag on the page. In blockStyleControls.js and inlineStylesControls.js we have arrays that contain both block and inline text styles. We map through each style and pass them to the StyleButton component which renders them.
Bringing it together
If you have followed the post to this point, you should have a working text editor on your page. To make the editor realtime, we need to notify Pusher every time there is a change in the editor’s state.
To do this, in our RichEditor component’s onChange method, we’ll make an AJAX request to our server with the new editor’s state so it can be broadcasted in realtime.
Update the RichEditor component’s onChange method with the following:
1// src/pages/index.js 2 3 class RichEditor extends Component { 4 constructor(props) { 5 super(props); 6 this.state = { editorState: EditorState.createEmpty(), text: '', }; 7 this.focus = () => this.refs.editor.focus(); 8 this.onChange = (editorState) => { // update this line 9 // onChange, update editor state then notify pusher of the new editorState 10 this.setState({ editorState }, () => { 11 // call the function to notify Pusher of the new editor state 12 this.notifyPusher(stateToHTML(this.state.editorState.getCurrentContent())); 13 this.notifyPusherEditor(this.state.editorState) 14 }) 15 }; // update ends here 16 this.handleKeyCommand = this._handleKeyCommand.bind(this); 17 this.mapKeyToEditorCommand = this._mapKeyToEditorCommand.bind(this); 18 this.toggleBlockType = this._toggleBlockType.bind(this); 19 this.toggleInlineStyle = this._toggleInlineStyle.bind(this); 20 this.getBlockStyle = this._getBlockStyle.bind(this); 21 this.notifyPusher = this._notifyPusher.bind(this); // add this line 22 this.notifyPusherEditor = this._notifyPusherEditor.bind(this); // add this line 23 } 24 25 ... 26 // send the editor's text with axios to the server so it can be broadcasted by Pusher 27 _notifyPusher(text) { 28 axios.post('http://localhost:5000/save-text', { text }) 29 } 30 31 // send the editor's current state with axios to the server so it can be broadcasted by Pusher 32 _notifyPusherEditor(editorState) { 33 const selection = editorState.getSelection() 34 let text = convertToRaw(editorState.getCurrentContent()) 35 axios.post('http://localhost:5000/editor-text', { text, selection }) 36 } 37 ... 38 render() { 39 .... 40 } 41 } 42 export default RichEditor
With that, if you open your app in a second browser tab and type in your editor, you should get realtime updates in your second tab. Ensure the server we added is running.
Conclusion
That’s it! In this post, you’ve learned how to build a realtime collaborative editor with Gatsby, Draft.js and Pusher Channels. I can’t wait to see what you build with the new knowledge you’ve gained. You can find the source code for the demo app on GitHub.


© 2025 Pusher Ltd. All rights reserved.
Pusher Limited is a company registered in England and Wales (No. 07489873) whose registered office is at MessageBird UK Limited, 3 More London Riverside, 4th Floor, London, United Kingdom, SE1 2AQ.