- Products

- Developers
- User stories
- Blog
- Pricing

Build a CMS with Laravel and Vue - Part 1: Setting up
- Introduction
- Prerequisites
- Installing the Laravel CLI
- Installing PHP
- Installing the Mbstring extension
- Installing the XML PHP extension
- Installing the ZIP PHP extension
- Installing curl
- Installing Composer
- Installing the Laravel installer
- Creating the CMS project
- Setting up the database
- Setting up user roles
- Setting up user authentication
- Setting up role authorization
- Testing the application
- Conclusion
Introduction
In this 6-parts tutorial series, we will be building a CMS with Laravel and Vue.js.
The birth of the internet has since redefined content accessibility for the better, causing a distinct rise in content consumption across the globe. The average user of the internet consumes and produces some form of content formally or informally.
An example of an effort at formal content creation is when an someone makes a blog post about their work so that a targeted demographic can easily find their website. This type of content is usually served and managed by a CMS (Content Management System). Some popular ones are WordPress,and Drupal.
A CMS helps content creators produce content in an easily consumable format. In this tutorial series, we will consider how to build a simple CMS from scratch using Laravel and Vue.
Our CMS will be able to make new posts, update existing posts, delete posts that we do not need anymore, and also allow users make comments to posts which will be updated in realtime using Pusher. We will also be able to add featured images to posts to give them some visual appeal.
When we are done, we will be able to have a CMS that looks like this:
Prerequisites
To follow along with this series, a few things are required:
- Basic knowledge of PHP.
- Basic knowledge of the Laravel framework.
- Basic knowledge of JavaScript (ES6 syntax).
- Basic knowledge of Vue.
- Postman installed on your machine.
The source code for this project is available here on GitHub.
Installing the Laravel CLI
If you already have the Laravel CLI installed on your machine, please skip this section.
The first thing we need to do is install the Laravel CLI, and the Laravel dependencies. The CLI will be instrumental in creating new Laravel projects whenever we need to create one. Laravel requires PHP and a few other tools and extensions, so we need to first install these first before installing the CLI.
Here’s a list of the dependencies as documented on the official Laravel documentation:
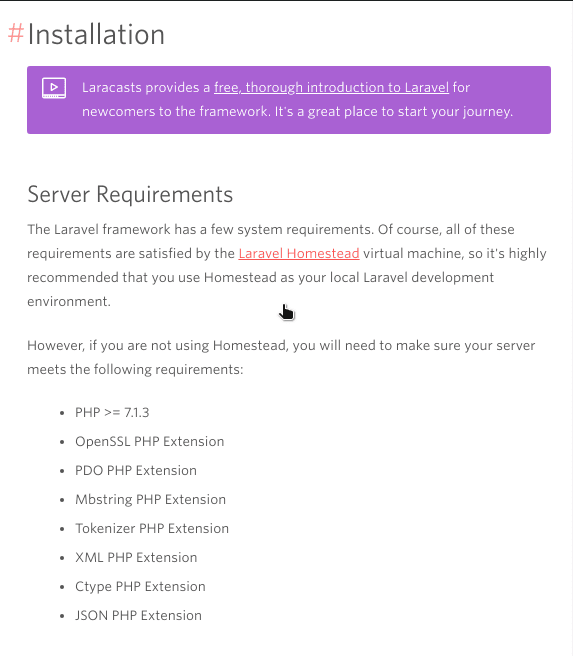
Let’s install them one at a time.
Installing PHP
An equivalent for Windows users could be to download and install XAMPP here. XAMPP comes with a UI for installing most of the other things you have to install manually below. Hence, Windows users may skip the next few steps until the Installing Composer sub-heading.
Open a fresh instance of the terminal and paste the following command:
1# Linux Users 2 $ sudo apt-get install php7.2 3 4 # Mac users 5 $ brew install php72
As at the time of writing this article, PHP 7.2 is the latest stable version of PHP so the command above installs it on your machine.
On completion, you can check that PHP has been installed to your machine with the following command:
$ php -v
Installing the Mbstring extension
To install the mbstring extension for PHP, paste the following command in the open terminal:
1# Linux users 2 $ sudo apt-get install php7.2-mbstring 3 4 # Mac users 5 # You don't have to do anything as it is installed automatically.
To check if the mbstring extension has been installed successfully, you can run the command below:
$ php -m | grep mbstring
Installing the XML PHP extension
To install the XML extension for PHP, paste the following command in the open terminal:
1# Linux users 2 $ sudo apt-get install php-xml 3 4 # Mac users 5 # You don't have to do anything as it is installed automatically.
To check if the xml extension has been installed successfully, you can run the command below:
$ php -m | grep xml
Installing the ZIP PHP extension
To install the zip extension for PHP, paste the following command in your terminal:
1# Linux users 2 $ sudo apt-get install php7.2-zip 3 4 # Mac users 5 # You don't have to do anything as it is installed automatically.
To check if the zip extension has been installed successfully, you can run the command below:
$ php -m | grep zip
Installing curl
Windows users may need to download curl from here.
To install curl, paste the following command in your terminal:
1# Linux users 2 $ sudo apt-get install curl 3 4 # Mac users using Homebrew (https://brew.sh) 5 $ brew install curl
To verify that curl has been installed successfully, run the following command:
$ curl --version
Installing Composer
Windows users can download and install Composer here. After the installation is complete, start a fresh instance of the command prompt as administrator and run this command anytime you need composer:
php composer.phar
Now that we have curl installed on our machine, let’s pull in Composer with this command:
$ curl -sS https://getcomposer.org/installer | sudo php -- --install-dir=/usr/local/bin --filename=composer
For us to run Composer in the future without calling sudo, we may need to change the permission, however you should only do this if you have problems installing packages:
$ sudo chown -R $USER ~/.composer/
Installing the Laravel installer
At this point, we can already create a new Laravel project using Composer’s create-project command, which looks like this:
$ composer create-project --prefer-dist laravel/laravel project-name
But we will go one step further and install the Laravel installer using composer:
$ composer global require "laravel/installer"
If you are on Windows, you may need to run the previous command in an advanced terminal such as PowerShell or the Gitbash terminal. Windows users can also skip the steps below.
After the installation, we will need to add the PATH to the bashrc file so that our terminal can recognize the laravel command:
1$ echo 'export PATH="$HOME/.composer/vendor/bin:$PATH"' >> ~/.bashrc 2 $ source ~/.bashrc
Creating the CMS project
Now that we have the official Laravel CLI installed on our machine, let’s create our CMS project using the installer. In your terminal window, cd to the project directory you want to create the project in and run the following command:
$ laravel new cms
At the time of writing this article, the latest version of Laravel is 5.6
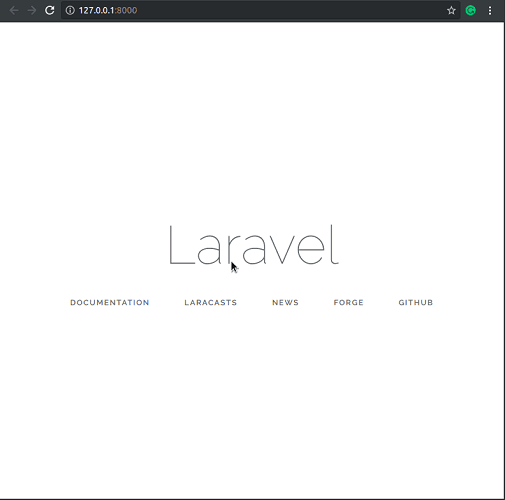
We will navigate into the project directory and serve the application using PHP’s web server:
1$ cd cms 2 $ php artisan serve
Now, when we visit http://127.0.0.1:8000/, we will see the default Laravel template:
Setting up the database
In this series, we will be using MySQL as our database system so a prerequisite for this section is that you have MySQL installed on your machine.
You can follow the steps below to install and configure MySQL:
- Linux users - check here for a detailed guide.
- Mac users, you can just run the command
brew install mysql. - Windows users who installed XAMPP, as suggested earlier, do not need to install MySQL as it comes preinstalled.
You will also need a special driver that makes it possible for PHP to work with MySQL, you can install it with this command:
1# Linux users 2 $ sudo apt-get install php7.2-mysql 3 4 # Mac Users 5 # You don't have to do anything as it is installed automatically.
Load the project directory in your favorite text editor and there should be a .env file in the root of the folder. This is where Laravel stores its environment variables.
Create a new MySQL database and call it laravelcms. In the .env file, update the database configuration keys as seen below:
1DB_CONNECTION=mysql 2 DB_HOST=127.0.0.1 3 DB_PORT=3306 4 DB_DATABASE=laravelcms 5 DB_USERNAME=YourUsername 6 DB_PASSWORD=YourPassword
Replace the
DB_USERNAMEandDB_PASSWORDwith your MySQL database credentials.
Setting up user roles
Like most content management systems, we are going to have a user role system so that our blog can have multiple types of users; the admin and regular user. The admin should be able to create a post and perform other CRUD operations on a post. The regular user, on the other hand, should be able to view and comment on a post.
For us to implement this functionality, we need to implement user authentication and add a simple role authorization system.
Setting up user authentication
Laravel provides user authentication out of the box, which is great, and we can key into the feature by running a single command:
$ php artisan make:auth
The above will create all that’s necessary for authentication in our application so we do not need to do anything extra.
Setting up role authorization
We need a model for the user roles so let’s create one and an associated migration file:
$ php artisan make:model Role -m
In the database/migrations folder, find the newly created migration file and update the CreateRolesTable class with this snippet:
1<?php // File: ./database/migrations/*_create_roles_table.php 2 3 // [...] 4 5 class CreateRolesTable extends Migration 6 { 7 public function up() 8 { 9 Schema::create('roles', function (Blueprint $table) { 10 $table->increments('id'); 11 $table->string('name'); 12 $table->string('description'); 13 $table->timestamps(); 14 }); 15 } 16 17 public function down() 18 { 19 Schema::dropIfExists('roles'); 20 } 21 }
We intend to create a many-to-many relationship between the User and Role models so let’s add a relationship method on both models.
Open the User model and add the following method:
1// File: ./app/User.php 2 public function roles() 3 { 4 return $this->belongsToMany(Role::class); 5 }
Open the Role model and include the following method:
1// File: ./app/Role.php 2 public function users() 3 { 4 return $this->belongsToMany(User::class); 5 }
We are also going to need a pivot table to associate each user with a matching role so let’s create a new migration file for the role_user table:
$ php artisan make:migration create_role_user_table
In the database/migrations folder, find the newly created migration file and update the CreateRoleUserTable class with this snippet:
1// File: ./database/migrations/*_create_role_user_table.php 2 <?php 3 4 // [...] 5 6 class CreateRoleUserTable extends Migration 7 { 8 9 public function up() 10 { 11 Schema::create('role_user', function (Blueprint $table) { 12 $table->increments('id'); 13 $table->integer('role_id')->unsigned(); 14 $table->integer('user_id')->unsigned(); 15 }); 16 } 17 18 public function down() 19 { 20 Schema::dropIfExists('role_user'); 21 } 22 }
Next, let’s create seeders that will populate the users and roles tables with some data. In your terminal, run the following command to create the database seeders:
1$ php artisan make:seeder RoleTableSeeder 2 $ php artisan make:seeder UserTableSeeder
In the database/seeds folder, open the RoleTableSeeder.php file and replace the contents with the following code:
1// File: ./database/seeds/RoleTableSeeder.php 2 <?php 3 4 use App\Role; 5 use Illuminate\Database\Seeder; 6 7 class RoleTableSeeder extends Seeder 8 { 9 public function run() 10 { 11 $role_regular_user = new Role; 12 $role_regular_user->name = 'user'; 13 $role_regular_user->description = 'A regular user'; 14 $role_regular_user->save(); 15 16 $role_admin_user = new Role; 17 $role_admin_user->name = 'admin'; 18 $role_admin_user->description = 'An admin user'; 19 $role_admin_user->save(); 20 } 21 }
Open the UserTableSeeder.php file and replace the contents with the following code:
1// File: ./database/seeds/UserTableSeeder.php 2 <?php 3 4 use Illuminate\Database\Seeder; 5 use Illuminate\Support\Facades\Hash; 6 use App\User; 7 use App\Role; 8 9 class UserTableSeeder extends Seeder 10 { 11 12 public function run() 13 { 14 $user = new User; 15 $user->name = 'Samuel Jackson'; 16 $user->email = 'samueljackson@jackson.com'; 17 $user->password = bcrypt('samuel1234'); 18 $user->save(); 19 $user->roles()->attach(Role::where('name', 'user')->first()); 20 21 $admin = new User; 22 $admin->name = 'Neo Ighodaro'; 23 $admin->email = 'neo@creativitykills.co'; 24 $admin->password = bcrypt('neo1234'); 25 $admin->save(); 26 $admin->roles()->attach(Role::where('name', 'admin')->first()); 27 } 28 }
We also need to update the DatabaseSeeder class. Open the file and update the run method as seen below:
1// File: ./database/seeds/DatabaseSeeder.php 2 <?php 3 4 // [...] 5 6 class DatabaseSeeder extends Seeder 7 { 8 public function run() 9 { 10 $this->call([ 11 RoleTableSeeder::class, 12 UserTableSeeder::class, 13 ]); 14 } 15 }
Next, let’s update the User model. We will be adding a checkRoles method that checks what role a user has. We will return a 404 page where a user doesn’t have the expected role for a page. Open the User model and add these methods:
1// File: ./app/User.php 2 public function checkRoles($roles) 3 { 4 if ( ! is_array($roles)) { 5 $roles = [$roles]; 6 } 7 8 if ( ! $this->hasAnyRole($roles)) { 9 auth()->logout(); 10 abort(404); 11 } 12 } 13 14 public function hasAnyRole($roles): bool 15 { 16 return (bool) $this->roles()->whereIn('name', $roles)->first(); 17 } 18 19 public function hasRole($role): bool 20 { 21 return (bool) $this->roles()->where('name', $role)->first(); 22 }
Let’s modify the RegisterController.php file in the Controllers/Auth folder so that a default role, the user role, is always attached to a new user at registration.
Open the RegisterController and update the create action with the following code:
1// File: ./app/Http/Controllers/Auth/RegisterController.php 2 protected function create(array $data) 3 { 4 $user = User::create([ 5 'name' => $data['name'], 6 'email' => $data['email'], 7 'password' => bcrypt($data['password']), 8 ]); 9 10 $user->roles()->attach(\App\Role::where('name', 'user')->first()); 11 12 return $user; 13 }
Now let’s migrate and seed the database so that we can log in with the sample accounts. To do this, run the following command in your terminal:
$ php artisan migrate:fresh --seed
In order to test that our roles work as they should, we will make an update to the HomeController.php file. Open the HomeController and update the index method as seen below:
1// File: ./app/Http/Controllers/HomeController.php 2 public function index(Request $request) 3 { 4 $request->user()->checkRoles('admin'); 5 6 return view('home'); 7 }
Now, only administrators should be able to see the dashboard. In a more complex application, we would use a middleware to do this instead.
We can test that this works by serving the application and logging in both user accounts; Samuel Jackson and Neo Ighodaro.
Remember that in our UserTableSeeder.php file, we defined Samuel as a regular user and Neo as an admin, so Samuel should see a 404 error after logging in and Neo should be able to see the homepage.
Testing the application
Let’s serve the application with this command:
$ php artisan serve
When we try logging in with Samuel’s credentials, we should see this:
On the other hand, we will get logged in with Neo’s credentials because he has an admin account:
We will also confirm that whenever a new user registers, he is assigned a role and it is the role of a regular user. We will create a new user and call him Greg, he should see a 404 error right after:
It works just as we wanted it to, however, it doesn’t really make any sense for us to redirect a regular user to a 404 page. Instead, we will edit the HomeController so that it redirects users based on their roles, that is, it redirects a regular user to a regular homepage and an admin to an admin dashboard.
Open the HomeController.php file and update the index method as seen below:
1// File: ./app/Http/Controllers/HomeController.php 2 public function index(Request $request) 3 { 4 if ($request->user()->hasRole('user')) { 5 return redirect('/'); 6 } 7 8 if ($request->user()->hasRole('admin')){ 9 return redirect('/admin/dashboard'); 10 } 11 }
If we serve our application and try to log in using the admin account, we will hit a 404 error because we do not have a controller or a view for the admin/dashboard route. In the next article, we will start building the basic views for the CMS.
Conclusion
In this tutorial, we learned how to install a fresh Laravel app on our machine and pulled in all the needed dependencies. We also learned how to configure the Laravel app to work with a MySQL database. We also created our models and migrations files and seeded the database using database seeders.
In the next part of this series, we will start building the views for the application.
The source code for this project is available on Github.


© 2026 Pusher Ltd. All rights reserved.
Pusher Limited is a company registered in England and Wales (No. 07489873) whose registered office is at MessageBird UK Limited, 3 More London Riverside, 4th Floor, London, United Kingdom, SE1 2AQ.