- Products

- Developers
- User stories
- Blog
- Pricing

Build a Chrome extension to track cryptocurrency prices - Part 2: Allowing user interaction
- Introduction
- Prerequisites
- New tools we will add
- Creating our server with Express instead of HTTPS
- Importing all we will need
- Initial definitions of what we will need
- More initial definitions
- Setting up our authentication routes
- Setting up routes to fetch coins
- Setting up routes to add our favorite coins
- Setting up routes to fetch our favorite coins
- Defining the helpers
- The database manager
- Updating our Chrome extension
- Defining our stylesheet for our index page
- Create a page to list all coins
- Create a page to view all user defined favorite coins
- Create a page for users to add favorite coins
- Testing the extension
- Conclusion
Introduction
If you made it to this part of the guide, then by the end of this guide, you will realize building Chrome extensions is like building a website. Emphasis on “Like” 😃 .
In the last part of the tutorial, we got into Chrome extensions and built our first extension. We connected it to our server using Pusher to get updates in realtime.
For this tutorial, we will allow users to customize their experience a little.
Prerequisites
- You have read the first part of this guide
New tools we will add
Creating our server with Express instead of HTTPS
Ah… yes. This is an important update to explain so you do not get confused. If you are familiar with Node.js, you would realize this is a no-brainer. If we were to use HTTPS to create our server, we would have to designed middlewares (maybe?) to check for the following:
- Type of request we are receiving [GET, POST, PUT …]
- The URI of the request
- The body of the request
- Create self-signed SSL certs for the HTTPS server to work
- A few more other things we might not know off the top of our head until we proceed to use it
With Express and body-parser you will be handling requests like “Please, can I get a real challenge?” 💪. We still use HTTPS to make the request to CryptoCompare’s API because as of this writing, they do not support requests over HTTP.
Enough talking, open your index.js file. To reduce confusions, we will assume that this file is empty. So feel free to wipe everything in it and start afresh.
Importing all we will need
1// index.js 2 3 "use strict"; 4 const cryptos = require('./cryptos.json') 5 const jwt = require('jsonwebtoken') 6 const bodyParser= require('body-parser') 7 const helpers = require('./helpers') 8 const config = require('./config') 9 const express = require('express') 10 const bcrypt = require('bcrypt') 11 const DB = require('./db')
We have a few additions here that we need to install and define. Let us start with what we need to install. Run the following command on your console
$ npm install --save express body-parser jsonwebtoken sqlite3 bcrypt
Now, create the following files:
1$ touch helpers.js 2 $ touch db.js
We shall define their contents soon.
Initial definitions of what we will need
Back to index.js file, add the following definitions:
1//index.js 2 [...] 3 const db = new DB("sqlitedb") 4 const app = express() 5 const router = express.Router() 6 7 router.use(bodyParser.urlencoded({ extended: false })); 8 router.use(bodyParser.json());
At this stage, we have imported our database manager and passed the name we want it to create the database with. Then we created an instance of express and express.Router() to allow us to create a server and define routes respectively.
We also informed our express.Router() handler to use body-parser definitions, this will help us to read data sent from the client either as json or regular form submission.
More initial definitions
1// index.js 2 3 [...] 4 const {allowCrossDomain,fetchCoins,handleResponse,handleFavoriteResponse,generateUrl} = helpers 5 app.use(allowCrossDomain) 6 7 const defaultUrl= generateUrl(cryptos.coins,cryptos.currencies) 8 fetchCoins(defaultUrl,handleResponse) 9 10 // We will define our routes here 11 12 app.use(router) 13 app.listen(process.env.PORT || 4003)
We imported helper functions to help us process our requests and responses to users. We will create them shortly. The allowCrossDomain middleware will allow our Express application receive a request from a domain other than itself. For instance, if we run our app on localhost:4000, we can not make a call to it from localhost:4001 without a pre-flight issue (CORS).
The fetchCoins() method fetches the coins and sends them to Pusher which will broadcast to all our users who are listening on that channel.
Finally, we set our application to listen on either a dynamically assigned port or 4003. We are set to go at this point.
Setting up our authentication routes
Still in the index.js file, let us start with the route to handle authentication:
1//index.js 2 3 [...] 4 // We will define our routes here 5 6 router.post('/auth', function(req, res) { 7 db.selectByEmail(req.body.email, (err,user) => { 8 if (err) return res.status(500).send(JSON.stringify({message : "There was a problem getting user"})) 9 if(user) { 10 if(!bcrypt.compareSync(req.body.password, user.user_pass)) { 11 return res.status(400).send(JSON.stringify({message : "The email or password incorrect"})) 12 } 13 let token = jwt.sign({ id: user.id }, config.secret, { 14 expiresIn: 86400 // expires in 24 hours 15 }) 16 res.status(200).send(JSON.stringify({token: token, user_id:user.id})) 17 } else { 18 db.insertUser([req.body.email,bcrypt.hashSync(req.body.password, 8)], 19 function (err, id) { 20 if (err) return res.status(500).send(JSON.stringify({message : "There was a problem getting user"})) 21 else { 22 let token = jwt.sign({ id: id }, config.secret, { 23 expiresIn: 86400 // expires in 24 hours 24 }); 25 res.status(200).send(JSON.stringify({token: token, user_id:id})) 26 } 27 }); 28 } 29 }) 30 }) 31 32 [...]
In our /auth route, we are checking if the user exists. If the email and password matches what we stored, we log the user in and send them a token. If the email exists but the password does not match, we have to handle that as well.
jwtcreates a hashed token using the user’s ID and the secret we defined in our config.js file. It sets the token to expire in 24 hours but you can make this longer or shorter
What we are sending back to the user is their token and ID to help them make requests in the future.
When we cannot find the email address of a user in our database, we assume we have a new user and register them directly. We also generated a token and returned it to the user.
WARNING❗ For any reason whatsoever, do not implement your authentication in a production application like this. While it provides convenience for you, it is very bad for user experience. We did it for the sake of this guide to get quickly to the most important thing — the Chrome extension.
Setting up routes to fetch coins
1//index.js 2 3 [...] 4 router.get('/coins', function(req, res) { 5 let token = req.headers['x-access-token']; 6 if (!token) return res.status(401).send(JSON.stringify({message: 'Unauthorized request!' })) 7 jwt.verify(token, config.secret, function(err, decoded) { 8 if (err) return res.status(500).send(JSON.stringify({message: 'Failed to authenticate token.' })) 9 res.status(200).send(JSON.stringify({coins : cryptos.coins})) 10 }); 11 }) 12 [...]
The coins route is protected by the access token. This means only authenticated users can fetch the coins we track their prices.
Setting up routes to add our favorite coins
1//index.js 2 [...] 3 router.post('/favorite/add', function(req, res) { 4 let token = req.headers['x-access-token']; 5 jwt.verify(token, config.secret, function(err, decoded) { 6 if (err) return res.status(401).send(JSON.stringify({message: 'Unauthorized request' })) 7 db.insertFavorite([req.body.coin, decoded.id], (err,favs) => { 8 if (err) return res.status(500).send(JSON.stringify({message : "There was a problem adding your favs"})) 9 res.status(200).send(JSON.stringify({message: "Coin added to your favorites"})) 10 }); 11 }); 12 }) 13 [...]
The good thing about our token is that we encoded it with the user’s ID. This means, once the user presents a valid token, we can find out who the user is from the token. Awesome right?
Once we find who the user is, we add the coin they chose to their favorites. Whenever they click on the link to see their favorites, we return it to them and track price changes in realtime.
Setting up routes to fetch our favorite coins
1//index.js 2 3 [...] 4 router.get('/favorite', function(req, res) { 5 let token = req.headers['x-access-token']; 6 jwt.verify(token, config.secret, function(err, decoded) { 7 if (err) return res.status(401).send(JSON.stringify({message: 'Unauthorized request' })) 8 db.selectFavorite(decoded.id, (err,favs) => { 9 // We use the favs returned by the db manager 10 if (err) return res.status(500).send(JSON.stringify({message : "There was a problem getting your favs"})) 11 let coins = [] 12 if (favs && favs.length > 0) { 13 favs.forEach( fav => coins.push(fav.coin)) 14 const url = generateUrl(coins,cryptos.currencies) 15 const event = `user${decoded.id}` 16 fetchCoins(url, handleFavoriteResponse, event) 17 res.status(200).send(JSON.stringify({event : event})) 18 } else { 19 res.status(200).send(JSON.stringify({message : "You do not have favs"})) 20 } 21 }); 22 }); 23 }) 24 [...]
This is straightforward. If the token is invalid, we return 401: Unauthorised to the user and that settles it. If the token is valid, then we decode it and retrieve the user’s favorite coins.
Sqlite3returns an array of objects for us, so we take all the coins and push them into an array — coins. We use the coins array to construct the URL we will use to make requests. Then we generate an event for the user based on theirid. This makes it possible for us to send a message that only the user will receive.
Our route definitions are complete now. Let us define our helper functions.
Defining the helpers
The helpers are set of functions we stored in helpers.js file. Open the file and add the following
1const Pusher = require('pusher') 2 const config = require('./config') 3 const https = require('https') 4 const pusher = new Pusher(config) 5 6 // The functions 7 8 const allowCrossDomain = (req, res, next) => { 9 res.header('Access-Control-Allow-Origin', '*'); 10 res.header('Access-Control-Allow-Methods', '*'); 11 res.header('Access-Control-Allow-Headers', '*'); 12 next(); 13 } 14 15 16 let fetchCoins = (url, handler, event = false) => { 17 setInterval(() => { 18 https.get(url, response => { 19 response.setEncoding('utf8') 20 .on('data', data => event? handler(data,event) : handler(data)) 21 .on('error', e => console.error(e.message)) 22 }) 23 }, 10000) 24 } 25 26 27 let handleResponse = (data) => { 28 pusher.trigger('cryptowatch', 'prices', { 29 "update": data 30 }); 31 } 32 33 let handleFavoriteResponse = (data,event) => { 34 pusher.trigger('cryptowatch', event, { 35 "update": data 36 }); 37 } 38 39 40 let generateUrl = (coins,currencies) => { 41 return `https://min-api.cryptocompare.com/data/pricemulti?fsyms=${coins.join()}&tsyms=${currencies.join()}` 42 } 43 44 module.exports = { 45 allowCrossDomain : allowCrossDomain, 46 fetchCoins : fetchCoins, 47 handleResponse : handleResponse, 48 handleFavoriteResponse : handleFavoriteResponse, 49 generateUrl : generateUrl 50 }
We are using Pusher in one of the functions here, so it only makes sense we define it. We exported all the functions with their name so it is easy for us to import them where we need it. We created allowCrossDomain function to help us handle CORS. We also moved our fetchCoins method from part one into our helper file, this way the method is reusable especially when it comes to creating dynamic events on Pusher channel.
Finally, we defined our generateURL method, which we will call to fetch our defined currencies or a user’s favorite.
The database manager
The database manager manages the database. We will define the queries to create the database, select from the database and insert into it. Because this is not part of our focus, I will gloss over the long code pasted below and explain things that may vary if you are familiar with MySQL.
Insert the following content into our db.js file:
1//db.js 2 "use strict"; 3 const sqlite3 = require('sqlite3').verbose(); 4 5 class Db { 6 constructor(file) { 7 this.db = new sqlite3.Database(file); 8 this.createTables() 9 } 10 11 createTables() { 12 let sql = ` 13 CREATE TABLE IF NOT EXISTS user ( 14 id integer PRIMARY KEY, 15 email text NOT NULL UNIQUE, 16 user_pass text NOT NULL)` 17 this.db.run(sql); 18 19 sql = ` 20 CREATE TABLE IF NOT EXISTS favorite ( 21 id integer PRIMARY KEY, 22 coin text NOT NULL, 23 user_id integer NOT NULL)` 24 this.db.run(sql); 25 return true 26 } 27 28 selectByEmail(email, callback) { 29 return this.db.get( 30 `SELECT * FROM user WHERE email = ?`, 31 [email], (err,row) => { 32 callback(err,row) 33 } 34 ) 35 } 36 37 selectFavorite(user_id, callback) { 38 return this.db.all( 39 `SELECT * FROM favorite WHERE user_id = ?`, 40 [user_id], (err,row) => { 41 callback(err,row) 42 } 43 ) 44 } 45 46 insertUser(user, callback) { 47 return this.db.run( 48 'INSERT INTO user (email,user_pass) VALUES (?,?)', 49 user, function(err) { 50 callback(err,this.lastID) 51 } 52 ) 53 } 54 55 insertFavorite(favs, callback) { 56 return this.db.run( 57 'INSERT INTO favorite (coin,user_id) VALUES (?,?)', 58 favs, err => { 59 callback(err) 60 } 61 ) 62 } 63 } 64 65 module.exports = Db
A few things to know:
- We will execute
sqlite3queries that will not return a row or rows with.run()method. - When we want to fetch a single row, we will execute the query with a
.get()method. - When we want to fetch multiple rows, we will execute the query with a
.all()method. - To get the
idof the last inserted item, we runthis.lastIDinside the callback function we passed to.run()method. - All
sqlite3methods are asynchronous, hence the callback functions we pass to each one.
Now, let us modify our Chrome extension.
Updating our Chrome extension
We have explained Chrome extensions in details in the last post. This means we will get right to our customization.
The first thing we want to do is get permission for our extension to use Chrome storage. So, modify the permissions array in the extension/manifest.json file and add the following:
1[...] 2 "permissions": [ 3 "activeTab", 4 "storage" 5 ] 6 [...]
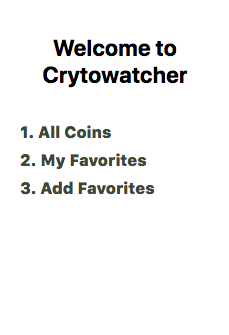
Let us update our extension/index.html file
1//extension/index.html 2 <!DOCTYPE html> 3 <html lang="en"> 4 <head> 5 <meta charset="UTF-8"> 6 <title>Crypto Watcher</title> 7 <link rel="stylesheet" type="text/css" href="./css/style.css"> 8 </head> 9 <body> 10 <h1>Welcome to Crytowatcher</h1> 11 <div class="box hide"> 12 <a href="/coins.html" class="link">1. All Coins</a> 13 <a href="/favorite.html" class="link">2. My Favorites</a> 14 <a href="/add-favorite.html" class="link">3. Add Favorites</a> 15 </div> 16 <div class="login hide"> 17 <form id="form"> 18 <input class="form-elements" type="email" name="email" value="" placeholder="email" required> 19 <input class="form-elements" type="password" name="password" value="" placeholder="password" required> 20 <button class="form-elements btn">Submit</button> 21 </form> 22 </div> 23 <script src="./js/index.js"></script> 24 </body> 25 </html>
We removed the style we included in the page and then proceed to add it to an external stylesheet. We will create the external stylesheet later.
Things to note:
- The first thing you will notice is that we removed the Pusher scripts we had on this page before. We moved it to where we will need it shortly.
- Next, we added links to other pages. We will create the pages very soon.
- Then we have a form which will handle login.
- It seems we are hiding both the link and the form. So what shows up?
- We have removed the
script.jsfile and createdindex.jsin the/jsdirectory.
Before we proceed, open you terminal to create the following folder and files.
1$ mkdir extension/js 2 $ touch extension/js/index.js 3 $ touch extension/js/favorite.js 4 $ touch extension/js/auth.js 5 $ touch extension/js/add-favorite.js 6 $ mkdir extension/css 7 $ touch extension/css/base.css 8 $ touch extension/css/style.css 9 $ touch extension/favorite.html 10 $ touch extension/add-favorite.html 11 $ touch extension/coins.html
Finally, we want to move pusher.min.js and scripts.jsfile into our js folder. Run this command to move the file:
1mv extension/pusher.min.js extension/js 2 mv extension/scripts.js extension/js
Now, open the extension/js/index.js script and insert the following:
1//extension/js/index.js 2 window.addEventListener('load', function(evt) { 3 const form = document.getElementById('form') 4 document.getElementById('form').addEventListener('submit', function(e) { 5 e.preventDefault() 6 7 let options = { 8 method : "POST", 9 body : JSON.stringify({ 10 'email' : this.elements.email.value, 11 'password' : this.elements.password.value 12 }), 13 headers : new Headers({'content-type': 'application/json'}) 14 } 15 16 fetch("http://localhost:4003/auth",options) 17 .then(res => { 18 if(res.ok) return res.json() 19 else throw new Error(res.status) 20 }) 21 .then(data => { 22 storeToken(data, () => { 23 document.querySelector('.box').classList.remove('hide') 24 document.querySelector('.login').classList.add('hide') 25 }) 26 }) 27 .catch(error => { 28 console.log(error) 29 }) 30 }) 31 getToken(result => { 32 if(!result) { 33 document.querySelector('.login').classList.remove('hide') 34 } 35 else { 36 document.querySelector('.box').classList.remove('hide') 37 } 38 }) 39 }) 40 41 function storeToken(data, callback){ 42 let dt = new Date() 43 chrome.storage.local.set( 44 { "access-token": 45 { 46 'token' : data.token, 47 'user_id' : data.user_id, 48 'expires' : dt.setDate(dt.getDate()+1) 49 } 50 }, 51 () => callback() 52 ); 53 } 54 55 function getToken(callback){ 56 chrome.storage.local.get("access-token", result => { 57 let data = false 58 if (result['access-token']) { 59 let expires = new Date(result['access-token']['expires']) 60 let now = new Date() 61 if (expires > now) { 62 data = true 63 } 64 else { 65 chrome.storage.local.remove("access-token", () => {}) 66 } 67 } 68 callback(data) 69 }); 70 }
These two methods handle our authorization token. One stores it in Chrome storage and the second retrieves it. Chrome storage works like local storage but it is asynchronous, hence the callback functions we defined.
When we store tokens, we store a time they are to expire as well. This allows us to remove the token if it has expired without having to make a request to the server. Since we know the tokens typically last a day, we set the expiration time here on the frontend.
When we retrieve a token, we check if it has expired or not. If it has expired, we remove it completely and so the user will not try to use it to make a request.
Defining our stylesheet for our index page
1/* extension/css/style.css*/ 2 body { 3 min-width: 200px; 4 height: 300px; 5 padding: 10px; 6 } 7 h1 { 8 text-align: center; 9 margin-bottom: 2rem; 10 } 11 .box { 12 display: block; 13 } 14 .box .link { 15 transition: 0.2s all; 16 font-size: 16px; 17 font-weight: 900; 18 padding: 5px; 19 text-decoration: none; 20 color: #3A4A33; 21 display: block; 22 } 23 .box .link:hover { 24 transition: 0.1s linear; 25 opacity: 0.8; 26 font-weight: 300; 27 text-decoration: underline; 28 } 29 .hide { 30 display: none 31 } 32 .form-elements { 33 display: block; 34 height: 20px; 35 border-radius: 2px; 36 margin: 0 auto; 37 margin-bottom: 10px; 38 border: #eee 0.5px solid; 39 max-width: 100%; 40 padding: 5px; 41 } 42 .select-elements { 43 display: block; 44 height: 30px; 45 margin-bottom: 10px; 46 border: #eee 0.5px solid; 47 width: 100%; 48 padding: 5px; 49 } 50 select:required:invalid { 51 color :#AAAAAA; 52 } 53 option[value=''][disabled] { 54 display: none; 55 } 56 .btn { 57 height: auto; 58 transition: 0.5s all; 59 background: #4AA71B;; 60 color: #FFFFFF; 61 margin-top: 1rem; 62 padding: 0.5rem 2rem; 63 border-radius: 4px; 64 } 65 .btn:hover { 66 transition: 0.5s all; 67 background: #4A872B; 68 cursor: pointer; 69 }
Next, insert the following content into base.css file
1/* extension/css/base.css */ 2 body { 3 min-width: 200px; 4 height: 300px; 5 } 6 .back-btn { 7 height: 1.2rem; 8 color: #FFFFFF; 9 font-size: 14px; 10 font-weight: 900em; 11 cursor: pointer; 12 border-radius: 4px; 13 background: #3A3A3B; 14 text-decoration: none; 15 padding: 0.2rem 1rem; 16 margin-top: 0.5rem; 17 } 18 nav { 19 display: grid; 20 grid-template-columns: auto auto; 21 grid-template-rows: auto; 22 justify-content: space-between; 23 align-content: space-between; 24 }
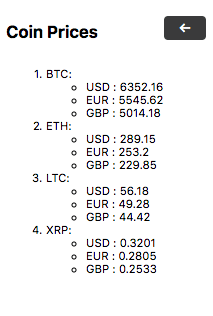
Create a page to list all coins
The first page we want to make is the page to display all coins.
Open the file extension/coins.html and add the following content:
1// extension/coins.html 2 <!DOCTYPE html> 3 <html lang="en"> 4 <head> 5 <meta charset="UTF-8"> 6 <title>Crypto Watcher</title> 7 <link rel="stylesheet" type="text/css" href="./css/base.css"> 8 </head> 9 <body> 10 <nav> 11 <h1>Coin Prices</h1> 12 <a href="/index.html" class="back-btn">←</a> 13 </nav> 14 <main> 15 <ol id="crypto-prices">Fetching coins...</ol> 16 </main> 17 <script src="./js/pusher.min.js"></script> 18 <script src="./js/auth.js"></script> 19 <script src="./js/scripts.js"></script> 20 </body> 21 </html>
We changed a few little things:
- We added an
auth.jsscript, which ensures only an authenticated user views this page. - We moved the
scripts.jsfile from in/jsdirectory and changed nothing in it. - We added a link to take us back to home page.
- We now have a
navandmainsection on our page.
Create a page to view all user defined favorite coins
Open the extension/favorite.html file and insert the following content
1// extension/favorite.html 2 3 <!DOCTYPE html> 4 <html lang="en"> 5 <head> 6 <meta charset="UTF-8"> 7 <title>Crypto Watcher</title> 8 <link rel="stylesheet" type="text/css" href="./css/base.css"> 9 </head> 10 <body> 11 <nav> 12 <h1>My Favorites</h1> 13 <a href="/index.html" class="back-btn">←</a> 14 </nav> 15 <main> 16 <ol id="crypto-prices">Fetching coins...</ol> 17 </main> 18 <script src="./js/pusher.min.js"></script> 19 <script src="./js/auth.js"></script> 20 <script src="./js/favorite.js"></script> 21 </body> 22 </html>
Now, let us create the content of our extension/js/favorite.js file:
1//extension/js/favorite.js 2 3 const pusher = new Pusher('Your-App-Key', { 4 cluster: 'Your-cluster-key', 5 encrypted: true 6 }) 7 8 function handleBinding(event){ 9 let channel = pusher.subscribe('cryptowatch'); 10 channel.bind(event, (data) => { 11 let priceLists = "" 12 let obj = JSON.parse(data.update) 13 Object.keys(obj).forEach( (key, index) => { 14 priceLists += `<li>${key}: </br>` 15 let currencies = obj[key] 16 let currencyLists = "<ul>" 17 Object.keys(currencies).forEach( (currency, index) => { 18 currencyLists += `<li>${currency} : ${currencies[currency]}</li>` 19 }); 20 currencyLists += "</ul>" 21 priceLists += `${currencyLists}</li>` 22 }); 23 document.getElementById('crypto-prices').innerHTML = priceLists 24 }); 25 }
Remember to replace ‘Your-App-Key’ and ‘Your-cluster-key’ with the values you generated from Pusher’s dashboard
We have a similar script running here to what we had in part one that fetches and updates realtime data. The only difference is that we took the channel subscription part and put it in a function. You will see why below:
1// favorite.js 2 [...] 3 window.addEventListener('load', function(evt) { 4 let xhr = new XMLHttpRequest(); 5 getToken(function(result) { 6 xhr.open("GET", 'http://localhost:4003/favorite', true); 7 xhr.setRequestHeader('x-access-token',result.token) 8 xhr.send(); 9 }) 10 xhr.onreadystatechange = function() { 11 if (xhr.readyState == 4) { 12 let res = JSON.parse(xhr.responseText) 13 if(res.event) handleBinding(res.event) 14 else document.getElementById('crypto-prices').innerHTML = res.message 15 } 16 } 17 })
As you can see here, we make a request to our API to get the user’s favorites. Upon getting the result, we call the function where we defined the channel binding and pass the user’s unique event. This is how they will get custom coin price updates. Cool right? 😎
Create a page for users to add favorite coins
Open the extension/add-favorite.html file and insert the following content
1<!DOCTYPE html> 2 <html lang="en"> 3 <head> 4 <meta charset="UTF-8"> 5 <title>Crypto Watcher</title> 6 <link rel="stylesheet" type="text/css" href="./css/base.css"> 7 <link rel="stylesheet" type="text/css" href="./css/style.css"> 8 </head> 9 <body> 10 <nav> 11 <h1>Add Favorite</h1> 12 <a href="/index.html" class="back-btn">←</a> 13 </nav> 14 <main> 15 <form id="form"> 16 <select id="coin" class="select-elements" type="text" name="coin" required> 17 <option disabled>-- Select Coin --</option> 18 </select> 19 <button class="form-elements btn">Submit</button> 20 </form> 21 </main> 22 <script src="./js/auth.js"></script> 23 <script src="./js/add-favorite.js"></script> 24 </body> 25 </html>
Let us create the content for out add-favorite.js file. It has two main parts. Open the file and edit as follows:
The first part fetches the coins
1//extension/js/add-favorite.js 2 window.addEventListener('load', function(evt) { 3 let xhr = new XMLHttpRequest(); 4 let coinOptions = document.getElementById('coin') 5 getToken(result => { 6 xhr.open("GET", "http://localhost:4003/coins", true) 7 xhr.setRequestHeader('x-access-token',result.token) 8 xhr.send() 9 }) 10 xhr.onreadystatechange = function() { 11 if (xhr.readyState == 4) { 12 let result = JSON.parse(xhr.responseText) 13 result.coins.forEach(coin => { 14 let el = document.createElement('option') 15 el.value = coin 16 coinOptions.appendChild(el) 17 el.innerText = coin 18 }) 19 } 20 } 21 // Form submission 22 })
And the second submits the form:
1//extension/js/add-favorite.js 2 [...] 3 document.getElementById('form').addEventListener('submit', function(e) { 4 e.preventDefault() 5 getToken(result => { 6 let options = { 7 method : "POST", 8 body : JSON.stringify({coin : this.elements.coin.value}), 9 headers : new Headers({ 10 'content-type': 'application/json', 11 'x-access-token' : result.token 12 }) 13 } 14 fetch('http://localhost:4003/favorite/add',options) 15 .then(res => { 16 if(res.ok) return res.json() 17 else throw new Error(res.status) 18 }) 19 .then(data => { 20 window.location = "/favorite.html" 21 }) 22 .catch(error => console.log(error)) 23 }) 24 }) 25 [...]
Finally, we need to create our auth.js file
Open the extension/js/auth.js file and add the following content
1getToken(function(result) { 2 if(!result) { 3 window.location = "/index.html" 4 } 5 }) 6 7 function getToken(callback){ 8 chrome.storage.local.get("access-token", (result) => { 9 let data = false 10 if (result['access-token']) { 11 let expires = new Date(result['access-token']['expires']) 12 let now = new Date() 13 if (expires > now) { 14 data = { 15 'token' : result['access-token']['token'], 16 'user_id' : result['access-token']['user_id'] 17 } 18 } 19 else { 20 chrome.storage.local.remove("access-token", () => {}) 21 } 22 } 23 callback(data) 24 }) 25 }
We called the getToken function and check if we have a valid token. If we don’t, we redirect the user to the index.html file where they can log in.
Testing the extension
If you got to this point, then I am happy to tell you that we are done coding. Time to mount the extension and give it a trial. From your browser, open chrome://extensions/ and click Load Unpacked. Then select your extension’s directory.
If you did not deploy your application to Heroku like we did in part one, you can run it locally to give it a trial. However, if you deployed to Heroku, please go through the code and replace http://localhost:4003 with your Heroku app URL.
To run it locally:
$ npm start
Your extension should look like this:


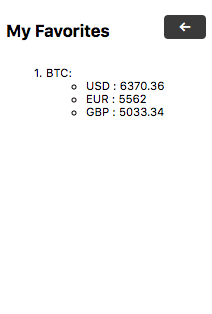
NOTE: On My Favorites page, there will be an initial delay of about ten seconds when trying to fetch the coin for the first time
Conclusion
In the last part, we said we would extend the extension to make it easy for a user to specify the tokens they want to track. Well, we have delivered that.
At the start of this tutorial, I mentioned that when you are done with it, you would realise building a Chrome extension is like making a webpage. There are a few things that change when you are building an extension.
Before you say “Wow! So this is all there is to Chrome extension”, let me pause you for a moment. A Chrome extension can interact with the webpage where it is loaded. It can also do so much more than what we have seen so far.
The source code to the application in this article is available on GitHub.


© 2026 Pusher Ltd. All rights reserved.
Pusher Limited is a company registered in England and Wales (No. 07489873) whose registered office is at MessageBird UK Limited, 3 More London Riverside, 4th Floor, London, United Kingdom, SE1 2AQ.