- Products

- Developers
- User stories
- Blog
- Pricing

Build a chat app using Framework7
Introduction
Introduction
Realtime chat functionality has revitalized the way we communicate over the years. In recent times, customers can speak directly with business owners from their mobile applications and websites. This is a huge plus in technology considering how difficult it was in the past.
Framework7 is a free and open source mobile HTML framework to develop hybrid mobile apps with iOS and Android native look and feel. In this tutorial, we'll build a realtime chat application with Framework7 using Pusher Channels. Here’s a preview of what we’ll be building.
Prerequisites
Before you begin, ensure that you have Node and npm or Yarn installed on your machine. Here is a run-down of the core technologies we will be using.
-
Framework7 ****- a framework for building native-like mobile applications with HTML
-
Pusher Channels - Pusher Channels is a solution for building apps with varying realtime needs like push notifications and pub/sub messaging. It is the engine behind the realtime ability of our chat app.
-
Vue.js - an open-source JavaScript framework for building user interfaces
-
Phonegap - an application framework that enables you to build natively installed applications using HTML and JavaScript.
Setting up the project
The simplest way to set up a Phonegap project is through the command line interface (CLI). Before we create a Phonegap project, ensure that you have Phonegap installed on your machine. To install Phonegap, run:
$ npm install -g phonegap
This will install phonegap on your machine and you can confirm the installation by running the command:
$ phonegap -v
This should print the version of the currently installed Phonegap. Now that we have that installed let’s create a Phonegap project. Run:
1// create a phonegap project with the framework7 vue template 2 $ phonegap create pusher-chat --template https://github.com/hollyschinsky/phonegap-template-framework7-vue 3 $ cd pusher-chat 4 //start the server 5 $ phonegap serve
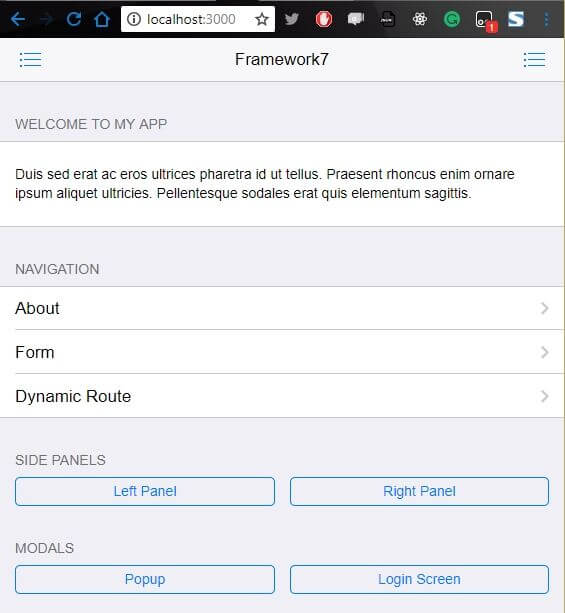
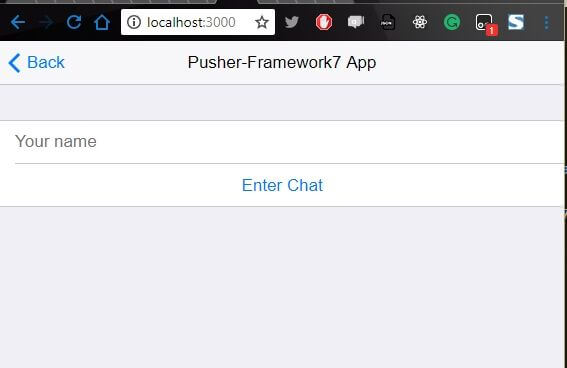
If you get any prompts in the process, it is always safe to say yes within the scope of this demo. The phonegap serve command will start your project on localhost:3000. If you navigate to it on your browser, you should see this.
Setting up Pusher
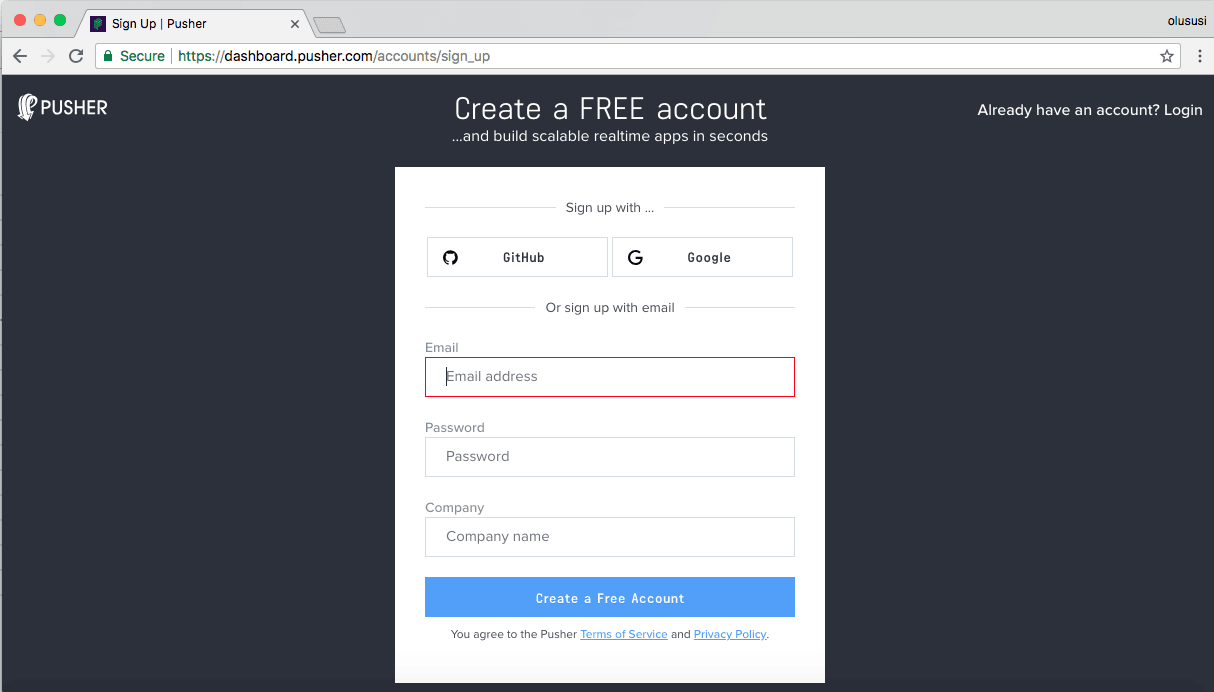
Head over to Pusher and sign up for a free account.
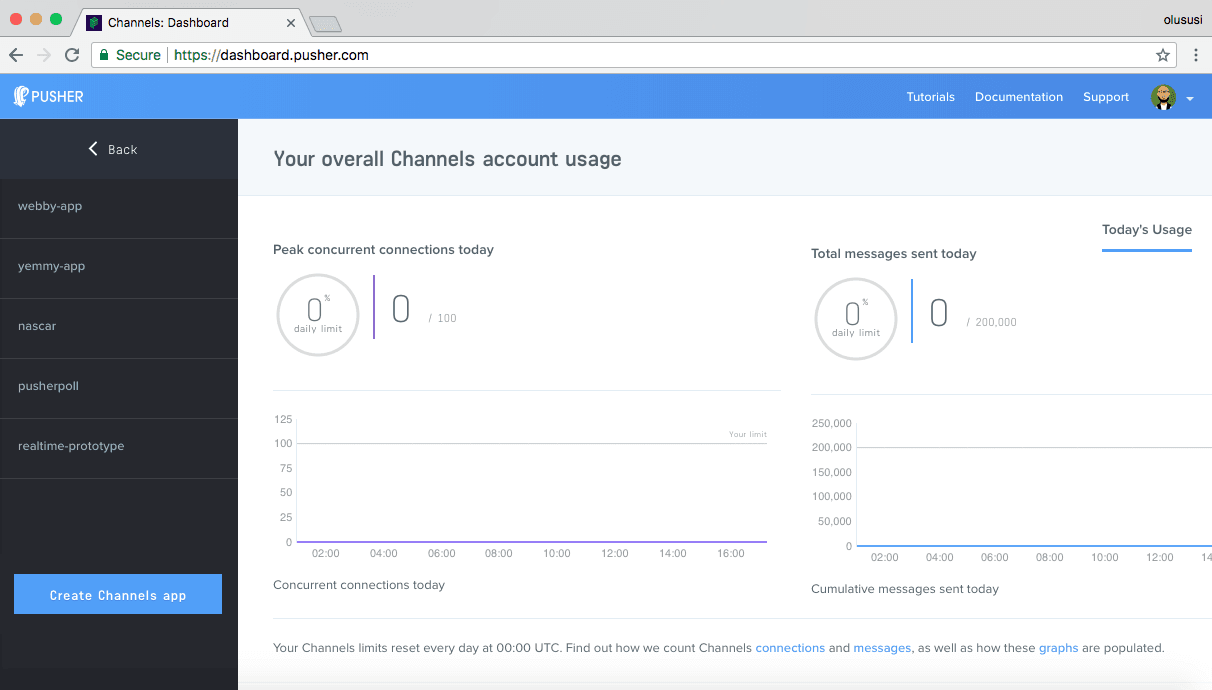
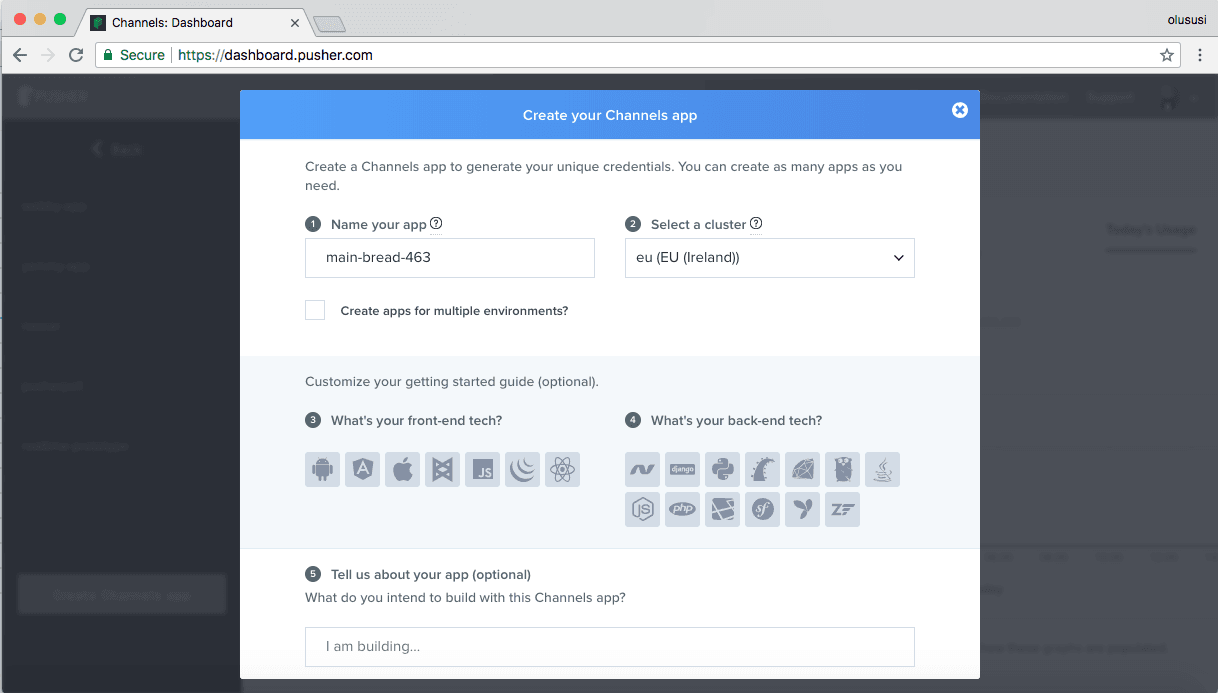
Create a new app by selecting Channels apps on the sidebar and clicking Create Channels app button on the bottom of the sidebar:
Configure an app by providing basic information requested in the form presented. You can also choose the environment you intend to integrate Pusher with to be provided with some boilerplate code:
You can retrieve your keys from the App Keys tab:
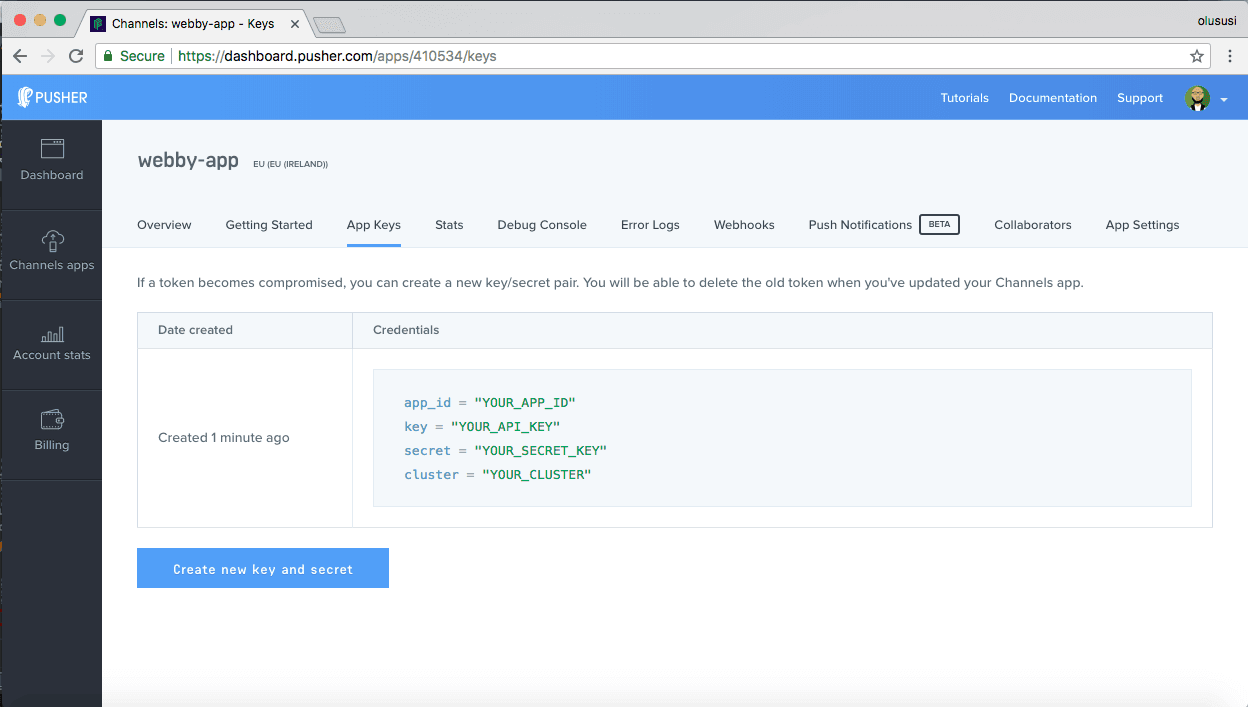
Save your Pusher credentials somewhere in your editor where you can quickly retrieve it as we’ll be needing it soon.
Server configurations
We’ll be using a local Node server to establish communications with the client so as to render messages in realtime. Before we create our server, let’s install the packages it’ll need to run effectively. Back in your project root, run:
$ npm install --save axios body-parser cors express pusher pusher-js
Then in your code editor, create a new file server.js and set it up like so:
1//server.js 2 const Pusher = require('pusher'); 3 const express = require('express'); 4 const bodyParser = require('body-parser'); 5 const cors = require('cors'); 6 const app = express(); 7 app.use(cors()); 8 app.use(bodyParser.urlencoded({extended: false})); 9 app.use(bodyParser.json()); 10 11 var pusher = new Pusher({ 12 appId: 'Your-app-Id', 13 key: 'Your-app-Key', 14 secret: 'Your-app-secret', 15 cluster: 'Your-app-cluster', 16 encrypted: true 17 }); 18 app.set('PORT', process.env.PORT || 6000); 19 app.post('/message', (req, res) => { 20 const message = req.body; 21 pusher.trigger('chat', 'message', message); 22 res.send(message) 23 24 }); 25 app.listen(app.get('PORT'), () => 26 console.log('Listening at ' + app.get('PORT')))
Do not forget to replace the placeholder values here with your unique keys from Pusher.
Here we loaded all the necessary middlewares for the Express server and then configured Pusher using the credentials we got from our Pusher dashboard.
We also created the /``message endpoint that will receive and process messages sent in from our app. Finally, we trigger an event named message to Pusher Channels on a channel called chat. The chat channel holds a message payload that contains the message sent by the user.
To start the server, run:
$ node server
The above command should output this message in your terminal:
Listening on port 6000
Application layout
Now let’s open the index.html file and set it up. This is the entrance to our app and we’ll place a form to collect the user’s name and a button to take them to the chat page. Open the index.html file, delete all the code in it and update it with this:
1// www/index.html 2 3 <!DOCTYPE html> 4 <html> 5 <head> 6 <meta name="viewport" content="width=device-width, initial-scale=1, maximum-scale=1, minimum-scale=1, user-scalable=no, minimal-ui"> 7 <meta name="apple-mobile-web-app-capable" content="yes"> 8 <meta name="apple-mobile-web-app-status-bar-style" content="black"> 9 <title>My App</title> 10 <link rel="stylesheet" href="css/framework7.ios.min.css"> 11 <link rel="stylesheet" href="css/framework7.ios.colors.min.css"> 12 <link rel="stylesheet" href="css/app.css"> 13 </head> 14 <body> 15 <div id="app"> 16 <f7-statusbar></f7-statusbar> 17 <f7-views> 18 <f7-view id="main-view" navbar-through :dynamic-navbar="true" main> 19 <f7-navbar back-link="Back" sliding> 20 <f7-nav-center sliding>Pusher-Framework7 App </f7-nav-center> 21 </f7-navbar> 22 23 <f7-pages> 24 <f7-page> 25 <f7-list> 26 </f7-list-item> 27 <f7-list-item> 28 <f7-input type="text" v-model:value="name" placeholder="Your name" clear-button></f7-input> 29 </f7-list-item> 30 </f7-list-item> 31 <f7-list-button v-on:click="enterChat">Enter Chat</f7-list-button> 32 </f7-list> 33 </f7-page> 34 </f7-pages> 35 </f7-view> 36 </f7-views> 37 </div> 38 <template id="page-chat"> 39 <f7-page> 40 <!-- chat page goes here ... --> 41 </f7-page> 42 </template> 43 44 <!-- Add CDN for Pusher and Axios --> 45 <script src="https://unpkg.com/axios/dist/axios.min.js"></script> 46 <script src="https://js.pusher.com/4.1/pusher.min.js"></script> 47 48 <script src="cordova.js"></script> 49 <script src="js/framework7.min.js"></script> 50 <script src="js/vue.min.js"></script> 51 <script src="js/framework7-vue.min.js"></script> 52 <script src="js/app.js"></script> 53 </body> 54 </html>
Notice we added the CDN for both Pusher and Axios in the scripts above. Next, open the app.js file and replace the code there in it with this:
1// www/js/app.js 2 3 (function(){ 4 function init(){ 5 Vue.use(Framework7Vue) 6 Vue.component('page-chat', { 7 template: '#page-chat', 8 9 }); 10 // Init App 11 new Vue({ 12 el: '#app', 13 methods: { 14 enterChat: function(){ 15 if(this.name.trim().length === 0 ){ 16 alert(" Enter your name ...") 17 return false; 18 } 19 } 20 }, 21 framework7: { 22 root: '#app', 23 // material: true, 24 routes: [ 25 { 26 path: '/chat/', 27 component: 'page-chat' 28 } 29 ], 30 } 31 }); 32 } 33 // Handle device ready event 34 document.addEventListener('deviceready', init, false) 35 })();
At this point, if you save both edited files and check back on your browser, you should now get this look:
Here we can supply a name and click the Enter Chat button to enter the chat page, but at this point it won’t work. That is expected, given that we’ve not defined a function to handle the button click event. To fix that, let’s go ahead and do some data binding between our component and our states. Update the app.js file like so:
1// www/js/app.js 2 3 // init states 4 var states = { 5 name: '', 6 msgs: [] 7 }; 8 9 (function(){ 10 function init(){ 11 12 Vue.use(Framework7Vue) 13 14 Vue.component('page-chat', { 15 template: '#page-chat', 16 data: function(){ 17 return states; 18 }, 19 // handle onSend 20 methods: { 21 onSend: function(text, clear){ 22 console.log("clicked") 23 if( typeof clear == 'function' ) clear() 24 } 25 } 26 }); 27 // Init App 28 new Vue({ 29 el: '#app', 30 data: function(){ 31 return states; 32 }, 33 // handle enterChat button 34 methods: { 35 enterChat: function(){ 36 if(this.name.trim().length === 0 ){ 37 alert(" Enter your name ...") 38 return false; 39 } 40 this.msgs.length = 0; 41 this.$f7.mainView.router.load({url:'/chat/'}); 42 } 43 }, 44 framework7: { 45 root: '#app', 46 /* Uncomment to enable Material theme: */ 47 // material: true, 48 routes: [ 49 { 50 path: '/chat/', 51 component: 'page-chat' 52 } 53 ], 54 } 55 }); 56 } 57 // Handle device ready event 58 59 document.addEventListener('deviceready', init, false) 60 })();
Here we defined a states object to hold the name of the user and an array of messages. Then we added the missing callbacks that we defined in our HTML file to handle the click events on the buttons.
If the user supplies a name and clicks the Enter Chat button, it’ll open up the chat page, but if that is not the case, it’ll alert the user to a name. Update your app.js file with the snippet above and save. Now go back to the browser, enter a name and click Enter Chat. This should now open up the empty chat page.
Next, we’ll set up the chat page to have a simple chat form with an input to collect the message and a button to send it. Open the index.html file and update the chat page template section with this code:
1// www/index.html 2 // ... 3 <f7-messages> 4 <f7-message v-for="msg in msgs" :name="msg.name" :text="msg.text" :type="msg.type"> 5 </f7-message> 6 </f7-messages> 7 <f7-messagebar placeholder="type message" send-link="Send" v-on:submit="onSend" > 8 </f7-messagebar> 9 // ...
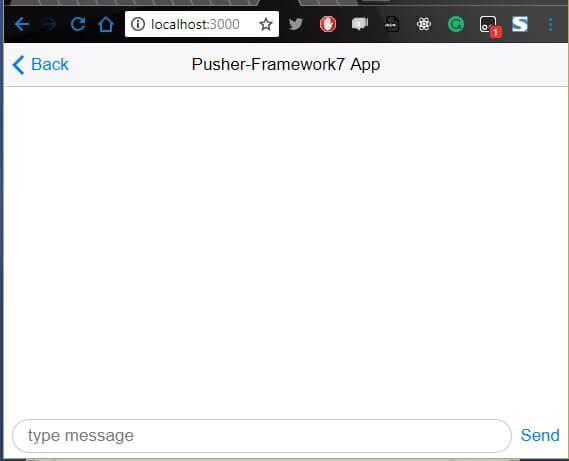
Add this code in the section where we left a comment to add chat page. Save the index.html file and check back on your browser. The chat page should look like this:
Realtime updates
At this point, we can type messages, but nothing happens when you try to send. This is because we haven’t integrated Pusher. At the beginning we set up Pusher and retrieved our app keys, we’ll now use it to configure our project. Open the app.js file and add this code:
1// www/js/app.js 2 3 const pusher = new Pusher('YOUR_PUSHER_KEY', { 4 cluster: 'YOUR_CLUSTER', 5 encrypted: true, 6 }); 7 const channel = pusher.subscribe('chat'); 8 channel.bind('message', data => { 9 console.log(data) 10 var type = data.name == states.name ? 'sent':'received' 11 var name = type == 'sent'? states.name : data.name; 12 states.msgs.push({name:name, text:data.text, type:type}); 13 }); 14 15 // ...
This sets up Pusher in our client with the credentials from our dashboard. We subscribe to the chat channel we defined on the server and bind our response data to the appropriate view objects to display them on screen.
Now to send the chat to the server when the user clicks the Send button, let’s update the onSend function in the app.js file:
1// www/js/app.js 2 ... 3 4 // Init Page Components 5 Vue.component('page-chat', { 6 template: '#page-chat', 7 data: function(){ 8 return states; 9 }, 10 11 methods: { 12 onSend: function(text, clear){ 13 console.log("clicked") 14 var message = { 15 name: this.name, 16 text: text 17 } 18 axios.post('http://localhost:6000/message', message); 19 if( typeof clear == 'function' ) clear() 20 } 21 } 22 }); 23 24 // Init App 25 new Vue({ 26 el: '#app', 27 data: function(){ 28 return states; 29 }, 30 methods: { 31 enterChat: function(){ 32 if(this.name.trim().length === 0 ){ 33 alert(" Enter your name ...") 34 return false; 35 } 36 this.msgs.length = 0; 37 this.$f7.mainView.router.load({url:'/chat/'}); 38 39 } 40 }, 41 ...
Here we define a message object that takes the name of the user and text message to send. Then we use Axios to post the message object to the /messages endpoint we defined on the server.
Testing
To test out the application, ensure that both Phonegap server and the Node server is running. If that’s not the case, you can start the Phonegap server in project root with phonegap serve and the Node server with node server.
Before testing your application, I recommend you compare your codes with mine to ensure that you did everything right so as not to encounter any blockers. Compare your index.html, server.js and app.js. If everything looks alright, now go ahead and test the application.
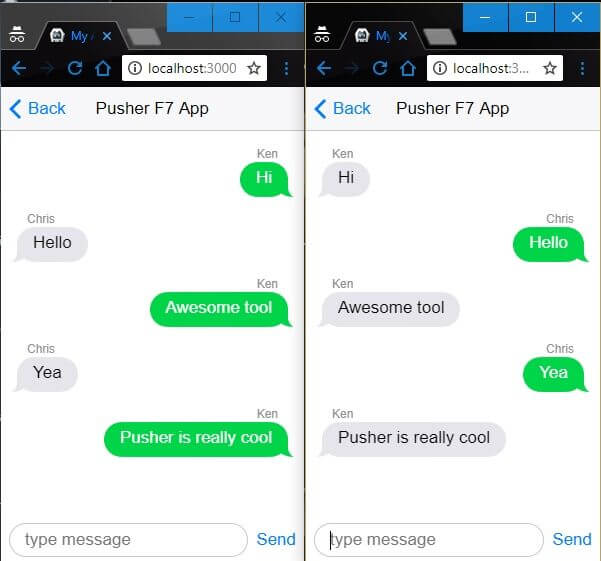
Open two browser windows to localhost:3000 and send messages:
Conclusion
The importance of realtime engagement of users on any platform cannot be overemphasized. As seen in this tutorial, we were able to implement a realtime chat system with Framework7 and Pusher. I hope you found this tutorial helpful.
Feel free to explore the code for this tutorial on GitHub and add more features as you deem fit.


© 2025 Pusher Ltd. All rights reserved.
Pusher Limited is a company registered in England and Wales (No. 07489873) whose registered office is at MessageBird UK Limited, 3 More London Riverside, 4th Floor, London, United Kingdom, SE1 2AQ.