- Products

- Developers
- User stories
- Blog
- Pricing

Build a realtime stock ticker with Ruby and Pusher Channels
Introduction
Realtime data applications
When it comes to trading and investment applications, accurate and responsive live dashboards are an essential feature. They provide a crucial feed of consistent realtime data, enabling traders to make decisions with confidence.
In this tutorial, we'll build a simple web application where users can monitor tick by tick stock prices of any company listed on the NYSE in realtime. This simple-to-implement feature powers live dashboard data for many of the most popular financial websites in the world.
Pusher is a platform built by developers, for developers, and provides everything you need to build efficient and scalable realtime applications.
We will be leveraging the Pusher Channels API with our new channel type, cache channels, to show live prices and performance metrics in a simple box. Cache channels are a great choice for applications where new subscribers to your realtime feed need existing data fast, as they reduce the complexity of setting an initial state of your application.
The web application will be built with Ruby and Sinatra, with JavaScript for the frontend and WebSockets by Pusher. Check out how it will look when we’re finished:
Set up
Ruby
Take a look at the Ruby documentation for installation instructions.
Sinatra
We'll use Sinatra to expose some endpoints and trigger events using Pusher SDK for this web application. To create a new application, let's create a new directory with a new file:
mkdir real-time-stock-prices
Now, go ahead and change the directory into the newly created folder:
cd real-time-stock-prices
In this current folder, create a new Gemfile to manage our dependencies by running:
touch Gemfile
After that, we need to declare the following gems in our newly created Gemfile:
1source "https://rubygems.org" 2 3gem "sinatra" 4gem "pusher" 5gem "thin" 6gem "http"
What do our dependencies mean?
Sinatra: a tiny web framework that we'll be using to expose some HTTP endpoints
Pusher Channels: responsible for triggering events to a Pusher channels
Thin: small web server and will be used to run our application
Http: HTTP client to retrieve information about the stock prices.
Then, in your terminal, make sure you're in the project root directory and install all dependencies by running:
bundle install
Pusher Channels
If you don't already have an account you can sign up for Pusher here.
The free sandbox plan comes with 200,000 messages per day and 100 concurrent connections (total number of simultaneous connections across your app) so it will be more than sufficient for this demo app.
In your dashboard, create a new Channels app and choose your preferred cluster.
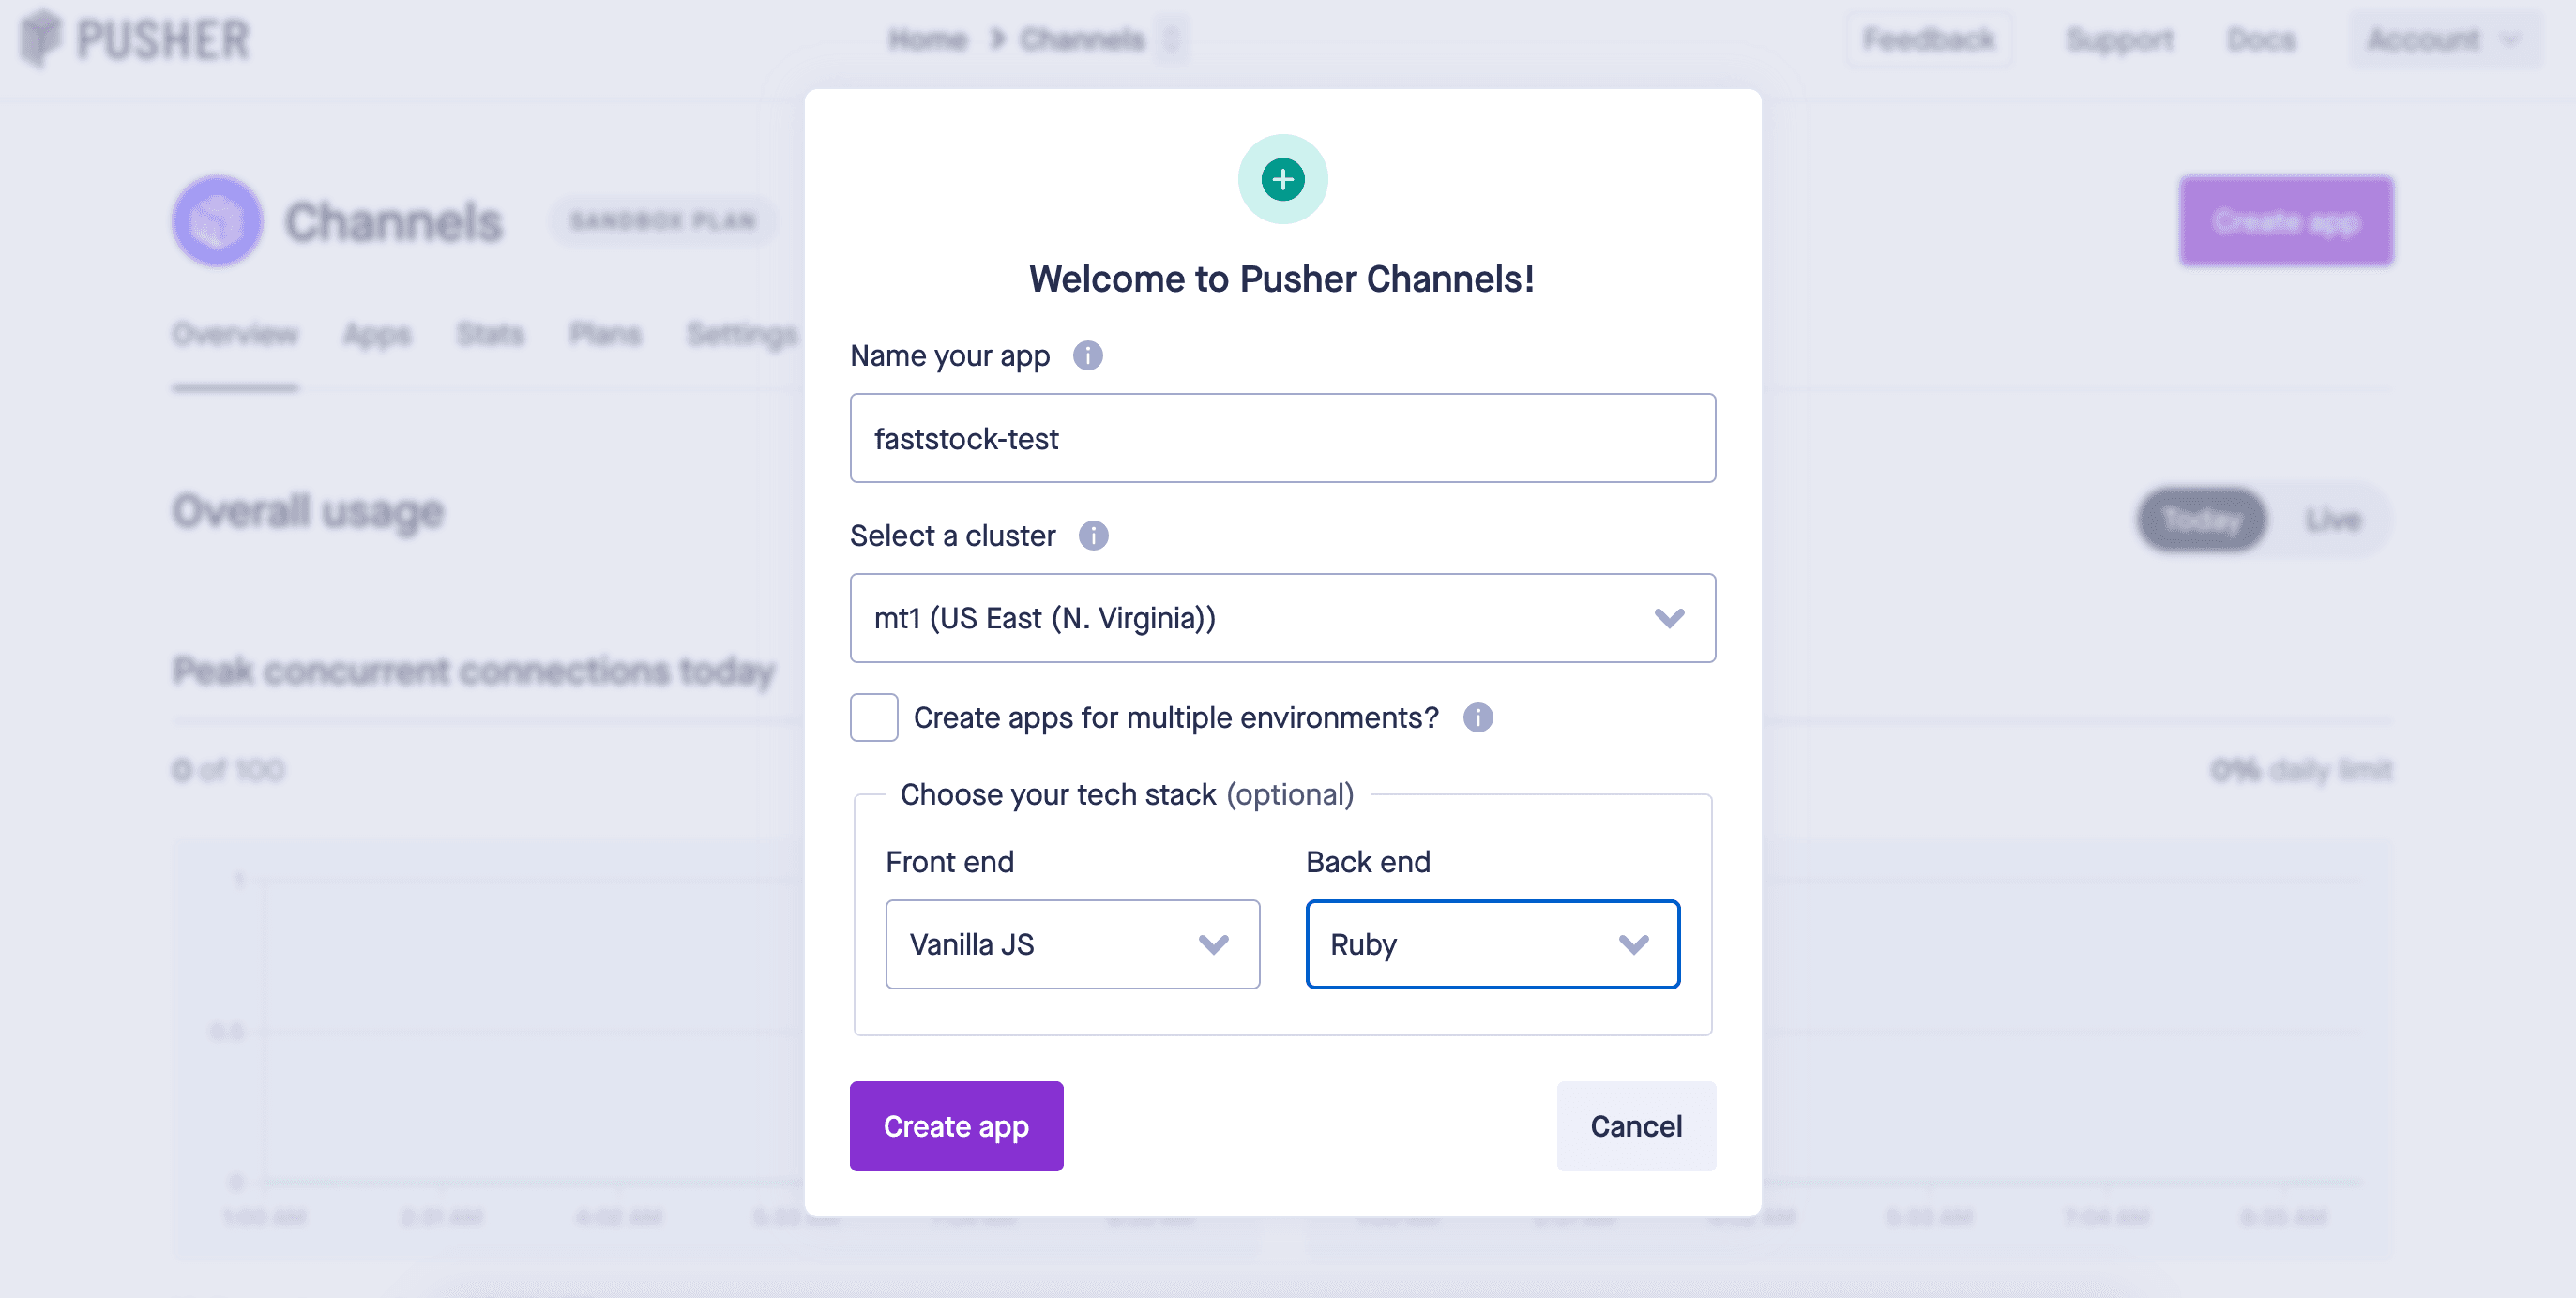
After configuring your app, it's time to set some environment variables so that we can bootstrap the Pusher client inside your Ruby application.
You can export them by running the following commands:
1export PUSHER_APP_ID=xxx 2 export PUSHER_KEY=yyyy 3 export PUSHER_SECRET=ddd 4 export PUSHER_CLUSTER=aa
Creating your app
As a second step to building our realtime application, we need to create a new file that will represent the entry point of our application.
Let's call it app.rb, and it's located in the root directory by running:
touch app.rb
Now, open app.rb and create your first route by adding the following code:
1require "sinatra" 2require "pusher" 3require "http" 4 5# Setup Pusher SDK 6pusher = Pusher::Client.new( 7 app_id: ENV["PUSHER_APP_ID"], 8 key: ENV["PUSHER_KEY"], 9 secret: ENV["PUSHER_SECRET"], 10 cluster: ENV["PUSHER_CLUSTER"], 11 use_tls: true 12) 13 14get "/" do 15 "This is your real-time application" 16end
After those steps, run the following command in your terminal:
ruby app.rb -o 0.0.0.0
If you go to http://localhost:4567, you should see the following message in your browser:
This is your realtime application
Building the landing page
We'll show stock prices on a landing page in our application. The next step will be to configure the root page and set up Pusher JS on the client-side.
In the root directory, create a new folder and call it views by running:
mkdir views
After that, create a new view file in this newly created folder. In this case, we'll call it index.erb:
touch index.erb
Then, add the following code to the newly created file:
1<html> 2<head> 3 <title>Live Stock Prices</title> 4 <script src="https://cdn.tailwindcss.com"></script> 5</head> 6 7<body> 8 <div> 9 10 <div class="grid place-items-center h-screen"> 11 <div class="bg-gray-200 p-5"> 12 <div class="mb-4"> 13 <h1 class="text-xl" id="company-name"></h1> 14 </div> 15 16 <div class="mb-4"> 17 <p class="text-sm text-gray-500">Current price</p> 18 <p class="text-l" id="current-price"></p> 19 </div> 20 21 <div class="mb-4"> 22 <p class="text-sm text-gray-500">Percent change</p> 23 <p class="text-l" id="percent-change"></p> 24 </div> 25 26 <div class="mb-4"> 27 <p class="text-sm text-gray-500">Last update:</p> 28 <p class="text-l" id="timestamp"></p> 29 </div> 30 </div> 31 </div> 32 </div> 33</body>
We also need to update our routes on app.rb to start rendering this new view and, therefore, replace your root route with:
1get "/" do 2 erb :index 3end
If we restart our server and reload the app, we should see a different page.
Adding realtime with Pusher
Pusher serves live data values as they occur in realtime, via channels.
Recently, Pusher has released a new channel type: cache channels. A cache channel remembers the last triggered event and sends this as the first to new subscribers, and it helps developers provide the initial state without the need to fetch it from their servers.
Cache channels are the perfect tool for the application we're building in this tutorial.
To update stock prices in real-time, in a simplified way, we publish stock prices information using an endpoint responsible for triggering this event on a cache channel, and we'll see this information on the client side.
That means, we need to import Pusher Client SDK as a script in the HTML file:
<script src="<https://js.pusher.com/7.0/pusher.min.js>"></script>
Now, it's time to create a method that fetches stock prices data. In order to do that, add the following code to the app.rb:
1def get_stock_prices(symbol) 2 response = HTTP.get("https://us-stocks.herokuapp.com/quote?symbol=#{symbol.upcase}") 3 JSON.parse(response.body) 4end
We also need a way to trigger this event through the cache channel, so let's build an endpoint to do this by adding the following snippet:
1post "/trigger" do 2 company = ['nflx', 'googl', 'aapl', 'amzn'].sample 3 4 stock = get_stock_prices(company) 5 event = { 6 company: company.upcase, 7 price: stock['current_price'], 8 percent_change: stock['percent_change'], 9 currency: stock['currency'], 10 timestamp: Time.now 11 } 12 pusher.trigger('cache-stock-prices', 'stock-updated', event) 13end
Here, our initialised Pusher client triggers a stock-updated event through a cache channel named cache-stock-prices.
Updating the UI
After configuring the server to push data whenever an endpoint is called, now it's time to set up the UI to listen for this data and show the stock price of a specific company.
To do this, import the Pusher client SDK as a script in the index.erb previously created by adding the following snippet inside the <head> tag:
<script src="https://js.pusher.com/7.0/pusher.min.js"></script>
Additionally, set up the SDK with your Pusher account:
1Pusher.logToConsole = true 2 3 var pusher = new Pusher('<%= ENV["PUSHER_KEY"] %>', { 4 cluster: '<%= ENV["PUSHER_CLUSTER"] %>' 5 }); 6 7 var channel = pusher.subscribe('cache-stock-prices'); 8 channel.bind('stock-updated', function(data) { 9 document.querySelector("#company-name").innerHTML = data.company 10 document.querySelector("#current-price").innerHTML = `${data.currency} ${data.price}` 11 document.querySelector("#percent-change").innerHTML = `${data.percent_change}%` 12 document.querySelector("#timestamp").innerHTML = data.timestamp 13 }); 14 15 channel.bind('pusher:cache_miss', function() { 16 fetch('http://localhost:4567/trigger', { method: 'POST' }) 17 });
You should have noticed that we're using some Ruby code inside this script. That's a good way not to duplicate code and use the same Pusher account information provided server-side.
It’s also worth noting that we don't need to fetch any initial state when the page is loaded. Instead, we'll show the latest data available thanks to the cache channels.
Handling cache misses
As we mentioned earlier, cache channels store the latest triggered event. However, after 30 minutes, this information expires, and we need to update it with a new one. So how do we know when a cache in a Pusher channel has expired?
Cache channels have two approaches to solving this issue. One of them is by using webhooks, and the other is by subscribing to a pusher:cache_miss event on the client-side. In this instance we'll use the latter.
1channel.bind('pusher:cache_miss', function() { 2 fetch('http://localhost:4567/trigger', { method: 'POST' }) 3 });
Bringing it all together
Check out the Github repo for this project to see the demo code all together.
This demo app demonstrates the ease of building fast and reliable data streams with Pusher Channels. Now that we have the live ticker in place there are an infinite number of ways you can expand the functionality of your app.
Why not allow your users to build personalised watch lists, track changes in analytics dashboards, or add notifications with Beams to keep your users up to date when they leave the application.
Building with this tutorial? Get in touch to show us what you made.


© 2025 Pusher Ltd. All rights reserved.
Pusher Limited is a company registered in England and Wales (No. 07489873) whose registered office is at MessageBird UK Limited, 3 More London Riverside, 4th Floor, London, United Kingdom, SE1 2AQ.