- Products

- Developers
- User stories
- Blog
- Pricing

Azure function running Java for iOS notifications
Introduction
Introduction
Pusher Beams allows you to customize push notifications you send to your devices via a server. However it can be expensive to run a server 24 hours a day 7 days a week and we may only need to send notifications every so often.
This is where Microsoft Azure Functions can help. Azure Functions are serverless and work on a pay as you go model (with a generous free tier). This means that you only pay for when you use the function. We’re going to explore how we can setup Pusher Beams on an iOS client using an Azure Function running Java to trigger the notifications.
Prerequisites
- A free Microsoft Azure account. You can create one here.
- A free Pusher account. You can create one here.
- Homebrew installed on your machine. Instructions here.
- Postman or another HTTP client installed on your machine. You can download Postman from here.
- Xcode 10+
- MacOS
- An iOS device for testing notifications.
- An understanding of iOS development and Xcode environment.
- Cocoapods - Install instructions here.
Create your Azure function
Creating a Pusher Beams instance
Log in or create an account to access your dashboard here. Create a new Pusher Beams instance using the dashboard.
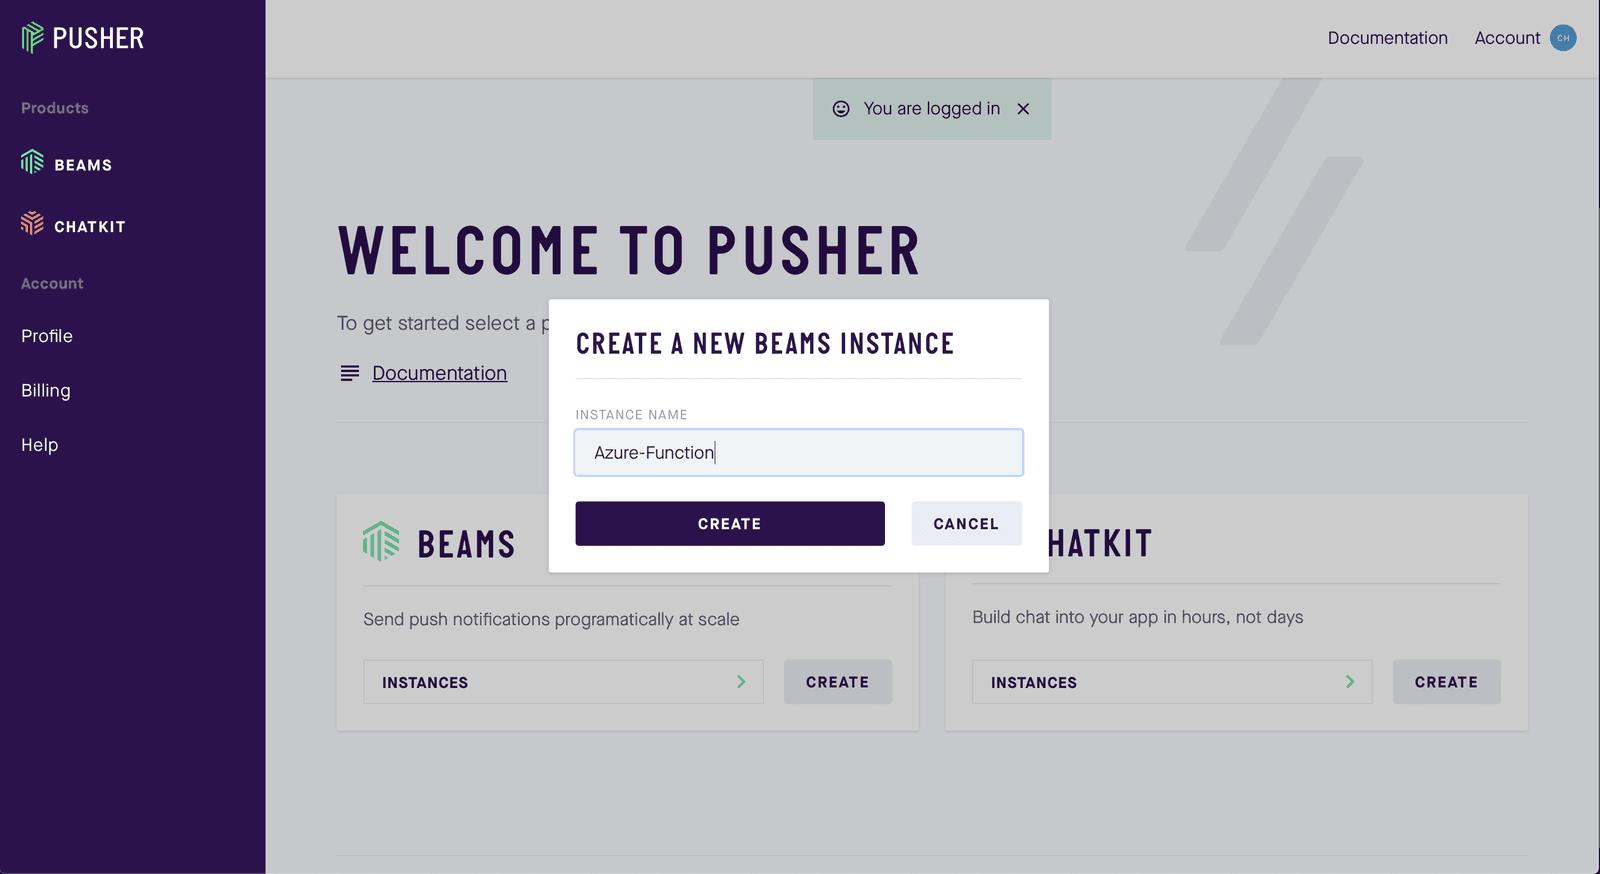
Complete step one of the iOS setup guide, by providing your APNS key and team ID and clicking Continue. We will pick up the remainder later on in this tutorial. Press the X to exit the setup guide and you will be returned to your dashboard for that instance. Scroll to the bottom of the page and you will find your Pusher Beams instance ID and secret key, make note of these you will need them later.
Creating our function
Log in to your Microsoft Azure portal here. Using the search facility (found at the top of the page) search for “Function App”.
Note: When searching make sure to sure for “Function App” and not “Function Apps”
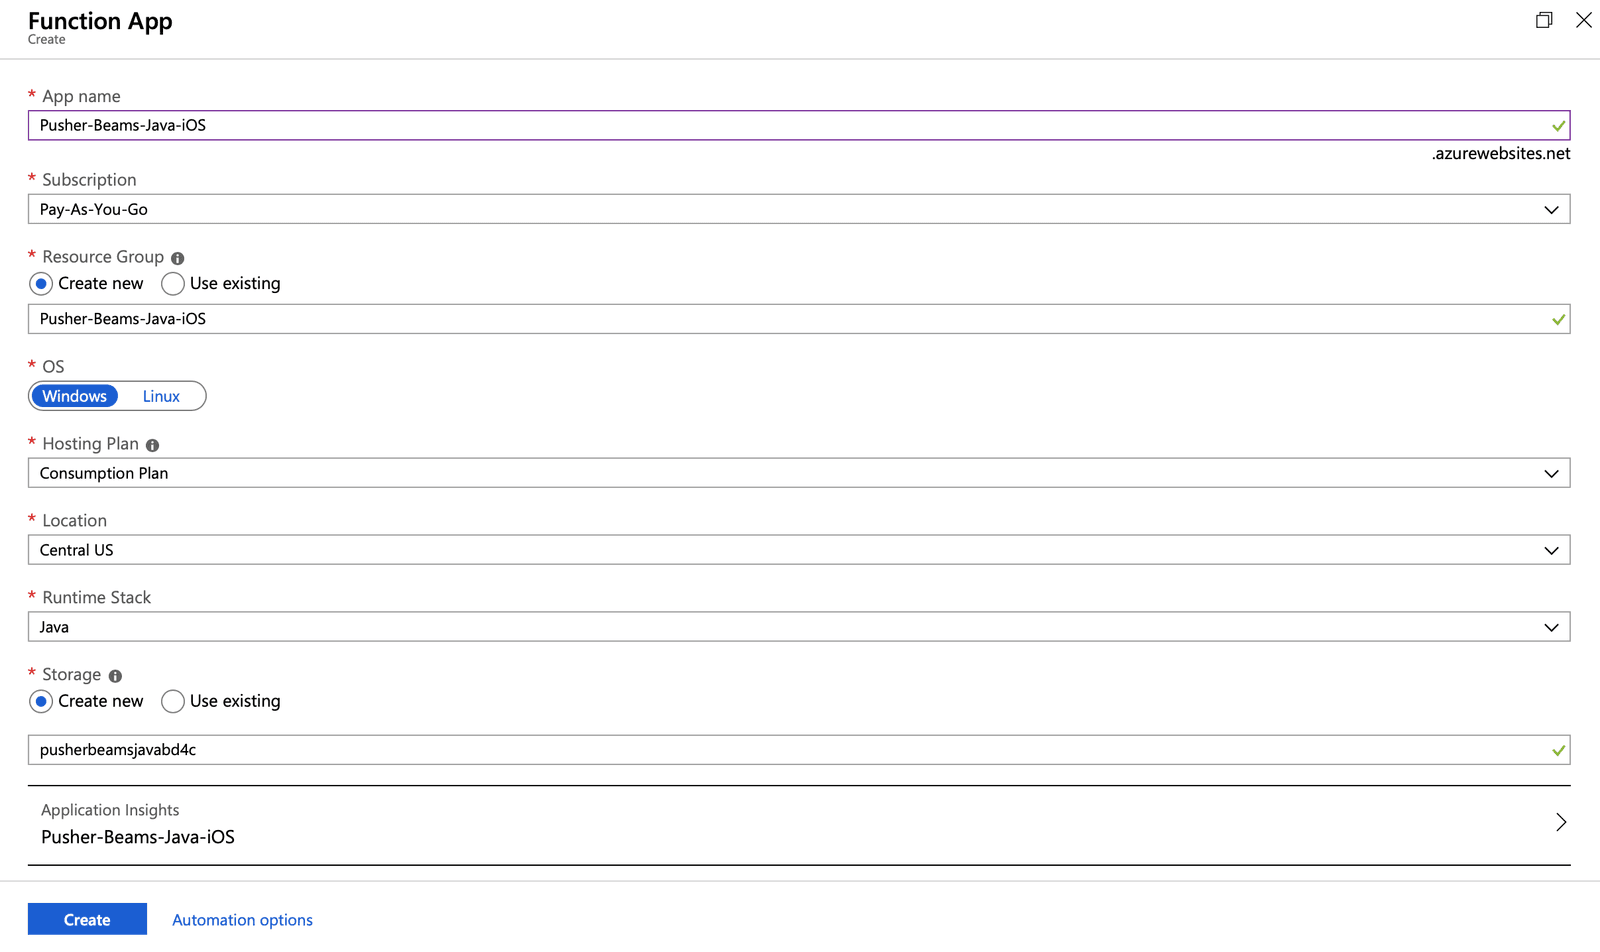
Once you are on the function app page click Add to begin the process of adding a new Azure Function. You will need to give your app a name, this must be unique and you cannot use full stops. Try reverse domain naming like this: com-example-appname. I have used PusherBeams-Java-iOS. As long as the radio buttons are set to Create new, entering a name should also auto complete the resource group and storage. If it hasn’t you should complete these fields as well.
Select your Subscription and Hosting Plan. If you’re unsure what these should be leave them as the default values.
We will also be using Windows OS for this tutorial and our location will be set to Central US. However feel free to alter the location if the Java run time is available there as well. Make sure your Runtime Stack is set to Java and click Create.
Once your resource has been created you should receive a notification on the navigation bar. If you don’t see this, wait a couple of minutes and refresh the page. Your resource should appear in a list of Function Apps. Select your resource.
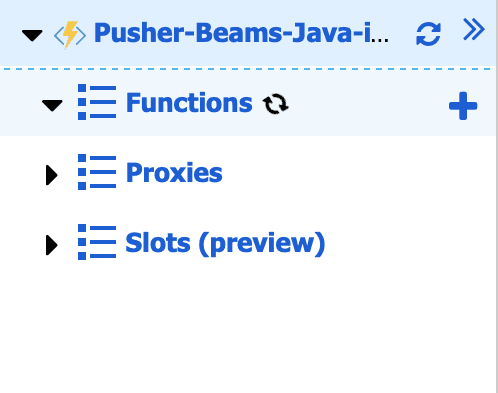
Now you have created a Function App you need to create a Function. On the overview page select the button New Function or from the side bar click on the + the is next to the Functions (Read Only) drop down.
You will be given a selection of ways to build your function, select the Visual Code option and click Continue. On the next page select the Direct Publish option and click Continue. Follow the instructions on the next page for installing and setting up for Visual Code, the Azure command line tools and the Azure Functions extension for Visual Studio Code. Make sure you have signed in to your Azure account in Visual Studio Code before continuing.

Before you continue you will need to install maven by running the following in terminal:
$ brew install maven
With Visual Code Studio open open the command palette (View → Command Palette), select Create New Project. When prompted provide an empty directory for your project and select the language to be Java. Provide a group ID using a reverse domain name naming method. Complete the remaining steps as appropriate (you can just accept the default values).
Azure functions make it easy to invoke your code by hitting an HTTP endpoint. This is great for push notifications, as you can hit this endpoint using our HTTP rest client and passing in our message. You will see more of this later when you test your integration. For now all you need to know is that the default implementation will set this up for you.
Note: There are lots of other templates available for invoking your function and you may wish to explore these as well. You can always invoke your function from the portal if you wish to.
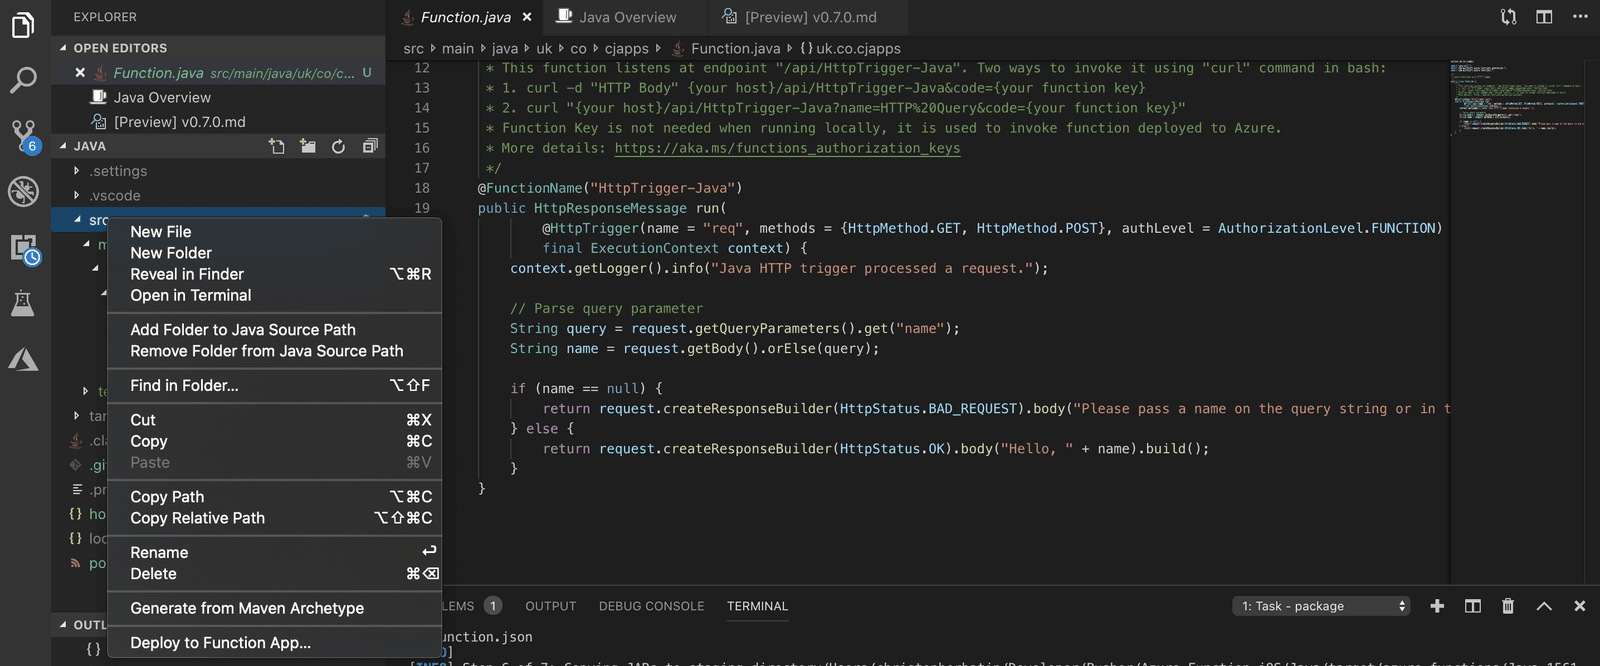
Once your project is setup you can deploy it straight from Visual Code, right click on the newly created src folder and select Deploy to Function App. Select the function app you created earlier for example Pusher-Beams-Java-iOS. This will complete the deployment process for you, you can confirm the success by checking the terminal output in Visual Code Studio and by refreshing your Azure Portal.
Writing our function
The first thing we need to do in our function is install our dependencies. Open your pom.xml file and add the following to your dependencies:
1// pom.xml 2 <dependencies> 3 // .... 4 <dependency> 5 <groupId>com.pusher</groupId> 6 <artifactId>push-notifications-server-java</artifactId> 7 <version>1.1.0</version> 8 </dependency> 9 // ... 10 </dependencies>
Note: If prompted you should synchronize your project. If you are not prompted you may need to install the maven extension for Visual Studio Code such that you can synchronise.
Now open your Function.java and replace the contents of the file with the following:
1// src/main/java/uk/co/cjapps/Function.java 2 package YOUR_PACKAGE_NAME; 3 4 import java.io.IOException; 5 import java.net.URISyntaxException; 6 import java.util.*; 7 import com.microsoft.azure.functions.annotation.*; 8 import com.pusher.pushnotifications.PushNotifications; 9 import com.microsoft.azure.functions.*; 10 public class Function { 11 @FunctionName("HttpTrigger-Java") 12 public HttpResponseMessage run(@HttpTrigger(name = "req", methods = { HttpMethod.GET, 13 HttpMethod.POST }, authLevel = AuthorizationLevel.FUNCTION) HttpRequestMessage<Optional<Notification>> request, 14 final ExecutionContext context) { 15 String instanceId = "YOUR_INSTANCE_ID"; 16 String secretKey = "YOUR_SECRET_KEY"; 17 final Notification body = request.getBody().get(); 18 if (body == null) { 19 return request.createResponseBuilder(HttpStatus.BAD_REQUEST) 20 .body("Please pass a string or in the request body").build(); 21 } 22 PushNotifications beamsClient = new PushNotifications(instanceId, secretKey); 23 List<String> interests = Arrays.asList("hello"); 24 Map<String, Map> publishRequest = new HashMap(); 25 Map<String, String> alertMessage = new HashMap(); 26 alertMessage.put("title", body.getTitle()); 27 alertMessage.put("body", body.getMessage()); 28 Map<String, Map> alert = new HashMap(); 29 alert.put("alert", alertMessage); 30 Map<String, Map> aps = new HashMap(); 31 aps.put("aps", alert); 32 publishRequest.put("apns", aps); 33 try { 34 beamsClient.publishToInterests(interests, publishRequest); 35 return request.createResponseBuilder(HttpStatus.OK).body("Push Sent").build(); 36 } catch (IOException e) { 37 e.printStackTrace(); 38 return request.createResponseBuilder(HttpStatus.INTERNAL_SERVER_ERROR).body("Push Failed").build(); 39 } catch (InterruptedException e) { 40 e.printStackTrace(); 41 return request.createResponseBuilder(HttpStatus.INTERNAL_SERVER_ERROR).body("Push Failed").build(); 42 } catch (URISyntaxException e) { 43 e.printStackTrace(); 44 return request.createResponseBuilder(HttpStatus.INTERNAL_SERVER_ERROR).body("Push Failed").build(); 45 } 46 } 47 }
This code will be used by our Azure function later on to publish notifications to devices that our registered for the hello interest. We retrieve the title and message from the request body before creating an object that the Pusher Beams library can use to publish our push notification. Remember to replace YOUR_INSTANCE_ID and YOUR_SECRET_KEY with the credentials from your Pusher Beams console. The above code has used an object Notification, this object is used to decode the request body.
Create a new file called Notification.java and add the following to fix the compiler warnings:
1// src/main/java/uk/co/cjapps/Notification.java 2 package YOUR_PACKAGE_NAME; 3 public class Notification { 4 private String title; 5 private String message; 6 7 public Notification(String title, String message) { 8 this.title = title; 9 this.message = message; 10 } 11 12 public String getTitle() { 13 return title; 14 } 15 16 public String getMessage() { 17 return message; 18 } 19 20 @Override 21 public String toString() { 22 return "Notification={title=" + title + ",message=" + message + "}"; 23 } 24 }
Next we need to comment out the auto-generated test case that Visual Studio Code has made for us. Go to FunctionTest.java and comment out the file. Alternatively you could get the test to pass if you wish.
Now we can deploy the correct code to, make sure you have saved all your files and deploy your code as you did before. Alternatively you can use the command palette and the Deploy to Function App command.
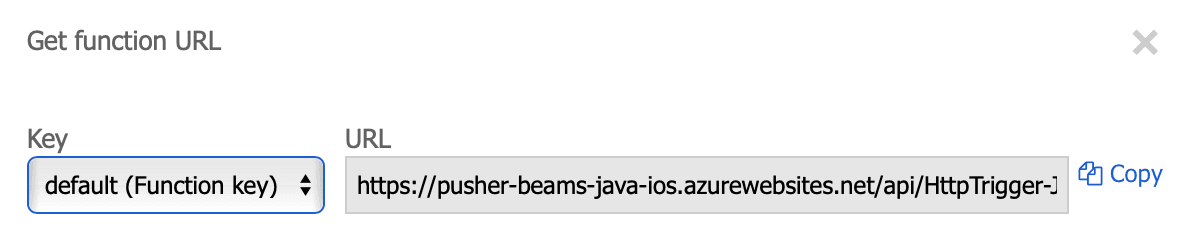
Return to your Azure Portal and your function app, select the HttpTrigger-Java (it may be named differently for you if you used a custom setup earlier in this tutorial) within the Functions dropdown. At the top of your text editor you should see a Get function URL button, click this and copy the URL for the default (Function key) and keep it somewhere safe. You will need it for testing your integration later on.
Create your iOS application
Now that we have created our Azure function, we need to have a user that has actually registered for notifications and signed up for the hello interest so we can test out our implementation. We’re going to create a very basic app that doesn’t actually show anything to the user except for the notification on the lock screen.
Project setup
Create a new Single View App using Xcode and name it something like AzurePush. Once the project is created we need to install the Beams SDK. Open the terminal and go to the working directory of the newly created project and run the following command.
$ pod init
Open the newly created Podfile and add the following pod:
pod 'PushNotifications', '2.0.0'
In the terminal run:
$ pod install
Make sure you close your Xcode project and reopen the newly created Xcode Workspace before continuing. Within your project capabilities make sure you have switched on the Push Notifications capability. Also turn on the Background Modes capability and tick the box for Remote Notifications.
Open your AppDelegate.swift file and replace its contents with the following. Remembering to replace the instance ID with your own.
1// AppDelegate.swift
2 import UIKit
3 import PushNotifications
4
5 @UIApplicationMain
6 class AppDelegate: UIResponder, UIApplicationDelegate {
7 var window: UIWindow?
8 let pushNotifications = PushNotifications.shared
9
10 func application(_ application: UIApplication, didFinishLaunchingWithOptions launchOptions: [UIApplication.LaunchOptionsKey: Any]?) -> Bool {
11 self.pushNotifications.start(instanceId: "YOUR_INSTANCE_ID")
12 self.pushNotifications.registerForRemoteNotifications()
13 try? self.pushNotifications.addDeviceInterest(interest: "hello")
14
15 return true
16 }
17
18 func application(_ application: UIApplication, didRegisterForRemoteNotificationsWithDeviceToken deviceToken: Data) {
19 self.pushNotifications.registerDeviceToken(deviceToken)
20 }
21
22 func application(_ application: UIApplication, didReceiveRemoteNotification userInfo: [AnyHashable: Any], fetchCompletionHandler completionHandler: @escaping (UIBackgroundFetchResult) -> Void) {
23 self.pushNotifications.handleNotification(userInfo: userInfo)
24 }
25 }
You can now run the application on your iOS device and accept to receive notifications. The SDK will then manage registering our interest in hello. Remember to replace YOUR_INSTANCE_ID with your instance ID credential from your Pusher Beams console.
Testing our implementation
Open your Postman HTTP rest client and create a new POST request. Add the function URL, that you got from your Azure function earlier, to the URL field. This URL contains a secret key for invoking your function, anybody with this key could potentially invoke your function so you should not share it within the public domain. Within the body of the post request add the following:
1{ 2 "title": "hello", 3 "message": "Just a friendly hello" 4 }
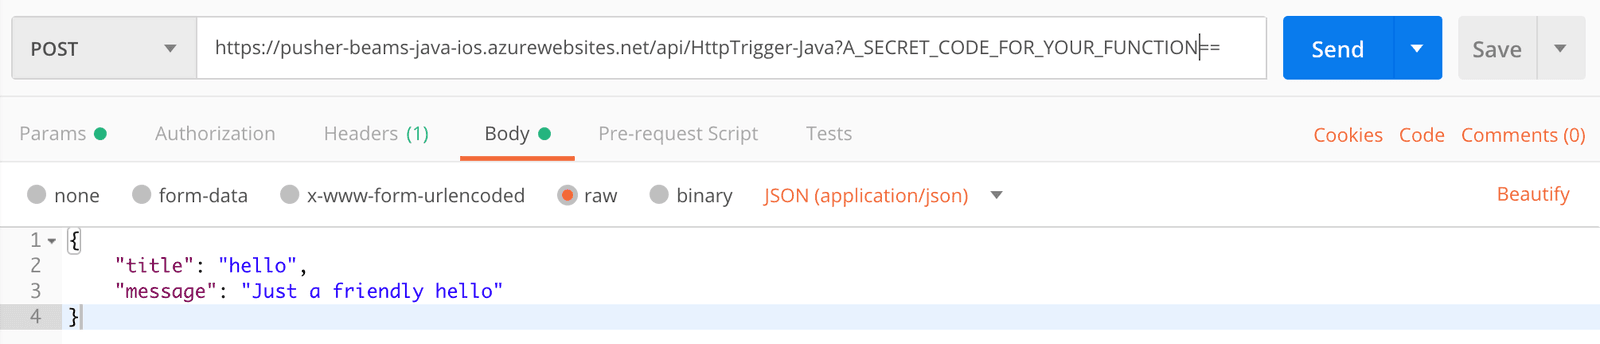
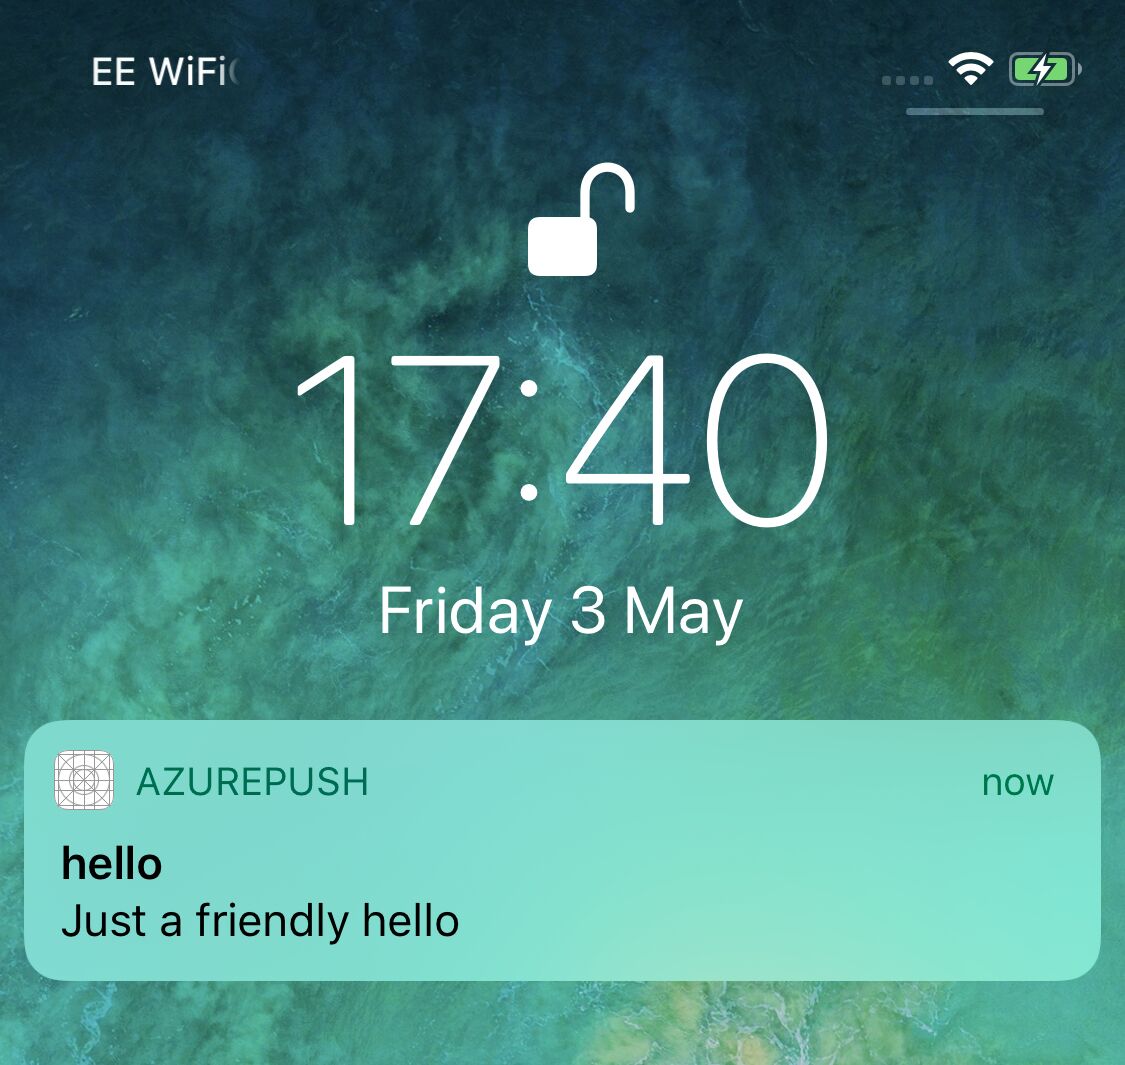
Once you are done press the Send button at the bottom. If everything has worked as expected you should receive a push to your device.
Conclusion
We’ve learnt how to create an Azure function using Java that can publish a push notification using Pusher Beams to an iOS device. The source code for this tutorial can be found here.


© 2026 Pusher Ltd. All rights reserved.
Pusher Limited is a company registered in England and Wales (No. 07489873) whose registered office is at MessageBird UK Limited, 3 More London Riverside, 4th Floor, London, United Kingdom, SE1 2AQ.