- Products

- Developers
- User stories
- Blog
- Pricing

Authentication in Vue using Vuex
- Introduction
- Introduction
- Prerequisites
- Setting up the application modules
- Install and configure Axios
- Setting up the server for authentication
- Define the authentication route
- Set up the database and config
- Set up components for the application
- The Login component
- The Register component
- The secure component
- Update the base component
- Building out the auth module
- Set up Vuex actions
- Login action
- Register action
- Logout action
- Defining the mutations
- Create the getters
- Defining routes for authenticated and unauthenticated pages
- Handling unauthorized access cases
- Running the application
- Test the application
- Conclusion
Introduction
Introduction
Authentication is one of the most important parts of any modern application, especially ones built with JavaScript. To successfully achieve this, there are numerous options available to developers when building web applications that involves protected routes.
The simplest option will be to set a unique token for each user in a localStorage. This means, whenever you need to access the user’s token or any other important user data for authentication purposes, we will need to fetch the token over and over again.
To handle this properly and ensure the we don’t have to reach out to the localStorage all the time, we need to persist the required data and easily access it whenever we want to. This will ensure that we have a centralized location for all our important data.
In this tutorial, we will be exploring the usage of Vuex to manage authentications within a Vue application.
Prerequisites
A knowledge of JavaScript and Vue is required for this tutorial. Also ensure that you have Node.js (version 8.9 or above) and Vue CLI 3.0 installed on your machine. If you have the previous versions of vue-cli installed globally already, kindly follow the installation guide here to upgrade to the latest version.
Setting up the application modules
Run the command below to begin the setup of our application:
$ vue create vuex-auth-jwt
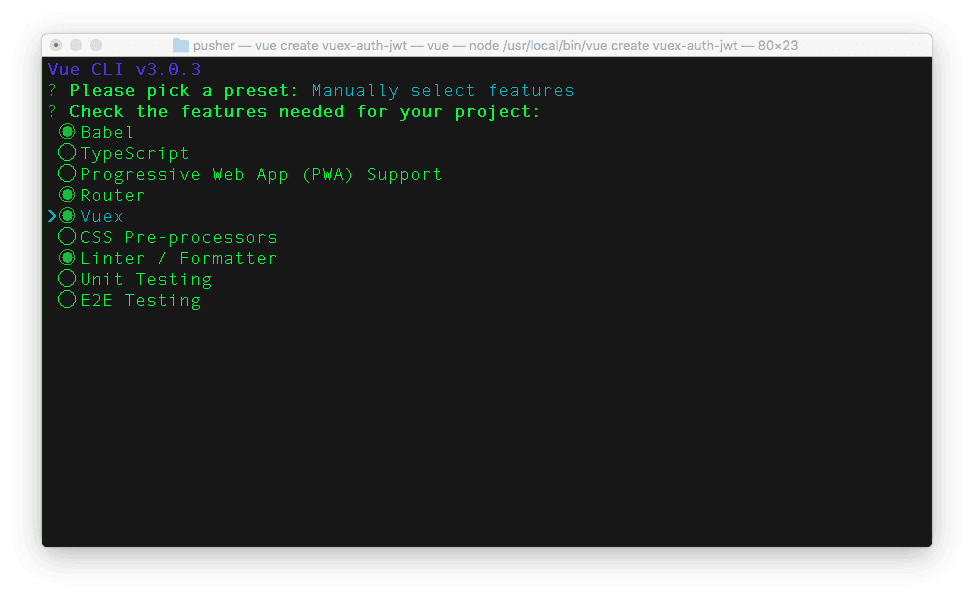
Choose the “manually select features” options and check the features we will need for this project by pressing space on your computer to select one. As shown below I have selected Babel, Router, Vuex and Linter / Formatter. You can skip this selection process and have them installed later but to get started easily, I will advise you select them:
For other instructions, type y to use history mode for router, this will ensure that history mode is enable within the router file that will automatically be generated for our project. In addition, select ESLint with error prevention only in order to pick a linter / formatter config. Next, select Lint on save for additional lint features and save your configuration in a dedicated config files for future projects. Type a name for your preset, I named mine vuerc:
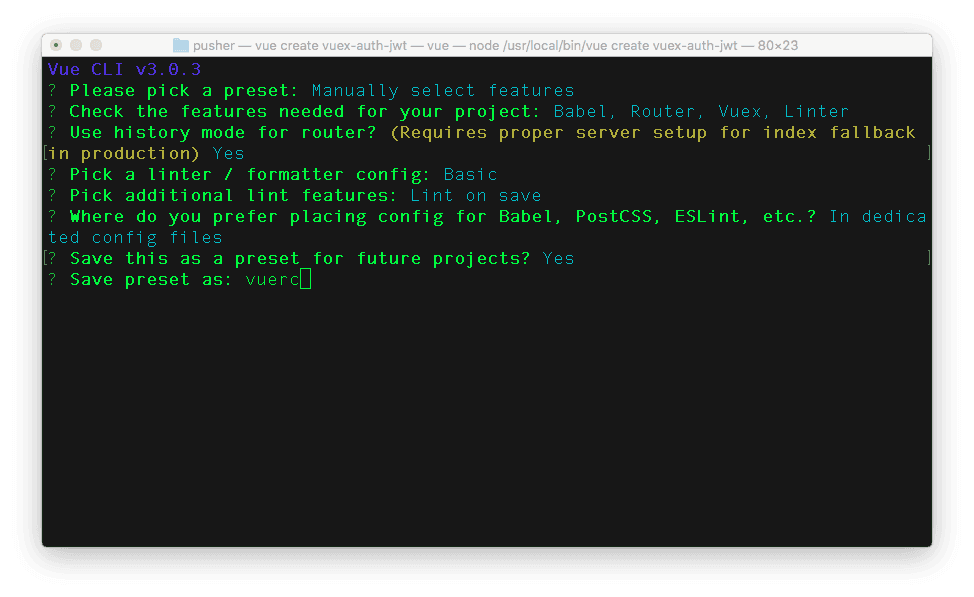
Finally, hit enter to continue the installation process:

With this option, the Vue-CLI will automatically set up the store for Vuex and configure a file for router as well.
Install and configure Axios
We will need to perform HTTP requests within our application, for this, we will install axios. Open up the terminal and run the command below from your project directory:
$ npm install axios --save
In addition, it is certain that we will be making use of axios across many of the components that will be created for our application, it will be preferable to import it once at the entry level and easily use it anywhere. Open the ./src/main.js file and update it with the content below:
1// ./src/main.js 2 ... 3 import Axios from 'axios' 4 5 Vue.prototype.$http = Axios; 6 const token = localStorage.getItem('token'); 7 if (token) { 8 Vue.prototype.$http.defaults.headers.common['Authorization'] = token 9 } 10 11 ...
A major benefit of the setup above is that it makes it very easy for us to call axios directly inside any of our application’s components by simply using this.$http. We also proceeded to set up Authorization header with a token that will be sent with our requests if required.
Setting up the server for authentication
Next, we will set up a Node.js server for authentication. For this server, we will use SQLite as the database of choice for this tutorial. To install SQLite driver and other required dependencies for our server, run the command below:
$ npm install --save sqlite3 bcryptjs jsonwebtoken body-parser
A quick look at some of the newly installed dependency:
- sqlite3: asynchronous, non-blocking SQLite3 bindings for Node.js.
- bcryptjs: a library to help hash passwords for users
- jsonwebtoken: a JSON Web Tokens package to manage user’s authentication
- body-parser: a package to help read the json data send to our server.
Once the installation is completed, then it’s time for us to proceed and create the Node.js server that will handle user authentication as mentioned earlier. Within the root folder of your project directory, create a new folder named server and create a JavaScript file called app.js inside of it. This is where configuration takes place to import the required libraries to easily set up our server.
Now open the newly created file and add the following:
1// ./server/app.js 2 3 "use strict"; 4 const express = require('express'); 5 const DB = require('./db'); 6 const config = require('./config'); 7 const bcrypt = require('bcryptjs'); 8 const jwt = require('jsonwebtoken'); 9 const bodyParser = require('body-parser'); 10 const db = new DB("sqlitedb") 11 const app = express(); 12 const router = express.Router(); 13 router.use(bodyParser.urlencoded({ extended: false })); 14 router.use(bodyParser.json()); 15 16 // CORS middleware 17 const enableCrossDomain = function (req, res, next) { 18 res.header('Access-Control-Allow-Origin', '*'); 19 res.header('Access-Control-Allow-Methods', '*'); 20 res.header('Access-Control-Allow-Headers', '*'); 21 next(); 22 } 23 app.use(enableCrossDomain)
What we have done in the file above is to require all the necessary packages for our server to run effectively as stated initially. A close look at the file again, you will notice that we are also requiring a database file DB and configuration file config. We will create these files in a bit.
Lastly, we went further to set up a simple CORS middleware within a function named enableCrossDomain. This is to ensure that any cross origin resource errors are taken care of.
Define the authentication route
Next, we will define the route for registering a new user and also a login route to authenticate whenever the user comes back to log in. To begin, go back to the ./server/app.js file and include the code below immediately after the CORS middleware configuration:
1// ./server/app.js 2 3 ... 4 router.post('/register', function (req, res) { 5 db.insert([ 6 req.body.name, 7 req.body.email, 8 bcrypt.hashSync(req.body.password, 8) 9 ], 10 function (err) { 11 if (err) return res.status(500).send("There was a problem registering the user.") 12 db.selectByEmail(req.body.email, (err, user) => { 13 if (err) return res.status(500).send("There was a problem getting user") 14 let token = jwt.sign({ id: user.id }, config.secret, { 15 expiresIn: 86400 // expires in 24 hours 16 }); 17 res.status(200).send({ auth: true, token: token, user: user }); 18 }); 19 }); 20 });
The content above is used to define the route for registering a new user. Here, we passed the request body to the insert method with our database class that will be created in the next section. We added a callback function to handle responses and provide accurate information of an authenticated user.
After successfully registering a user, we used email, since it will be configured as a unique field later in the tutorial to retrieve the user data and create an authentication token for the user by using the jwt packaged installed via npm earlier. We also used a secret key to verify a token sent to the server to uniquely identify a user. The configuration file for the secret key will be created soon.
Next, we will define the login route. Paste the content below within the app.js file right after the already configured /register route:
1// ./server/app.js 2 3 router.post('/login', (req, res) => { 4 db.selectByEmail(req.body.email, (err, user) => { 5 if (err) return res.status(500).send('Error on the server.'); 6 if (!user) return res.status(404).send('No user found.'); 7 let passwordIsValid = bcrypt.compareSync(req.body.password, user.password); 8 if (!passwordIsValid) return res.status(401).send({ auth: false, token: null }); 9 let token = jwt.sign({ id: user.id }, config.secret, { 10 expiresIn: 86400 // expires in 24 hours 11 }); 12 res.status(200).send({ auth: true, token: token, user: user }); 13 }); 14 })
We basically received the request body containing the email and password of a user during the login process. We used bcrypt to easily compare the hashed password during registration with the supplied password and log the user in if there is a match, else we will throw an error.
Next, add the content below to complete the setting up process of the server:
1// ./server/app.js 2 3 ... 4 app.use(router) 5 let port = process.env.PORT || 3000; 6 let server = app.listen(port, function () { 7 console.log('Server listening on port ' + port) 8 });
With the content above, our server will be available on port:3000. Now, we are done setting up our simple Node.js server.
Set up the database and config
Remember we made reference to a configuration and database file earlier? First, to set up the configuration file, create a new file in the same server directory and call it config.js. Add the following contents to it:
1// ./server/config.js 2 3 module.exports = { 4 'secret': 'applicationsecret' 5 };
Finally, create another file for the database within the server directory called db.js and use the following content:
1// ./server/db.js 2 3 "use strict"; 4 const sqlite3 = require('sqlite3').verbose(); 5 class Db { 6 constructor(file) { 7 this.db = new sqlite3.Database(file); 8 this.createTable() 9 } 10 createTable() { 11 const sql = ` 12 CREATE TABLE IF NOT EXISTS userAuth ( 13 id integer PRIMARY KEY, 14 name text, 15 email text UNIQUE, 16 password text)` 17 return this.db.run(sql); 18 } 19 selectByEmail(email, callback) { 20 return this.db.get( 21 `SELECT * FROM userAuth WHERE email = ?`, 22 [email], function (err, row) { 23 callback(err, row) 24 }) 25 } 26 insert(user, callback) { 27 return this.db.run( 28 'INSERT INTO userAuth (name,email,password) VALUES (?,?,?)', 29 user, (err) => { 30 callback(err) 31 }) 32 } 33 } 34 module.exports = Db
Here, we created a database class with methods like:
createTable(): to create a table nameduserAuthfor the usersselectByEmail(): to fetch user’s data from the databaseinsert(): to insert user’s data into the database during the registration process
In case you missed any of the steps above, check here for the complete app.js file.
Set up components for the application
Now that we are done setting up the server, let’s create the required components for the application. First, locate the src/components folder and create a new folder named auth inside of it. This newly created folder will house both the Login and Register components.
The Login component
Create a new file Login.vue within the ./src/components/auth directory and add the content below:
1// ./src/components/auth/Login.vue 2 3 <template> 4 <div> 5 <form class="login" @submit.prevent="login"> 6 <h1>Sign in</h1> 7 <label>Email</label> 8 <input required v-model="email" type="email" placeholder="Name"/> 9 <label>Password</label> 10 <input required v-model="password" type="password" placeholder="Password"/> 11 <hr/> 12 <button type="submit">Login</button> 13 </form> 14 </div> 15 </template> 16 <script> 17 export default { 18 data() { 19 return { 20 email: "", 21 password: "" 22 }; 23 }, 24 methods: { 25 login: function() { 26 let email = this.email; 27 let password = this.password; 28 this.$store 29 .dispatch("login", { email, password }) 30 .then(() => this.$router.push("/")) 31 .catch(err => console.log(err)); 32 } 33 } 34 }; 35 </script>
Here, in the <template> section we created the required fields to log in a user and within the <script>, we added the data attributes that will bind to the HTML form. Lastly, we included a method to handle the login process. We are using a Vuex action named login to handle this authentication. We will set this up later.
The Register component
Next, let’s create a component for registering users. To do this, create a new file Register.vue in the .src/components/auth folder and add the following to it:
1// ./src/components/auth/Register.vue 2 3 <template> 4 <div> 5 <h4>Register</h4> 6 <form @submit.prevent="register"> 7 <label for="name">Name</label> 8 <div> 9 <input id="name" type="text" v-model="name" required autofocus> 10 </div> 11 <label for="email" >E-Mail Address</label> 12 <div> 13 <input id="email" type="email" v-model="email" required> 14 </div> 15 <label for="password">Password</label> 16 <div> 17 <input id="password" type="password" v-model="password" required> 18 </div> 19 <label for="password-confirm">Confirm Password</label> 20 <div> 21 <input id="password-confirm" type="password" v-model="password_confirmation" required> 22 </div> 23 <div> 24 <button type="submit">Register</button> 25 </div> 26 </form> 27 </div> 28 </template> 29 <script> 30 export default { 31 data() { 32 return { 33 name: "", 34 email: "", 35 password: "", 36 password_confirmation: "", 37 }; 38 }, 39 methods: { 40 register: function() { 41 let data = { 42 name: this.name, 43 email: this.email, 44 password: this.password, 45 }; 46 this.$store 47 .dispatch("register", data) 48 .then(() => this.$router.push("/")) 49 .catch(err => console.log(err)); 50 } 51 } 52 }; 53 </script>
Similar to the Login component, we created a form with the required fields to register a user and set up a method to handle the registration process within the <script> section. We also used a Vuex action named register.
The secure component
One of the main objectives of this application is to give a user access to a particular protected resource once they are authenticated. Let’s create this secured resource page.
To start, create a new folder named resources within the components folder and then create a new file called Resources.vue within it. Open Resources.vue and paste the content below in it:
1// ./src/components/resources/Resources.vue 2 <template> 3 <div> 4 <h1>Protected resource page </h1> 5 </div> 6 </template>
Update the base component
Open ./src/App.vue file and update it with the content <template> below:
1// ./src/App.vue
2
3 <template>
4 <div id="app">
5 <div id="nav">
6 <router-link to="/">Home</router-link> |
7 <router-link to="/about">About</router-link>
8 <span v-if="isLoggedIn"> | <a @click="logout">Logout</a></span>
9 <span v-else> | <router-link to="/login">Login</router-link></span>
10 </div>
11 <router-view/>
12 </div>
13 </template>
We included a Logout method to check if a user is logged in. Paste the code below after the <template> to include the logout() method:
1// ./src/App.vue 2 3 <script> 4 export default { 5 computed: { 6 isLoggedIn: function() { 7 return this.$store.getters.isLoggedIn; 8 } 9 }, 10 methods: { 11 logout: function() { 12 this.$store.dispatch("logout").then(() => { 13 this.$router.push("/login"); 14 }); 15 } 16 } 17 }; 18 </script>
Once a user clicks on the logout link, we dispatched a logout action to our vuex store and send the user to login page using this.$router.push('/login').
Building out the auth module
There are four things that go into a Vuex module: the initial state, getters, mutations and actions. We will set this up for our store. To begin, open store.js file and paste the code below in it:
1// ./src/store.js 2 3 import Vue from 'vue' 4 import Vuex from 'vuex' 5 import axios from 'axios' 6 7 Vue.use(Vuex) 8 export default new Vuex.Store({ 9 state: { 10 status: '', 11 token: localStorage.getItem('token') || '', 12 user: {} 13 }, 14 mutations: { 15 }, 16 actions: { 17 }, 18 getters: { 19 } 20 })
Here, we imported Vue, Vuex and axios and set the initial state for the authentication status, token and user information.
Set up Vuex actions
Our application is a minimal one and we only require to set up three different actions. They are login, register, and logout. Actions in Vuex provides us with a way of committing mutations to the vuex store. Go back to the store.js file and update the actions with:
1// ./src/store.js 2 3 actions: { 4 login({ commit }, user) { 5 return new Promise((resolve, reject) => { 6 commit('auth_request') 7 axios({ url: 'http://localhost:3000/login', data: user, method: 'POST' }) 8 .then(resp => { 9 const token = resp.data.token 10 const user = resp.data.user 11 localStorage.setItem('token', token) 12 // Add the following line: 13 axios.defaults.headers.common['Authorization'] = token 14 commit('auth_success', token, user) 15 resolve(resp) 16 }) 17 .catch(err => { 18 commit('auth_error') 19 localStorage.removeItem('token') 20 reject(err) 21 }) 22 }) 23 }, 24 register({ commit }, user) { 25 return new Promise((resolve, reject) => { 26 commit('auth_request') 27 axios({ url: 'http://localhost:3000/register', data: user, method: 'POST' }) 28 .then(resp => { 29 const token = resp.data.token 30 const user = resp.data.user 31 localStorage.setItem('token', token) 32 // Add the following line: 33 axios.defaults.headers.common['Authorization'] = token 34 commit('auth_success', token, user) 35 resolve(resp) 36 }) 37 .catch(err => { 38 commit('auth_error', err) 39 localStorage.removeItem('token') 40 reject(err) 41 }) 42 }) 43 }, 44 logout({ commit }) { 45 return new Promise((resolve, reject) => { 46 commit('logout') 47 localStorage.removeItem('token') 48 delete axios.defaults.headers.common['Authorization'] 49 resolve() 50 }) 51 } 52 }
Login action
The login action will be used to authenticate a user before logging in into the application and then commit the user’s credentials to the Vuex store.
Within this action object, we made a call to the server’s login route and return the necessary data. We then store the token in local storage and then pass the token and user data to auth_success to update the store’s attributes. Saving the token within the local storage instead of Vuex store will help to ensure that the user will still be logged in for as long as the token is still within the validity time.
Register action
Similar to the Login action, the will get the data of a user into our application and set a unique token in the local storage.
Logout action
After all the activity within our application, the user needs to be able to logout and have all the data created during the authenticated session destroyed. Once a user clicks on the logout link, we will remove the token we stored earlier.
Defining the mutations
Next, we will define mutators that will be used to change the state of data within the Vuex store. In the mutations object, add the following content:
1// ./src/store.js 2 auth_request(state) { 3 state.status = 'loading' 4 }, 5 auth_success(state, token, user) { 6 state.status = 'success' 7 state.token = token 8 state.user = user 9 }, 10 auth_error(state) { 11 state.status = 'error' 12 }, 13 logout(state) { 14 state.status = '' 15 state.token = '' 16 },
Create the getters
We will also add getters to get the value of the attributes of vuex state. Still within the ./src/store.js add the content below to the getters object:
1./src/store.js 2 3 isLoggedIn: state => !!state.token, 4 authStatus: state => state.status,
Defining routes for authenticated and unauthenticated pages
As pointed out earlier, we intend to hide certain resources or pages from an unauthenticated user. For this, we will use vue-router to control the access of a user to a protected route. Once the user is authenticated we will give them access to a protected page and then redirect unauthenticated users back to the login page. Open the ./src/router.js file and import all the required component as shown below:
1// ./src/router.js 2 3 import Vue from 'vue' 4 import Router from 'vue-router' 5 import store from './store.js' 6 import Home from './views/Home.vue' 7 import About from './views/About.vue' 8 import Login from './components/auth/Login.vue' 9 import Register from './components/auth/Register.vue' 10 import Resource from './components/resources/Resources.vue' 11 Vue.use(Router) 12 let router = new Router({ 13 mode: 'history', 14 routes: [ 15 { 16 path: '/', 17 name: 'home', 18 component: Home 19 }, 20 { 21 path: '/login', 22 name: 'login', 23 component: Login 24 }, 25 { 26 path: '/register', 27 name: 'register', 28 component: Register 29 }, 30 { 31 path: '/resources', 32 name: 'resources', 33 component: Resource, 34 meta: { 35 requiresAuth: true 36 } 37 }, 38 { 39 path: '/about', 40 name: 'about', 41 component: About, 42 } 43 ] 44 }) 45 export default router
We imported all the required components and then proceeded to define routes for the application. The only route requiring authentication here is the route that points to the page we want to protect. That is why we had to add a meta attribute to the route definition. If an unauthenticated user hits the /resources endpoint, he or she will be redirected back to the Login component.
We will set up the requiresAuth meta in the next section.
Handling unauthorized access cases
To check for unauthorized access, add the code below within the router.js file just before the export default router:
1// ./src/router.js 2 3 ... 4 router.beforeEach((to, from, next) => { 5 if (to.matched.some(record => record.meta.requiresAuth)) { 6 if (store.getters.isLoggedIn) { 7 next() 8 return 9 } 10 next('/login') 11 } else { 12 next() 13 } 14 }) 15 ...
Running the application
Lastly, to test the application, run the command below to start the Vue application:
$ npm run serve
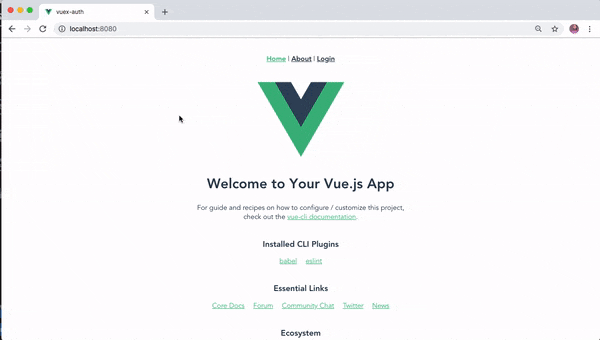
This will start the development server for Vue on http://localhost:8080/, open that in your favorite browser to view the application.
And next, start the Node.js server in another terminal with:
$ node server/app
This will print out a message to the console Server listening on port 3000;
Test the application
Now, if you navigate to the endpoint for our protected page http://localhost:8080/resources, you will be redirected to the login page as you have not been authenticated yet:
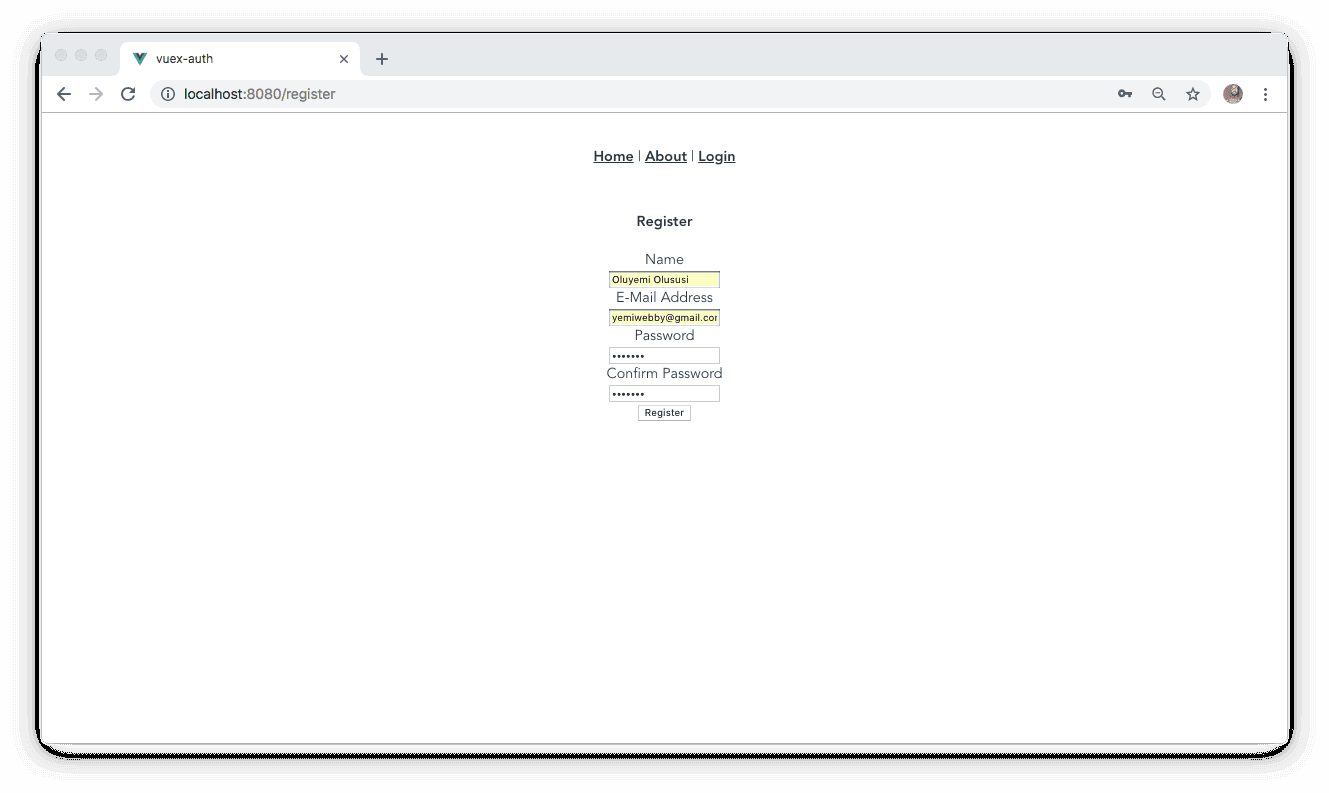
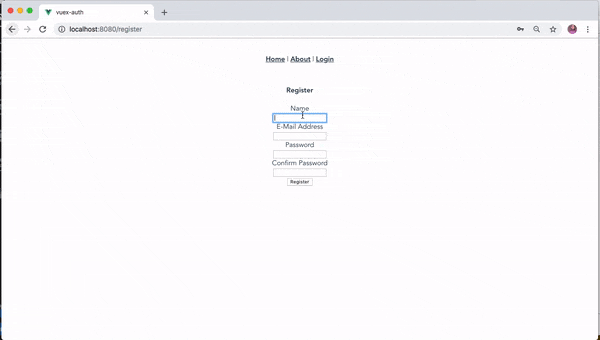
Proceed to the registration page http://localhost:8080/register and provide your details.
Once you are done, try to access the protected page again:
Conclusion
In this tutorial, we were able to learn how to use Vuex to manage authentication within our application. We were also able to set up a protected route that only authenticated users can have access to and redirect any unauthenticated user to a login page.
I hope you found this post helpful. Find the complete source code here on GitHub.


© 2026 Pusher Ltd. All rights reserved.
Pusher Limited is a company registered in England and Wales (No. 07489873) whose registered office is at MessageBird UK Limited, 3 More London Riverside, 4th Floor, London, United Kingdom, SE1 2AQ.