- Products

- Developers
- User stories
- Blog
- Pricing

Handling authentication in React Native using Okta
Introduction
While building applications, authentication is usually a very important aspect because this is how you identify every user and it can sometimes be tedious. This problem is what Authentication Service Providers solve. They provide authentication and user management services for applications and sometimes easily configurable functionalities such as the login, log out, social media integration and they support authentication protocols such as OpenID Connect and SMAL.
Okta (formerly Stormpath)
Okta recently gained Stormpath and a couple of things have changed. Stormpath API was shut down fully in August 2017. Okta is a third party authentication provider that adds authentication, authorization, and user management to your web or mobile app within minutes. Okta provides token authentication, single sign-on, multi-factor authentication, and social logins.
Okta account setup
To get started with using Okta, create an account on the registration page and if you’ve already got an account, log in. After login, see a screen similar to this.
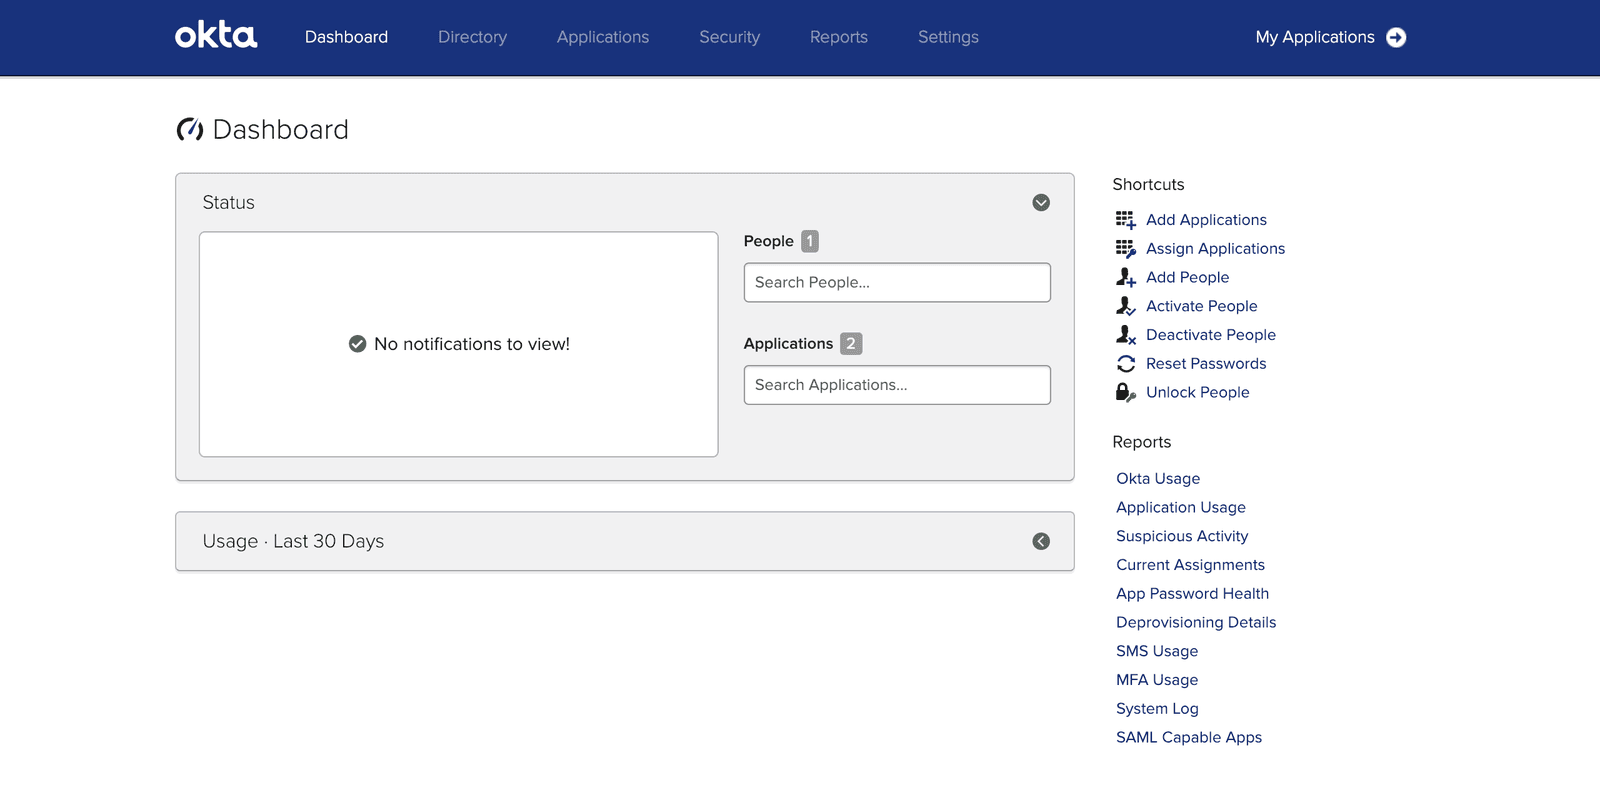
After login is successful, we need to add an application and then configure the app. To add an application, navigate through Shortcut > Add Application > Create new app. Then select Native apps from the drop-down and click create This will take you to a Create OpenID Connect Integration page. See image below for an example:
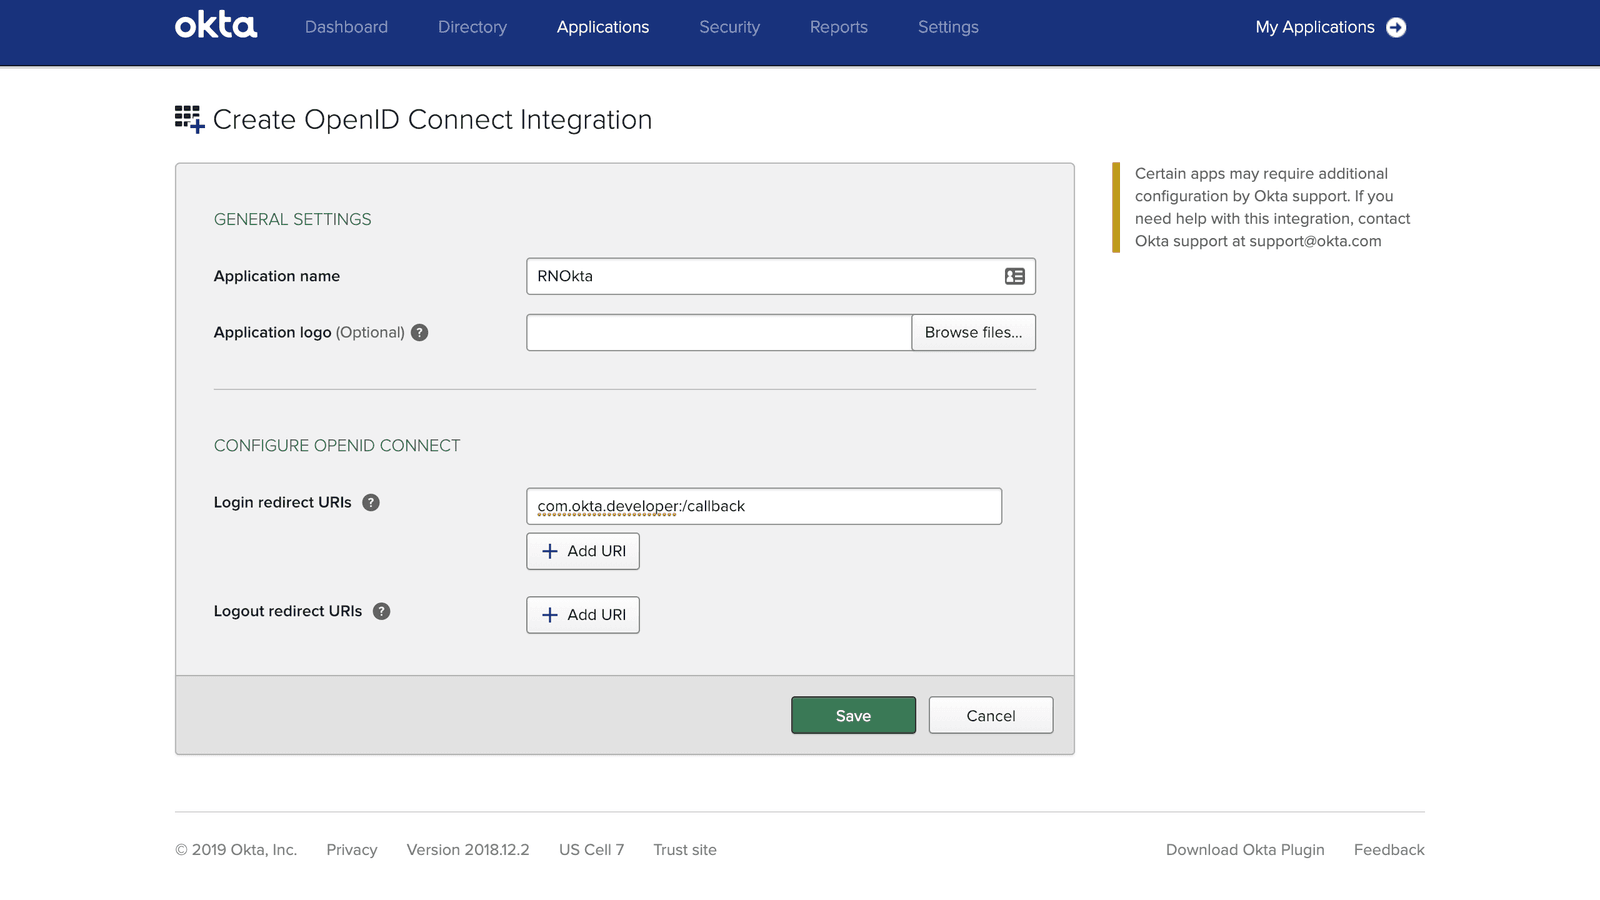
Replace developer in the redirect URI with your Okta account company name and then save.
You will need the ClientID and the redirect_uri when setting up our React Native app.
Project setup
To set up our React Native application
$ react-native init react_native_okta_app
This will initialize our project. To be sure everything went well, build the app:
$ react-native run-ios
For Android, we run:
$ react-native run-android
Install dependencies
1$ npm install react-native-app-auth --save 2 $ react-native link
Setup for iOS
Navigate to the iOS folder.
sudo gem install cocoapods
Then create a Podfile and paste
1platform :ios, '11.0' 2 3 target 'react_native_okta_app' do 4 pod 'AppAuth', '>= 0.95' 5 end
Run pod install. If you encounter any error, run pod repo update.
If there are no errors, open the react_native_okta_app.xcworkspace and edit the AppDelegate.h file.
1#import <UIKit/UIKit.h> 2 #import "RNAppAuthAuthorizationFlowManager.h" 3 4 @interface AppDelegate : UIResponder <UIApplicationDelegate, RNAppAuthAuthorizationFlowManager> 5 6 @property (nonatomic, weak) id<RNAppAuthAuthorizationFlowManagerDelegate>authorizationFlowManagerDelegate; 7 8 @property (nonatomic, strong) UIWindow *window; 9 10 @end
Setup for Android
To get started on Android devices, from the project root directory, navigate to the android directory and upgrade Gradle to the latest version
1$ cd android 2 $ ./gradlew wrapper --gradle-version 4.10.2
If you get an error that says: "compile" is obsolete and has been replaced with "implementation", you must edit the app/src/build.gradle file and make the change under the react-native-app-auth dependency:
1dependencies { 2 implementation project(':react-native-app-auth') 3 ... 4 }
We also need to add appAuthRedirectScheme to the defaultConfig section.
1defaultConfig { 2 ... 3 manifestPlaceholders = [ 4 appAuthRedirectScheme: '{yourOktaCompanyUsername}' 5 ] 6 }
Save the changes and run Android react-native run-android
Build the React Native app
We’ll split our application into components. to get started, we need to install styled-components in order to style our application.
We also need a background image for our application. Save your image of choice in a folder called assets. I will be using the stock image available here.
1$ npm install styled-components --save 2 $ mkdir assets/
Create a new folder called components, create the following files inside the folder:
$ touch index.js Header.js Button.js ButtonContainer.js Page.js Form.js
Replace the contents of the files above with the following:
1// /components/index.js 2 export { default as Button } from './Button'; 3 export { default as ButtonContainer } from './ButtonContainer'; 4 export { default as Form } from './Form'; 5 export { default as Header } from './Header'; 6 export { default as Page } from './Page';
1// /components/Header.js 2 import { Platform } from 'react-native'; 3 import styled from 'styled-components/native'; 4 5 export default styled.Text` 6 color: white; 7 font-size: 32px; 8 margin-top: 120px; 9 background-color: transparent; 10 text-align: center; 11 `;
1// /components/Button.js 2 3 import React, { Component } from 'react'; 4 import { Platform } from 'react-native'; 5 import styled from 'styled-components/native'; 6 7 type Props = { 8 text: string, 9 color: string, 10 onPress: () => any 11 }; 12 13 const ButtonBox = styled.TouchableOpacity.attrs({ activeOpacity: 0.8 })` 14 height: 50px; 15 flex: 1; 16 margin: 5px; 17 align-items: center; 18 justify-content: center; 19 background-color: ${props => props.color}; 20 `; 21 22 const ButtonText = styled.Text` 23 color: white; 24 `; 25 26 const Button = ({ text, color, onPress }: Props) => ( 27 <ButtonBox onPress={onPress} color={color}> 28 <ButtonText>{text}</ButtonText> 29 </ButtonBox> 30 ); 31 32 export default Button; 33 34 35 // /components/ButtonContainer.js 36 import styled from 'styled-components/native'; 37 const ButtonContainer = styled.View` 38 position: absolute; 39 left: 0; 40 right: 0; 41 bottom: 0; 42 align-self: flex-end; 43 flex-direction: row; 44 margin: 5px; 45 `; 46 export default ButtonContainer;
1// /components/Page.js 2 import styled from 'styled-components/native'; 3 4 export default styled.ImageBackground.attrs({ 5 source: require('../assets/image1.jpeg') 6 })` 7 flex: 1; 8 background-color: white; 9 padding: 40px 10px 10px 10px; 10 `;
1// /components/Form.js 2 import styled from 'styled-components/native'; 3 4 const Form = styled.View` 5 flex: 1; 6 `; 7 8 Form.Label = styled.Text` 9 font-size: 14px; 10 font-weight: bold; 11 background-color: transparent; 12 margin-bottom: 10px; 13 `; 14 15 Form.Value = styled.Text.attrs({ numberOfLines: 10, ellipsizeMode: 'tail' })` 16 font-size: 14px; 17 background-color: transparent; 18 margin-bottom: 20px; 19 `; 20 21 export default Form;
The components created above, are all exported and can be accessed in our app.js file.
Import all dependencies and components
Let us replace the import statements in our app.js file with this:
1// App.js 2 import React, { Component } from 'react'; 3 import { Alert, UIManager, LayoutAnimation } from 'react-native'; 4 import { authorize, refresh, revoke } from 'react-native-app-auth'; 5 import { Page, Button, ButtonContainer, Form, Heading } from './components';
Then we need to define some properties in our state object:
1type State = { 2 hasLoggedInOnce: boolean, 3 accessToken: ?string, 4 accessTokenExpirationDate: ?string, 5 refreshToken: ?string 6 };
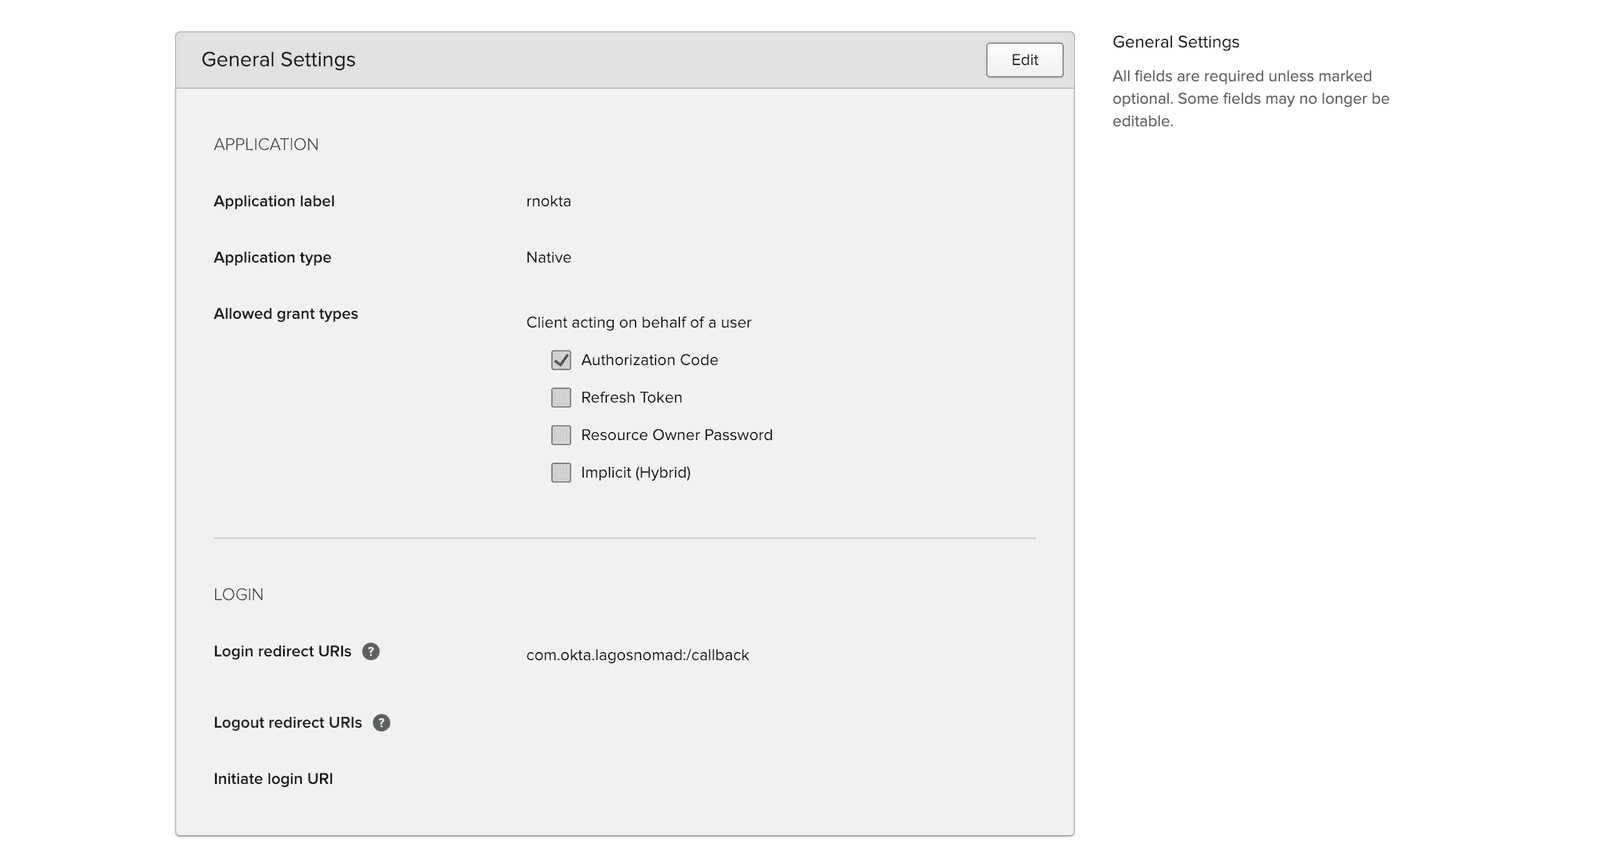
The most important part is where we define our config object to be used for Okta authentication. You will need your issuer, clientId, redirectUrl, and so on, and they all can be gotten from your Okta application dashboard:
1const config = { 2 issuer: 'https://<oktausername>.okta.com', 3 clientId: '<your okta application client ID>', 4 redirectUrl: 'com.okta.<oktausername>:/callback', 5 serviceConfiguration: { 6 authorizationEndpoint: 'https://<oktausername>.okta.com/oauth2/v1/authorize', 7 tokenEndpoint: 'https://<oktausername>.okta.com/oauth2/v1/token', 8 registrationEndpoint: 'https://<oktausername>.okta.com/oauth2/v1/clients' 9 }, 10 additionalParameters: { 11 prompt: 'login' 12 }, 13 scopes: ['openid', 'profile', 'email', 'offline_access'] 14 };
We need to create our authorize function to enable users to log in and also create functions to refresh our authentication token or revoke it.
1authorize = async () => { 2 try { 3 const authState = await authorize(config); 4 this.animateState( 5 { 6 hasLoggedInOnce: true, 7 accessToken: authState.accessToken, 8 accessTokenExpirationDate: authState.accessTokenExpirationDate, 9 refreshToken: authState.refreshToken 10 }, 11 500 12 ); 13 } catch (error) { 14 Alert.alert('Failed to log in', error.message); 15 } 16 }; 17 refresh = async () => { 18 try { 19 const authState = await refresh(config, { 20 refreshToken: this.state.refreshToken 21 }); 22 this.animateState({ 23 accessToken: authState.accessToken || this.state.accessToken, 24 accessTokenExpirationDate: 25 authState.accessTokenExpirationDate || this.state.accessTokenExpirationDate, 26 refreshToken: authState.refreshToken || this.state.refreshToken 27 }); 28 } catch (error) { 29 Alert.alert('Failed to refresh token', error.message); 30 } 31 }; 32 revoke = async () => { 33 try { 34 await revoke(config, { 35 tokenToRevoke: this.state.accessToken, 36 sendClientId: true 37 }); 38 this.animateState({ 39 accessToken: '', 40 accessTokenExpirationDate: '', 41 refreshToken: '' 42 }); 43 } catch (error) { 44 Alert.alert('Failed to revoke token', error.message); 45 } 46 };
In the authorize method, we pass the config object and try to fetch the access token, access token expiration date, and if there are errors, we'll send alert the user with a pop-up.
In the refresh method, we pass the config object and try to refresh the token. When an authentication token is refreshed, the expiration date is also refreshed alongside.
The revoke method deactivates a token. This means that the user will be required to log in again or refresh the token to get a new token.
To finally wrap up the code, when a user opens our application, we first need to check if the user has been logged in, before deciding what to render. If the user has logged in before, we display the token and expiration date, else a button for the user to authenticate from.
1render() { 2 const {state} = this; 3 return ( 4 <Page> 5 {!!state.accessToken ? ( 6 <Form> 7 <Form.Label>accessToken</Form.Label> 8 <Form.Value>{state.accessToken}</Form.Value> 9 <Form.Label>accessTokenExpirationDate</Form.Label> 10 <Form.Value>{state.accessTokenExpirationDate}</Form.Value> 11 <Form.Label>refreshToken</Form.Label> 12 <Form.Value>{state.refreshToken}</Form.Value> 13 </Form> 14 ) : ( 15 <Header>{state.hasLoggedInOnce ? 'Goodbye.' : 'Okta and React Native!'}</Header> 16 )} 17 18 <ButtonContainer> 19 {!state.accessToken && ( 20 <Button onPress={this.authorize} text="Login" color="#017CC0"/> 21 )} 22 {!!state.refreshToken && <Button onPress={this.refresh} text="Refresh" color="#24C2CB"/>} 23 {!!state.accessToken && <Button onPress={this.revoke} text="Revoke" color="#EF525B"/>} 24 </ButtonContainer> 25 </Page> 26 ); 27 }
Putting it all together, App.js should look like this:
1import React, { Component } from 'react'; 2 import { Alert, UIManager, LayoutAnimation } from 'react-native'; 3 import { authorize, refresh, revoke } from 'react-native-app-auth'; 4 import { Page, Button, ButtonContainer, Form, Header } from './components'; 5 6 UIManager.setLayoutAnimationEnabledExperimental && 7 UIManager.setLayoutAnimationEnabledExperimental(true); 8 9 type State = { 10 hasLoggedInOnce: boolean, 11 accessToken: ?string, 12 accessTokenExpirationDate: ?string, 13 refreshToken: ?string 14 }; 15 16 const config = { 17 issuer: 'https://<oktausername>.okta.com', 18 clientId: '<your okta application client ID>', 19 redirectUrl: 'com.okta.<oktausername>:/callback', 20 serviceConfiguration: { 21 authorizationEndpoint: 'https://<oktausername>.okta.com/oauth2/v1/authorize', 22 tokenEndpoint: 'https://<oktausername>.okta.com/oauth2/v1/token', 23 registrationEndpoint: 'https://<oktausername>.okta.com/oauth2/v1/clients' 24 }, 25 additionalParameters: { 26 prompt: 'login' 27 }, 28 scopes: ['openid', 'profile', 'email', 'offline_access'] 29 }; 30 31 export default class App extends Component<{}, State> { 32 state = { 33 hasLoggedInOnce: false, 34 accessToken: '', 35 accessTokenExpirationDate: '', 36 refreshToken: '' 37 }; 38 39 animateState(nextState: $Shape<State>, delay: number = 0) { 40 setTimeout(() => { 41 this.setState(() => { 42 LayoutAnimation.easeInEaseOut(); 43 return nextState; 44 }); 45 }, delay); 46 } 47 48 authorize = async () => { 49 try { 50 const authState = await authorize(config); 51 this.animateState( 52 { 53 hasLoggedInOnce: true, 54 accessToken: authState.accessToken, 55 accessTokenExpirationDate: authState.accessTokenExpirationDate, 56 refreshToken: authState.refreshToken 57 }, 58 500 59 ); 60 } catch (error) { 61 Alert.alert('Failed to log in', error.message); 62 } 63 }; 64 65 refresh = async () => { 66 try { 67 const authState = await refresh(config, { 68 refreshToken: this.state.refreshToken 69 }); 70 71 this.animateState({ 72 accessToken: authState.accessToken || this.state.accessToken, 73 accessTokenExpirationDate: 74 authState.accessTokenExpirationDate || this.state.accessTokenExpirationDate, 75 refreshToken: authState.refreshToken || this.state.refreshToken 76 }); 77 } catch (error) { 78 Alert.alert('Failed to refresh token', error.message); 79 } 80 }; 81 82 revoke = async () => { 83 try { 84 await revoke(config, { 85 tokenToRevoke: this.state.accessToken, 86 sendClientId: true 87 }); 88 this.animateState({ 89 accessToken: '', 90 accessTokenExpirationDate: '', 91 refreshToken: '' 92 }); 93 } catch (error) { 94 Alert.alert('Failed to revoke token', error.message); 95 } 96 }; 97 98 render() { 99 const {state} = this; 100 return ( 101 <Page> 102 {!!state.accessToken ? ( 103 <Form> 104 <Form.Label>accessToken</Form.Label> 105 <Form.Value>{state.accessToken}</Form.Value> 106 <Form.Label>accessTokenExpirationDate</Form.Label> 107 <Form.Value>{state.accessTokenExpirationDate}</Form.Value> 108 <Form.Label>refreshToken</Form.Label> 109 <Form.Value>{state.refreshToken}</Form.Value> 110 </Form> 111 ) : ( 112 <Header>{state.hasLoggedInOnce ? 'Goodbye.' : 'Okta and React Native!'}</Header> 113 )} 114 115 <ButtonContainer> 116 {!state.accessToken && ( 117 <Button onPress={this.authorize} text="Login" color="#017CC0"/> 118 )} 119 {!!state.refreshToken && <Button onPress={this.refresh} text="Refresh" color="#24C2CB"/>} 120 {!!state.accessToken && <Button onPress={this.revoke} text="Revoke" color="#EF525B"/>} 121 </ButtonContainer> 122 </Page> 123 ); 124 } 125 }
After receiving the access token, it can be used to send requests to your Okta based API to authenticate with clients.
Install on Android or iOS
To build for Android:
$ react-native run-android
To build for iOS:
$ react-native run-ios
On installation, your screen should be similar to the following:

Conclusion
With third-party authentication, we can easily build authentication into our applications and save time rather than build our own authentication system from scratch for every application every time. The code base to this tutorial is available in a public GitHub Repository. Feel free to experiment around with it.


© 2026 Pusher Ltd. All rights reserved.
Pusher Limited is a company registered in England and Wales (No. 07489873) whose registered office is at MessageBird UK Limited, 3 More London Riverside, 4th Floor, London, United Kingdom, SE1 2AQ.