- Products

- Developers
- User stories
- Blog
- Pricing

Build an Android poll app with push notifications
- Introduction
- Prerequisites
- Setting up your Android application
- Creating your Beams and Channels instance
- Setting up Pusher Channels
- Getting your FCM key
- Setting up Pusher Beams
- Building the Android application
- Adding our dependencies
- Developing the logic for our Android application
- Building your backend
- Conclusion
Introduction
The web has become so dynamic that it's weird to have to refresh anything anymore. We expect instant feedback from whatever application we are using and whatever action we are taking on the application.
Polls adopt realtime technologies to give the owners live updates. This has become a major feature in top social media platforms and it is most essential when you need to perform quick surveys. Popular services like Twitter have adopted polls as a part of their services and it works well to gather user sentiments and thoughts.
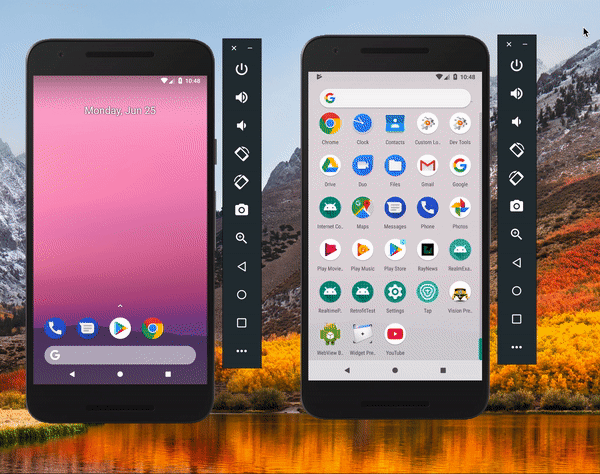
In this tutorial, you will learn how to build a realtime poll. We will be using Kotlin, Flask and Pusher Channels. By the time we are done, we will have an application that looks like this:
Prerequisites
In other to follow this tutorial, you need the following:
- Android Studio. Version >= 3.x is recommended. Download here.
- Flask - you will be guided on how to install it in the post.
- Virtualenv installed on your machine.
- Introductory knowledge of Kotlin. Here are some resources.
- Pusher Beams and Pusher Channels instance.
Setting up your Android application
Create a new project and follow the wizard to set it up. Name your app RealtimePolls. Enter your company‘s domain name. The company domain affects the package name. We will set the domain to com.example and the package name to com.example.realtimepolls.
Choose your minimum SDK. API 19 (Android 4.4) is just fine. Continue with the EmptyActivity template chosen for you, and finish the wizard.
Let’s stop here for now and set up our Pusher Beams and Channels application.
Creating your Beams and Channels instance
Setting up Pusher Channels
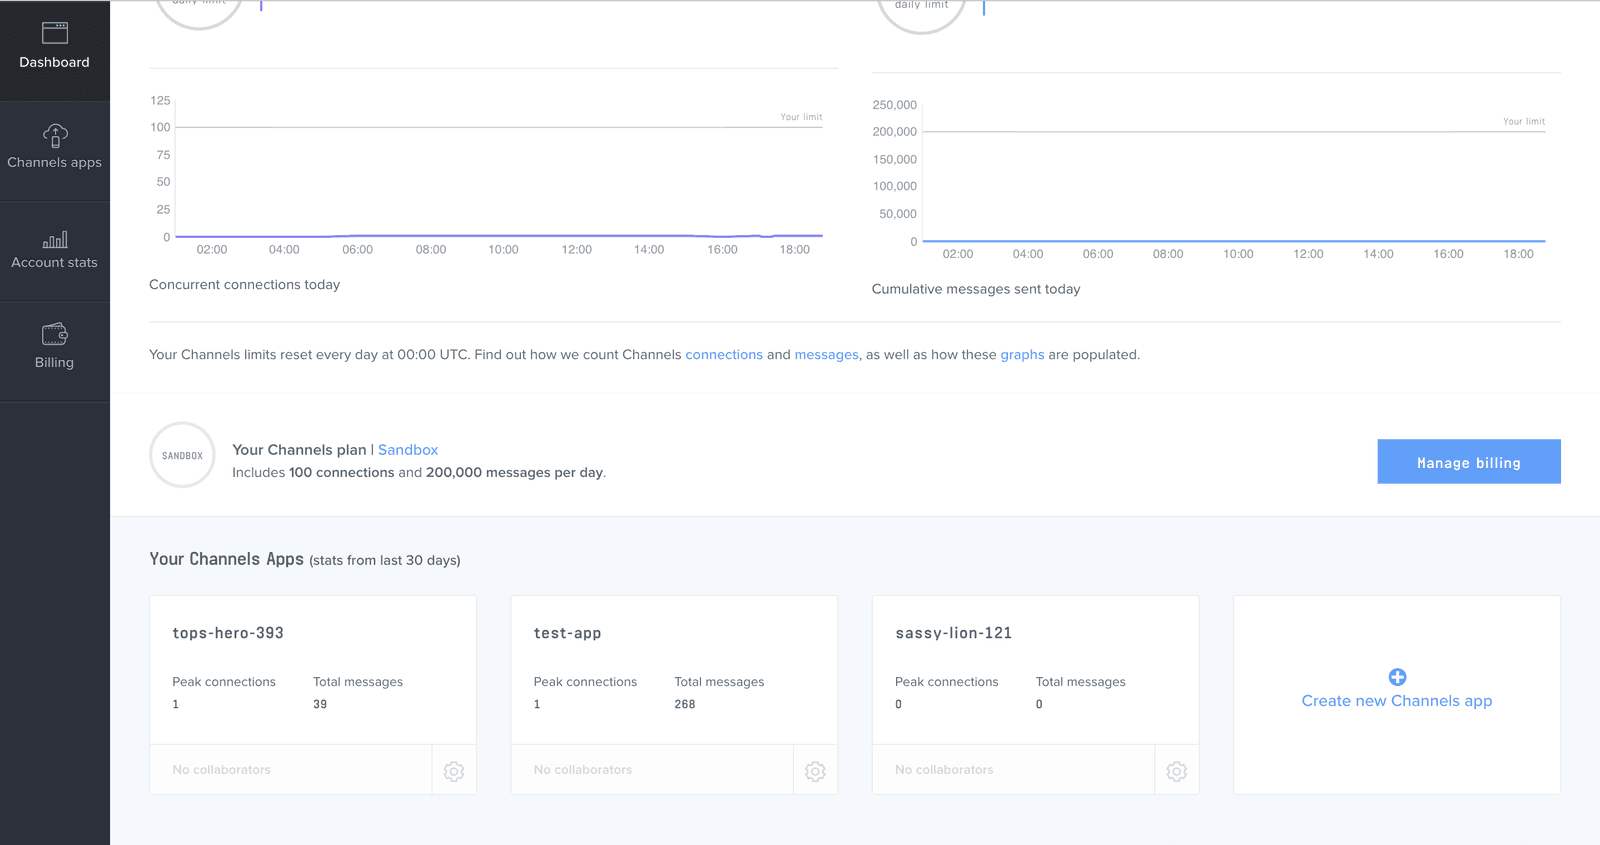
Log in to your Pusher dashboard. If you don’t have an account, create one. Your dashboard should look like this:
Create a new Channels app. You can easily do this by clicking the big Create new Channels app card at the bottom right. When you create a new app, you are provided with keys. Keep them safe as you will soon need them.
Getting your FCM key
Before you can start using Beams, you need an FCM key and a google-services file because Beams relies on Firebase. Go to your Firebase console and create a new project.
When you get to the console, click the Add project card to initialize the app creation wizard. Add the name of your project. Read and accept the terms of conditions. After this, you will be directed to the project overview screen. Choose the Add Firebase to your Android app option. The next screen will require the package name of your app.
An easy way to get the package name of your app is from your AndroidManifest.xml file. Check the <manifest> tag and copy the value of the package attribute. Another place you can find this is your app-module build.gradle file. Look out for the applicationId value. When you enter the package name and click Register app.
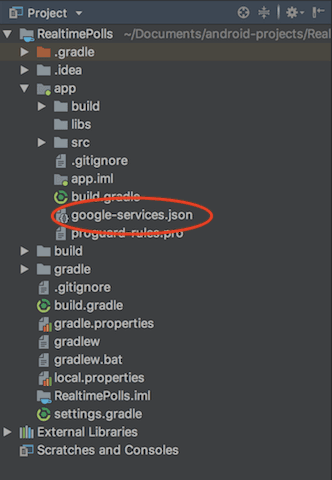
Next, download your google-services.json file. After you have downloaded the file, you can skip the rest of the process. Add the downloaded file to the app folder of your app RealtimePolls/app.
Next, go to your Firebase project settings, under the Cloud messaging tab, copy your server key.
Setting up Pusher Beams
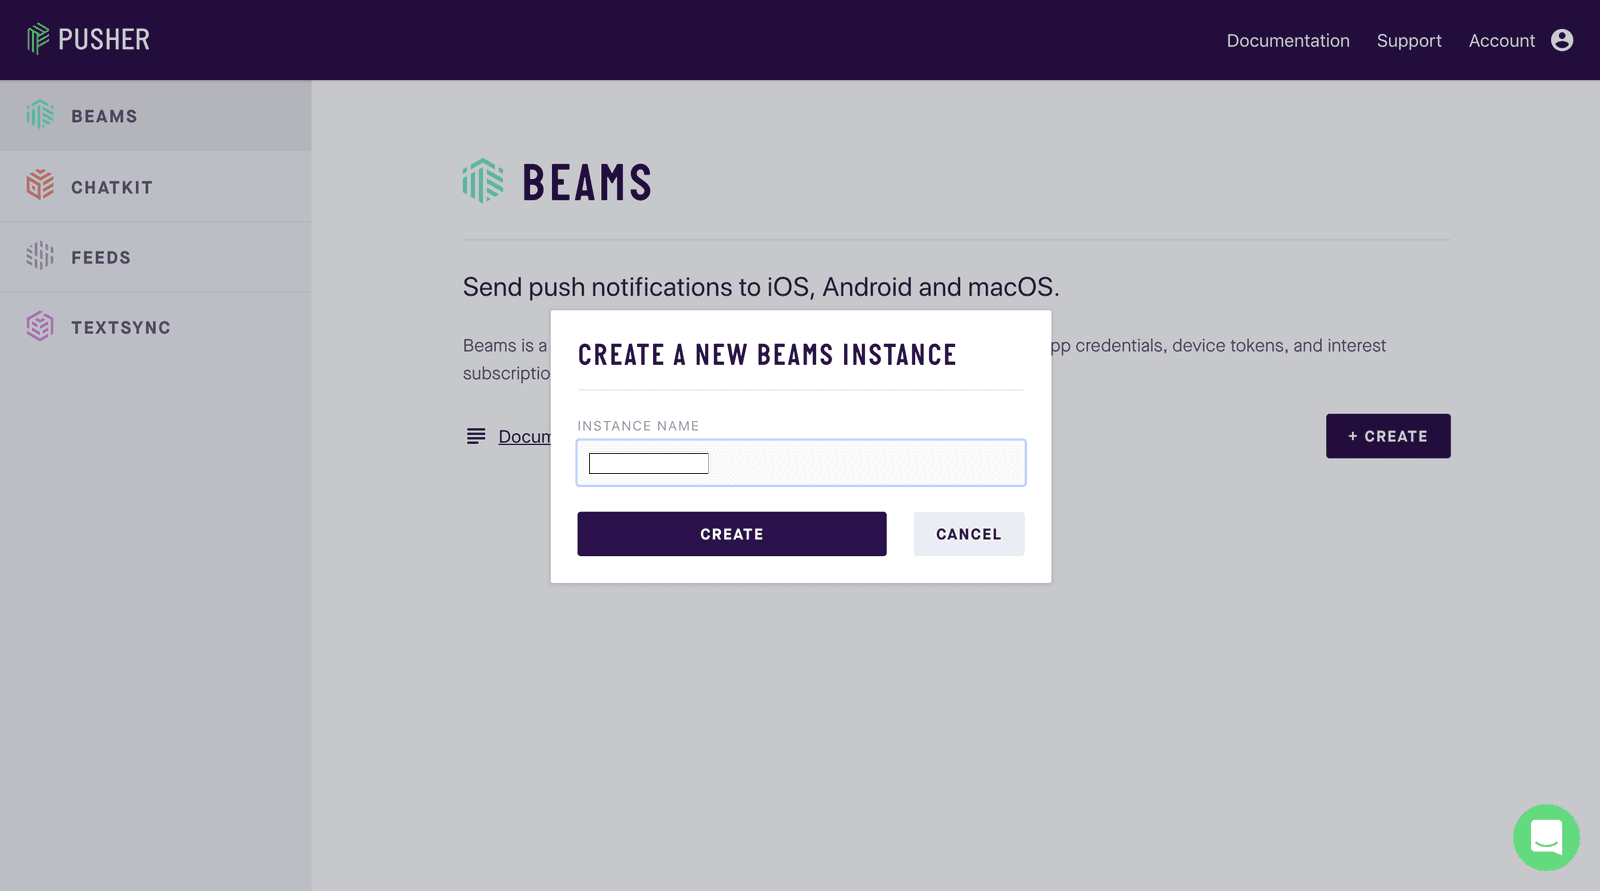
Next, log in to the new Pusher dashboard, in here we will create a Pusher Beams instance. You should sign up if you don’t have an account yet. Click on the Beams button on the sidebar then click Create, this will launch a pop up to Create a new Beams instance and give it a name.
As soon as you create the instance, you will be presented with a quickstart guide. Select the ANDROID quickstart

The next screen requires the FCM key you copied earlier. After you add the FCM key, you can exit the quickstart guide.
Building the Android application
Adding our dependencies
Reopen our project in Android Studio. The next thing we need to do is install the necessary dependencies for our app. Open your app-module build.gradle file and add these:
1// File: ./app/build.gradle 2 dependencies { 3 // other dependencies... 4 implementation 'com.pusher:pusher-java-client:1.5.0' 5 implementation 'com.google.firebase:firebase-messaging:17.0.0' 6 implementation 'com.pusher:push-notifications-android:0.10.0' 7 implementation 'com.pusher:pusher-java-client:1.5.0' 8 implementation "com.squareup.retrofit2:retrofit:2.4.0" 9 implementation "com.squareup.retrofit2:converter-scalars:2.4.0" 10 implementation "com.squareup.retrofit2:converter-gson:2.3.0" 11 } 12 apply plugin: 'com.google.gms.google-services'
And in the project build.gradle file add this:
1// File: ./build.gradle 2 dependencies { 3 // add other dependencies... 4 classpath 'com.google.gms:google-services:4.0.0' 5 }
After adding the dependencies, sync your Gradle files so that the dependencies are imported.
Developing the logic for our Android application
Pusher Beams makes use of a service to notify the app when there is a remote message. Create a new service named NotificationsMessagingService and paste this:
1// File: ./app/src/main/java/com/example/realtimepolls/NotificationsMessagingService.kt 2 import android.app.NotificationChannel 3 import android.app.NotificationManager 4 import android.app.PendingIntent 5 import android.content.Intent 6 import android.os.Build 7 import android.support.v4.app.NotificationCompat 8 import android.support.v4.app.NotificationManagerCompat 9 import com.google.firebase.messaging.RemoteMessage 10 import com.pusher.pushnotifications.fcm.MessagingService 11 12 class NotificationsMessagingService : MessagingService() { 13 14 override fun onMessageReceived(remoteMessage: RemoteMessage) { 15 val notificationId = 10 16 val channelId = "polls" 17 lateinit var channel:NotificationChannel 18 val intent = Intent(this, MainActivity::class.java) 19 intent.flags = Intent.FLAG_ACTIVITY_NEW_TASK or Intent.FLAG_ACTIVITY_CLEAR_TASK 20 val pendingIntent = PendingIntent.getActivity(this, 0, intent, 0) 21 val mBuilder = NotificationCompat.Builder(this, channelId) 22 .setSmallIcon(R.mipmap.ic_launcher) 23 .setContentTitle(remoteMessage.notification!!.title!!) 24 .setContentText(remoteMessage.notification!!.body!!) 25 .setContentIntent(pendingIntent) 26 .setPriority(NotificationCompat.PRIORITY_DEFAULT) 27 .setAutoCancel(true) 28 29 if (Build.VERSION.SDK_INT >= Build.VERSION_CODES.O) { 30 val notificationManager = applicationContext.getSystemService(NotificationManager::class.java) 31 val name = getString(R.string.channel_name) 32 val description = getString(R.string.channel_description) 33 val importance = NotificationManager.IMPORTANCE_DEFAULT 34 channel = NotificationChannel("world-cup", name, importance) 35 channel.description = description 36 notificationManager!!.createNotificationChannel(channel) 37 notificationManager.notify(notificationId, mBuilder.build()) 38 39 } else { 40 val notificationManager = NotificationManagerCompat.from(this) 41 notificationManager.notify(notificationId, mBuilder.build()) 42 } 43 } 44 }
The method onMessageReceived is called when a push notification is received on the device. The message received is then used to display a notification for the user.
Add the following to your string.xml file:
1// File: ./app/src/main/res/values/strings.xml 2 <string name="channel_name">Polls</string> 3 <string name="channel_description">To receive updates about polls</string>
Add the service to your AndroidManifest.xml file like so:
1// File: ./app/src/main/AndroidManifest.xml 2 <application 3 ...> 4 5 [...] 6 7 <service android:name=".NotificationsMessagingService"> 8 <intent-filter android:priority="1"> 9 <action android:name="com.google.firebase.MESSAGING_EVENT" /> 10 </intent-filter> 11 </service> 12 13 </application>
Create an interface named ApiService and paste the following:
1// File: ./app/src/main/java/com/example/realtimepolls/ApiService.kt 2 import okhttp3.RequestBody 3 import retrofit2.Call 4 import retrofit2.http.Body 5 import retrofit2.http.GET 6 import retrofit2.http.POST 7 8 interface ApiService { 9 10 @GET("/generate") 11 fun generatePolls(): Call<String> 12 13 @POST("/update") 14 fun updatePolls(@Body body: RequestBody):Call<String> 15 16 }
This interface contains the endpoints to be accessed during the course of this tutorial. There are two endpoints, the first one is to get the question and options from the server while the second is to send the option selected by the user to the server.
Since internet connection is required for some functionalities, you need to request for the internet permissions. Add this to your AndroidManifest.xml file:
1// File: ./app/src/main/AndroidManifest.xml 2 <manifest xmlns:android="http://schemas.android.com/apk/res/android" 3 package="com.example.realtimepolls"> 4 5 <uses-permission android:name="android.permission.INTERNET"/> 6 7 [...] 8 9 </manifest>
Next, let’s design the layout of the app. The app will contain radio buttons so as to ensure that only one option is chosen. Open your activity_main.xml file and paste this:
1// File: ./app/src/main/res/layout/activity_main.xml 2 <?xml version="1.0" encoding="utf-8"?> 3 <ScrollView xmlns:android="http://schemas.android.com/apk/res/android" 4 xmlns:app="http://schemas.android.com/apk/res-auto" 5 xmlns:tools="http://schemas.android.com/tools" 6 android:layout_width="match_parent" 7 android:layout_height="match_parent"> 8 9 <android.support.constraint.ConstraintLayout 10 android:layout_width="match_parent" 11 android:layout_height="wrap_content" 12 tools:context=".MainActivity"> 13 14 <TextView 15 android:id="@+id/poll_title" 16 android:layout_width="0dp" 17 android:layout_height="wrap_content" 18 android:layout_margin="10dp" 19 android:textSize="20sp" 20 app:layout_constraintLeft_toLeftOf="parent" 21 app:layout_constraintRight_toRightOf="parent" 22 app:layout_constraintTop_toTopOf="parent" /> 23 24 <RadioGroup xmlns:android="http://schemas.android.com/apk/res/android" 25 android:id="@+id/radio_group" 26 android:layout_width="wrap_content" 27 android:layout_height="wrap_content" 28 android:layout_margin="20dp" 29 android:orientation="vertical" 30 app:layout_constraintLeft_toLeftOf="parent" 31 app:layout_constraintTop_toBottomOf="@id/poll_title"> 32 33 <RadioButton 34 android:id="@+id/choice_1" 35 android:layout_width="wrap_content" 36 android:layout_height="wrap_content" /> 37 38 <android.support.v4.widget.ContentLoadingProgressBar 39 android:id="@+id/progress_choice_1" 40 style="@style/Base.Widget.AppCompat.ProgressBar.Horizontal" 41 android:layout_width="200dp" 42 android:layout_height="50dp" 43 android:layout_marginStart="10dp" 44 android:max="100" /> 45 46 <RadioButton 47 android:id="@+id/choice_2" 48 android:layout_width="wrap_content" 49 android:layout_height="wrap_content" /> 50 51 <android.support.v4.widget.ContentLoadingProgressBar 52 android:id="@+id/progress_choice_2" 53 style="@style/Base.Widget.AppCompat.ProgressBar.Horizontal" 54 android:layout_width="200dp" 55 android:layout_height="50dp" 56 android:layout_marginStart="10dp" 57 android:max="100" /> 58 59 <RadioButton 60 android:id="@+id/choice_3" 61 android:layout_width="wrap_content" 62 android:layout_height="wrap_content" /> 63 64 <android.support.v4.widget.ContentLoadingProgressBar 65 android:id="@+id/progress_choice_3" 66 style="@style/Base.Widget.AppCompat.ProgressBar.Horizontal" 67 android:layout_width="200dp" 68 android:layout_height="50dp" 69 android:layout_marginStart="10dp" 70 android:max="100" /> 71 72 </RadioGroup> 73 74 <Button 75 android:id="@+id/vote" 76 android:layout_width="match_parent" 77 android:layout_height="wrap_content" 78 android:layout_margin="10dp" 79 android:text="Vote" 80 android:textAllCaps="false" 81 app:layout_constraintLeft_toLeftOf="parent" 82 app:layout_constraintRight_toRightOf="parent" 83 app:layout_constraintTop_toBottomOf="@+id/radio_group" /> 84 85 </android.support.constraint.ConstraintLayout> 86 87 </ScrollView>
The layout contains radio buttons with a progress bar below each of them. The progress bar will give a visual feedback of the vote count.
Go to your MainActivity file and add this:
1// File: ./app/src/main/java/com/example/realtimepolls/MainActivity.kt 2 import android.os.Bundle 3 import android.util.Log 4 import android.widget.Toast 5 import android.support.v7.app.AppCompatActivity 6 import com.pusher.client.Pusher 7 import com.pusher.client.PusherOptions 8 import com.pusher.pushnotifications.PushNotifications 9 import kotlinx.android.synthetic.main.activity_main.* 10 import okhttp3.MediaType 11 import okhttp3.OkHttpClient 12 import okhttp3.RequestBody 13 import org.json.JSONObject 14 import retrofit2.Call 15 import retrofit2.Callback 16 import retrofit2.Response 17 import retrofit2.Retrofit 18 import retrofit2.converter.scalars.ScalarsConverterFactory 19 20 class MainActivity : AppCompatActivity() { 21 22 private val apiService: ApiService by lazy { 23 Retrofit.Builder() 24 .baseUrl("http://10.0.2.2:5000/") 25 .addConverterFactory(ScalarsConverterFactory.create()) 26 .client(OkHttpClient.Builder().build()) 27 .build().create(ApiService::class.java) 28 } 29 30 val tag = "MainActivity" 31 32 override fun onCreate(savedInstanceState: Bundle?) { 33 super.onCreate(savedInstanceState) 34 setContentView(R.layout.activity_main) 35 generatePolls() 36 setupPusher() 37 setupBeams() 38 setupClickListener() 39 } 40 }
Above, the class variables apiService and tag are declared. The first is to be used to make API calls to the local server while the second will be used for logging. In the onCreate method, there are some other custom methods called. Let’s create them.
First is the generatePolls method. Paste the function in your MainActivity class:
1private fun generatePolls() { 2 apiService.generatePolls().enqueue(object : Callback<String> { 3 override fun onFailure(call: Call<String>?, t: Throwable?) { 4 5 } 6 7 override fun onResponse(call: Call<String>?, response: Response<String>?) { 8 val jsonObject = JSONObject(response!!.body()) 9 poll_title.text = jsonObject.getString("title") 10 choice_1.text = jsonObject.getString("choice1") 11 choice_2.text = jsonObject.getString("choice2") 12 choice_3.text = jsonObject.getString("choice3") 13 } 14 }) 15 }
This method makes a network call to the server to get the poll question and options and populate the questions and options to the layout.
Next, is the setupPusher method. Add the following to the MainActivity class:
1private fun setupPusher() { 2 val options = PusherOptions() 3 options.setCluster(PUSHER_APP_CLUSTER) 4 val pusher = Pusher(PUSHER_API_KEY, options) 5 val channel = pusher.subscribe("polls") 6 7 channel.bind("vote") { channelName, eventName, data -> 8 Log.d(tag, data) 9 val jsonObject = JSONObject(data) 10 11 runOnUiThread { 12 progress_choice_1.progress = jsonObject.getInt("1") 13 progress_choice_2.progress = jsonObject.getInt("2") 14 progress_choice_3.progress = jsonObject.getInt("3") 15 } 16 } 17 18 pusher.connect() 19 }
Replace the
PUSHER_KEY_*placeholders with the keys from your Pusher Channels dashboard.
This method subscribes to the polls channel and listens to the vote event. Here, what is expected from the Pusher event is the score in percent of each option of the poll. The results are then populated to their respective progress-bars on the UI thread.
Next, create the setupBeams function and add it to the same class:
1private fun setupBeams() { 2 PushNotifications.start(applicationContext, "PUSHER_BEAMS_INSTANCE_ID") 3 PushNotifications.subscribe("polls-update") 4 }
This method above initializes Pusher Beams and subscribes to the polls-update event.
Replace
PUSHER_BEAMS_INSTANCE_IDwith the instance ID from your Beams dashboard.
Finally, create the setupClickListener and add it to the class:
1private fun setupClickListener() { 2 vote.setOnClickListener { 3 val checkedButton = radio_group.checkedRadioButtonId 4 if (checkedButton == -1) { 5 Toast.makeText(this, "Please select an option", Toast.LENGTH_SHORT).show() 6 } else { 7 Log.d(tag, checkedButton.toString()) 8 val selectedId = when (checkedButton) { 9 R.id.choice_1 -> 1 10 R.id.choice_2 -> 2 11 R.id.choice_3 -> 3 12 else -> -1 13 } 14 15 val jsonObject = JSONObject() 16 jsonObject.put("option", selectedId) 17 18 val body = RequestBody.create(MediaType.parse("application/json"), jsonObject.toString()) 19 20 apiService.updatePolls(body).enqueue(object : Callback<String> { 21 override fun onFailure(call: Call<String>?, t: Throwable?) { 22 Log.d(tag, t?.localizedMessage) 23 } 24 25 override fun onResponse(call: Call<String>?, response: Response<String>?) { 26 Log.d(tag, response?.body()) 27 } 28 }) 29 } 30 } 31 }
This method above contains the click listener added to the vote button. The user must choose an option for the vote to be recorded. Based on the choice of the user, a unique ID is sent to the server to update the poll and trigger a Pusher event.
That’s all for the Android application. Let’s build a simple Python backend.
Building your backend
Let’s create our project folder, and activate a virtual environment in it. Run the commands below:
1$ mkdir pypolls 2 $ cd pypolls 3 $ virtualenv .venv 4 $ source .venv/bin/activate # Linux based systems 5 $ \path\to\env\Scripts\activate # Windows users
Now that we have the virtual environment setup, we can install Flask within it with this command:
$ pip install flask
Next, run the following command to set the Flask environment to development (on Linux based machines):
$ export FLASK_ENV=development
If you are on Windows, the environment variable syntax depends on command line interpreter. On Command Prompt:
C:\path\to\app>set FLASK_APP=app.py
And on PowerShell:
PS C:\path\to\app> $env:FLASK_APP = "app.py"
Now we need to install some of the other dependencies:
1$ pip install pusher pusher_push_notifications 2 $ pip install --ignore-installed pyopenssl
When the installation is complete, create the main and only Python file called app.py and paste the following code:
1// File: ./app.py 2 # Imports 3 from flask import Flask, jsonify, request, json 4 from pusher import Pusher 5 from pusher_push_notifications import PushNotifications 6 7 app = Flask(__name__) 8 pn_client = PushNotifications( 9 instance_id='YOUR_INSTANCE_ID_HERE', 10 secret_key='YOUR_SECRET_KEY_HERE', 11 ) 12 13 pusher = Pusher(app_id=u'PUSHER_APP_ID', key=u'PUSHER_APP_KEY', secret=u'PUSHER_SECRET', cluster=u'PUSHER_CLUSTER') 14 15 # Variables to hold scores of polls 16 choice1 = 0 17 choice2 = 0 18 choice3 = 0 19 20 # Route to send poll question 21 @app.route('/generate') 22 def send_poll_details(): 23 return jsonify({'title':'Who will win the 2018 World Cup','choice1': 'Germany', 'choice2':'Brazil', 'choice3':'Spain'}) 24 25 @app.route('/update', methods=['POST']) 26 def update_poll(): 27 global choice1, choice2, choice3 28 29 req_data = request.get_json() 30 31 user_choice = req_data['option'] 32 33 if user_choice == 1: 34 choice1 += 1 35 elif user_choice == 2: 36 choice2 += 1 37 elif user_choice == 3: 38 choice3 += 1 39 else: 40 print("User choose a wrong option") 41 42 total = 0.0 43 total = float(choice1 + choice2 + choice3) 44 45 choice1_percent = (choice1/total) * 100 46 choice2_percent = (choice2/total) * 100 47 choice3_percent = (choice3/total) * 100 48 49 pn_client.publish( 50 interests=['polls-update'], 51 publish_body={ 52 'fcm': { 53 'notification': { 54 'title': 'Polls update', 55 'body': 'There are currently ' + str(int(round(total))) + 'vote(s) in the polls. Have you casted your vote?', 56 }, 57 }, 58 }, 59 ) 60 61 pusher.trigger(u'polls', u'vote', {u'1': choice1_percent, '2':choice2_percent, '3':choice3_percent}) 62 63 return 'success', 200
Replace the
PUSHER_APP_*keys with the credentials from your Pusher dashboard.
This is the only file needed for your Flask application. This snippet contains two endpoints to send out the poll question and to give current results.
Run your Python app using this command:
$ flask run
Now run your Android application in Android Studio and you should see something like this:
Conclusion
In this post, you have learned briefly about Flask and how to use it to develop RESTful APIs. You have also explored Pusher’s realtime technologies both on the client and server side. Feel free to check out the final GitHub repo and play around with the application.


© 2026 Pusher Ltd. All rights reserved.
Pusher Limited is a company registered in England and Wales (No. 07489873) whose registered office is at MessageBird UK Limited, 3 More London Riverside, 4th Floor, London, United Kingdom, SE1 2AQ.