- Products

- Developers
- User stories
- Blog
- Pricing

Build a modern web application with Laravel and Vue Part 4: Creating Vue applications in Laravel
In the last tutorial, we talked about how you can create API endpoints in a Laravel application. We also explored how you can take it a step further by integrating tests into the application.
Introduction
In the last tutorial, we talked about how you can create API endpoints in a Laravel application. We also explored how you can take it a step further by integrating tests into the application.
In this part 4 of the tutorial series, we are going to change our point of view, slightly overused pun intended, and look at how we can create the frontend of our application using Vue. It is very common nowadays for web applications to have a front and backend in a somewhat separate fashion. So let’s explore different ways we could build a Vue application on Laravel and see how it all ties together.
Prerequisites
To follow this chapter you need:
Different ways to Vue things
There are different ways we can use Vue with Laravel. We can choose to build a standalone Vue application, Single Page Application, and have Laravel provide the API endpoints, or we can integrate the Vue components into Laravel blade templates as Multi Page Applications. Whichever method you choose is up to you and it depends on your situation.
Single Page Applications (SPA)
SPAs work inside a browser and do not need a page to reload. They create a wonderful user experience and can simulate native applications that you can install on your device. The key thing to note is that they load data and markup independently.
This means that for an SPA to change the content on the page, it would never reload, but fetch the data using JavaScript. Although SPAs are fast and require minimal access to the internet after they are loaded, they don’t do too well in search rankings and usually require some extra optimization for SEO.
In our case, the SPA will load on the first call to your application, then swap out the different pages as you continue to use the application with the aid of vue-router. All the data required for each page would be loaded when the components are mounted via calls to your backend API.
Multi Page Applications (MPA)
MPAs are the traditional way web applications have been built for years. They typically reload the browser every time data needs to be changed or a request for a new resource is made. You can certainly use AJAX to simplify some MPA operations and reduce page reloads.
MPAs have an edge when it comes to SEO as they are by default crawlable. Unlike SPAs, you do not need to do anything special to make your MPA crawlable. You just need to serve the pages as they are and it will be crawled by search engines unless they are explicitly told not to.
When using Vue in a Laravel MPA, you’ll embed your Vue components directly in your blade file. You can pass data as props to the component. This won’t disrupt the page and its assets and you can easily your normal CSS and JS in addition to Vue.
Building a standalone Vue application
To get started with Vue, you will need to create a new Vue application. To do so, we would need the Vue-CLI which is a command-line tool we can use to scaffold new Vue applications. To use the vue-cli to set up a standalone project, open your terminal and run the following:
1$ npm install --global vue-cli
When vue-cli has been installed, you can create a standalone Vue application anywhere by running the following command:
1$ vue init webpack my-new-app
We won’t need to do this though as we are using the built-in Laravel installation.
?
webpackin the command above specifies the template we want to use. Vue projects can be initialized with different templates.
The above command will create a new Vue project using the webpack template. From here you can start building your Vue application.
Vue-Laravel integration
Laravel comes pre-packaged with Vue, which means you don’t need to use the Vue-CLI, especially if you want to build your application with a single codebase. In a new installation of Laravel, you can see the Vue files by going to the resources/assets/js/components directory.
For brevity, we will be developing using the inbuilt Laravel integration since it already comes with the build tools and all.
Setting up vue-router
There are a lot of packages that work with Vue and if you need to add more you can always install them using NPM. Packages installed get saved in a package.json file and this comes with the Laravel installation.
Install predefined modules in package.json file first:
1$ npm install
After the modules are installed, we can install the vue-router with the command below:
1$ npm install vue-router
When the installation is complete, open your resources/assets/js/app.js file and replace the contents with the following code:
1import Vue from 'vue' 2 import VueRouter from 'vue-router' 3 4 Vue.use(VueRouter) 5 6 import App from './views/App' 7 import Welcome from './views/Welcome' 8 9 const router = new VueRouter({ 10 mode: 'history', 11 routes: [ 12 { 13 path: '/', 14 name: 'home', 15 component: Welcome 16 }, 17 ], 18 }); 19 20 const app = new Vue({ 21 el: '#app', 22 components: { App }, 23 router, 24 });
Above, we have imported the VueRouter and we added it to our Vue application. We defined routes for our application and then registered it to the Vue instance so it is available to all Vue components.
? The
VueRouterconstructor takes an array of routes. In there we define the URL path, the name of the route, and the component used to fulfill requests to the route.
Next, we need to make the route for our Vue app. We’ll use a Laravel web route to load the app, and the vue router will take over the rest from there. Open your routes/web.php file and add the following route before the default route:
1Route::get('/{any}', 'SinglePageController@index')->where('any', '.*');
We also need to create the SpaController to handle the requests. Run the following command:
1$ php artisan make:controller SinglePageController
After it is created, go to your app/Http/Controller directory and open the SinglePageController.php file, and add the following method to the class:
1[...] 2 3 public function index() 4 { 5 return view("landing"); 6 } 7 8 [...]
Next, let’s make the landing view file. Create the file resources/views/landing.blade.php and add the following code:
1<!DOCTYPE html> 2 <html> 3 <head> 4 <meta charset="utf-8"> 5 <meta http-equiv="X-UA-Compatible" content="IE=edge"> 6 <meta name="viewport" content="width=device-width, initial-scale=1"> 7 <meta name="csrf-token" content="{{csrf_token()}}"> 8 <title>Treclon</title> 9 <link href=" {{ mix('css/app.css') }}" rel="stylesheet"> 10 </head> 11 <body> 12 <div id="app"> 13 <app></app> 14 </div> 15 <script src="{{ mix('js/bootstrap.js') }}"></script> 16 <script src="{{ mix('js/app.js') }}"></script> 17 </body> 18 </html>
In the code above, we just have the HTML for our application. If you look closely, you can see the app tag. This will be the entry point to our Vue application and where the App component will be loaded in.
Next, let’s edit the webpack.mix.js file so it compiles our assets. Update the mix declarations in the file to the following:
1[...] 2 3 mix.js('resources/assets/js/app.js', 'public/js') 4 .js('resources/assets/js/bootstrap.js', 'public/js') 5 .sass('resources/assets/sass/app.scss', 'public/css');
?
webpack.mix.jsfile holds the configuration files forlaravel-mixwhich provides a wrapper around Webpack. It lets us take advantage of webpack’s amazing asset compilation abilities without having to write Webpack configurations by ourselves. You can learn more about Webpack here.
Now, let us set up a simple welcome page for our Vue application. Create a new file, resources/assets/js/views/Welcome.vue, and add the following code to the file:
1<template> 2 <div class="flex-center position-ref full-height"> 3 <div class="content"> 4 <div class="m-b-md"> 5 <h2 class="title m-b-md"> 6 Treclon 7 </h2> 8 <h3> 9 Your efficent task planner 10 </h3> 11 </div> 12 </div> 13 </div> 14 </template>
The code above within the template tags defines the HTML of our Vue component. In the same file, append the code below the closing template tag:
1<style scoped> 2 .full-height { 3 height: 100vh; 4 } 5 .flex-center { 6 align-items: center; 7 display: flex; 8 justify-content: center; 9 } 10 .position-ref { 11 position: relative; 12 } 13 .top-right { 14 position: absolute; 15 right: 10px; 16 top: 18px; 17 } 18 .content { 19 text-align: center; 20 } 21 .title { 22 font-size: 60px; 23 } 24 .links > a { 25 color: #636b6f; 26 padding: 0 25px; 27 font-size: 12px; 28 font-weight: 600; 29 letter-spacing: .1rem; 30 text-decoration: none; 31 text-transform: uppercase; 32 } 33 .m-b-md { 34 margin-bottom: 30px; 35 color: #000000; 36 } 37 </style>
In the code above, we have defined the style to use with the welcome component.
? When a
<style>tag has thescopedattribute, its CSS will apply to elements of the current component only. This is similar to the style encapsulation found in Shadow DOM. It comes with some caveats but doesn’t require any polyfills. – Vue documentation.
Next, append the code below to the file:
1<script> 2 export default {} 3 </script>
Because our component does not need scripting logic, we leave it empty.
Next create another file, resources/assets/js/views/App.vue. This will be the application
container and all other components will be loaded into this container using the vue-router. In this file, add the following code:
1<template> 2 <div> 3 <nav class="navbar navbar-expand-md navbar-light navbar-laravel"> 4 <div class="container"> 5 <router-link :to="{name: 'home'}" class="navbar-brand">Treclon</router-link> 6 <button class="navbar-toggler" type="button" data-toggle="collapse" data-target="#navbarSupportedContent" aria-controls="navbarSupportedContent" aria-expanded="false" aria-label="Toggle navigation"> 7 <span class="navbar-toggler-icon"></span> 8 </button> 9 10 <div class="collapse navbar-collapse" id="navbarSupportedContent"> 11 <!-- Left Side Of Navbar --> 12 <ul class="navbar-nav mr-auto"></ul> 13 <!-- Right Side Of Navbar --> 14 <ul class="navbar-nav ml-auto"> 15 <li class="nav-link"> Hi, There</li> 16 </ul> 17 </div> 18 </div> 19 </nav> 20 <main class="py-4"> 21 <router-view></router-view> 22 </main> 23 </div> 24 </template>
As we said earlier, the template tag holds the HTML for our component. However, we used some Vue specific tags in the code above like router-link, which helps us generate links for routing to pages defined in our router. We also have the router-view, which is where all the child component pages will be loaded.
Since we don’t need scripting on this page also, append the following to the file:
1<script> 2 export default {} 3 </script>
Now, build the Vue application with the command below:
1$ npm run dev
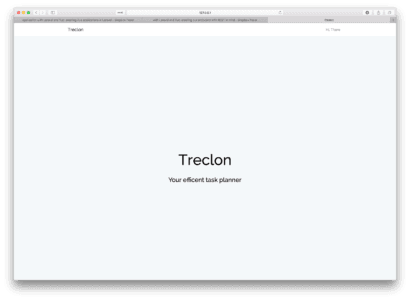
This will compile all our js assets and put them inside the public/js folder. To test the application and see what we have been able to achieve, run the php artisan serve command as we have done before.
1$ php artisan serve
When you visit the page you should see something like this:
Authentication
As with most web applications, authentication is important. We had, in the previous parts, discussed authentication and set up endpoints for authenticating users. In the next and final part, we will see how to protect pages we do not want unauthenticated users to see and how to make authenticated requests to the API.
Conclusion
In this chapter, we have looked at the basics of building a simple standalone application with Vue-CLI and also how we can build the same using the built-in Laravel integration. In the next chapter, we will continue building our Treclon app and see how everything ties in together.


© 2026 Pusher Ltd. All rights reserved.
Pusher Limited is a company registered in England and Wales (No. 07489873) whose registered office is at MessageBird UK Limited, 3 More London Riverside, 4th Floor, London, United Kingdom, SE1 2AQ.