- Products

- Developers
- User stories
- Blog
- Pricing

Handling authentication in GraphQL Part 3: Auth0
In the last tutorial in this series, we looked at how to add authentication using JWT to a GraphQL server. In this tutorial, we’ll be looking at how to add authentication to GraphQL using Auth0\.
Introduction
In the last tutorial in this series, we looked at how to add authentication using JWT to a GraphQL server. In this tutorial, we’ll be looking at how to add authentication to GraphQL using Auth0.
You can find part 1
What we’ll be building
To demonstrate things, we’ll be building a simple todo app that is secured with Auth0. The todo app will comprise of a GraphQL server and a frontend app which will consume the GraphQL server. This tutorial will be grouped into two sections. In the first section we’ll build the GraphQL server, then in the second section, we’ll build the frontend app.
We won’t be using any database in this tutorial so as to make things simple and focus on the goal of the tutorial. The todo app will use in-memory persistence. If you would like to use a database, you can look at the database setup section in the last tutorial in the series.
Creating an Auth0 account
This tutorial assumes you already have an Auth0 account. If you don’t, you can sign up for a free one.
Creating Auth0 API
We need to create an Auth0 API which will be used in our GraphQL server. Login to your Auth0 dashboard and create a new Auth0 API with the details as in the image below:

Take note of the details, as we’ll be using them later in the tutorial.
Creating the GraphQL server
Create a new folder called graphql-auth0-server then open the folder in the terminal and run the command below:
1npm init
Then we’ll update the dependencies section of package.json as below:
1// package.json 2 3 "dependencies": { 4 "apollo-server-express": "^1.3.2", 5 "body-parser": "^1.18.2", 6 "cors": "^2.8.4", 7 "dotenv": "^4.0.0", 8 "express": "^4.16.2", 9 "express-jwt": "^5.3.0", 10 "graphql": "^0.12.3", 11 "graphql-tools": "^2.19.0", 12 "jwks-rsa": "^1.2.1" 13 }
These are all the dependencies for our GraphQL server. We’ll go over each of them as we begin to use them. Enter the command below to install them:
1npm install
Next, let’s create a server.js file and paste the code below into it:
1// server.js 2 3 const express = require('express') 4 const bodyParser = require('body-parser') 5 const cors = require('cors') 6 const { graphqlExpress } = require('apollo-server-express') 7 const schema = require('./data/schema') 8 const jwt = require('express-jwt') 9 var jwks = require('jwks-rsa') 10 require('dotenv').config() 11 12 const PORT = 3000 13 14 // create our express app 15 const app = express() 16 17 // enable CORS 18 app.use(cors()) 19 20 // auth middleware 21 const auth = jwt({ 22 secret: jwks.expressJwtSecret({ 23 cache: true, 24 rateLimit: true, 25 jwksRequestsPerMinute: 5, 26 jwksUri: `${process.env.AUTH0_ISSUER}.well-known/jwks.json` 27 }), 28 audience: process.env.AUTH0_AUDIENCE, 29 issuer: process.env.AUTH0_ISSUER, 30 algorithms: ['RS256'] 31 }) 32 33 // graphql endpoint 34 app.use( 35 '/api', 36 bodyParser.json(), 37 auth, 38 graphqlExpress(req => ({ 39 schema, 40 context: { 41 user: req.user 42 } 43 })) 44 ) 45 46 app.listen(PORT, () => { 47 console.log(`The GraphQL server is running on http://localhost:${PORT}/api`) 48 })
First, we pull in the dependencies and our GraphQL schema (which we’ll create shortly). express is the Node.js framework, body-parser is used to parse the incoming request body, graphqlExpress is the express implementation of Apollo server which will be used to power our GraphQL server. cors will be used to enable CORS on our GraphQL server since we’ll be consuming it from a client app running on a different domain from the GraphQL server. We’ll use express-jwt to validate a JSON Web Token (JWT) and set req.user to the attributes encoded in the JWT. jwks-rsa is a library that will allow us to retrieve RSA public keys from a JWKS (JSON Web Key Set) endpoint. dotenv will be used to read from our .env file.
Using the cors middleware, we enable CORS on the server. Then we define an authentication middleware using express-jwt. This will check if there is an Authorization header with a valid token on incoming requests made to the endpoint. If present, it will decode it then add a user object to the request. Otherwise, user will be null. jwks-rsa is used to retrieve the RSA public keys from our JWKS endpoint (which is our {Auth0 domain}/.well-known/jwks.json ). The RSA public key is then passed as secret to jwt. We set the audience, issuer and algorithms to those of the Auth0 API we created earlier.
Next, we define the route (in this case /api) for our GraphQL server. Then we add body-parser and auth middleware created above to the route. Also, we add graphqlExpress passing along our schema and user as context to GraphQL. Adding the auth middleware makes the route secured.
Finally, we start the server and listen on a specified port (as specified when creating our Auth0 API).
We are using the dotenv package to read environment variables from a .env file. Let’s create the .env file within the project’s root directory and paste the snippet below into it:
1// .env 2 3 AUTH0_ISSUER=YOUR_API_ISSUER 4 AUTH0_AUDIENCE=YOUR_API_AUDIENCE
Update YOUR_API_ISSUER and YOUR_API_AUDIENCE with your Auth0 API details we created above. AUTH0_ISSUER should be your Auth0 domain and AUTH0_AUDIENCE should be the identifier we set when we created the Auth0 API.
Defining GraphQL schema
Now, let’s define our GraphQL schema. Create a folder name data and, within this folder, create a schema.js file then paste the code below into it:
1// data/schema.js 2 3 const { makeExecutableSchema } = require('graphql-tools') 4 const resolvers = require('./resolvers') 5 6 // Define our schema using the GraphQL schema language 7 const typeDefs = ` 8 type Todo { 9 userId: ID! 10 title: String! 11 } 12 13 type Query { 14 myTodos: [Todo] 15 } 16 17 type Mutation { 18 addTodo (title: String!): Todo 19 } 20 ` 21 22 module.exports = makeExecutableSchema({ typeDefs, resolvers })
We define a Todo type which has userId and title fields. The userId will be the ID of the user that created the todo, and title will be the title of the todo. The myTodos query will be used to fetch todos of the currently authenticated user. Finally, we define an addTodo mutation which will be used to add a new todo, accepting the title of the todo. We don’t need to pass the ID of the user creating the todo, the userId will be the ID of the currently authenticated user.
Writing resolver functions
Within the data folder, create a resolvers.js file and paste the following code into it:
1// data/resolvers.js 2 3 // sample data 4 const todos = [] 5 6 const resolvers = { 7 Query: { 8 // fetch authenticated user todos 9 myTodos (_, args, { user }) { 10 // make sure user is logged in 11 if (!user) { 12 throw new Error('You are not authenticated!') 13 } 14 15 // return only the authenticated user todos 16 return todos.filter(todo => todo.userId === user.sub) 17 } 18 }, 19 20 Mutation: { 21 // Add new todo 22 addTodo (_, { title }, { user }) { 23 // make sure user is logged in 24 if (!user) { 25 throw new Error('You are not authenticated!') 26 } 27 28 // add new todo to list of todos 29 todos.push({ 30 userId: user.sub, 31 title 32 }) 33 34 // return the newly added todo 35 return todos.find(todo => todo.userId === user.sub && todo.title === title) 36 } 37 } 38 } 39 40 module.exports = resolvers
Firstly, we define a todos variable as an empty array. This will be used as our list of todos. Then we define the myTodos resolver. We make sure the user is authenticated by checking if there is a user object available. If the user is authenticated, we filter the list of todos to only those where the userId matches the authenticated user ID. The sub claim on the JWT is used as the user ID since Auth0 will send the user_id property as sub in the JWT. In the addTodo mutation, we also checked to make sure the user is authenticated before proceeding to add a new todo. To add a new todo, we simply push a new object containing the user ID and the title of the todo the user entered into the todos array. Lastly, we return the newly added todo as the response of the addTodo mutation.
That’s all for our GraphQL server. Now, let’s move to create the frontend app.
Creating Auth0 client
Again, log in to your Auth0 dashboard and create a new Auth0 client. Give the client a name and select Single Page Web Application as the client type as in the image below:
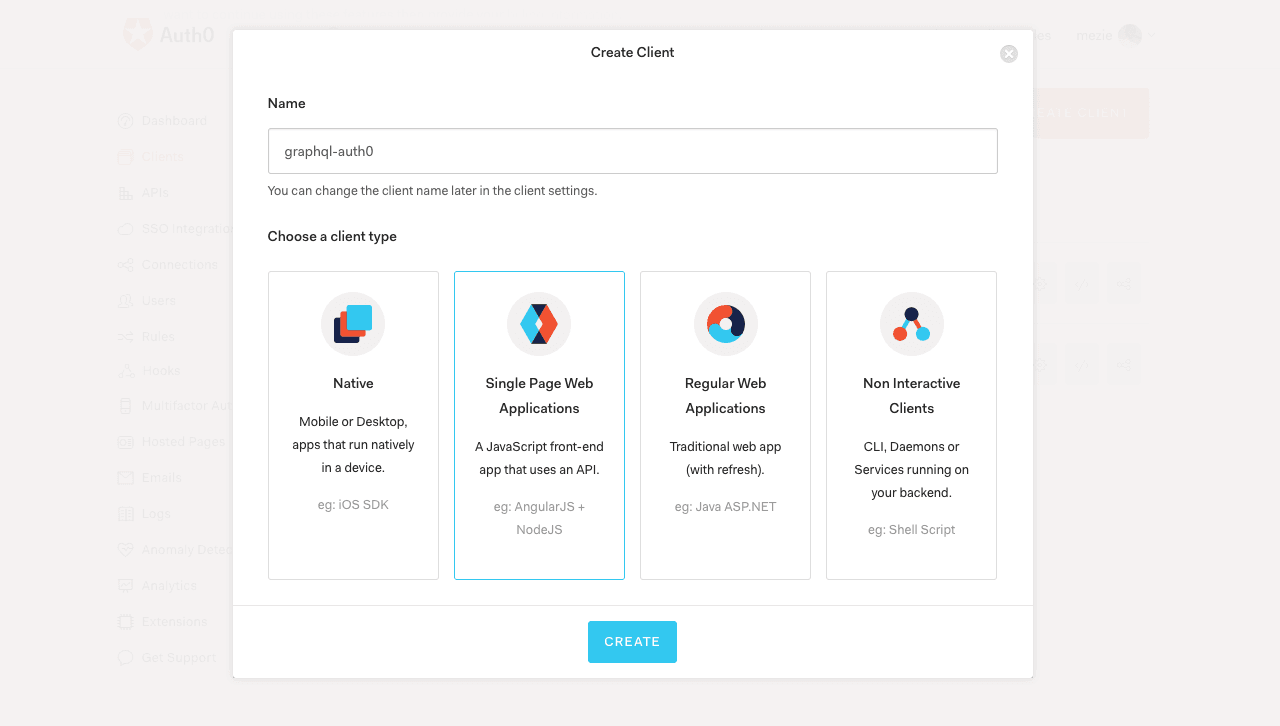
You should take note of your application keys which can be found in the client settings. We’ll be needing the Client ID and Domain.
Next, we’ll configure a callback URL for our app where Auth0 redirects the user after they are authenticated. Add http://localhost:8080/callback to the Allowed Callback URLs field in Client Settings.
Create new Vue app
The frontend app will be a Vue app. So, let’s create a new Vue app using the Vue CLI:
1vue init webpack graphql-auth0-client
Once the app is created, cd into the app directory and run the command below to install the app dependencies:
1npm install
Next, add the line below to index.html so we can make use of Bulma CSS framework:
1// index.html 2 3 <link rel="stylesheet" href="https://cdnjs.cloudflare.com/ajax/libs/bulma/0.6.2/css/bulma.min.css" />
Adding authentication with Auth0
Create a new services folder inside the src directory. Then, within the services folder, create an Auth.js file and paste the code into it:
1// src/services/Auth.js 2 3 import auth0 from 'auth0-js' 4 import EventEmitter from 'EventEmitter' 5 import router from './../router' 6 7 export default class Auth { 8 authenticated = this.isAuthenticated() 9 authNotifier = new EventEmitter() 10 11 constructor () { 12 this.login = this.login.bind(this) 13 this.setSession = this.setSession.bind(this) 14 this.logout = this.logout.bind(this) 15 this.isAuthenticated = this.isAuthenticated.bind(this) 16 } 17 18 auth0 = new auth0.WebAuth({ 19 domain: '{AUTH0_DOMAIN}', 20 clientID: '{AUTH0_CLIENT_ID}', 21 redirectUri: '{AUTH0_CALLBACK_URL}', 22 audience: '{AUTH0_AUDIENCE}', 23 responseType: 'token id_token', 24 scope: 'openid' 25 }) 26 27 login () { 28 this.auth0.authorize() 29 } 30 31 handleAuthentication () { 32 this.auth0.parseHash((err, authResult) => { 33 if (authResult && authResult.accessToken && authResult.idToken) { 34 this.setSession(authResult) 35 router.replace('/') 36 } else if (err) { 37 router.replace('/') 38 } 39 }) 40 } 41 42 setSession (authResult, profile) { 43 // Set the time that the access token will expire at 44 const expiresAt = JSON.stringify( 45 authResult.expiresIn * 1000 + new Date().getTime() 46 ) 47 48 localStorage.setItem('graphql_auth0_access_token', authResult.accessToken) 49 localStorage.setItem('graphql_auth0_id_token', authResult.idToken) 50 localStorage.setItem('graphql_auth0_expires_at', expiresAt) 51 52 this.authNotifier.emit('authChange', { authenticated: true }) 53 } 54 55 logout () { 56 // Clear access token and ID token from local storage 57 localStorage.removeItem('graphql_auth0_access_token') 58 localStorage.removeItem('graphql_auth0_id_token') 59 localStorage.removeItem('graphql_auth0_expires_at') 60 61 this.authNotifier.emit('authChange', false) 62 63 // navigate to the home route 64 router.replace('/') 65 } 66 67 isAuthenticated () { 68 // Check whether the current time is past the 69 // access token's expiry time 70 const expiresAt = JSON.parse( 71 localStorage.getItem('graphql_auth0_expires_at') 72 ) 73 74 return new Date().getTime() < expiresAt 75 } 76 }
Using our Auth0 client details, we create a new instance of Auth0 WebAuth. AUTH0_AUDIENCE should be the identifier we set when we created the Auth0 API, which is http://localhost:3000. Let’s quickly go over each of the methods above:
loginwill redirect the user to use Auth0 hosted login page for user login.handleAuthentication, as it name implies, will be used to handle user authentication once they are redirected from the hosted login page. It looks for an authentication result in the URL hash and processes it with theparseHashmethod fromauth0.js.setSessionwill be used to set the user’saccess_token,id_token, and a time at which theaccess_tokenwill expire.logoutwill remove the user’s tokens from browser local storage.isAuthenticatedchecks whether the expiry time for theaccess_tokenhas passed
You’ll notice we imported some packages we are yet to install. Let’s do that now:
1npm install auth0-js EventEmitter --save
Adding user login
Next, let’s add the login link which allows users to be redirected to the login using Auth0 hosted login page. Update src/App.vue as below:
1// src/App.vue 2 3 <template> 4 <div> 5 <nav class="navbar is-primary"> 6 <div class="container"> 7 <div class="navbar-brand"> 8 <router-link 9 class="navbar-item" 10 to="/"> 11 GraphQL Auth0 12 </router-link> 13 </div> 14 <div class="navbar-menu"> 15 <div class="navbar-end"> 16 <a 17 class="navbar-item" 18 v-if="!authenticated" 19 @click="login()"> 20 Log In 21 </a> 22 <a 23 class="navbar-item" 24 v-else 25 @click="logout()"> 26 Log Out 27 </a> 28 </div> 29 </div> 30 </div> 31 </nav> 32 <div class="container"> 33 <router-view 34 :auth="auth" 35 :authenticated="authenticated"> 36 </router-view> 37 </div> 38 </div> 39 </template> 40 41 <script> 42 43 import Auth from '@/services/Auth' 44 45 const auth = new Auth() 46 const { login, logout, authenticated, authNotifier } = auth 47 48 export default { 49 name: 'App', 50 data () { 51 return { 52 auth, 53 authenticated 54 } 55 }, 56 created () { 57 authNotifier.on('authChange', authState => { 58 this.authenticated = authState.authenticated 59 }) 60 }, 61 methods: { 62 login, 63 logout 64 } 65 } 66 </script>
We show users the link to login. Once they are logged in, we show them the link to log out. Inside the script section, we import the Auth.js file then make a new instance of it and extract our methods from it. auth and authenticated are passed as data to the component. Once the component is created, we listen for the authChange event (using the EventEmiiter package we installed earlier) and set the authenticated data accordingly. This is used to determine whether a user is currently logged in or not. The login and logout methods make use of the appropriate methods respectively pulled in from the Auth.js file.
Creating the app homepage
Users will be redirected to the homepage and they will be shown an appropriate message to login or not. Create a Home component inside src/components and paste the code below into it:
1// src/components/Home.vue 2 3 <template> 4 <div> 5 <div v-if="authenticated"> 6 <p>You are logged in!</p> 7 8 <p> 9 <router-link to="addtodo">Add new todo</router-link> 10 or view your list of <router-link to="mytodos">todos</router-link> 11 </p> 12 </div> 13 <h4 v-else> 14 You are not logged in! Please <a @click="auth.login()">Log In</a> to continue. 15 </h4> 16 </div> 17 </template> 18 19 <script> 20 export default { 21 name: 'Home', 22 props: ['auth', 'authenticated'] 23 } 24 </script>
This component accepts auth and authenticated that were passed from the App component as props. If a user is logged in, the user is shown links to add a new todo and view his/her list of todos respectively.
Next, let’s update the route file as below:
1// src/router/index.js 2 3 import Vue from 'vue' 4 import Router from 'vue-router' 5 import Home from '@/components/Home' 6 7 Vue.use(Router) 8 9 export default new Router({ 10 mode: 'history', 11 routes: [ 12 { 13 path: '/', 14 component: Home 15 } 16 ] 17 })
Note: Because Auth0 will be passing the authenticated user access_token as URL hash, we need to set Vue Router to use
historymode.
Adding a callback component
Recall we said once a user is authenticated, the user will be redirected to the callback URL we defined when we created our Auth0 client. So, let’s create a Callback component that we’ll use to handle the redirect. Create a callback.vue the file inside src/components and paste the code below into it:
1// src/components/Callback.vue 2 3 <template> 4 <div>Loading...</div> 5 </template> 6 7 <script> 8 export default { 9 name: 'Callback', 10 props: ['auth'], 11 created () { 12 this.auth.handleAuthentication() 13 } 14 } 15 </script>
We display a loading… (you can use a spinner here) message to the user while the user is been authenticated. This makes use of the handleAuthentication method we talked about earlier. Then the user is redirected to the homepage.
Next, let’s add the callback route:
1// src/router/index.js 2 3 import Callback from '@/components/Callback' 4 5 // add these to the routes array 6 { 7 path: '/callback', 8 component: Callback 9 }
Installing Vue Apollo
To interact with our GraphQL server, we’ll be making use of Apollo client. To use Apollo client in a Vue app, we need to install the Vue Apollo plugin which is an Apollo/GraphQL integration for Vue.js. So, let’s install it alongside its dependencies:
1npm install vue-apollo@next graphql apollo-client apollo-link apollo-link-context apollo-link-http apollo-cache-inmemory graphql-tag --save
Next, let’s set up the plugin to be used in our Vue app. Update src/main.js as below:
1// src/main.js 2 3 import Vue from 'vue' 4 import { ApolloClient } from 'apollo-client' 5 import { HttpLink } from 'apollo-link-http' 6 import { setContext } from 'apollo-link-context' 7 import { InMemoryCache } from 'apollo-cache-inmemory' 8 import VueApollo from 'vue-apollo' 9 import App from './App' 10 import router from './router' 11 12 Vue.config.productionTip = false 13 14 const httpLink = new HttpLink({ 15 uri: 'http://localhost:3000/api' 16 }) 17 18 const authLink = setContext((_, { headers }) => { 19 // get the authentication token from localstorage if it exists 20 const token = localStorage.getItem('graphql_auth0_access_token') 21 // return the headers to the context so httpLink can read them 22 return { 23 headers: { 24 ...headers, 25 authorization: token ? `Bearer ${token}` : null 26 } 27 } 28 }) 29 30 // Create the apollo client 31 const apolloClient = new ApolloClient({ 32 link: authLink.concat(httpLink), 33 cache: new InMemoryCache() 34 }) 35 36 // Install the vue plugin 37 Vue.use(VueApollo) 38 const apolloProvider = new VueApollo({ 39 defaultClient: apolloClient 40 }) 41 42 /* eslint-disable no-new */ 43 new Vue({ 44 el: '#app', 45 router, 46 apolloProvider, 47 components: { App }, 48 template: '<App/>' 49 })
We pull in the necessary dependencies. Then we create an httpLink using the URL to our GraphQL server. We create an auth middleware, which will add an Authorization header containing the user access token or null to every request. Next, we create the Apollo client passing along the authLink and httpLink. We also specify we want an in-memory cache. Then we install the Vue plugin passing to it the Apollo client we created. Lastly, we make use of apolloProvider by adding it in our Vue instance.
Displaying user todos
Once a user is logged, the user should be able to view a list of his/her todos. For this, we’ll create a MyTodos component inside src/components and paste the code below into it:
1// src/components/MyTodos.vue 2 3 <template> 4 <div class="section"> 5 <h2 class="title">My Todos</h2> 6 <ul> 7 <p v-if="myTodos.length === 0">No todos!</p> 8 <li 9 v-else 10 v-for="(todo, key) in myTodos" 11 :key="key"> 12 {{ todo.title }} 13 </li> 14 </ul> 15 </div> 16 </template> 17 18 <script> 19 import { MY_TODOS_QUERY } from '@/graphql' 20 21 export default { 22 name: 'MyTodos', 23 props: ['authenticated'], 24 data () { 25 return { 26 myTodos: [] 27 } 28 }, 29 beforeRouteEnter (to, from, next) { 30 next(vm => { 31 return vm.authenticated ? next() : next('/') 32 }) 33 }, 34 apollo: { 35 myTodos: { 36 query: MY_TODOS_QUERY 37 } 38 } 39 } 40 </script>
We simply loop through the user’s todos and display them in a list. If the user has not added any we’ll display an appropriate message. Within the apollo object, we define the GraphQL query (MY_TODOS_QUERY, which we’ll create in a bit) to fetch the user’s todos. It is important to note that our data myTodos must have the same name as the query object (myTodos) defined inside the apollo object.
This component accepts authenticated as props. To make sure only authenticated users can access the component, we define a beforeRouteEnter guard which checks if a user is authenticated or not. If the user is authenticated, the user will be allowed to access the component. Otherwise, the user is redirected to the homepage.
Next, let’s create the MY_TODOS_QUERY GraphQL query. Create a graphql.js file inside src and paste the code below into it:
1// src/graphql.js 2 3 import gql from 'graphql-tag' 4 5 export const MY_TODOS_QUERY = gql` 6 query MyTodosQuery { 7 myTodos { 8 title 9 } 10 } 11 `
We make use of the graphql-tag package to parse our GraphQL query. We are returning only the title of the todo.
Lastly, let’s add the route:
1// src/router/index.js 2 3 import MyTodos from '@/components/MyTodos' 4 5 // add these to the routes array 6 { 7 path: '/mytodos', 8 component: MyTodos 9 }
Users should be able to see a list of the todos:

Adding new todo
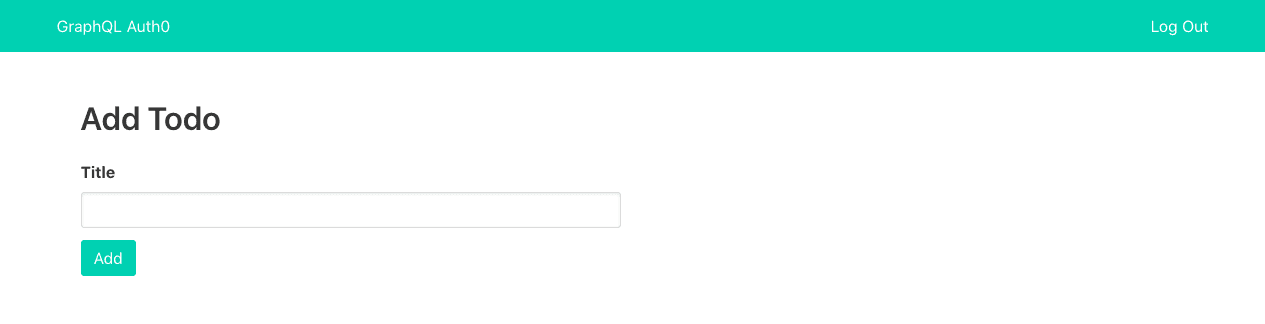
Now, let’s add the ability for users to add a new todo. For this, we’ll create a AddTodo component inside src/components and paste the code below into it:
1// src/components/AddTodo.vue 2 3 <template> 4 <div class="section"> 5 <div class="columns"> 6 <div class="column is-6"> 7 <h2 class="title">Add Todo</h2> 8 <form method="post" @submit.prevent="addTodo"> 9 <div class="field"> 10 <label class="label">Title</label> 11 <div class="control"> 12 <input 13 type="text" 14 class="input" 15 v-model="title"> 16 </div> 17 </div> 18 <div class="control"> 19 <button class="button is-primary">Add</button> 20 </div> 21 </form> 22 </div> 23 </div> 24 </div> 25 </template> 26 <script> 27 import { ADD_TODO_MUTATION, MY_TODOS_QUERY } from '@/graphql' 28 29 export default { 30 name: 'AddTodo', 31 props: ['authenticated'], 32 data () { 33 return { 34 title: '' 35 } 36 }, 37 beforeRouteEnter (to, from, next) { 38 next(vm => { 39 return vm.authenticated ? next() : next('/') 40 }) 41 }, 42 methods: { 43 addTodo () { 44 this.$apollo 45 .mutate({ 46 mutation: ADD_TODO_MUTATION, 47 variables: { 48 title: this.title 49 }, 50 update: (store, { data: { addTodo } }) => { 51 // read data from cache for this query 52 const data = store.readQuery({ query: MY_TODOS_QUERY }) 53 // add new todo from the mutation to existing todos 54 data.myTodos.push(addTodo) 55 // write data back to the cache 56 store.writeQuery({ query: MY_TODOS_QUERY, data }) 57 } 58 }) 59 .then(response => { 60 this.$router.replace('/mytodos') 61 }) 62 } 63 } 64 } 65 </script>
We display a single field form to add new todo. Once the form is submitted, the addTodo method will be called. This method makes use of the Vue Apollo plugin mutate(). We pass to it the mutation to add a new todo (ADD_TODO_MUTATION, which we’ll create in a bit). We also pass to it the required variables (in this case title, which is gotten from the form). Because of Apollo client caches (in memory in our case) its queries, we need a way to update the cache whenever we perform mutation actions. Hence the need for the update function which we use to update the store by adding the newly added todo to the cache. First, we fetch the data from the cache matching our query (MY_TODOS_QUERY), then we add the new todo to the myTodos array. Lastly, we write the new data back to the cache. Once the todo is added successfully, we redirect the user to /mytodos route.
Just as we did with the MyTodos component, we make sure only authenticated users can add new todo.
Next, let’s create the ADD_TODO_MUTATION GraphQL mutation. Add the code below to src/graphql.js:
1// src/graphql.js 2 3 export const ADD_TODO_MUTATION = gql` 4 mutation AddTodoMutation($title: String!) { 5 addTodo(title: $title) { 6 title 7 } 8 } 9 `
Again, we return only the title of the todo from the mutation.
Lastly, let’s add the route:
1// src/router/index.js 2 3 import AddTodo from '@/components/AddTodo' 4 5 // add these to the routes array 6 { 7 path: '/addtodo', 8 component: AddTodo 9 }
Users should be able to add new todo:
The complete code for the server and the client is available on GitHub.
Conclusion
We have seen how to add authentication with Auth0 to GraphQL. This tutorial shows how to build a simple todo app, but I hope you get the concept. You can also use hosted GraphQL backend services like Graphcool and Scaphold, which has out of the box integration for Auth0.
This brings to the end the handling authentication in GraphQL series. I hope you found the series helpful.
You can find part 1


© 2026 Pusher Ltd. All rights reserved.
Pusher Limited is a company registered in England and Wales (No. 07489873) whose registered office is at MessageBird UK Limited, 3 More London Riverside, 4th Floor, London, United Kingdom, SE1 2AQ.