- Products

- Developers
- User stories
- Blog
- Pricing

Getting started with PWA using Vue
This tutorial shows and explains a hands-on experience on how to build a Progressive Web App using Vue from scratch. We will build a very simple book listing application with descriptions for each book.
Introduction
This tutorial shows and explains a hands-on experience on how to build a Progressive Web App using Vue from scratch. We will build a very simple book listing application with descriptions for each book. This UI will be built with Vue, a progressive framework suitable for small and large-scale apps:
Imagine a web application that you can browse, even with a very poor network connection. An offline web application that will still give access to up-to-date data and keep engaging users. This is the promise of progressive web applications and, as evident from testimonies of increased conversion rate by leading companies such as Twitter, Forbes, AliExpress, and others, we should know by now that progressive web applications are the future.
Our application is a very simple one but suitable to get you started with building progressive web applications using Vue.
Progressive Web Apps
A Progressive Web Application (PWA) is a web application that offers an app-like user experience on the web. Modern web technological innovations such as service workers, Native APIs have contributed greatly to progressive web apps and help improve the quality of web applications.
For more details about the background, history or principles of PWAs please visit the Google developer page.
Setting Up Vue with PWA Features
Vue-CLI, a command line tool for generating Vue projects, comes with a few project templates. For the sake of this tutorial, we will choose pwa-template. With this, Vue-CLI is going to set up a dummy Vue application with Webpack, vue-loader and basic offline support powered by service workers.
A service worker is a background worker that runs independently in the browser. It doesn’t make use of the main thread during execution. In fact, it’s unaware of the DOM, just JavaScript.
Utilizing the service worker simplifies the process of making an app run offline. Even though setting it up is simple, things can go really bad when it’s not done right. For this reason, a lot of community-driven utility tools exist to help scaffold a service worker with all the recommended configurations. Vue is not an exception.
Use the command below to install Vue-CLI if you don’t have it installed already:
1npm install -g vue-cli
Then initialize your application with :
1vue init pwa vue-pwa
You will be required to answer a few questions, including the Vue build type, whether to install vue-router, whether to use ESLint and whether to set up unit tests. Choosing the default answers is perfect for our demo. Afterwards, the process will create a project folder with the following subfolders: build, config, src, static, test.
The major difference of this template is in the build/webpack.prod.conf.js file:
1// service worker caching 2 new SWPrecacheWebpackPlugin({ 3 cacheId: 'my-vue-app', 4 filename: 'service-worker.js', 5 staticFileGlobs: ['dist/**/*.{js,html,css}'], 6 minify: true, 7 stripPrefix: 'dist/' 8 })
The plugin generates a service worker file when we run the build command. The generated service worker caches all the files that match the glob expression in staticFileGlobs.
As you can see, it is matching all the files in the dist folder. This folder is also generated after running the build command. We will see it in action later in this tutorial.
Create A Vue Component
Each of the books listed in our application will have an image for the book cover, a book title and a short description of the book.
Create a new component in src/components/Book.vue with the template below:
1<template> 2 <div class="book"> 3 <div class="booksDetails"> 4 <img :src="list.imageUrl" :alt="list.title"> 5 <h4>{{ list.title }}</h4> 6 <p>{{ list.description }}</p> 7 </div> 8 </div> 9 </template>
The template above expects a list property from whatever parent it will have in the near future.
To indicate that, add a Vue object with the props property:
1<template> 2 ...... 3 </template> 4 5 <script> 6 export default { 7 props: ['list'], 8 name: 'book' 9 } 10 </script>
To add basic styling to our Books.vue component:
1<template> 2 .... 3 </template> 4 <script> 5 ........ 6 </script> 7 8 <style> 9 .book { 10 background: #F5F5F5; 11 display: inline-block; 12 margin: 0 0 1em; 13 width: 100%; 14 cursor: pointer; 15 -webkit-perspective: 1000; 16 -webkit-backface-visibility: hidden; 17 transition: all 100ms ease-in-out; 18 } 19 .book:hover { 20 transform: translateY(-0.5em); 21 background: #EBEBEB; 22 } 23 img { 24 display: block; 25 width: 100%; 26 } 27 </style>
Since we are not really connecting to a backend server, let’s create an array of fake data for our example application. Create src/db.json. You can find this here, alternatively, here is a truncated version of it:
1[ 2 3 { 4 "imageUrl": "http://res.cloudinary.com/yemiwebby-com-ng/image/upload/v1507714088/cover1_qy3ovk.png", 5 "title": "ToArray", 6 "description": "An array is a data structure that contains a group of elements. Typically these elements are all of the same data type, such as an integer or string. Arrays are commonly used in computer programs to organize data so that a related set of values can be easily sorted or searched." 7 }, 8 { 9 "imageUrl": "http://res.cloudinary.com/yemiwebby-com-ng/image/upload/v1507714088/cover2_e50jkt.jpg", 10 "title": "Coding For Dummies", 11 "description": "Coding For Dummies is the perfect place to start! Explore the basics of HTML, CSS, JavaScript, Ruby, and Python and find out how to build great web applications. Once you're up and running, you can continue to refine and practice your skills online" 12 }, 13 { 14 "imageUrl": "http://res.cloudinary.com/yemiwebby-com-ng/image/upload/v1507714088/cover3_tyyyre.jpg", 15 "title": "Harry Potter and the sorcerer's stone", 16 "description": "For 10 years, Harry lives in the cupboard under the stairs and is subjected to cruel mistreatment by Aunt Petunia, Uncle Vernon, and their son Dudley. On his 11th birthday, Harry receives a letter inviting him to study magic at the Hogwarts School of Witchcraft and Wizardry." 17 }, 18 ..... 19 ]
Next action is to import the newly created db.json and consume it in src/App.vue:
1import data from './db.json'; 2 3 export default { 4 name: 'app', 5 data() { 6 return { 7 lists: [] 8 } 9 }, 10 created() { 11 this.lists = data; 12 } 13 }
We added a property list which we set to the JSON data.
To successfully display the books in the browser, we will need to import the card component in the Vue object, then add it to the App template in src/App:
1<template> 2 <div id="app"> 3 <header> 4 <span>PWA VueJs</span> 5 </header> 6 <main> 7 <div class="wrapper"> 8 <div class="books"> 9 <book v-for="list in lists" :key="list.imageUrl" :list="list"></book> 10 </div> 11 </div> 12 </main> 13 </div> 14 </template> 15 16 <script> 17 ... 18 import Book from './components/Books'; 19 20 export default { 21 name: 'app', 22 data() { 23 ... 24 }, 25 created() { 26 ... 27 }, 28 components: { 29 Book 30 } 31 } 32 </script>
We iterate over each card and list all the cards in the .books element:
At this point, the app looks absurd and the images are too wide. To make our page look presentable and styled let’s add a little bit of css to both books(parent) and book (child):
1/* App.vue */ 2 .books { 3 column-count: 1; 4 column-gap: 1em; 5 } 6 7 /* Book.vue */ 8 .book { 9 display: inline-block; 10 }
If you consider adding animations to the cards, be careful as you will experience flickers while using the transform property. Assuming you have this simple transition on .books:
1/* Book.vue */ 2 .book { 3 transition: all 100ms ease-in-out; 4 } 5 .book:hover { 6 transform: translateY(-0.5em); 7 background: #EBEBEB; 8 }
Setting perspective and backface-visibility to the element fixes that:
1.card { 2 -webkit-perspective: 1000; 3 -webkit-backface-visibility: hidden; 4 transition: all 100ms ease-in-out; 5 }
You can also account for screen sizes and make the grids responsive:
1@media only screen and (min-width: 500px) { 2 .books { 3 column-count: 2; 4 } 5 } 6 @media only screen and (min-width: 700px) { 7 .books { 8 column-count: 3; 9 } 10 } 11 @media only screen and (min-width: 900px) { 12 .books { 13 column-count: 4; 14 } 15 } 16 @media only screen and (min-width: 1100px) { 17 .books { 18 column-count: 5; 19 } 20 }
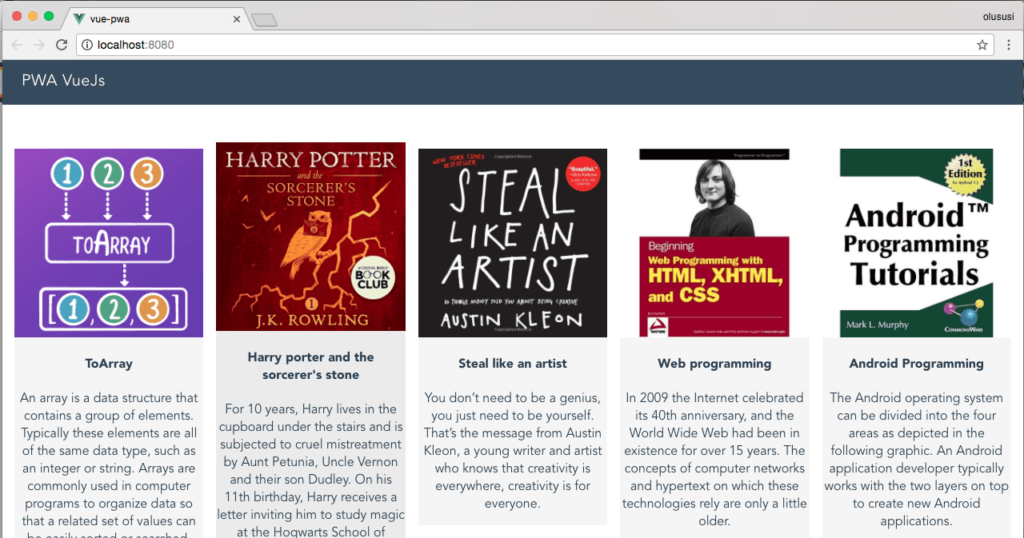
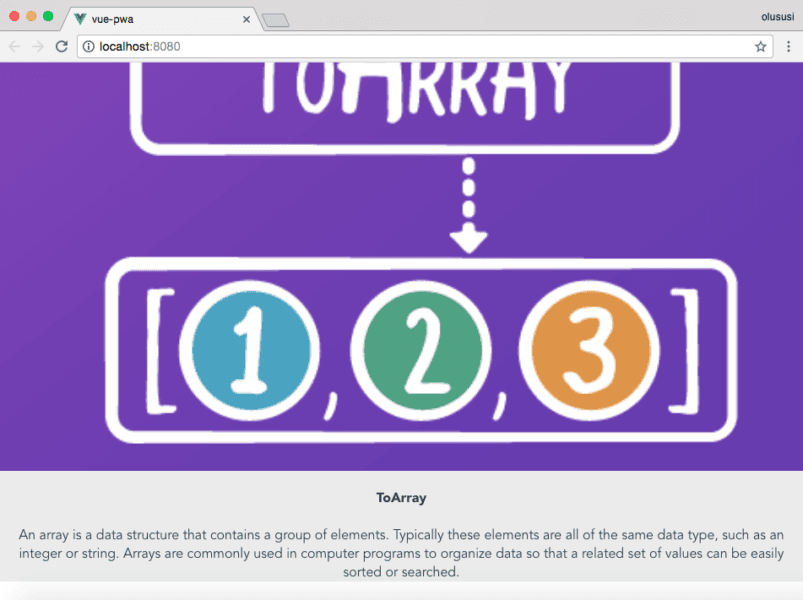
Here is what the output looks like:
Animate
Going Offline
This is the most interesting aspect of this tutorial. Right now, if we were to deploy then go offline, we would get an error message. If you’re using Chrome, you will see the popular dinosaur game.
Remember we already have a service worker configured. Now, all we need to do is to generate the service worker file when we run the build command. To do so, run the following in your terminal:
1npm run build
Next, serve the generated build file (found in the dist folder). There are lots of options for serving files on localhost, but my favorite still remains to serve:
1#install serve 2 npm install -g serve 3 4 # serve 5 serve dist
This will launch the app on localhost at port 5000. You would still see the page running as before. Open the developer tools, click the Application tab and select Service Workers. You should see a registered service worker:
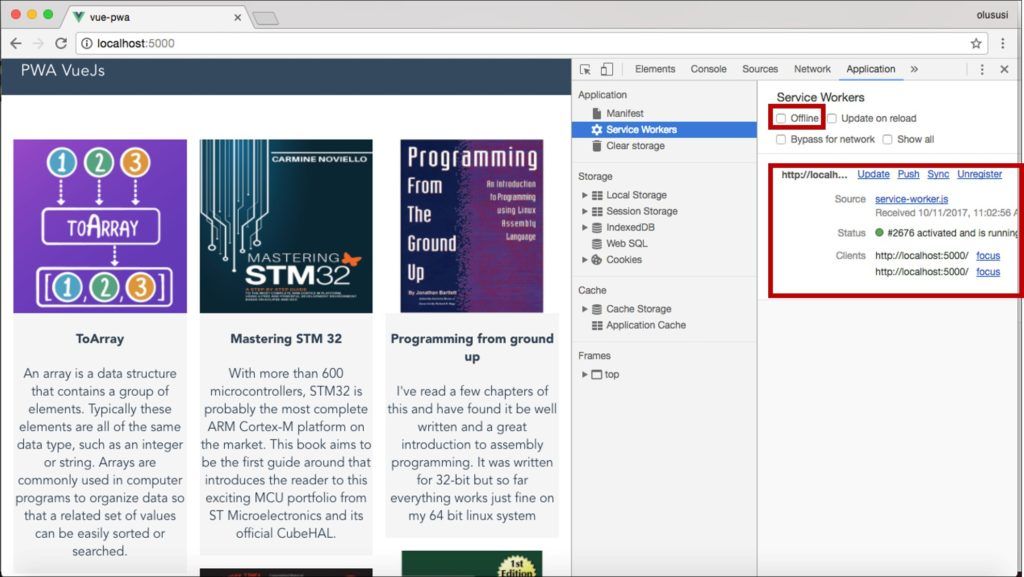
As you can see, the status of the service worker shows it’s active. Now let’s attempt going offline by clicking the check box for offline. Reload the page and you should see our app runs offline:

Cached resources are served when offline
If our book cover images are gone, don’t panic. That is because we haven’t cached our remote images yet. So let’s take a look at the service worker configuration again:
1new SWPrecacheWebpackPlugin({ 2 cacheId: 'my-vue-app', 3 filename: 'service-worker.js', 4 staticFileGlobs: ['dist/**/*.{js,html,css}'], 5 minify: true, 6 stripPrefix: 'dist/' 7 }) 8 staticFileGlobs property is an array of local files we need to cache.
Since our image is stored remotely, in order to cache stored assets and resources we need to make use of a different property called runtimeCaching. This array takes in an object that contains the URL pattern to be cached as well as the caching strategy. Update the build/webpack.prod.config.js to include the following block:
1// service worker caching 2 new SWPrecacheWebpackPlugin({ 3 cacheId: 'my-vue-app', 4 filename: 'service-worker.js', 5 staticFileGlobs: ['dist/**/*.{js,html,css}'], 6 runtimeCaching: [ 7 { 8 urlPattern: /^http:\/\/res\.cloudinary\.com\//, 9 handler: 'cacheFirst' 10 } 11 ], 12 minify: true, 13 stripPrefix: 'dist/' 14 })
For the URL pattern, you will notice that we are using HTTP. Service workers, for security reasons, only work with HTTPS -with an exception for localhost. And since we are using localhost, we can proceed, but don’t forget to change the URL pattern to HTTPS if your assets and resources are served over HTTPS:
1# Build 2 npm run build 3 4 # Serve 5 serve dist
Unregister the service worker from the developer tool, go offline, then reload. Now you have an offline app:
Offline Application
Conclusion
There is a possibility of retaining users on your platform by keeping them engaged at all times. This tutorial has introduced a very simple strategy on how to build a progressive web application using Vue with very little effort. We were able to create a dummy Vue project by using pwa-template, and we later went on to make our web application work offline by using a service worker to cache assets and resources of our web application.
I hope you have been able to learn how to cater to users that might experience poor connectivity or no internet access.


© 2026 Pusher Ltd. All rights reserved.
Pusher Limited is a company registered in England and Wales (No. 07489873) whose registered office is at MessageBird UK Limited, 3 More London Riverside, 4th Floor, London, United Kingdom, SE1 2AQ.