- Products

- Developers
- User stories
- Blog
- Pricing

Exploring Real Time Apps with VueJS, ES2015 and Webpack
Build a realtime web application with Pusher and VueJS.
Introduction
Vue.js is a framework for building web applications using a component based approach. It focuses primarily on the “View” layer of the traditional MVC and in that sense is much more akin to ReactJS than a larger framework like Angular or Ember. If you’re keen for code, the app we’ll build is on GitHub for you to check out and hack with. We’ve also put the app live on GitHub Pages for you to try it out for yourself.
Real Time Apps with VueJS
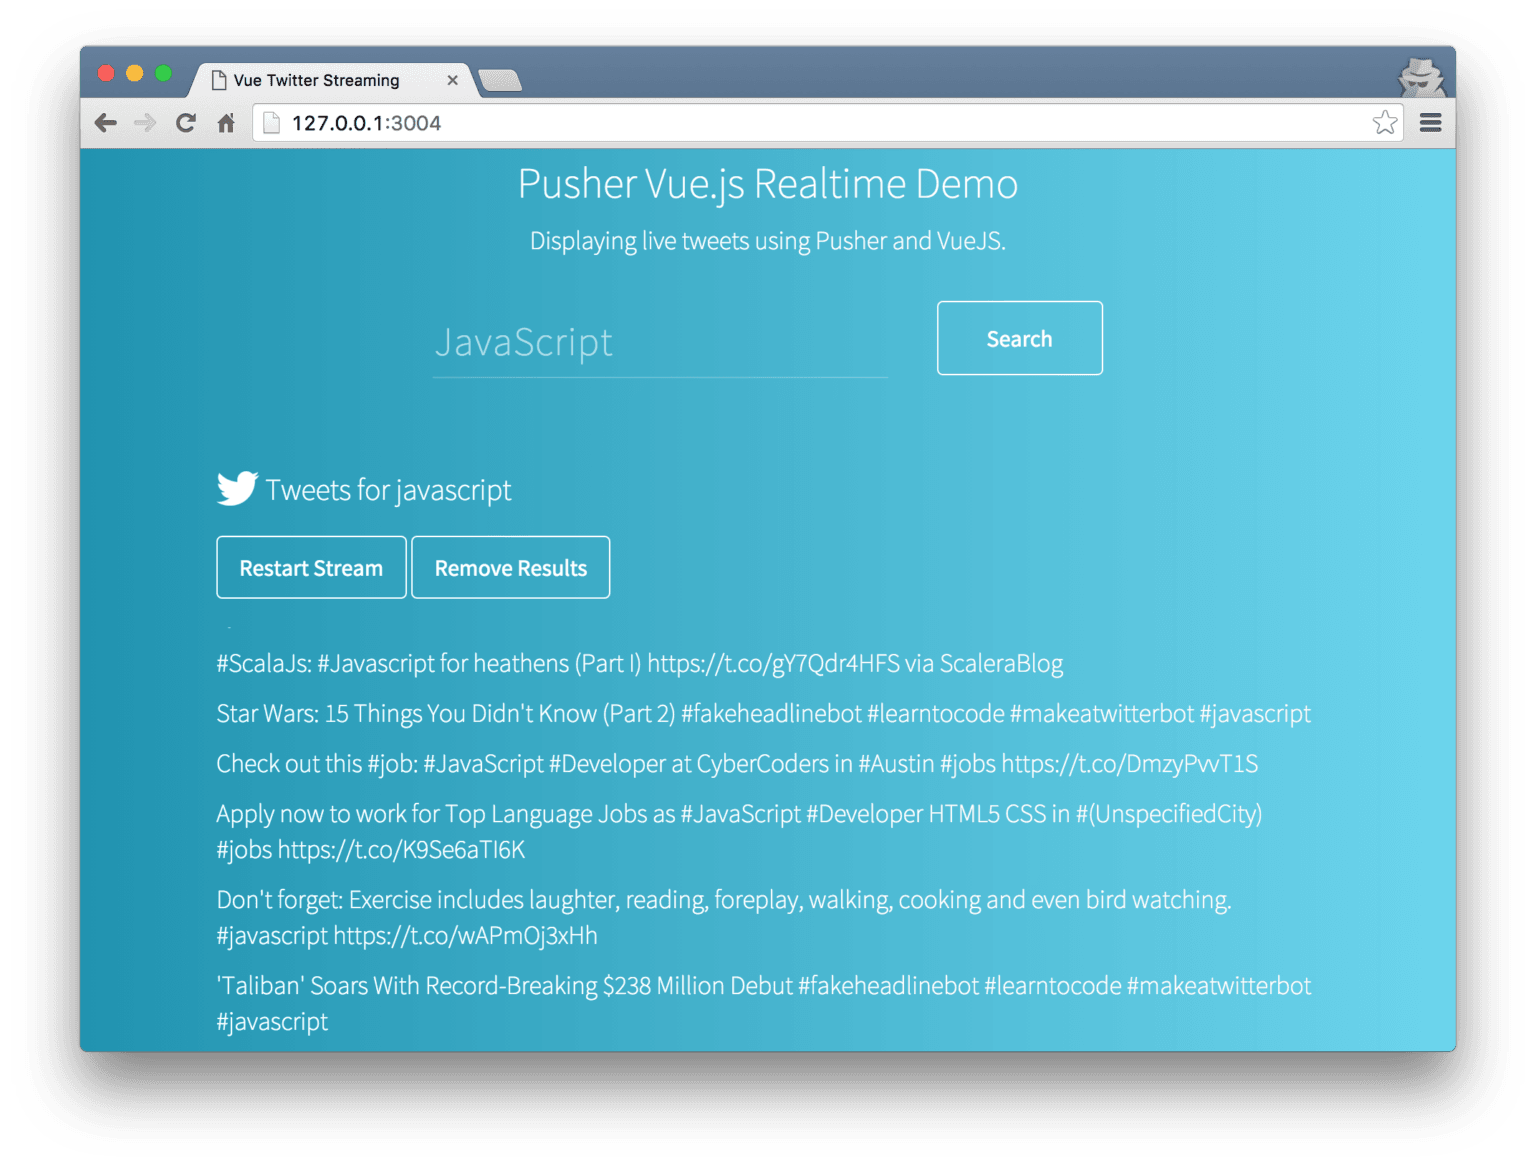
Vue.js recently passed the milestone of releasing Version 1, and to test it out we’re going to build a realtime Twitter search app using it. This is the same app we built in the Angular 2 blog post and uses the Pusher Datasource API project. This API lets us search Twitter for specific terms and have Pusher events triggered whenever a new tweet is found. Our app will let people enter multiple terms and then show tweets whenever we get new data from the Twitter streamer. The API is running live on Heroku and we won’t go into the specifics of it in this post, but the Readme on GitHub will talk you through how it works and how you can get it running locally.
Getting started with Vue.js and ECMAScript 2015
Vue.js can be written in ECMAScript 5 but for the best experience it’s recommended to write ECMAScript 6. This is recommended by Vue.js and also means we can write some more succinct code using some of the powerful new features of the language.
To do this we need to spend a few minutes setting up our environment. If you’d like to get up and running quickly, you can grab the code from GitHub and follow the instructions in the README to get it running locally.
Webpack
We’re going to use Webpack for bundling our application. Webpack can take a JavaScript application and bundle it all together with its dependencies. More importantly for us, we can configure it to run all our files through Babel. Babel will take our ES6 code and convert it into ES5 for us, so we can write using new features without having to worry about browser support.
It’s worth noting that Vue.js doesn’t require you to do this, and if you’d like to avoid Webpack the Vue.js installation guide lists a number of other ways you can get started with the library.
We’re going to stick with the Webpack approach; let’s create a new project with npm and then install our development dependencies:
1npm init -y 2npm install --save-dev webpack babel-loader babel-preset-es2015 babel-core live-server
babel-loaderis the plugin for Webpack that configures it to run all its files through Babel.babel-coreis the core Babel project.babel-preset-es2015is a set of Babel plugins that configures Babel to convert ES6 into ES5. By default Babel doesn’t perform any transformations, so we need to tell it what JS features we’d like it to transform.live-serveris a server that will run our application locally and refresh when it detects a change.
Finally we need to configure Webpack to bundle all our JavaScript up. To do this we create webpack.config.js:
1module.exports = { 2 entry: './app/main', 3 output: { 4 filename: 'bundle.js' 5 }, 6 module: { 7 loaders: [{ 8 test: /\.js$/, 9 exclude: /node_modules/, 10 loader: 'babel', 11 query: { 12 presets: ['es2015'] 13 } 14 }] 15 } 16}
This config tells Webpack to start from app/main.js. From there it will then go through all the code in the application and find any other JavaScript files we need. As it goes through it will also run each file through babel-loader, which we configure using the query property to use the es2015 preset that we installed previously. Webpack will then write our application into bundle.js.
Finally, let’s install Vue:
npm install --save vue
We’ll test out this configuration in a moment, but for now we’re finally ready to start writing some application code! First, let’s create index.html:
1<!DOCTYPE html> 2<html> 3 <head> 4 <title>Vue Twitter Streaming</title> 5 </head> 6 <body> 7 <div id="app"> 8 <app-component></app-component> 9 </div> 10 <script src="bundle.js"></script> 11 </body> 12</html>
The first thing to note is that at the bottom we load bundle.js, which will be the generated file that Webpack creates. The second is that within the #app div we have <app-component></app-component>. This will be a component that we create using Vue.js. Vue.js requires that when you create it, you give it an HTML element that the app will live within. In our case, we’ll use the div#app element. Let’s go and create that app-component and finally get something running on the screen. To do this, first create app/main.js. Here we will initialise Vue.js:
1import Vue from 'vue'; 2// don't worry, we haven't created this yet! 3import AppComponent from './components/app-component/app-component'; 4 5new Vue({ 6 el: '#app', 7 components: { 8 'app-component': AppComponent 9 } 10});
Don’t worry about the reference to AppComponent, we’re about to create that shortly. The way Vue.js works is that we instantiate our Vue app into an element. We then tell Vue what custom components it can expect to find in our code. In our case we reference app-component, so we tell Vue about it and then give it the component.
Let’s now create app-component. Create two folders, one within another:
1mkdir app/components 2mkdir app/components/app-component
We’re going to put each component into its own directory because later we’ll create a template file for each Vue component, and it makes sense for them to exist in the same directory. Now, create app/components/app-component/app-component.js:
1import Vue from 'vue'; 2 3const AppComponent = Vue.extend({ 4 template: '<h1>Hello World</h1>', 5}); 6 7export default AppComponent;
We use Vue.extend to create our components and in this case pass just one option, template, which is set to a string of HTML. Later we’ll see how to place templates into HTML files and load them using Webpack, which means we can avoid long strings of HTML in our JavaScript.
Now we just need to run a couple of terminal commands to get our app up and running. In one tab, run:
webpack -w
This will start Webpack but place it in watch mode, so it will continue to watch for files and rebundle when it needs to. The best thing about this is that Webpack can figure out exactly what changed and not regenerate your entire app again, so rebuilds are lightening quick.
In another tab run ./node_modules/.bin/live-server --port=3004 to run your app locally on port 3004 (pick whichever port you’d like). Then, visiting http://locahost:3004 should show Hello World on the page. We’re up and running.
Building the App Component
Let’s now flesh out our application component. It is going to be responsible for:
- rendering a form that allows the user to search Twitter
- keeping track of all our search terms and rendering results for each of them (using a separate component)
Let’s get started with the form so a user can tell us what they’d like to search for. Now we’re going to need much more HTML, I don’t want to include it inline in our JavaScript file. Let’s move it into a new file, app/components/app-component/app-component-template.html. For now, just place <h1>Hello World</h1> in there.
Next, we will configure Webpack to load raw text files. This is really nice; it lets us treat template files as if they were JS modules. This means we can import them and also that they get bundled up correctly. To do this we’ll install the raw-loader Webpack plugin:
npm install --save-dev raw-loader
Now, update webpack.config.js to configure the new loader:
1module.exports = { 2 entry: './app/main', 3 output: { 4 filename: 'bundle.js' 5 }, 6 module: { 7 loaders: [{ 8 test: /\.js$/, 9 exclude: /node_modules/, 10 loader: 'babel', 11 query: { 12 presets: ['es2015'] 13 } 14 }, { 15 test: /\.html$/, 16 loader: 'raw' 17 }] 18 } 19}
We tell Webpack that whenever a file matches the \/.html$/ regex, which means the file ends in .html, it should run it through the raw loader. Now, let’s update app-component.js to import the template:
1import Vue from 'vue'; 2import template from './app-component-template.html'; 3 4const AppComponent = Vue.extend({ 5 template, 6 // the above is ES6 shorthand for: 7 // template: template 8}); 9 10export default AppComponent;
If you restart Webpack (you have to restart it whenever you add a new plugin) you will still see “Hello World”, however now we’ve got our HTML in a separate file and we’re in a much better place. Let’s add the HTML we need for the form:
1<div> 2 <div id="search-form"> 3 <form v-on:submit.prevent="newSubscription"> 4 <input class="swish-input" v-model="newSearchTerm" placeholder="JavaScript" /> 5 <button class="bright-blue-hover btn-white">Search</button> 6 </form> 7 </div> 8</div>
Note the two Vue.js specific bindings. The first, v-on:submit.prevent binds the function newSubscription (which we’ll define shortly) to be called when our form is submitted. Adding .prevent tells Vue.js that it should prevent the default action. The second, v-model, on our input, sets up a binding between the value of the input and the variable newSearchTerm which we will use in our component. Let’s see the JavaScript that deals with the user submitting the form.
1const AppComponent = Vue.extend({ 2 template, 3 data() { 4 return { 5 newSearchTerm: '', 6 channels: [] 7 } 8 }, 9 methods: { 10 newSubscription() { 11 this.channels.push({ 12 term: this.newSearchTerm, 13 active: true 14 }); 15 this.newSearchTerm = ''; 16 } 17 } 18});
First we define the data function which is expected to return an object that defines the initial state of the component. In our case we’ll set newSearchTerm to an empty string and define an empty array of channels, which is what we’ll add to when the user searches for a new term.
Secondly, we define the newSubscription function within a methods object. Vue requires you to create methods in the methods object, which helps to keep your Vue components tidy and easier to work with. When the user fills in the form and submits it we add a new channel onto our array, and clear out the input field. Each channel has two properties: term, which is the search term, and active, which we set to true. Later we’ll add functionality to be able to toggle a channel to be inactive, at which point we’ll stop listing new results for that channel.
Listing Channels and their results
Next, let’s update the template for the app component so it renders some text for each channel and lets us stop and remove a channel.
1<div class="container tweets-container"> 2 <div id="channels-list"> 3 <div class="channel" v-for="channel in channels"> 4 <h3> 5 <img class="twitter-icon" src="img/twitter.png" width="30" /> 6 Tweets for {{ channel.term }} 7 </h3> 8 <div id="subscription-controls"> 9 <button v-on:click.prevent="toggleSearch(channel)"> 10 {{channel.active ? 'Stop' : 'Restart'}} Stream 11 </button> 12 <button v-on:click.prevent="clearSearch(channel)"> 13 Remove Results 14 </button> 15 </div> 16 <subscription-component 17 :channel="channel" 18 :pusher="pusher"></subscription-component> 19 </div> 20 </div> 21</div>
Firstly, note how we use v-for to loop over and create a new div for each channel:
<div class="channel" v-for="channel in channels">
This will tell Vue to create a new div for every channel in the channels array. The HTML within that div contains the title of the channel – using {{ content }} to output data into HTML – and then some buttons for pausing and removing a channel, along with the subscription-component, which we will look at later.
1<h3> 2 <img class="twitter-icon" src="img/twitter.png" width="30" /> 3 Tweets for {{ channel.term }} 4</h3> 5<div id="subscription-controls"> 6 <button v-on:click.prevent="toggleSearch(channel)"> 7 {{channel.active ? 'Stop' : 'Restart'}} Stream 8 </button> 9 <button v-on:click.prevent="clearSearch(channel)"> 10 Remove Results 11 </button> 12</div>
We then use v-on:click.prevent to bind to the click events of both the buttons. Here we give them a function to call, but also pass in channel as the argument to the function.
Lets write the JavaScript methods toggleSearch and clearSearch. As before, they go into the methods object of app-component.
1methods: { 2 ... 3 toggleSearch(channel) { 4 for (let ch of this.channels) { 5 if (ch.term === channel.term) { 6 ch.active = !ch.active; 7 break; 8 } 9 } 10 }, 11 clearSearch(channel) { 12 this.channels = this.channels.filter((ch) => { 13 return ch.term !== channel.term; 14 }); 15 }
toggleSearch loops through each channel and finds the one that we want to toggle, before swapping the value of activefrom true to false or vice-versa. clearSearch loops through each channel, only keeping the ones that don’t match the given channel.
The subscription component
Finally we’re ready to create subscription-component. This component will be responsible for handing the results that are sent through Pusher and displaying them on the screen. The app-component uses this:
1<subscription-component 2 :channel="channel" 3 :pusher="pusher"></subscription-component>
We pass through both the current channel and an instance of the PusherJS client library. Note that use of : in front of the attribute name; this tells VueJS that it’s a dynamic property and rather than passing through the literal string channel it should evaluate it. This also creates a binding, so if the value of channel changes in the parent component, that value will propagate through to the child.
First, we need to create the subscription component and tell app-component that it can use it. Create the directory app/components/subscription-component, and in there add subscription-component.js and subscription-component-template.html. Let’s first create the JS component:
1import Vue from 'vue'; 2import template from './subscription-component-template.html'; 3 4const SubscriptionComponent = Vue.extend({ 5 template, 6 props: [ 7 'channel', 8 'pusher' 9 ], 10 data() { 11 return { 12 tweets: [] 13 } 14 }, 15 16 // component methods and definitions here 17}); 18 19export default SubscriptionComponent;
Firstly we import the template and tell the subscription component what properties it can expect to be given – you must explicitly tell it what properties to expect. This is a really beneficial feature as it keeps each component very self documenting – it’s impossible to forget what properties it needs. Additionally I set our initial state by defining the data function, which returns tweets, set to an empty array. Now, we can head back into app-component.js and tell it about the subscription-component.
1import Vue from 'vue'; 2import template from './app-component-template.html'; 3import SubscriptionComponent from '../subscription-component/subscription-component'; 4 5const AppComponent = Vue.extend({ 6 template, 7 components: { 8 'subscription-component': SubscriptionComponent 9 }, 10 data() { 11 return { 12 newSearchTerm: '', 13 channels: [] 14 } 15 }, 16 ... 17}
The final thing to change in app-component is to install and then configure the PusherJS library. First, install it:
npm install --save pusher-js
And then import it into the app-component. We’ll define the function created, which is automatically called by Vue when a component is first initialised. This is a great place to perform any setup that’s needed.
1import Vue from 'vue'; 2import Pusher from 'pusher-js'; 3import template from './app-component-template.html'; 4import SubscriptionComponent from '../subscription-component/subscription-component'; 5 6const AppComponent = Vue.extend({ 7 template, 8 components: { 9 'subscription-component': SubscriptionComponent 10 }, 11 created() { 12 this.pusher = new Pusher(YOUR_PUSHER_KEY_HERE); 13 } 14 ... 15}
We’re now done in app-component and can focus on subscription-component. Firstly, let’s fill in the template. Edit subscription-component-template.html so it looks like below:
1<div> 2 <ul class="channel-results channel-{{channel.term}}"> 3 <li v-for="result in tweets"> 4 <p class="white">{{ result.tweet.text }}</p> 5 </li> 6 </ul> 7</div>
Once again we use v-for to loop over each of our tweets and render to the page. We’ll update tweets as new tweets come in from Pusher, and VueJS will take care of rendering them to the DOM.
Subscribing to a channel
When a subscription component is created we want to call our instance of PusherJS and subscribe to a Pusher channel using the search term we were passed by app-component. We can use VueJS’s created function hook to do this. Firstly, let’s define a method called subscribeToChannel. Remember that in VueJS any methods have to go within a methods object:
1methods: { 2 subscribeToChannel() { 3 this.pusherChannel = this.pusher.subscribe(btoa(this.channel.term)); 4 this.pusherChannel.bind('new_tweet', (data) => { 5 this.newTweet(data); // Don't worry, we haven't defined this func yet! 6 }); 7 this.subscribed = true; 8 } 9}
To subscribe to the channel we have to first use btoa to base64 encode the search term. This is because Pusher has rules on what can and can’t be used in channel names. To allow users to search for anything on Twitter regardless of the characters in the search term, we encode the search term, meaning it’s definitely safe to be used as a Pusher channel. We then bind to the new_tweet event, which will be triggered by the server, and set subscribed to true.
Finally, we add the created hook that will simply call this new method:
1created() { 2 this.subscribeToChannel() 3}
Listing new Tweets
Now let’s define newTweet that will take the data from the Pusher event and add it to the tweets array:
1methods: { 2 ... 3 newTweet(data) { 4 this.tweets.push(data); 5 this.$nextTick(() => { 6 const listItem = document.querySelector(`.channel-${this.channel.term}`); 7 listItem.scrollTop = listItem.scrollHeight; 8 }); 9 } 10}
There’s nothing much to do with the data other than push it onto the tweets array. The next piece of code is responsible for scrolling the element that contains the tweets, such that when a new tweet is added the element scrolls to make sure the latest tweet is in view. To do this we need to hook into VueJS to know when our new tweet has been rendered, and thankfully the $nextTick() method does just that. We give it a function and that function is guaranteed to run after the DOM has been updated.
Unsubscribing
If a user removes this subscription by clicking the “Remove” button we implemented previously we need to do some clean up. If we left things as is we’d be in trouble; each component would subscribe to a Pusher channel but wouldn’t unsubscribe when it was removed. This will cause memory leaks over a longer period of time. Thankfully Vue helps us out again – we can define a beforeDestroy function that will be called just before the component is removed from the DOM – this is a great chance to clean up after ourselves. Let’s define a method unsubscribe that will unsubscribe from a channel:
1methods: { 2 unsubscribe() { 3 this.pusherChannel.unsubscribe(btoa(this.channel.term)); 4 this.pusherChannel && this.pusherChannel.unbind(); 5 this.subscribed = false; 6 }, 7 ... 8 }
We call unsubscribe and then unbind, which stop the subscription to the channel and then remove any event listeners. We then set subscribed to false. We can then add a beforeDestroy function that will call this new method:
1beforeDestroy() { 2 this.unsubscribe(); 3}
Toggling between subscribed and unsubscribed
Earlier we implemented a button that would let the user stop one channel from updating, but then click the button again to change it to active once more. We need to listen out for when that occurs and act. To do this we can watch the channel.active property. VueJS lets us define a watch property that is an object of key value pairs. Here, the key will be the property we want to watch, and the value will be the function to call when it changes.
1watch: { 2 'channel.active': function() { 3 if (!this.channel.active && this.subscribed) { 4 this.unsubscribe(); 5 } else if (this.channel.active && !this.subscribed) { 6 this.subscribeToChannel(); 7 } 8 } 9},
Depending on if the channel is active and if we are subscribed or not, we unsubscribe or subscribe accordingly.
Conclusion
With that, we’re done! Whilst writing this article I was pleasantly surprised with how I found VueJS to work with. Its syntax is elegant and because what it is and isn’t responsible for is so well defined I found it easy to pick up. Its documentation is absolutely fantastic and I was able to get up and running really quickly. I hope this article has given you a taste for VueJS and I highly recommend playing with it further. The source is available on GitHub if you’d like to play with the code yourself, and you can also check out the app live on GitHub pages.


© 2026 Pusher Ltd. All rights reserved.
Pusher Limited is a company registered in England and Wales (No. 07489873) whose registered office is at MessageBird UK Limited, 3 More London Riverside, 4th Floor, London, United Kingdom, SE1 2AQ.