- Products

- Developers
- User stories
- Blog
- Pricing

Docker for development: Getting started (Part 1)
A short tutorial introducing Docker. Learn how to get started with Docker and how to work with Docker from the command line. Explore Docker commands and terminology.
Introduction
In this part of the mini-series, we will consider how you can get started with Docker, and introduce the various commands and terminologies.
You can find part 2
Requirements
For you to follow along you need the following:
- Knowledge of Command Line Interface (CLI). Here is a learning resource.
- Bash CLI environment (for windows you can download Git Bash.
- Basic knowledge of Unix commands. Here is a learning resource.
- Basic knowledge of Unix based OS.
- Knowledge of Apache/Nginx server.
When you have the requirements above, proceed to the next section.
Understanding Docker terminology
? Docker is designed to make it easier to create, deploy, and run applications by using containers. Containers allow a developer to package up an application with all of the parts it needs, such as libraries and other dependencies, and ship it all out as one package. – Opensource.com
Imagine being able to package your software along with all the technology it requires to run into a container. When the container is run on any operating system, it will work exactly the way you configured it to work. Docker containers give us this power.
What is a container?
A container is a runtime instance of a Docker image.
A container can also be generically seen as a ‘stand-alone package of a piece of software that includes everything needed to run it: code, runtime, system tools, system libraries, settings.
Containers isolate software from its surroundings, for example, differences between development and staging environments and help reduce conflicts between teams running different software on the same infrastructure.’ – Docker.com
What is an image?
An image is basically an immutable snapshot of a container. Images are created using the build Docker command and they produce a container when they are started with the run command. You can store images locally or in a remote registry and then you can pull the images from the registry from any server or machine.
Images can get very large since they are in essence the complete system. To help with the size when pulling images, Docker images are composed of several layers of other smaller images. This makes a smaller footprint when transferring images over the network. Everytime a Docker image is requested, it pulls all the several layers separately
When the image layers are pulled, it checks to see if it has a copy already locally, and if it does it leaves that layer and moves on to the next one. This means that pulling images has the potential to be fast especially if the image layer has been pulled before.
? If you want more info on Docker terminology, remove this keep this link stored somewhere as it is a glossary of all the Docker terms and what they mean.
Why should you use Docker
There are many reasons why you may use Docker. Here are a few:
- Docker makes it easy to deploy apps to multiple environments. Using Docker in Development makes sure no matter what OS your container is running in, you will have consistent environments every time.
- Run apps with little or no knowledge of how to set up. Docker images usually have a setup phase in the
Dockerfilethat can let the creator configure the entire application how they want it. Sometimes all you need to do isdocker runand your application is up and running. - Docker makes it easy to share code with team members. Git repos are great, however, Docker repositories not only store the code, they store the entire system to make sure the code runs smoothly. This means your teammate can install and run your application with little time spent.
- Docker fits right into the DevOps. There are many tools for DevOps and if you are a DevOps engineer you will definitely be pleased to know that most tools come with support for Docker.
- Keep your local machine clean. Some developers find they can stop installing things on their local machine. Instead, they install into Docker containers, which they can configure and then dispose of, without changing system settings. For instance, you can choose to install MySQL using Docker than using Brew or Apt.
Installing Docker on your machine
The first thing you need to do is install Docker on your local machine. Head over to the Docker download page and download Docker to your machine. Make sure you select the correct software for your operating system.
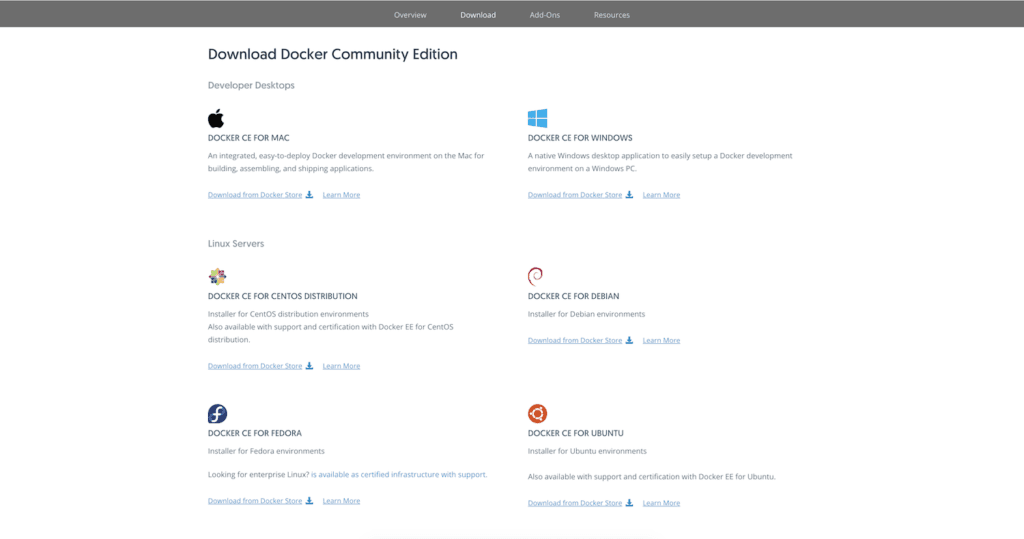
When the download is complete, run the software and follow the wizard that is specific to your operating system.
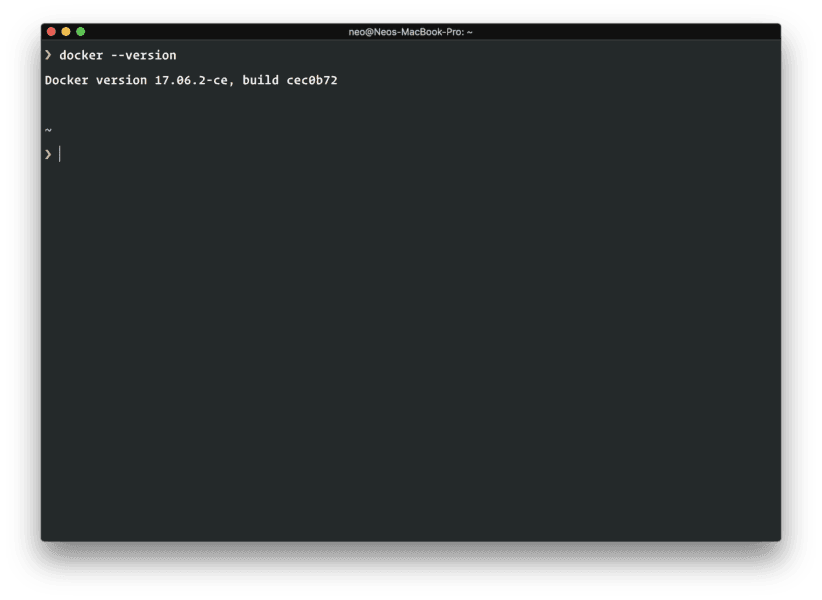
When the installation is complete, you can launch your terminal and run the command below to know if Docker was installed successfully:
1$ docker --version
When you run the command you should see the version of the Docker engine installed on your machine. If you do not see this, it means Docker was not installed or the Docker daemon is turned off and you will need to run the Docker CE software again.
Installing Docker on an Ubuntu server
If you are installing Docker onto an Ubuntu server, you may not be able to use the GUI so you will need to use the command line to install Docker. To do this, in your terminal, run the following command:
1$ curl -fsSL https://download.docker.com/linux/ubuntu/gpg | sudo apt-key add
This will add the GPG key for the official Docker repository to the system. Next, run:
1$ sudo add-apt-repository "deb [arch=amd64] https://download.docker.com/linux/ubuntu $(lsb_release -cs) stable"
The command above will add the Docker repository to APT sources. Next, run the following commands:
1$ sudo apt-get update 2$ sudo apt-get install -y docker-ce
The first one will update the APT sources, and the next one will install Docker Community Edition. You can test your installation by running the command below:
1$ docker --version
Now, you should have Docker installed on your Ubuntu server.
Useful Docker commands
When working with Docker, there are several commands you can work with. However, in real life, you will probably use just a handful. Let’s explore some of the key commands you should remember when working with Docker.
Pulling an image
When using Docker, there is a 100% chance you will need to pull an image at some point. That is the whole point of Docker anyway. So you need to remember the command to pull an image:
1$ docker pull image-name:image-tag

Read more about
docker pull.
Listing images you have locally
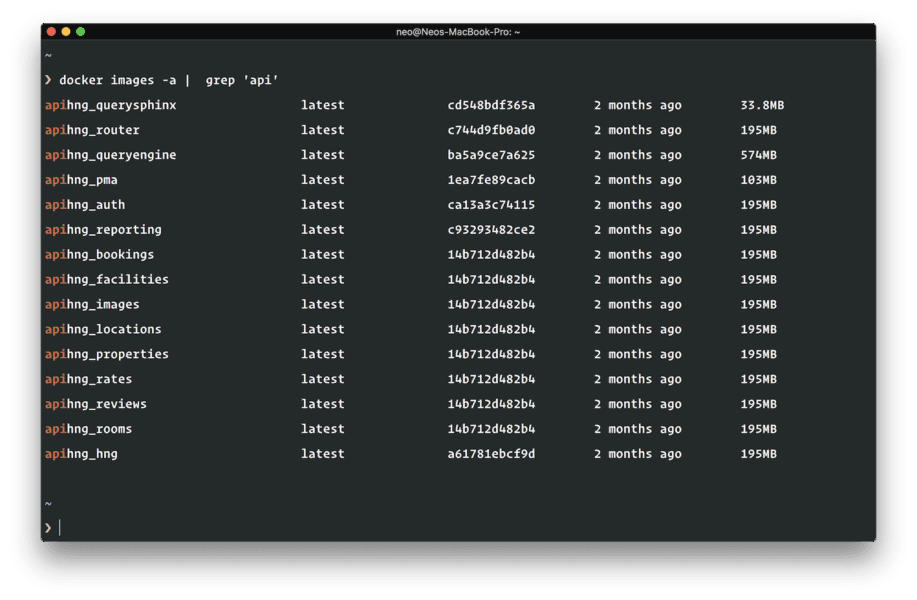
Whenever you run the command above, the image is pulled and stored locally. At some point, you might wish to know which images you have locally, so you can run the following command:
1$ docker images
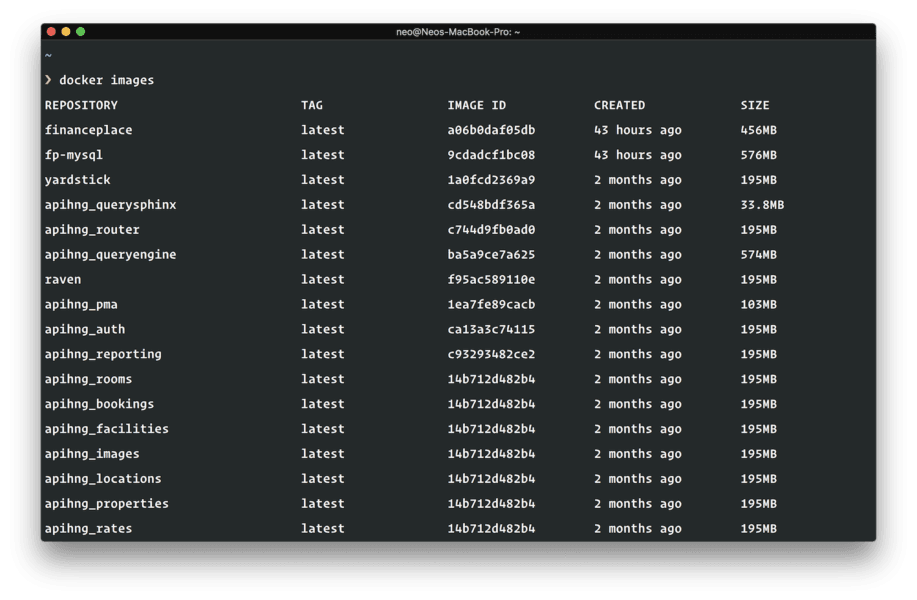
This will list the available Docker images on your machine. There are other options you can use to control the results you get. Read more about
docker images.
Removing images
Sometimes you just want to remove an image that you do not need anymore and free up precious disk space on your machine. Run the command:
1$ docker rmi IMAGE
This will delete the IMAGE you pass. Note that when an image is deleted, it will have to be pulled from the remote server when it is requested again. This can make building containers that require them slower. Also if an image is being used by the container you would have to first stop the container before deleting the image.
? You can pass multiple images to the command above to delete multiple images. e.g to delete the images
oneandtworun the command:docker rmi one two.
Removing dangling images
Docker images are made of multiple layers. Dangling images are layers that do not have any relationship to a tagged image. They are usually useless and consume disk space. To find dangling images you can add the --filter "dangling=true" to the docker images command.
To delete the dangling images run the following command:
1$ docker images prune
⚠ If you build an image locally without a tag then it will be displayed as a dangling image because it is untagged. You can avoid this by always tagging images built.
Removing all images (because of YOLO)
To remove all the images in your Docker environment, run the command below. Note that this action is irreversible and will definitely cause loss of the image data.
1$ docker rmi (docker images -a -q)
⚠ If you run this command it will delete all the images that are currently on your machine. So be careful when running a command like this and be absolutely sure that you want to.
Creating your own Docker image
It is possible to create your own Docker image. There are several ways to do this. You can create one from an existing image or you can create a fresh one, called parent image from scratch.
? Scratch is Docker’s reserved, minimal image for making the filesystem layer in your image. It small, fast, bug-free, and secure.
Creating your first Docker image
We will create a Docker image from the ubuntu file system. Create a directory and add it to Docker file sharing from Docker engine “Preferences → File Sharing”.
⚠ File sharing is specific to Docker for Mac users.
In the same directory, create a file name Dockerfile and add the following to it:
1FROM ubuntu 2MAINTAINER John Doe <john@doe.com> 3 4ENV DEBIAN_FRONTEND noninteractive 5 6ENV APACHE_RUN_USER www-data 7ENV APACHE_RUN_GROUP www-data 8ENV APACHE_LOG_DIR /var/log/apache2 9ENV APACHE_LOCK_DIR /var/lock/apache2 10ENV APACHE_PID_FILE /var/run/apache2.pid 11 12RUN apt-get update && apt-get install -y apache2 13 14EXPOSE 8080 15 16CMD ["/usr/sbin/apache2ctl", "-D", "FOREGROUND"]
? A
Dockerfileis basically an instruction guide to the Docker engine telling it how to build your image and what steps to take to make sure it is built successfully.
The MAINTAINER is the name of the person who maintains the image. The ENV command is used to set environment variables for our new image. These environment variables will be available inside the container just the same way your normal Ubuntu machine has environment variables.
The RUN command instructs Docker to run certain commands while building the image. Every like that has the RUN command spins off a new Image layer so that layer can be pulled from the cache when building in the future. In the file above, we are using apt-get to install Apache.
The EXPOSE command defines a port to expose the container too. By default, Docker container ports are closed off and inaccessible to the host machine or the outside world. By using EXPOSE we are telling the Docker engine to allow port 8080.
Finally, the CMD command lets you set a default command for the Docker container which will be run when you run the container. A Dockerfile is expected to have just one CMD and if there are multiple, only the last one will be run. The format for writing a command using CMD is: [``'``executable``'``, '``param1``'``, '``param2``'``]. In our case, we run apache2ctl.
? You can read more about
RUN,ENVandCMDin this article. You can also find out more about buildingDockerfiles here.
Building your Docker image
When you are done with your Dockerfile, open your terminal and cd to the same directory where the Dockerfile is and then run the following command to build the Image:
⚠ The Ubuntu image is quite large and may consume a lot of data to download. Remember that an Image is an entire package so you are downloading most of what makes up the Ubuntu server.
1$ docker build -t "image_name:tagname" .
When it is done, you can use the docker images command above to check for the image you just built. Read more about the [build](https://docs.docker.com/engine/reference/commandline/build/#options) command.
Running your Docker image as a container
When you have built your Docker Image, you need to run an instance of it. These instances are called Docker Containers. To run a container you need the docker run command. Here is an example of how the command works:
1$ docker run --name="container-name" image-name
The --name is useful sometimes as if you leave it out, Docker will create a nonsensical one for it. The image-name is the image you are trying to run. This image must exist locally and if you do not have it you’ll need the docker pull command to bring it in. Read more about [docker run](https://docs.docker.com/engine/reference/run/).
Listing containers
You can always view the list of containers available on your machine. Use the command below to view them:
1$ docker ps
? Running the above command only displays containers that are currently running. You can use the
-aflag to view all containers including those not currently running.
Read more about listing containers.
Stopping a running container
To stop a container, you can run the following command:
1$ docker stop container-name
This will stop the container if it has a running instance. You will always need to stop a container before deleting the container or its images. Read more about stopping a container.
Removing a container
You can remove a container by using the command below:
1$ docker rm container-name|container-ID
⚠ You have to have stopped the container to be able to remove a container. To remove a running container, you can add the
-fflag which will force it to be removed.
Read more about removing running containers.
Publishing images to the Docker registry
The ability to publish images is another advantage of Docker. When you have built an image, you can publish it so that any of your teammates or coworkers can pull your image and have the exact copy of your application environment. This means they do not have to worry about what the app needs.
Think of it as some sort of a push/pull Git system. Everytime you make changes to your image you can commit the changes then you can push the new changes to the Docker registry. When someone pulls the latest image version they get your committed image instead of the older one.
To publish to the Docker Registry, you need to first create an account on the Docker hub. Once you have an account, the next thing is to create a new repository for the image you have made. From your Docker hub dashboard, click on “Repositories” and then create a new one.
? For Docker images to be successfully pushed to the repository, they must have the same name as the repository you created. So when building your images, make sure you specified the correct name. Example:
docker build -t "Repo_Name" .You can also decide to retag an Image again by using the command:docker tag local-image:tagname new-repo:tagname
To push your image to the registry, run the command below in your terminal:
1$ docker push repo-name:tagname
Congratulations! You just published your first Docker image. It should now be available on the Docker registry.
Conclusion
Docker is an excellent tool for building applications. It allows you to set up and tear down containers in a matter of minutes. You can change your mind about a version of a tool your application is running, quickly change the configuration for your docker image and rebuild it without having to worry about any configuration issues. It is also an excellent way to test your preferred application environment without any lasting implications.
Upgrading your applications will be very easy and hitch-free, and most importantly, you do not have to ever install anything on your computer system again, keeping it clean and safe from any mistakes you may make in the future.
Most importantly, you can share your image with everyone you are working with to ensure everyone has the same application environment at all times.
Now you have learned a better way to build applications, use it for your next projects. In the next part, we will dive into actually using Docker in a project.
You can find part 2


© 2026 Pusher Ltd. All rights reserved.
Pusher Limited is a company registered in England and Wales (No. 07489873) whose registered office is at MessageBird UK Limited, 3 More London Riverside, 4th Floor, London, United Kingdom, SE1 2AQ.