- Products

- Developers
- User stories
- Blog
- Pricing

Debugging common React Native issues on iOS
This article explores common issues when developing for iOS with React Native. It shows you errors you can encounter, and how to troubleshoot them.
Introduction
In this tutorial, we’ll take a look at some of the issues you might encounter while developing iOS apps with React Native. Specifically, we’ll take a look at the following issues:
- Software dependency problems
- Third-party package issues
- Issues when running on device
- Expokit issues
Prerequisites
We assume that you know how to develop apps with React Native. It also assumes that you have set up your Mac for React Native development. This means you have installed Xcode, Node, and Watchman.
Optionally, you can check out my article on Debugging common React Native issues on Android for some tips on how to deal with issues that are Android-specific.
Debugging checklist
In this section, we’ll take a look at some of the things you might want to check before really diving into the issue you’re having. Making sure these are taken care of first will save you some time when developing iOS apps with React Native.
- Did you check the troubleshooting section of the React Native docs? If you haven’t seen it already, there’s a troubleshooting section in the React Native docs. There’s also a separate troubleshooting section for when running the app on an iOS device. Be sure to check those first before going through the rest of the article.
- Did you update Xcode to the latest version? Most of the time, what causes your build to fail is that you have an outdated version of Xcode. To update Xcode, open the App Store and navigate to the Updates tab. You should see a new entry if a new Xcode version is available. Just hit update and restart your computer once it’s done updating.
- Have you set up a personal team for Xcode? If you want to test your project on your iOS device, you should first set up a provisioning profile. Here’s a guide that shows you how to do that: How to Create a Free iOS Development Provisioning Profile.
- Have you tried deep-cleaning the project? If you’re trying to get a native module to work but it just won’t (after following the installation instructions to the letter). The best next step is to make sure you’re not caching anything that might be breaking your build. You can do that by executing the following commands:watchman watch-del-all
rm -rf node_modules
rm -rf $TMPDIR/react-*
rm -rf $TMPDIR/npm-*
rm -rf ios/build
Once that’s done, execute npm install again and re-run the project.
Software dependency problems
In this section, we’ll take a look at some of the problems you might encounter if you haven’t installed all of the software required by React Native. Or if there are problems with how the software is used.
Watchman
Here are a few issues brought about by Watchman.
Application has not been registered
If you see the error “Application {your project name} has not been registered”:

This issue is caused by an old bundler instance that is still running. When running different projects, it’s always a good practice to stop running instances of the metro bundler by pressing ctrl + c or ⌘ + c on your keyboard. After that, execute react-native start to re-run the bundler with the correct project.
If you still have the issue after applying the solution above, your problem might be that you’re using a different project name from the one you used when you initialized the project. If you used react-native init TestProject when you created your project, the name you register with AppRegistry should be the same as that:
1import { AppRegistry } from 'react-native'; 2 import App from './App'; 3 4 AppRegistry.registerComponent('TestProject', () => App);
Third-party package issues
In this section, we’ll take a look at some of the problems which you might encounter when installing third-party packages. As a case study, we’ll be looking at how to get React Native Maps working.
No podfile
When starting out with iOS app development with React Native, one of the first things you need to do is set up CocoaPods. CocoaPods is the dependency manager for native iOS projects. React Native taps into this as well so you need to set it up first. You can follow the installation instructions on their website.
Once Cocoapods is installed, navigate inside the ios folder of your React Native project and execute the following:
1pod init
That should set you up for any React Native package that uses Cocoapods to manage dependencies. Just remember to make the necessary changes to the ios/Podfile and execute pod install whenever you include a new dependency.
Unmet peer dependency
This issue is caused by the third-party modules that you install. For example, specific versions of React Native and React usually go together. Here are the dependencies (package.json file) in the project that I’m currently working on:
1"dependencies": { 2 "react-native": "0.55.4" 3 },
But when you install React Native Maps and you view its package.json file, it’s peer dependency doesn’t include React Native version 0.55:
1"peerDependencies": { 2 "react-native": "^0.51 || ^0.52 || ^0.53 || ^0.54", 3 }
This means you’ll get the following error when installing version 0.21.0 of React Native Maps:

This is more like a warning that React Native Maps won’t work as expected if your project uses a different version of React Native. So it doesn’t necessarily mean that your project will break if you continue to use this version. You can try running your project first, and if the build succeeds then there’s a good chance that that version actually works.
If you found that the build is breaking, then you can try the following solutions:
- Downgrading the version of React Native for your whole project.
- Using a lower version of React Native Maps. One that uses the same version of React Native as your project does.
The second option is a better idea if you have a lot of other third-party packages installed on your project. So we’ll go with that.
Visit the releases page of React Native Maps and check the version you want to install. When looking for a version, check the package.json file of the version you are installing and make sure its peerDependencies has the same react-native version as your project. After that, navigate to the root directory of your project and install the version you picked:
1npm install --save react-native-map@0.21.0
Once installed, follow the installation instructions for the version you picked.
Issues when running on a device
In this section, we’ll take a look at the issues you might encounter when running the app on an iOS device. Before you proceed with this section, I recommend you to check out the troubleshooting section when running on a device in the React Native docs. That shows you how to configure code signing. Code signing is a necessary step when running apps on an iOS device. This ensures that the apps installed on iOS devices are from a known source. If you want to know more about code signing, here’s an article that explains it very well: iOS Code Signing & Provisioning in a Nutshell.
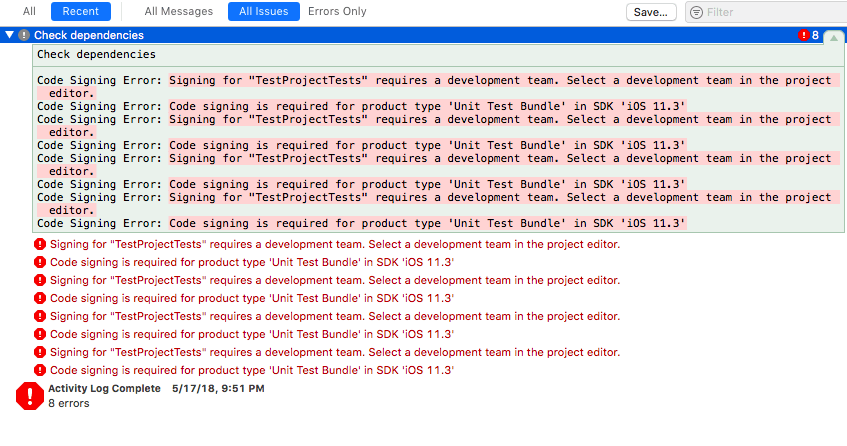
Back to the issue at hand, you will get an error similar to the following if you haven’t properly set up code signing for your project:
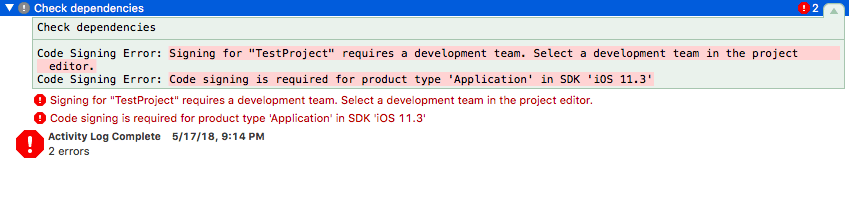
If you click on the project navigator on Xcode, click on your project name, then click on the General tab, you can see that there’s no team assigned to the project.
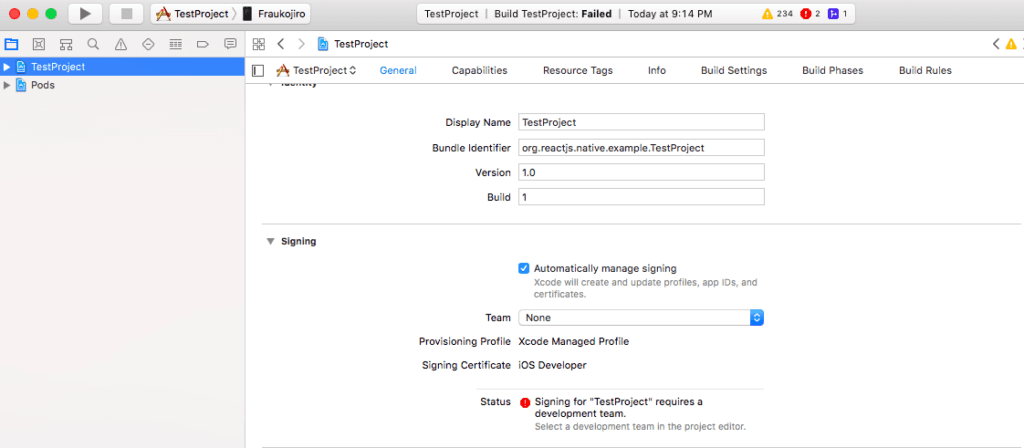
Select a team from the drop-down and it should prompt you to try creating a provisioning profile again because it couldn’t create it with the Bundle Identifier that you’ve provided.
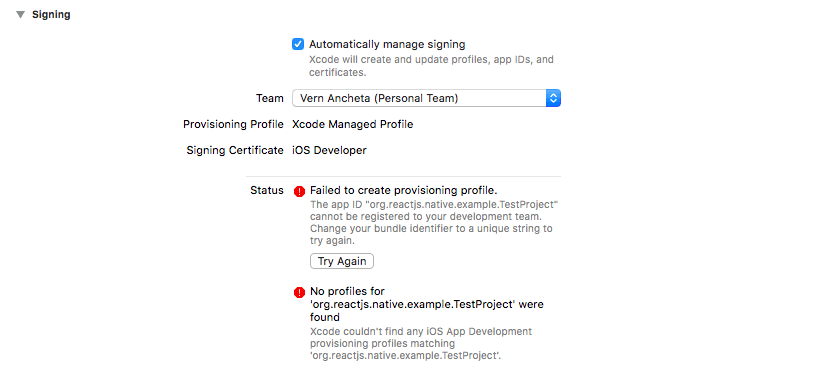
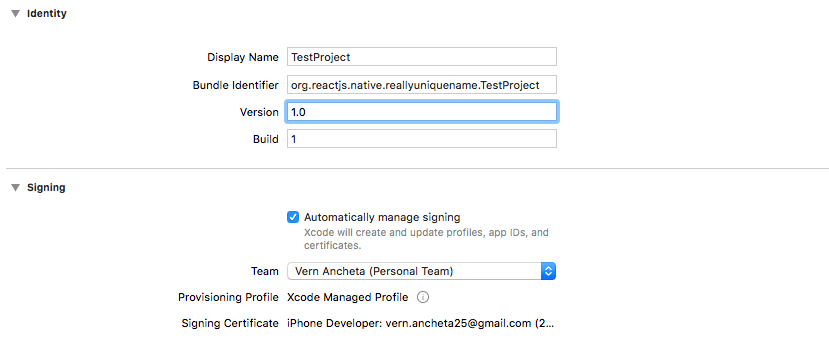
More often than not, the bundle identifier generated by React Native is already taken. The solution to this is to come up with a more unique name. This should automatically create the provisioning profile once you move out of the text field for the bundle identifier:
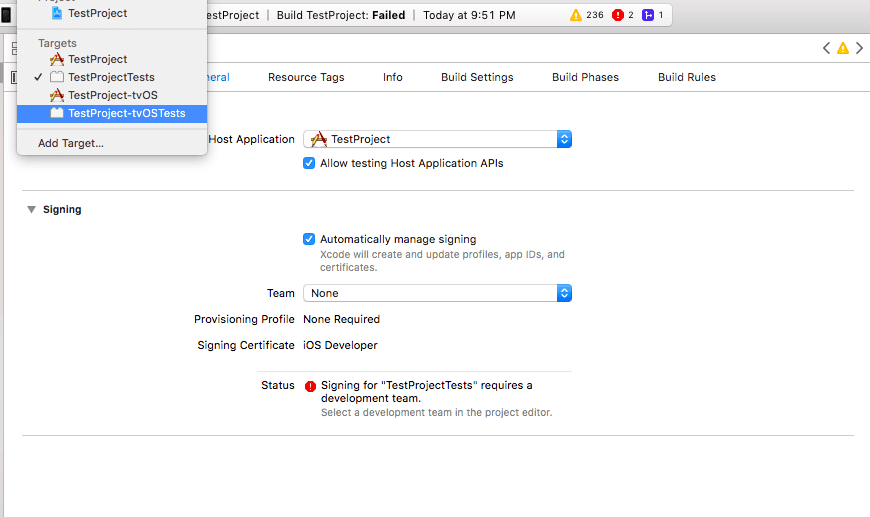
Running the project again on the device should work by now. But if not, then there’s a good chance that the error you’re getting is similar to the following:
To solve this, click on each of the project targets and select the same team that you used earlier:
Once that’s done, your project should run on the device without a hitch.
ExpoKit issues
In this section, we’ll take a look at some of the issues you might encounter when using ExpoKit. For those unaware, ExpoKit is an Objective-C and Java library that allows you to use Expo’s APIs within a native Android or iOS project. Not all React Native developers will decide to use Expo or ExpoKit, so this is more like an optional section for those who are using it.
To avoid problems when using ExpoKit, you first have to make sure you have properly set up your project. Open the app.json file and make sure that the name is set to the same name as what you gave your app when you first created it with exp init.
1{ 2 "expo": { 3 "name": "yourAppsName", 4 } 5 }
Next, you have to include the platforms that you want to build for:
1{ 2 "platforms": [ 3 "ios", 4 "android" 5 ] 6 }
If you want to build for ios, add a unique bundleIdentifier. This is what Xcode will use when building your app:
1{ 2 "ios": { 3 "bundleIdentifier": "com.yourname.yourapp" 4 } 5 }
If it’s Android, you also have to add the android option with the name of the package:
1{ 2 "android": { 3 "package": "com.yourname.yourapp" 4 } 5 }
After that, the last step is to open the package.json file and make sure that the name is the same as that of the app.json file:
1{ 2 "name": "yourAppsName" 3 }
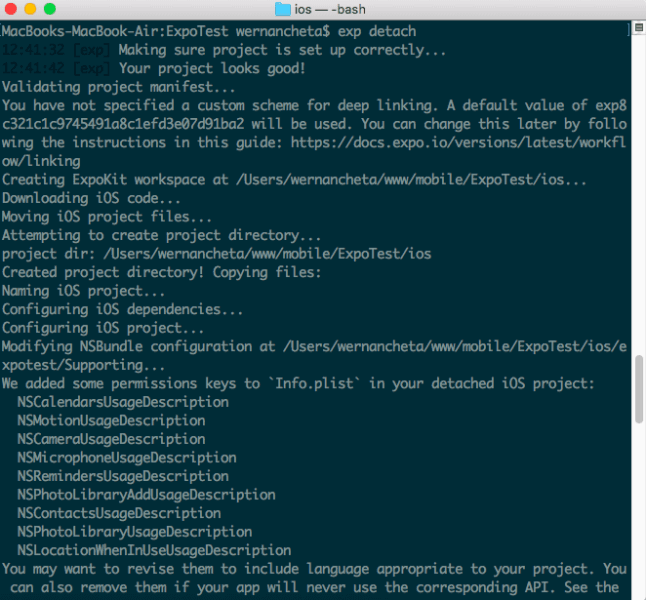
Once those steps are done, your Expo app should be ready for ExpoKit. At this point, you can already execute exp detach from the root of your project directory.
Here’s what it looks like if exp detach worked:
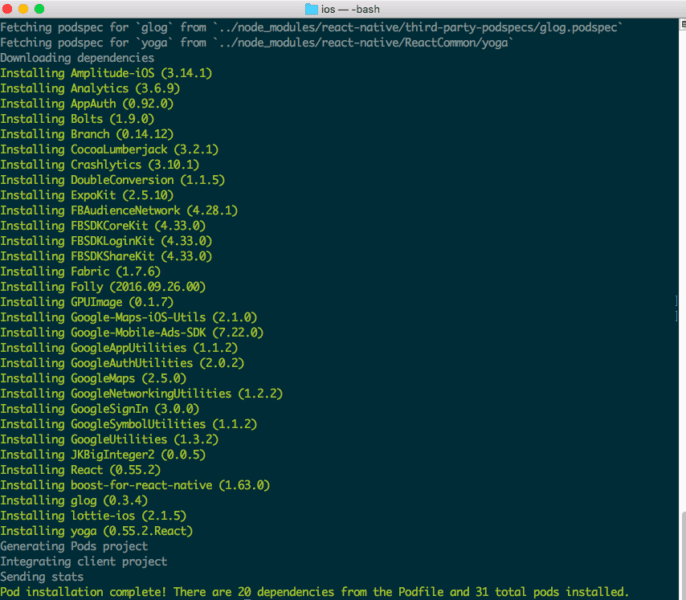
The next step is to navigate inside the ios directory and execute pod install. ExpoKit uses Cocoapods to manage its dependencies, but detaching to ExpoKit doesn’t automatically install the pods needed for the app to run. That’s why you have to install it manually:
When developing the app, you want to run the React Native development server first before opening the ios/yourprojectname.xcworkspace file on Xcode. This helps you avoid the following error:
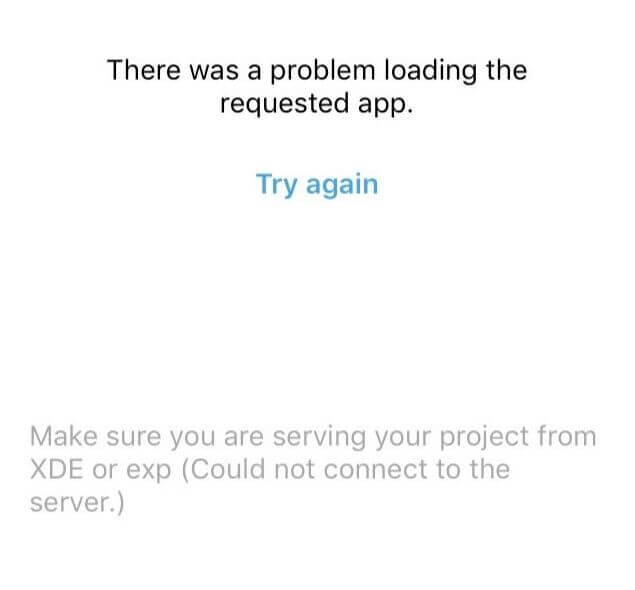
After that, you can already run the app on your device by searching for it on Xcode and hitting the play button.
ExpoKit issues with native packages
Detaching to ExpoKit means we’re still able to use Expo’s APIs. That includes the MapView API which allows us to display a map within the app. This means that we don’t have to install the React Native Maps package. Attempting to do so will only give you an error that looks like the one below:
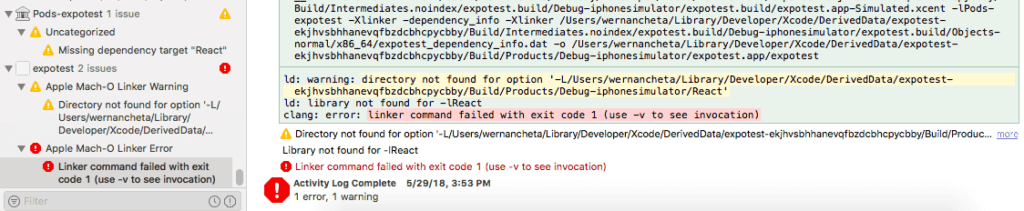
The error above isn’t really very user-friendly, but I only got it after installing React Native Maps and following the installation instructions on their GitHub repo.
ExpoKit already uses the React Native Maps package behind the scenes so installing it again will only cause errors. This is because you’re essentially duplicating the libraries linked to the iOS project.
If you’ve already installed React Native Maps, you can uninstall it by executing the following command from the root of your project directory:
1npm uninstall react-native-maps --save
After that, remove all the entries pertaining to React Native maps on your ios/Podfile. In my case, I had to remove the following lines:
1rn_path = '../node_modules/react-native' 2 rn_maps_path = '../node_modules/react-native-maps' 3 4 pod 'react-native-maps', path: rn_maps_path 5 pod 'react-native-google-maps', path: rn_maps_path 6 7 pod 'GoogleMaps' # Remove this line if you don't want to support GoogleMaps on iOS 8 pod 'Google-Maps-iOS-Utils' 9 10 installer.pods_project.targets.each do |target| 11 if target.name == 'react-native-google-maps' 12 target.build_configurations.each do |config| 13 config.build_settings['CLANG_ENABLE_MODULES'] = 'No' 14 end 15 end 16 if target.name == "React" 17 target.remove_from_project 18 end 19 end
Once you’ve removed those lines, save the file and execute pod update inside the ios directory of your project.
Once that’s done, you should now be able to start the development server and run the app:
1react-native start 2 react-native run-ios # only for running on the iOS simulator
Note that when running on a device, you should open the ios/yourproject.xcworkspace file in Xcode instead of executing react-native run-ios in your terminal.
You can choose which simulated device you want to run on by specifying the --simulator option:
1react-native run-ios --simulator "iPhone 5s"
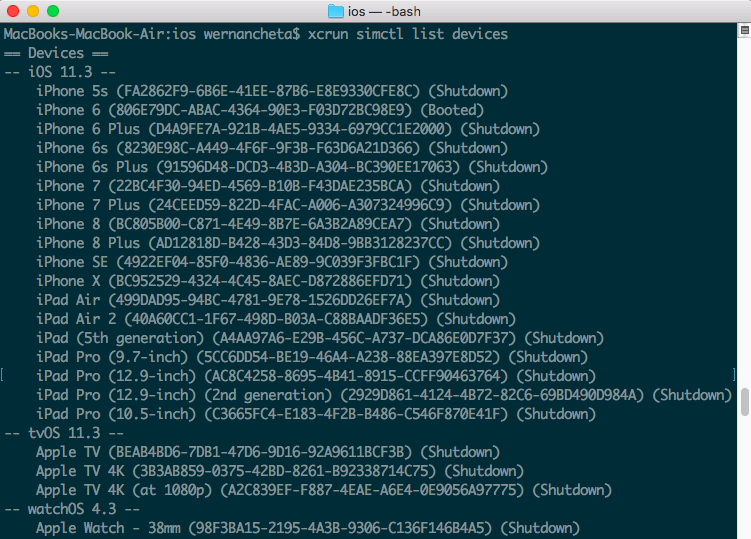
You can see a list of available devices by executing the following command:
1xcrun simctl list devices
This returns an output similar to the following:
Conclusion
That’s it! In this article, you’ve learned how to deal with some of the most common issues that you might encounter when first starting out developing React Native apps to be deployed for iOS.


© 2026 Pusher Ltd. All rights reserved.
Pusher Limited is a company registered in England and Wales (No. 07489873) whose registered office is at MessageBird UK Limited, 3 More London Riverside, 4th Floor, London, United Kingdom, SE1 2AQ.