- Products

- Developers
- User stories
- Blog
- Pricing

Build a realtime food delivery PWA using Vue.js and Pusher
In this tutorial, we will learn how to build a realtime delivery tracking PWA using Vue.js, Pusher, Progressbar.js, and Bulma.
Introduction
Quite a number of us like to order food. How about we track the delivery of meals right from placing our order to its delivery. In this article, we would be building a food delivery tracking progressive web app (PWA) using Pusher and Vue.js.
Here is what the final demo would look like:
Background
A progressive web app is simply an app that employs various modern technologies to achieve a unique goal. In this article, we will be building a PWA that can engage the user even when they lose connectivity.
To achieve this realtime feature, we will be using Pusher. Pusher is a leader in realtime technologies and allows us to perform various operations on the web in realtime. Our offline starter project will be an enhanced Vue PWA webpack template. Also, we will be making use of Progressbar.js to implement a smart progress bar functionality on our app and Bulma classes to style our app.
Requirements
Knowledge of HTML, CSS JavaScript and Vue is required, along with the following tools:
- Node
- Vue-cli
- Pusher
- Progressbar.js
- Bulma
Setup
Install Vue
We will be working with vue-cli, which you can install with:
1npm install vue-cli -g
This installs the latest version of Vue CLI globally on your machine. Webpack has a PWA template and we will work with this in building our app. Create a Vue project with the pwa template. This is the syntax for creating a project with a template in Vue:
1vue init <template> <project-name>
For our app, in the command prompt we run:
1vue init pwa pusher-vue-pwa
Several popup commands requesting some project details will be displayed on our console. For the purpose of this project, skip all of them and use all default values provided. You can customize these if you choose though.
Now let’s test our app, run:
1cd pusher-vue-pwa // Changes directory to our project folder 2 npm install //Installs all dependencies required 3 npm run dev //Serves our app locally.
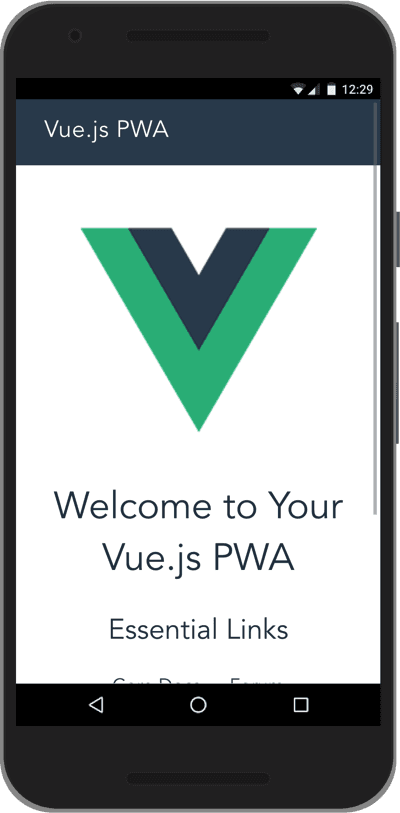
You should get a welcome screen:
Install Dependencies
Next, let’s install our dependencies with:
1npm install bulma progressbar.js pusher pusher-js dotenv --save
- Bulma: CSS framework based on flexbox
- Progressbar.js: Used to animate SVG paths
- Pusher: Provides realtime service (server-side)
- Pusher-js: Provides realtime service (client-side)
- Dotenv: Used to load environment variables
dotenv is used to load environmental variables from a .env file in our root folder. Our pusher keys will be saved in this file. No pusher keys yet? You’ll get them next.
Create a Pusher Account
Go on to Pusher and create an account. On the left nav bar, create a new app with any name of your choice. You will be issued an app-id, a pusher key, and a pusher-secret. Select a cluster near you and keep these credentials safe; we will require them later in our app.
Configure a Server
For our delivery app, we will configure our pusher server with the pusher credentials obtained on Pusher account creation. In our root folder, we create a file .env and pass in our credentials:
1**/.env** 2 3 PUSHER_APP_ID=XXXXXXXXXX 4 PUSHER_KEY=XXXXXXX 5 PUSHER_SECRET=XXXXXXX 6 TIME=5000
This file will be utilized by dotenv, which we installed earlier.
Create a file in the root directory named server.js, here we shall configure our server. First, we require dotenv and apply the .config() method to it. This allows us to use the process.env object.
1require('dotenv').config(); 2 const Pusher = require('pusher'); 3 const { PUSHER_APP_ID, PUSHER_KEY, PUSHER_SECRET, TIME } = process.env; 4 5 const pusher = new Pusher({ 6 appId: PUSHER_APP_ID, 7 key: PUSHER_KEY, 8 secret: PUSHER_SECRET, 9 cluster: 'eu', 10 encrypted: true 11 });
As seen above, the ES6 destructuring technique is used to assign the data in our .env object to the listed constants. Next, we create a new pusher instance and assign our pusher credentials to their respective object properties as seen above.
For our demo, we shall use a setInterval() function to simulate the timing of the pizza delivery process. Let’s configure this timing function:
1let stage = 1; 2 const interval = setInterval(() => { 3 const messages = { 4 1: "Order Received", 5 2: "Order Placed", 6 3: "In the Oven", 7 4: "Out for Delivery", 8 5: "Delivered" 9 } 10 stage = stage + 1; 11 const messageId = stage-1; 12 if (stage > 5) { 13 console.log('clearing'); 14 clearInterval(interval); 15 } 16 17 pusher.trigger('food', 'status', { 18 message: messages[messageId], 19 progress: messageId/5 20 }); 21 }, TIME);
We created a stage variable to keep track of the iteration. In our setInterval() function, we pass it the usual callback using the ES6 arrow function. In this function, we create an object containing the individual processes as values with their properties being numbered keys. The stage value is incremented by one for every iteration. This ensures that at the last stage, the interval is cleared out and exited.
We created a Message ID to refer to the message used from the array, and then converted that to a fraction to serve as the progress bar as well. This serves as our progress. The if block creates a termination case for our function based on the value of messageId. As long as the function is not terminated, we keep calling the trigger method on the pusher instance, passing it arguments of channel, event, and a payload. This payload is an object containing data we would like to send over our pusher channel.
Create a Client with Vue
Vue is used to create the client interface as stated earlier. In our src folder, there is an already configured Vue component — App.vue. Delete all the content in it and let’s get to creating our own content. Add the following template to represent the UI:
1**/src/App.vue** 2 3 <template> 4 <section class="hero is-danger is-fullheight"> 5 <div class="notification is-warning" v-show="!connectivityStatus"> 6 <button class="delete"></button> 7 {{connectivityText}} 8 </div> 9 <div class="hero-body"> 10 <div class="container"> 11 <div class="level"> 12 <div class="level-item has-text-centered"> 13 <div> 14 <status :progress="progress"></status> 15 <h1 class="title">{{statusText}}</h1> 16 </div> 17 </div> 18 </div> 19 </div> 20 </div> 21 </section> 22 </template>
Notice the <status> component and the :progress binding? Their values are received from the component’s object as shown below:
1**/src/App.vue** 2 3 <script> 4 require('../node_modules/bulma/css/bulma.css'); 5 import pusher from 'pusher-js'; 6 import Status from '@/components/Status'; 7 export default { 8 data() { 9 return { 10 statusText: '', 11 progress: 0, 12 connectivityText: '', 13 connectivityStatus: true, 14 } 15 }, 16 created() { 17 var pusher = new Pusher('API_KEY', { 18 cluster: 'eu', 19 encrypted: true 20 }); 21 var channel = pusher.subscribe('food'); 22 channel.bind('status', (data) => { 23 console.log(data) 24 this.statusText = data.message; 25 this.progress = data.progress; 26 }); 27 }, 28 components: { 29 'status': Status 30 } 31 } 32 </script>
First, we require bulma, this provides all the bulma classes used to style our app in the template.
Next, we import pusher-js which we installed at the beginning. A Status custom component is also imported which we will create soon. In our Vue data method, we create and return an object whose properties values will be used in the template. The statusText property displays the status of our order.
The value of connectivityText is displayed whenever our device is offline and this depends on the value of the connectivityStatus property to be visible or not. We will set these values soon.
In the created() lifecycle method, we create a new pusher instance on the client side. This instance receives the payload from the server once we subscribe to our channel created on the server.
Note: Multiple events can be created per channel.
After a new pusher instance is created with our pusher-key (obtained on registration) as seen above. With this instance, we can subscribe to the channel we used on the server. Next, bind the status event to channel, passing it a callback which fetches the payload from the channel. The data fetched is passed as values to the properties we created in our data() method.
Progress Status Component
In the components folder, delete the Hello.vue component and create a Status.vue file. You also need to replace Hello.vue with Status.vue in the routes list if you opted for routing when creating with Vue CLI.
Add a div with a status class to the template as shown below:
1<template> 2 <div class="status"></div> 3 </template>
The div tag serves as a mount point for the progress status widget. Next, create the component’s logic that imports the progressbar plugin:
1<script> 2 import ProgressBar from 'progressbar.js'; 3 export default { 4 data() { 5 return { 6 bar: null 7 } 8 }, 9 props: ['progress'], 10 watch: { 11 progress(val) { 12 this.bar.animate(val); 13 } 14 }, 15 mounted() { 16 this.bar = new ProgressBar.Circle(this.$el, { 17 color: '#FFEA82', 18 trailColor: '#eee', 19 trailWidth: 1, 20 duration: 1400, 21 easing: 'bounce', 22 strokeWidth: 6, 23 from: { color: '#d6ff82', a: 0 }, 24 to: { color: '#5aedb4', a: 1 }, 25 // Set default step function for all animate calls 26 step: function(state, circle) { 27 circle.path.setAttribute('stroke', state.color); 28 } 29 }); 30 this.bar.animate(this.progress); 31 } 32 } 33 </script>
The component has a bar property which is used to keep track of the widget configuration instance. It is used to configure the awesome circular status bar.
We configure the Progress Bar in our mounted lifecycle method to ensure that the DOM is ready before manipulating it. This is done by creating an instance of the Circle constructor on the ProgressBar object. After configuring our circular bar, the .animate() object is called on bar and passed a parameter which is the value of progress property. The property is received from the parent component via props. This triggers an animation in the status bar but with a zero initial value so nothing is obvious.
Remember the :progress property we bound to the value of progress in App.vue? It would only be accessible to the Status child component if we specify it in the props array.
Now to a fun part; in the watch object, we state a progress function which listens for value changes on the progress property. Whenever the value changes, the new value is passed as a parameter to the animate method on this.bar. This means that whenever a new progress value is received from the server, it propagates through the App parent component, down to the child’s watch object and updates the status of our order. This update is observed from the progress circular bar.
If you don’t have the app running, run:
1npm run dev
Then start the server:
1node server.js
Once the server starts running and is emitting events, you should see the client update as shown in the video below:
Handling Offline
How do we handle notifications when offline?
We listen to the windows object for an offline event or an online event, in which case this.conectivityStatus is false or true respectively. When connectivityStatus is false, connectivityText resolves to:
1'You seem to be offline. Connect to see latest order status'
In the created() method of App.vue, let’s create an EventListener:
1created() { 2 ... 3 window.addEventListener('offline', () => { 4 this.connectivityStatus = false; 5 this.connectivityText = 'You seem to be offline. Connect to see latest order status'; 6 }) 7 window.addEventListener('online', () => { 8 console.log('asd') 9 this.connectivityStatus = true; 10 }) 11 }, 12 ...
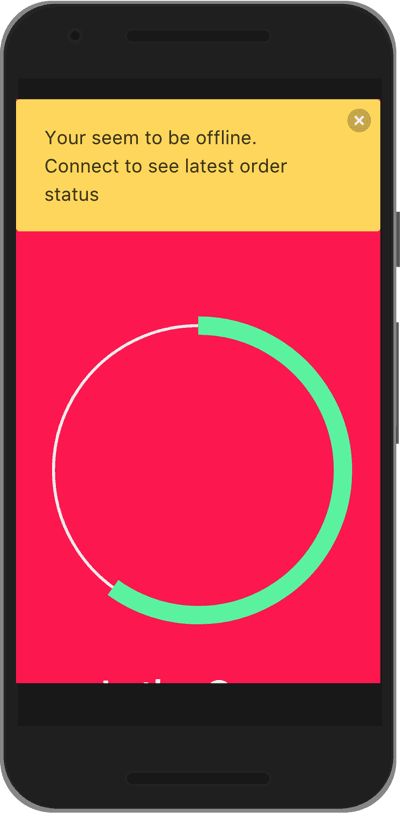
While the app is running, turn off your network connectivity and you should see a warning message pop-up on the screen as shown in the image below:
Conclusion
In this article, we built a realtime delivery tracking PWA using Pusher and Vue while implementing status bar features with Progressbar.js and styling with Bulma. This app has minimal styling, feel free to add more styles and possibly more cool functionalities. You can find the source code here.


© 2026 Pusher Ltd. All rights reserved.
Pusher Limited is a company registered in England and Wales (No. 07489873) whose registered office is at MessageBird UK Limited, 3 More London Riverside, 4th Floor, London, United Kingdom, SE1 2AQ.