- Products

- Developers
- User stories
- Blog
- Pricing

How to build a realtime collaborative text editor in iOS
In this tutorial, we will cover how to build a realtime collaborative text editor on iOS using Pusher, Swift and NodeJS.
Introduction
Text editors are increasingly popular these days, whether embedded in a website comment form, or as a notepad, there are many forms of text editors. In this post, we are not only going to learn how to build a beautiful text editor mobile app in iOS, we are also going to learn how to make it possible to collaborate on a note in realtime using Pusher. Please note, however, that to keep the application simple, the article will not cover concurrent edits, thus only one person can edit at the same time while others watch.
The application will work by triggering an event when some text is entered. This event will be sent to Pusher and then picked up by the collaborator’s device and updated automatically. Here is a screen recording of how it would work:

How to build a realtime collaborative text editor in iOS
To follow along in this tutorial, you will need the following:
- Cocoapods, to install run
gem install cocoapodson your machine - Xcode
- A Pusher application – you can create a free account and application here
- Some knowledge of the Swift language
- NodeJS
Getting started with our iOS application in Xcode
Launch Xcode and create a new project. We are calling ours Collabo. After following the set up wizard, and with the workspace open, close Xcode and then cd to the root of your project and run the command pod init. This should generate a Podfile for you. Change the contents of the Podfile:
1# Uncomment the next line to define a global platform for your project
2 platform :ios, '9.0'
3
4 target 'textcollabo' do
5 # Comment the next line if you're not using Swift and don't want to use dynamic frameworks
6 use_frameworks!
7
8 # Pods for anonchat
9 pod 'Alamofire'
10 pod 'PusherSwift'
11 end
Now run the command pod install so the Cocoapods package manager can pull in the necessary dependencies. When this is complete, close Xcode (if open) and then open the .xcworkspace file that is in the root of your project folder.
Designing the views for our iOS application
We are going to create some views for our iOS application and these will be the backbone where we will hook all the logic into. Using the Xcode story board, make your views look a little like the screenshots below.
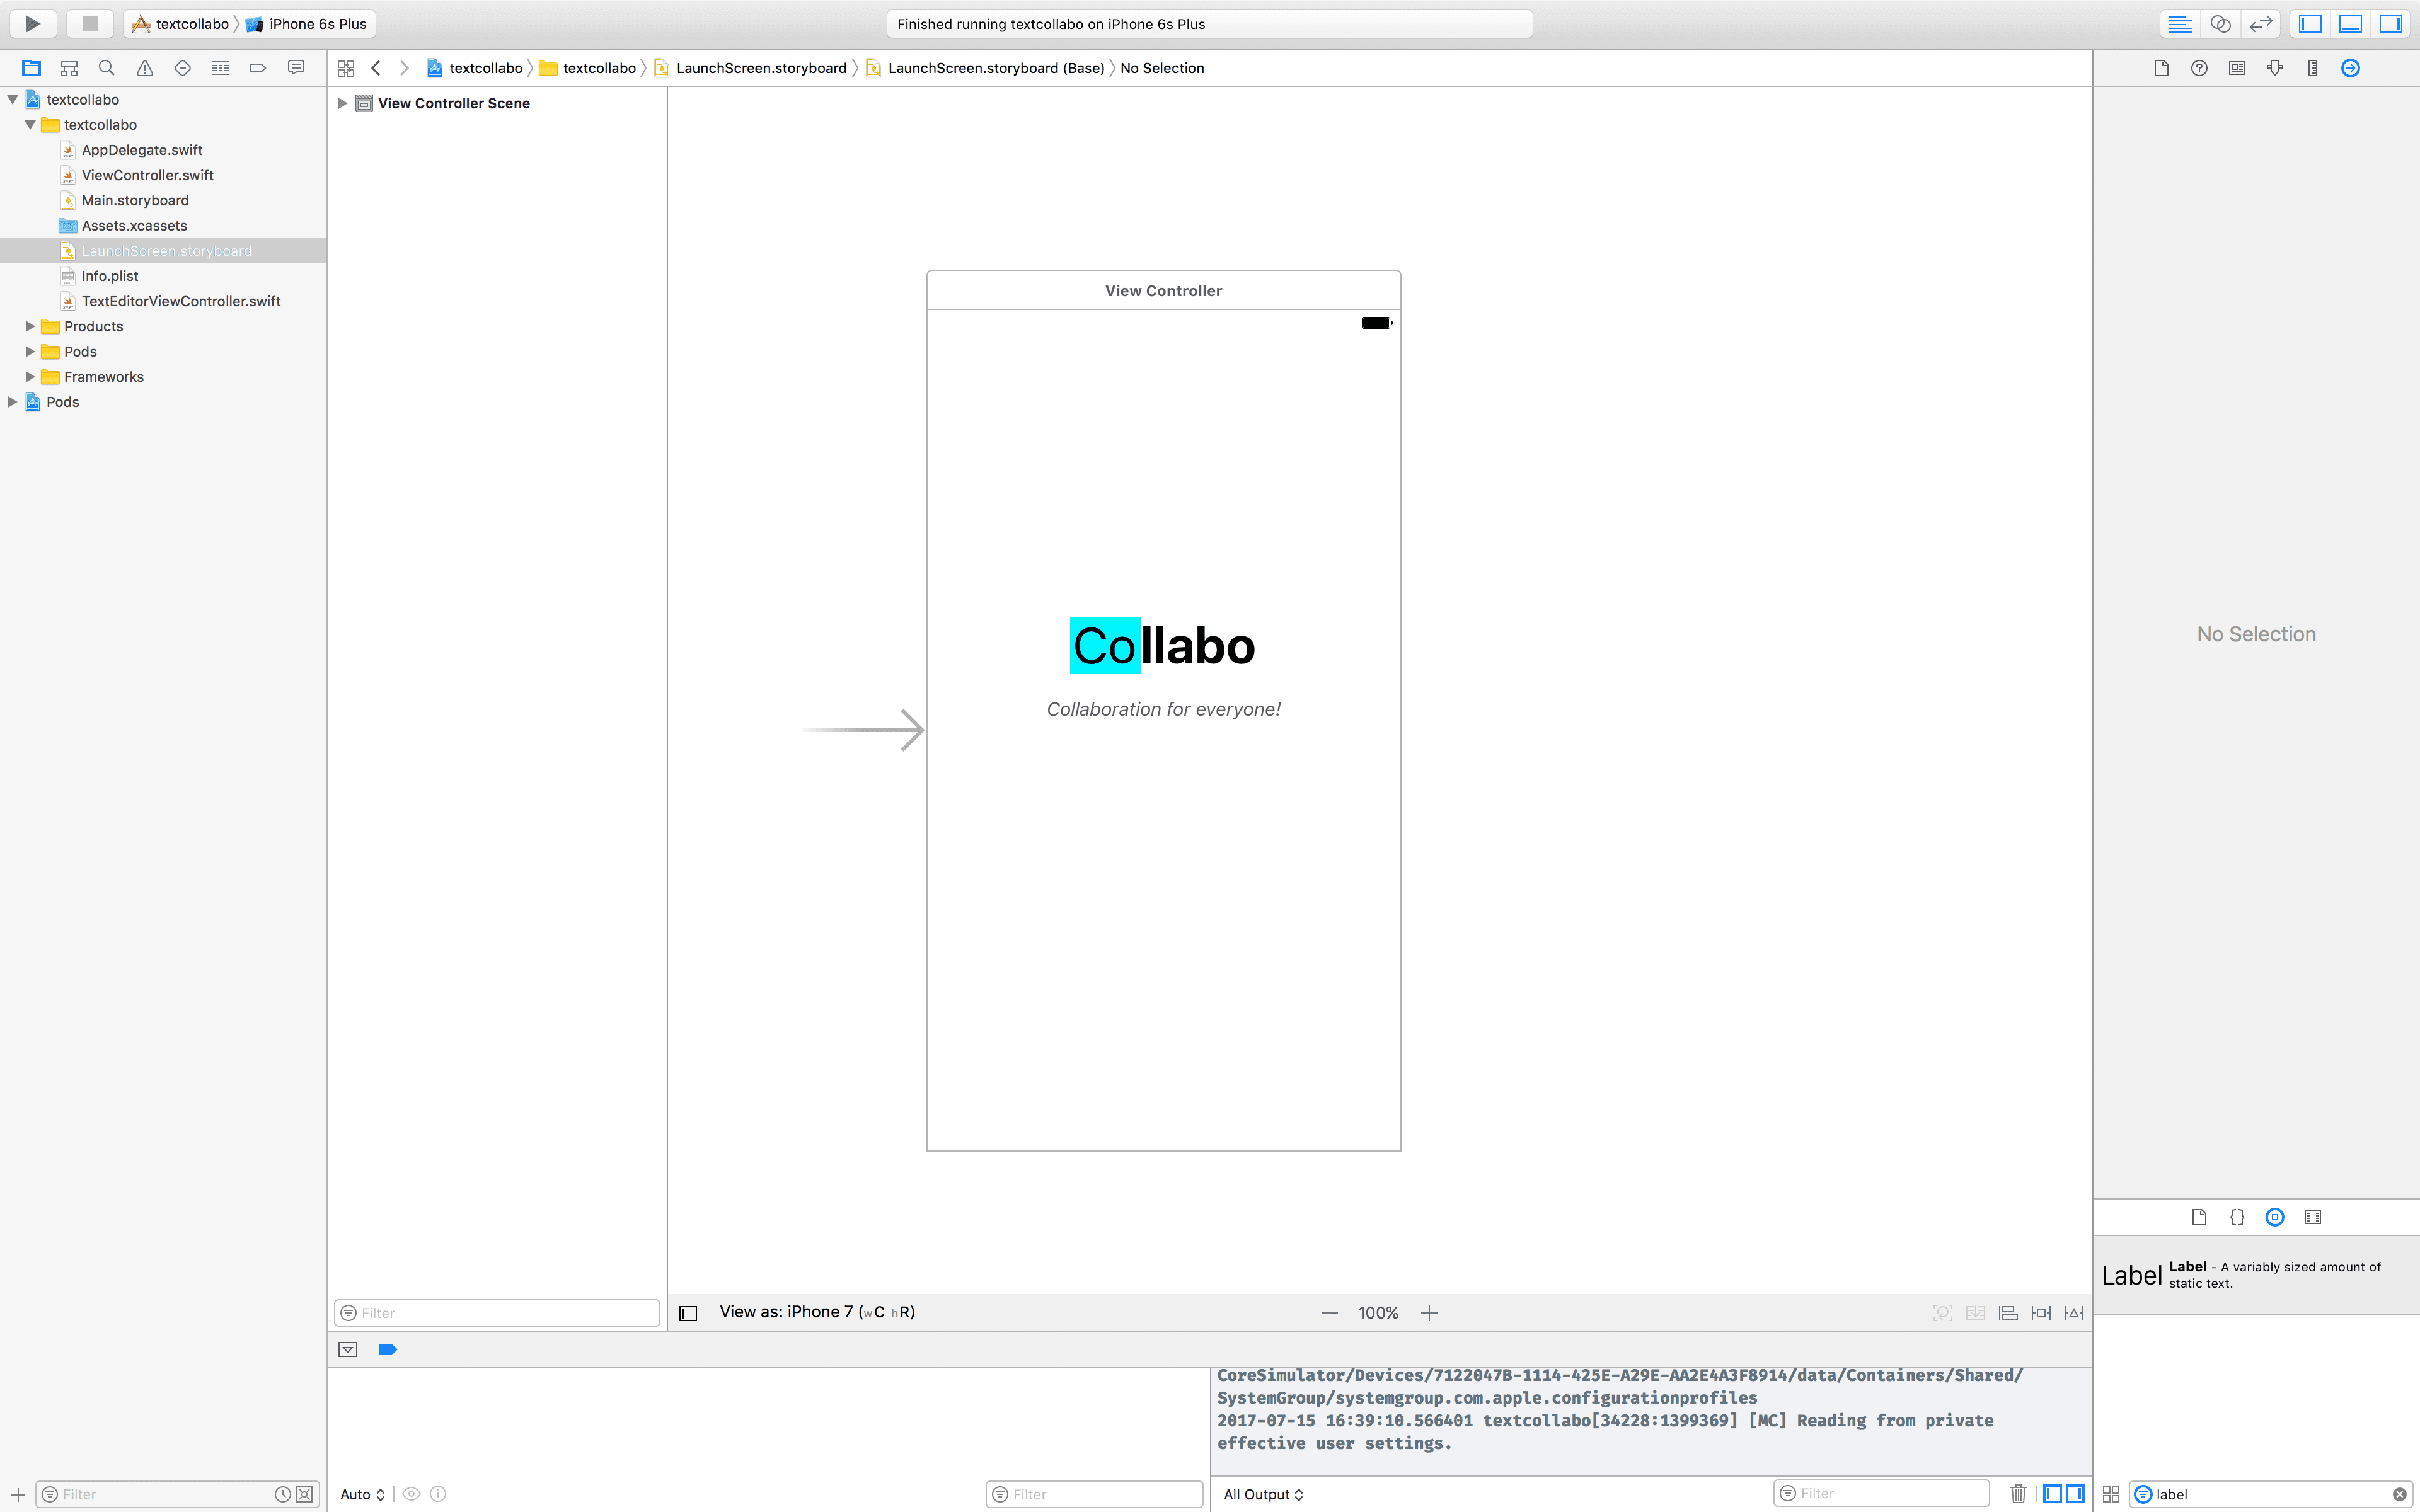
This is the LaunchScreen.storyboard file. We have just designed something simple with no functionality at all.
The next storyboard we will design is the Main.storyboard and, as the name implies, this is the main storyboard. This is where we have all the important views that are attached to some logic.
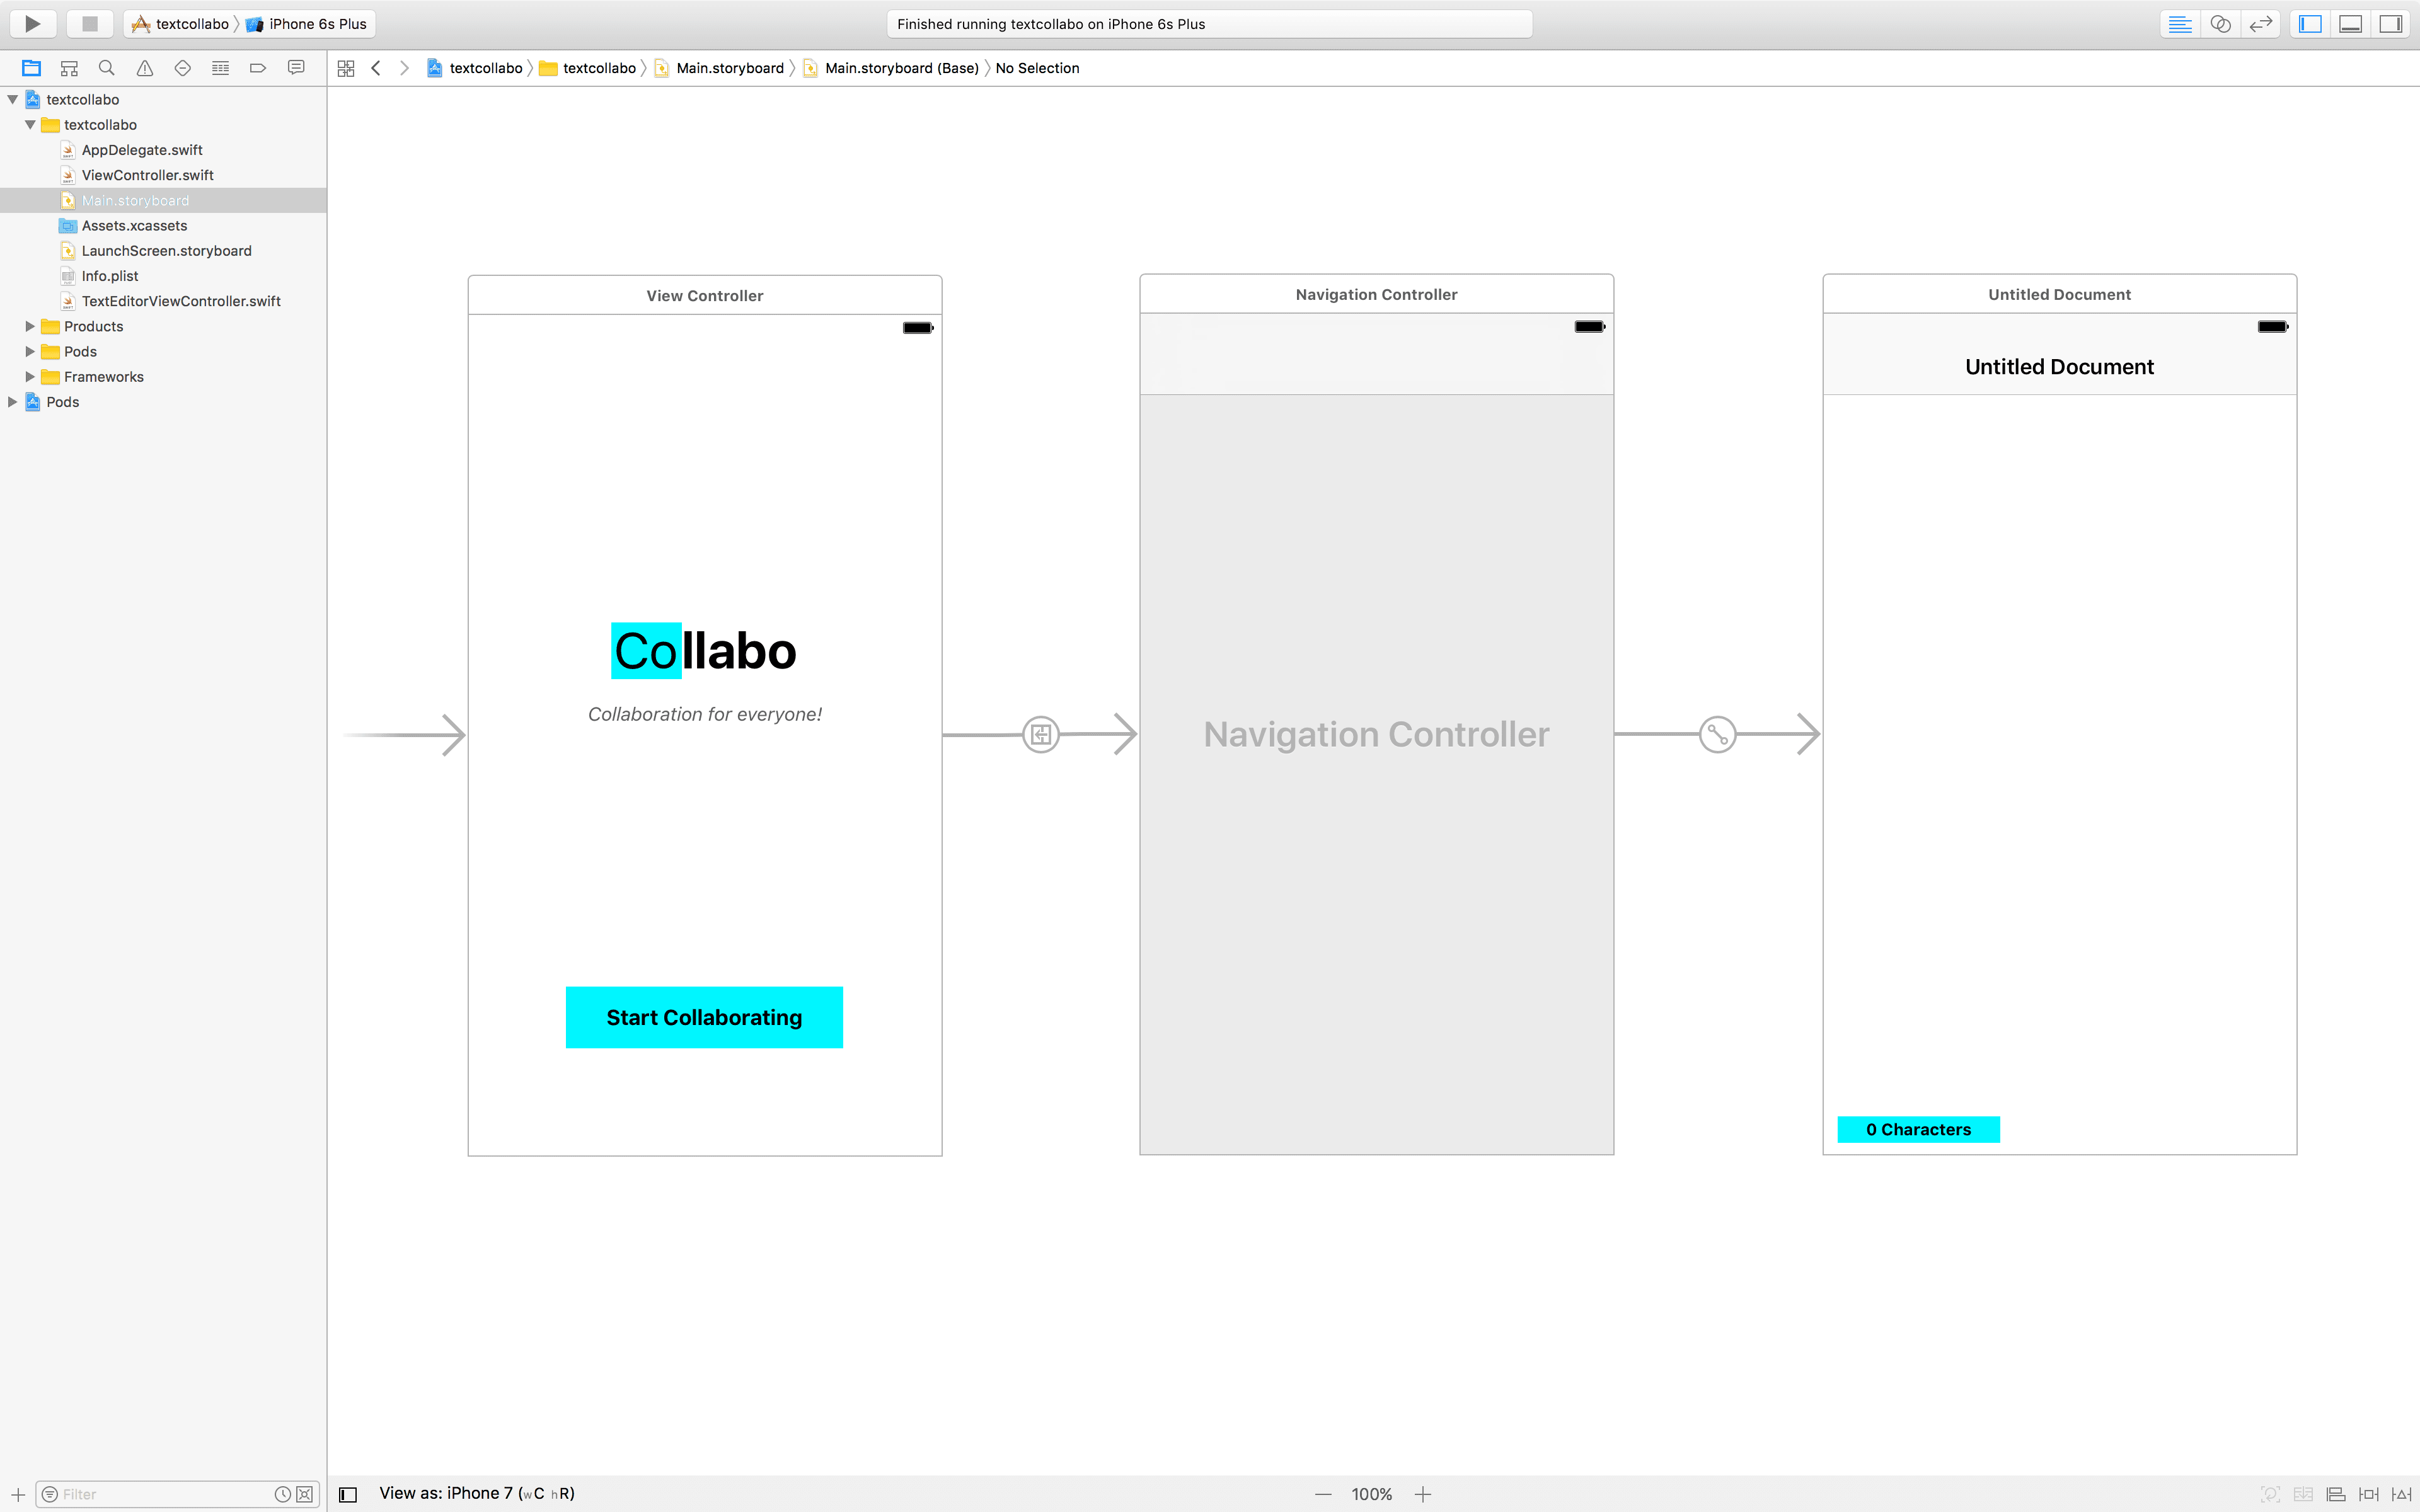
Here we have 3 views. The first view is designed to look exactly like the launch screen, with the exception of a button that we have linked to open up the second view. The second view is the Navigation controller, this is attached to a third view which is a ViewController. We have set the third view as the root controller to our Navigation Controller.
In the third view, we have a UITextView that is editable, placed in the view, and also a label that is supposed to be a character counter. This is the place where we will increment the characters as the user is typing text into the text view.
Coding the iOS collaborative text editor application
Now that we have successfully created the views required for the application to load, the next thing we will do is start coding the logic for the application.
Create a new cocoa class file and name it TextEditorViewController and link it to the third view in the Main.storyboard file. The TextViewController should also adopt the UITextViewDelegate. Now, you can ctrl+drag the UITextView and also ctrl+drag the UILabel in the Main.storyboard file to the TextEditorViewController class.
Also, you should import the PusherSwift and AlamoFire libraries to the TextViewController. You should have something close to this after you are done:
1import UIKit 2 import PusherSwift 3 import Alamofire 4 5 class TextEditorViewController: UIViewController, UITextViewDelegate { 6 @IBOutlet weak var textView: UITextView! 7 @IBOutlet weak var charactersLabel: UILabel! 8 }
Now we need to add some properties that we will be needing sometime later in the controller.
1import UIKit
2 import PusherSwift
3 import Alamofire
4
5 class TextEditorViewController: UIViewController, UITextViewDelegate {
6 static let API_ENDPOINT = "http://localhost:4000";
7
8 @IBOutlet weak var textView: UITextView!
9
10 @IBOutlet weak var charactersLabel: UILabel!
11
12 var pusher : Pusher!
13
14 var chillPill = true
15
16 var placeHolderText = "Start typing..."
17
18 var randomUuid : String = ""
19 }
Now we will break up the logic into three parts:
- View and Keyboard events
- UITextViewDelegate methods
- Handling Pusher events.
The first is View and Keyboard events. Open the TextEditorViewController and update it with the methods below:
1override func viewDidLoad() {
2 super.viewDidLoad()
3
4 // Notification trigger
5 NotificationCenter.default.addObserver(self, selector: #selector(keyboardWillShow), name: NSNotification.Name.UIKeyboardWillShow, object: nil)
6 NotificationCenter.default.addObserver(self, selector: #selector(keyboardWillHide), name: NSNotification.Name.UIKeyboardWillHide, object: nil)
7
8 // Gesture recognizer
9 view.addGestureRecognizer(UITapGestureRecognizer(target: self, action: #selector(tappedAwayFunction(_:))))
10
11 // Set the controller as the textView delegate
12 textView.delegate = self
13
14 // Set the device ID
15 randomUuid = UIDevice.current.identifierForVendor!.uuidString
16
17 // Listen for changes from Pusher
18 listenForChanges()
19 }
20
21 override func viewWillAppear(_ animated: Bool) {
22 super.viewWillAppear(animated)
23
24 if self.textView.text == "" {
25 self.textView.text = placeHolderText
26 self.textView.textColor = UIColor.lightGray
27 }
28 }
29
30 func keyboardWillShow(notification: NSNotification) {
31 if let keyboardSize = (notification.userInfo?[UIKeyboardFrameBeginUserInfoKey] as? NSValue)?.cgRectValue {
32 if self.charactersLabel.frame.origin.y == 1.0 {
33 self.charactersLabel.frame.origin.y -= keyboardSize.height
34 }
35 }
36 }
37
38 func keyboardWillHide(notification: NSNotification) {
39 if let keyboardSize = (notification.userInfo?[UIKeyboardFrameBeginUserInfoKey] as? NSValue)?.cgRectValue {
40 if self.view.frame.origin.y != 1.0 {
41 self.charactersLabel.frame.origin.y += keyboardSize.height
42 }
43 }
44 }
In the viewDidLoad method, we registered the keyboard functions so they respond to keyboard events, and we added gesture recognizers that will dismiss the keyboard when you tap outside the UITextView. We also set the textView delegate to the controller itself and finally, we called a function to listen for new updates (we will create this later).
In the viewWillAppear method, we simply hacked the UITextView into having a placeholder text, because, by default, the UITextView does not have that feature. Wonder why, Apple.
In the keyboardWillShow and keyboardWillHide functions, we made the character count label rise up with the keyboard and descend with it respectively. This will prevent the Keyboard from covering the label when it is active.
The second thing is UITextViewDelegate methods. Update the TextEditorViewController with the following:
1func textViewDidChange(_ textView: UITextView) {
2 charactersLabel.text = String(format: "%i Characters", textView.text.characters.count)
3
4 if textView.text.characters.count >= 2 {
5 sendToPusher(text: textView.text)
6 }
7 }
8
9 func textViewShouldBeginEditing(_ textView: UITextView) -> Bool {
10 self.textView.textColor = UIColor.black
11
12 if self.textView.text == placeHolderText {
13 self.textView.text = ""
14 }
15
16 return true
17 }
18
19 func textViewDidEndEditing(_ textView: UITextView) {
20 if textView.text == "" {
21 self.textView.text = placeHolderText
22 self.textView.textColor = UIColor.lightGray
23 }
24 }
25
26 func tappedAwayFunction(_ sender: UITapGestureRecognizer) {
27 textView.resignFirstResponder()
28 }
The textViewDidChange method simply updates the character count label and also sends the changes to Pusher using our backend API (which we will create later in the article). The textViewShouldBeginEditing is gotten from the UITextViewDelegate and it is triggered when the text view is about to be edited. In here, we basically play around with the placeholder, same as the textViewDidEndEditing method. Finally, in the tappedAwayFunction we define the event callback for the gesture we registered in the previous section. In the method, we basically dismiss the keyboard.
The last thing to do is Handling Pusher events. Update the controller with the following methods:
1func sendToPusher(text: String) {
2 let params: Parameters = ["text": text, "from": randomUuid]
3
4 Alamofire.request(TextEditorViewController.API_ENDPOINT + "/update_text", method: .post, parameters: params).validate().responseJSON { response in
5 switch response.result {
6
7 case .success:
8 print("Succeeded")
9 case .failure(let error):
10 print(error)
11 }
12 }
13 }
14
15 func listenForChanges() {
16 pusher = Pusher(key: "PUSHER_KEY", options: PusherClientOptions(
17 host: .cluster("PUSHER_CLUSTER")
18 ))
19
20 let channel = pusher.subscribe("collabo")
21 let _ = channel.bind(eventName: "text_update", callback: { (data: Any?) -> Void in
22
23 if let data = data as? [String: AnyObject] {
24 let fromDeviceId = data["deviceId"] as! String
25
26 if fromDeviceId != self.randomUuid {
27 let text = data["text"] as! String
28 self.textView.text = text
29 self.charactersLabel.text = String(format: "%i Characters", text.characters.count)
30 }
31 }
32 })
33
34 pusher.connect()
35 }
In the sendToPusher method, we send the payload to our backend application using AlamoFire, which will, in turn, send it to Pusher. In the listenForChanges method, we then listen for changes to the text and, if there are any, we apply the changes to the text view.
? Remember to replace the key and cluster with the actual value you have gotten from your Pusher dashboard.
If you have followed the tutorial closely. then your TextEditorViewController should look something like this:
1import UIKit
2 import PusherSwift
3 import Alamofire
4
5 class TextEditorViewController: UIViewController, UITextViewDelegate {
6 static let API_ENDPOINT = "http://localhost:4000";
7
8 @IBOutlet weak var textView: UITextView!
9
10 @IBOutlet weak var charactersLabel: UILabel!
11
12 var pusher : Pusher!
13
14 var chillPill = true
15
16 var placeHolderText = "Start typing..."
17
18 var randomUuid : String = ""
19
20 override func viewDidLoad() {
21 super.viewDidLoad()
22
23 // Notification trigger
24 NotificationCenter.default.addObserver(self, selector: #selector(keyboardWillShow), name: NSNotification.Name.UIKeyboardWillShow, object: nil)
25 NotificationCenter.default.addObserver(self, selector: #selector(keyboardWillHide), name: NSNotification.Name.UIKeyboardWillHide, object: nil)
26
27 // Gesture recognizer
28 view.addGestureRecognizer(UITapGestureRecognizer(target: self, action: #selector(tappedAwayFunction(_:))))
29
30 // Set the controller as the textView delegate
31 textView.delegate = self
32
33 // Set the device ID
34 randomUuid = UIDevice.current.identifierForVendor!.uuidString
35
36 // Listen for changes from Pusher
37 listenForChanges()
38 }
39
40 override func viewWillAppear(_ animated: Bool) {
41 super.viewWillAppear(animated)
42
43 if self.textView.text == "" {
44 self.textView.text = placeHolderText
45 self.textView.textColor = UIColor.lightGray
46 }
47 }
48
49 func keyboardWillShow(notification: NSNotification) {
50 if let keyboardSize = (notification.userInfo?[UIKeyboardFrameBeginUserInfoKey] as? NSValue)?.cgRectValue {
51 if self.charactersLabel.frame.origin.y == 1.0 {
52 self.charactersLabel.frame.origin.y -= keyboardSize.height
53 }
54 }
55 }
56
57 func keyboardWillHide(notification: NSNotification) {
58 if let keyboardSize = (notification.userInfo?[UIKeyboardFrameBeginUserInfoKey] as? NSValue)?.cgRectValue {
59 if self.view.frame.origin.y != 1.0 {
60 self.charactersLabel.frame.origin.y += keyboardSize.height
61 }
62 }
63 }
64
65 func textViewDidChange(_ textView: UITextView) {
66 charactersLabel.text = String(format: "%i Characters", textView.text.characters.count)
67
68 if textView.text.characters.count >= 2 {
69 sendToPusher(text: textView.text)
70 }
71 }
72
73 func textViewShouldBeginEditing(_ textView: UITextView) -> Bool {
74 self.textView.textColor = UIColor.black
75
76 if self.textView.text == placeHolderText {
77 self.textView.text = ""
78 }
79
80 return true
81 }
82
83 func textViewDidEndEditing(_ textView: UITextView) {
84 if textView.text == "" {
85 self.textView.text = placeHolderText
86 self.textView.textColor = UIColor.lightGray
87 }
88 }
89
90
91 func tappedAwayFunction(_ sender: UITapGestureRecognizer) {
92 textView.resignFirstResponder()
93 }
94
95 func sendToPusher(text: String) {
96 let params: Parameters = ["text": text, "from": randomUuid]
97
98 Alamofire.request(TextEditorViewController.API_ENDPOINT + "/update_text", method: .post, parameters: params).validate().responseJSON { response in
99 switch response.result {
100
101 case .success:
102 print("Succeeded")
103 case .failure(let error):
104 print(error)
105 }
106 }
107 }
108
109 func listenForChanges() {
110 pusher = Pusher(key: "PUSHER_KEY", options: PusherClientOptions(
111 host: .cluster("PUSHER_CLUSTER")
112 ))
113
114 let channel = pusher.subscribe("collabo")
115 let _ = channel.bind(eventName: "text_update", callback: { (data: Any?) -> Void in
116
117 if let data = data as? [String: AnyObject] {
118 let fromDeviceId = data["deviceId"] as! String
119
120 if fromDeviceId != self.randomUuid {
121 let text = data["text"] as! String
122 self.textView.text = text
123 self.charactersLabel.text = String(format: "%i Characters", text.characters.count)
124 }
125 }
126 })
127
128 pusher.connect()
129 }
130 }
Great! Now we need to make the backend of the application.
Building the backend Node application
Now that we are done with the Swift part, we can focus on creating the NodeJS backend for the application. We are going to be using Express so that we can quickly get something running.
Create a directory for the web application and then create some new files:
The index.js file…
1let path = require('path'); 2 let Pusher = require('pusher'); 3 let express = require('express'); 4 let bodyParser = require('body-parser'); 5 let app = express(); 6 let pusher = new Pusher(require('./config.js')); 7 8 app.use(bodyParser.json()); 9 app.use(bodyParser.urlencoded({ extended: false })); 10 11 app.post('/update_text', function(req, res){ 12 var payload = {text: req.body.text, deviceId: req.body.from} 13 pusher.trigger('collabo', 'text_update', payload) 14 res.json({success: 200}) 15 }); 16 17 app.use(function(req, res, next) { 18 var err = new Error('Not Found'); 19 err.status = 404; 20 next(err); 21 }); 22 23 module.exports = app; 24 25 app.listen(4000, function(){ 26 console.log('App listening on port 4000!'); 27 }); 28 29In the JS file above, we are using Express to create a simple application and in the `/update_text` route, we simply receive the payload and pass it on to Pusher. Nothing complicated there. 30 31Create a **package.json** file also: 32 33``` language-javascript 34 { 35 "main": "index.js", 36 "dependencies": { 37 "body-parser": "^1.17.2", 38 "express": "^4.15.3", 39 "path": "^0.12.7", 40 "pusher": "^1.5.1" 41 } 42 }
The package.json file is where we define all the NPM dependencies.
The last file to create is a config.js file. This is where we will define the configuration values for our Pusher application:
1module.exports = { 2 appId: 'PUSHER_ID', 3 key: 'PUSHER_KEY', 4 secret: 'PUSHER_SECRET', 5 cluster: 'PUSHER_CLUSTER', 6 encrypted: true 7 };
? Remember to replace the key and cluster with the actual value you have gotten from your Pusher dashboard.
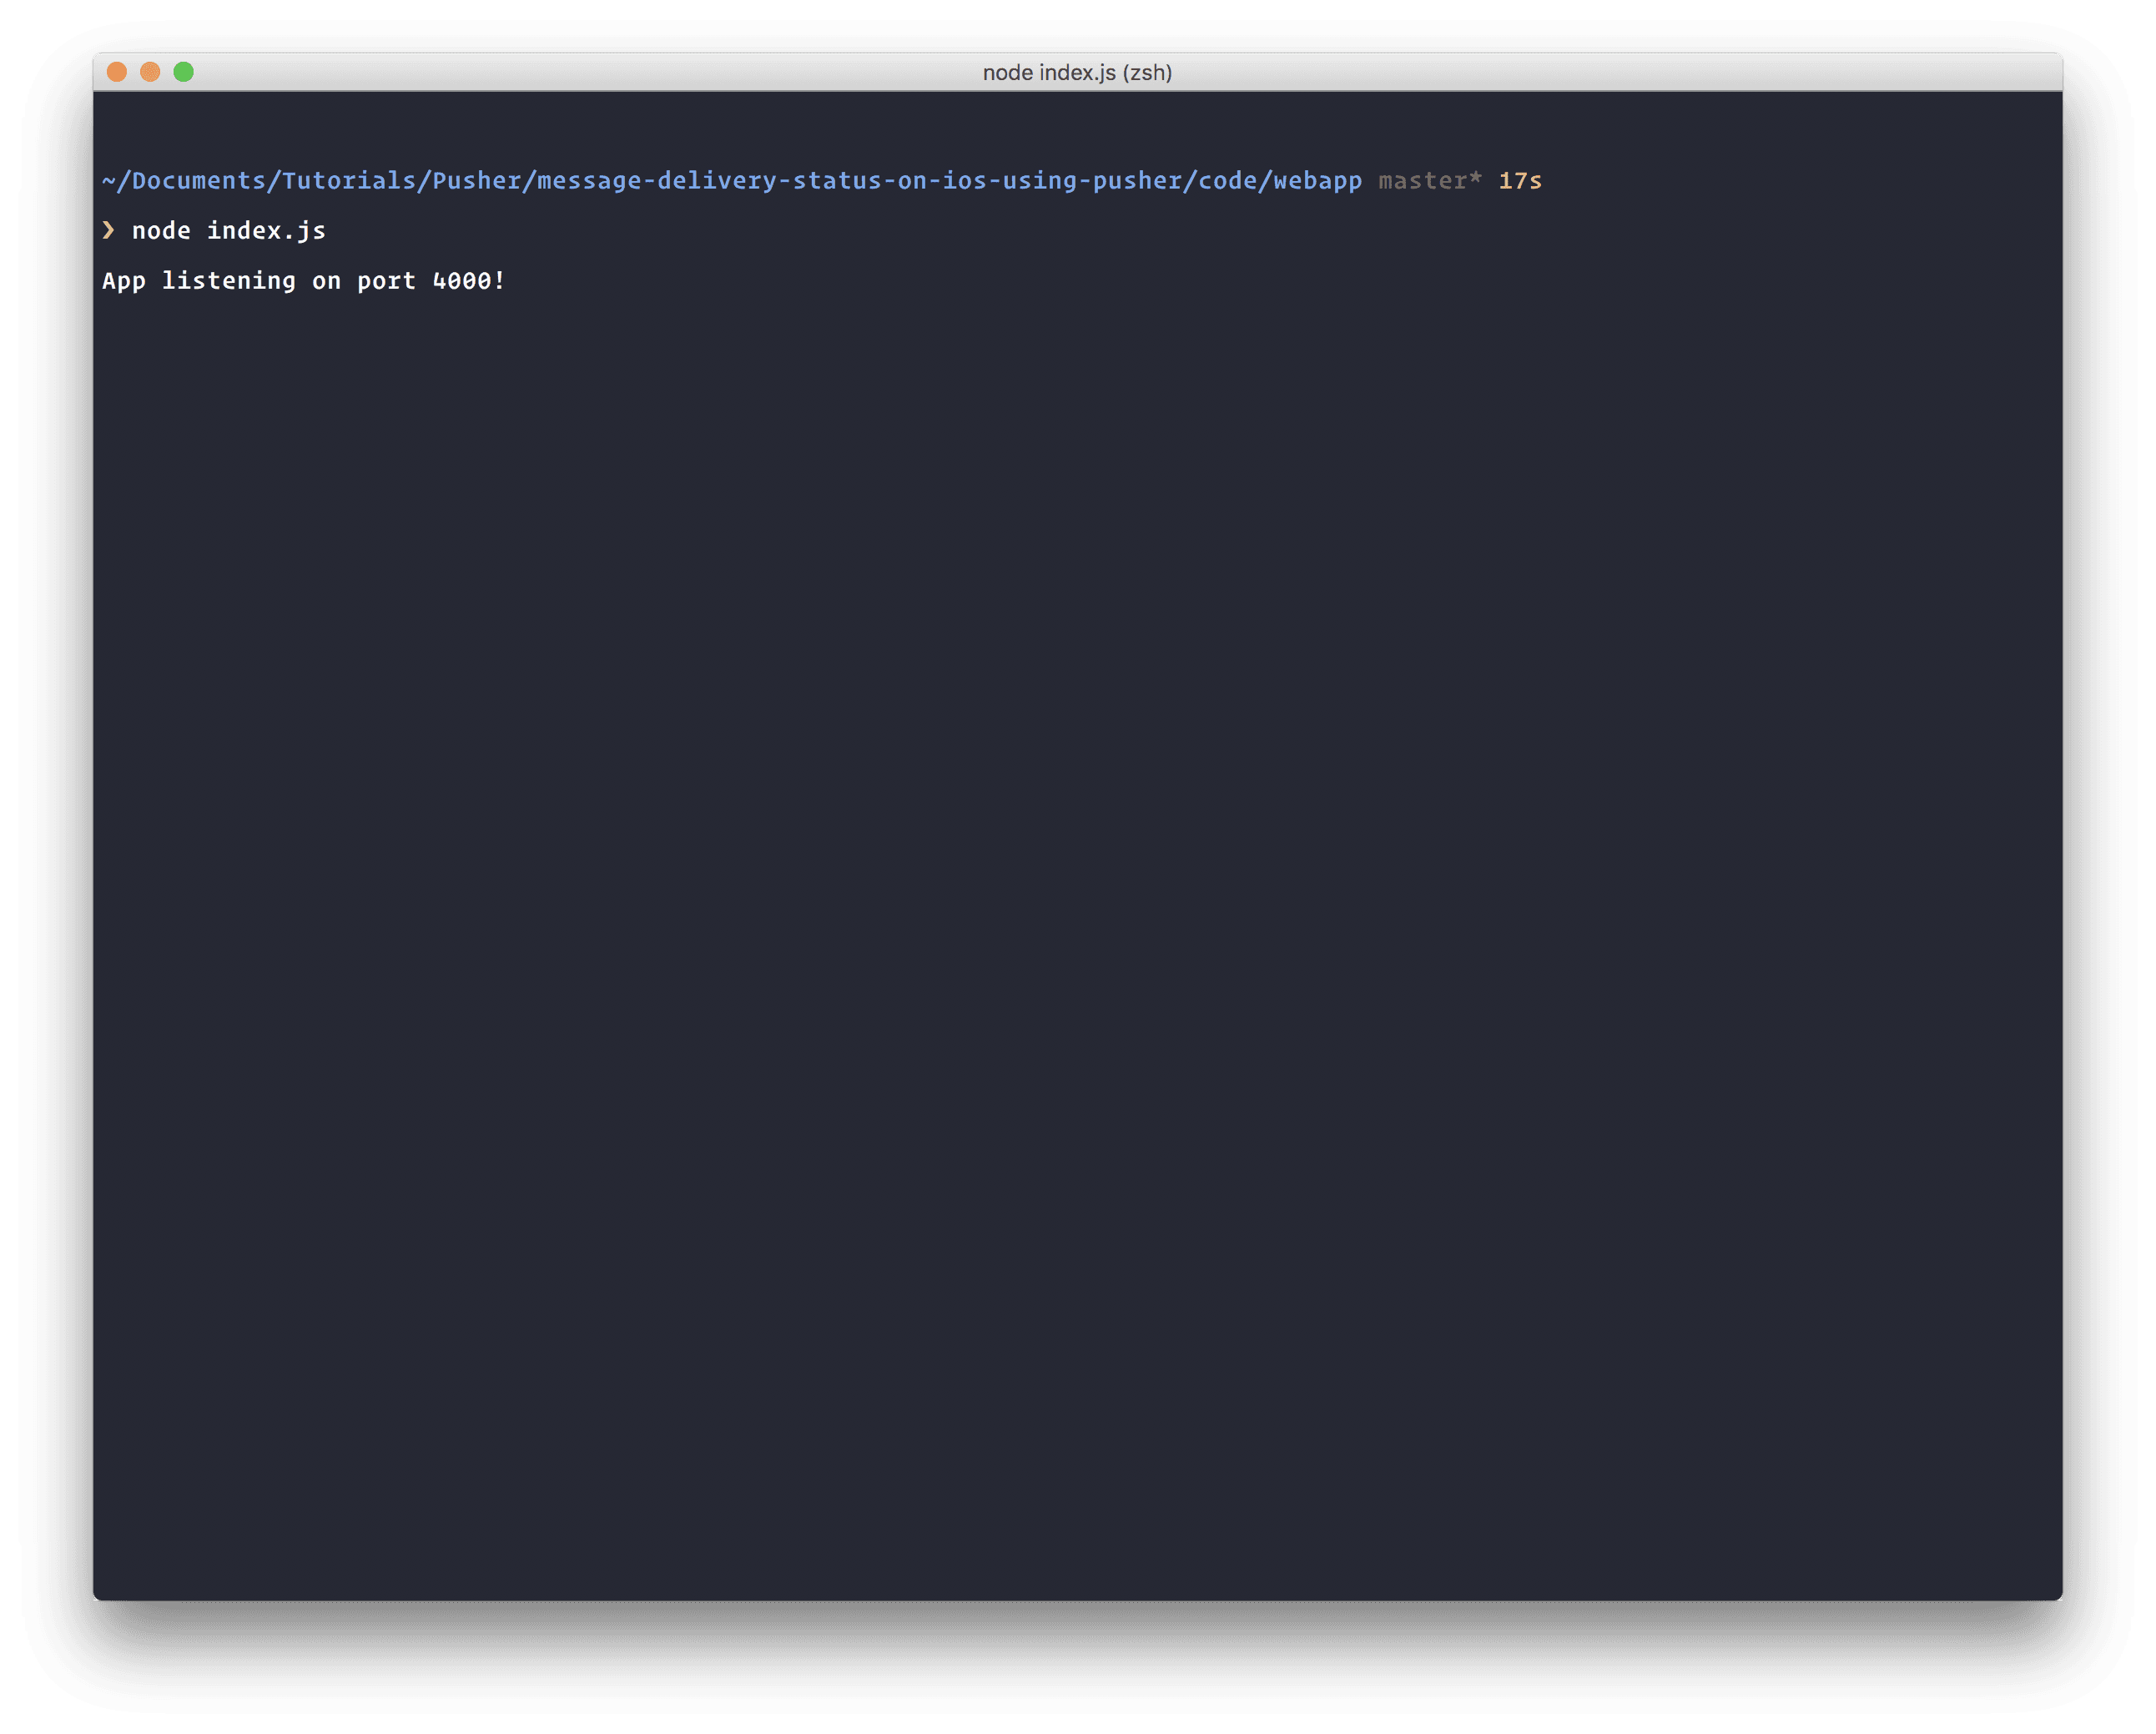
Now run npm install on the directory and then node index.js once the npm installation is complete. You should see App listening on port 4000! message.
Testing the application
Once you have your local node web server running, you will need to make some changes so your application can talk to the local web server. In the info.plist file, make the following changes:
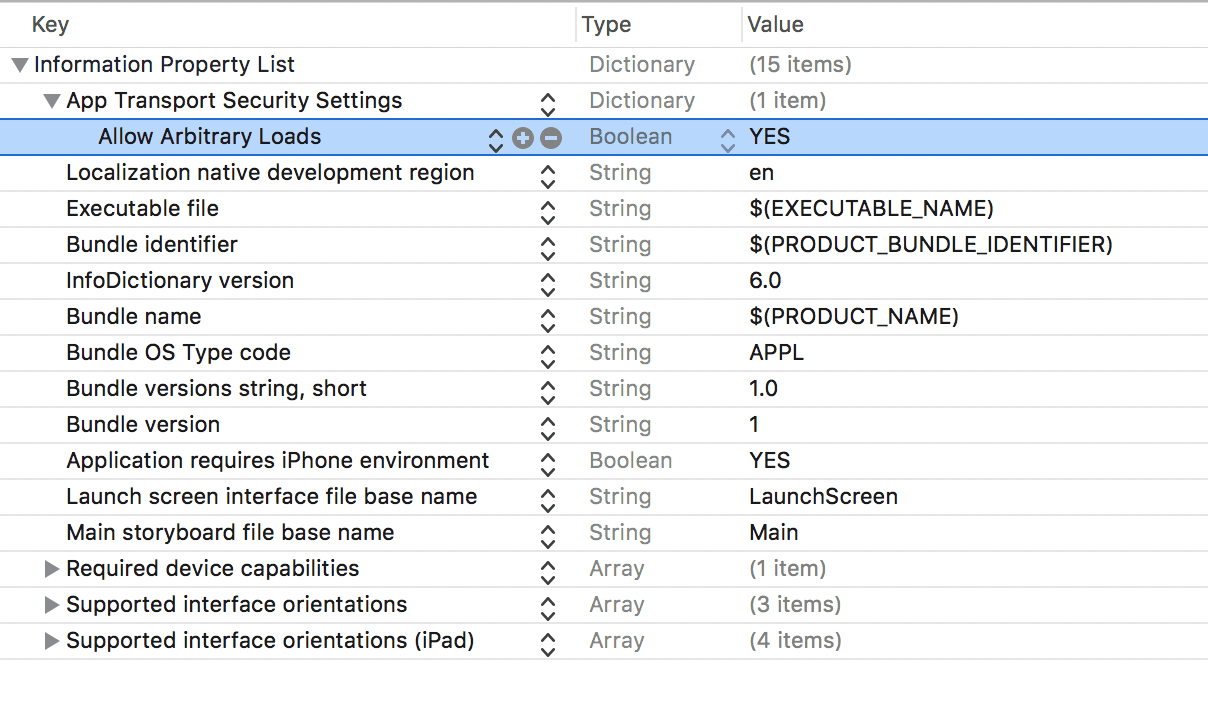
With this change, you can build and run your application and it will talk directly with your local web application.
Conclusion
In this article, we have covered how to build a realtime collaborative text editor on iOS using Pusher. Hopefully, you have learnt a thing or two from following the tutorials. For practice, you can expand the statuses to support more instances.
Have a question or feedback on the article? Please ask below in the comments section. The repository for the application and the Node backend is available here.


© 2026 Pusher Ltd. All rights reserved.
Pusher Limited is a company registered in England and Wales (No. 07489873) whose registered office is at MessageBird UK Limited, 3 More London Riverside, 4th Floor, London, United Kingdom, SE1 2AQ.